
Enterprise PKI
Overview
Foxpass Enterprise PKI is a flexible certificate authority management system that lets you issue, track, and revoke X.509 certificates for your organization's devices, users, and services — designed for internal, private trust scenarios.
Foxpass uses a two-tier hierarchy:
• Root CA: the top-level trust anchor distributed to devices.
• Sub CA: an intermediate authority that signs client certificates.
• Client certificate: an end-entity certificate issued to a user, device, or service.
A single Root CA can have multiple Sub CAs, each scoped to a different part of the organization. For example, one Sub CA can issue certificates to employee laptops managed by IT, while another can issue certificates to IoT devices on the factory floor.
Explore the interactive demo for a quick walkthrough of the main setup steps and workflows.
Create a Root CA
The Root CA is the trust anchor for certificates issued through Enterprise PKI
-
Go to PKI → Enterprise PKI.
-
In the Root Certificates section, click Create Root CA.
-
Enter the certificate subject information. The Common Name is required.
-
Select the Extended Key Usages (EKUs) that the Root CA should support.
-
Optionally enter a standard or custom EKU object identifier in the Manual Entry field.
-
Click Create CA.
Important: Download and distribute the Root CA certificate to every device that must trust certificates issued from this hierarchy. Deleting a Root CA is irreversible and invalidates the Sub CAs and client certificates beneath it.
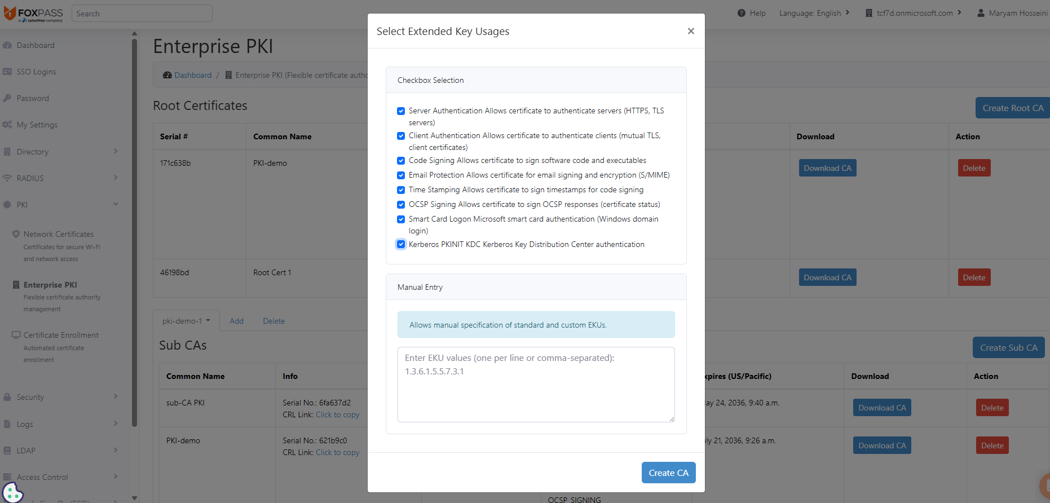
Select the Extended Key Usages for the Root CA. Custom EKU OIDs can also be entered manually.
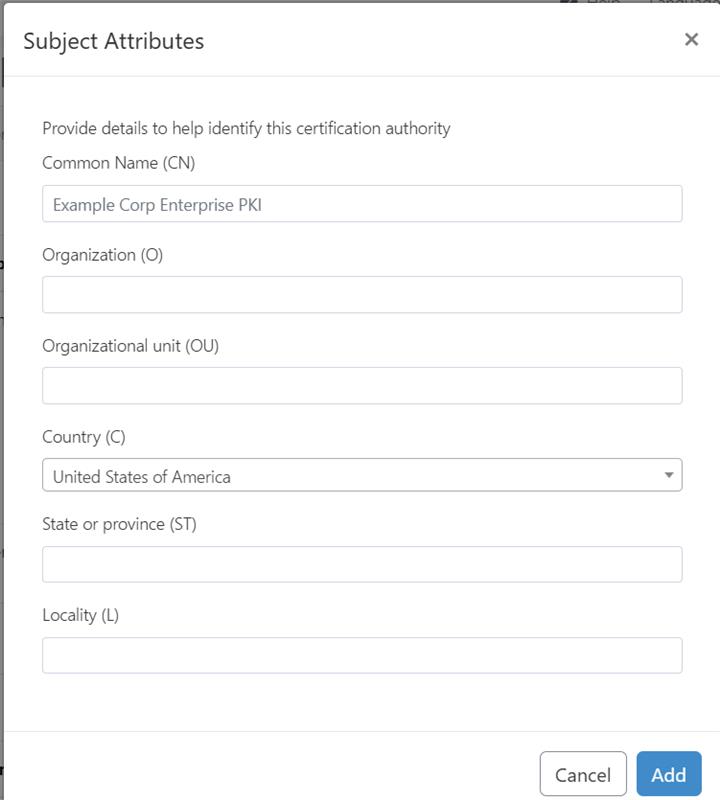
Root certificate authority subject information
Extended Key UsagesExtended Key Usage Common use Server Authentication TLS server authentication, including HTTPS and other TLS services Client Authentication Client authentication, including 802.1X Wi-Fi, VPN, and mutual TLS Code Signing Signing software and executable files Email Protection S/MIME email signing and encryption Time Stamping Signing trusted timestamps OCSP Signing Signing OCSP certificate-status responses Smart Card Logon Microsoft smart card and Windows domain authentication Kerberos PKINIT KDC Kerberos Key Distribution Center authentication
Create a PKI Configuration
A PKI configuration provides a logical grouping for Sub CAs and client certificates.
-
In the Sub CAs section, click Add next to the PKI selector.
-
Enter a PKI Name.
-
Enter an optional Purpose describing how the PKI will be used.
-
Click Add
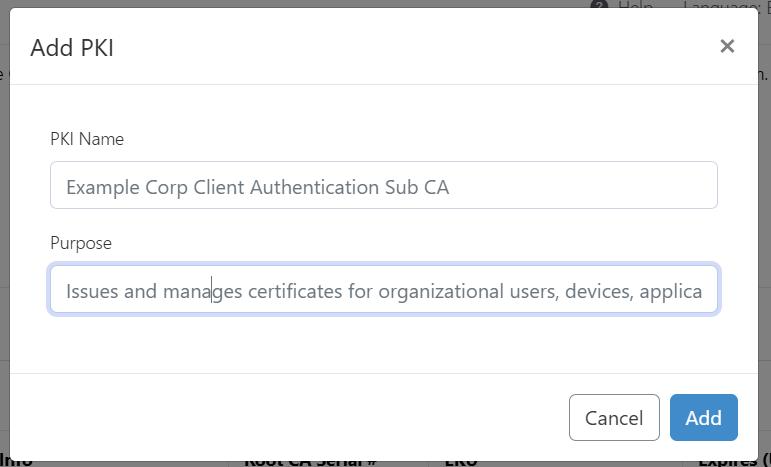
Add a PKI configuration by entering a name and an optional purpose.
Create a Sub CA
Client certificates are issued by a Sub CA rather than directly by the Root CA.
- Select the appropriate PKI from the PKI selector.
- Click Create Sub CA.
- Select the Root CA that will sign the Sub CA.
- Select the required EKUs. The Sub CA EKUs must be supported by the signing Root CA.
- Click Create CA.
- Enter the Sub CA subject information. The Common Name is required.
- Click Add
Create a Sub CA using a CSRUse Create CA Using CSR when the Sub CA private key must remain on infrastructure controlled by your organization. Foxpass signs the uploaded Certificate Signing Request, while the private key remains outside Foxpass.
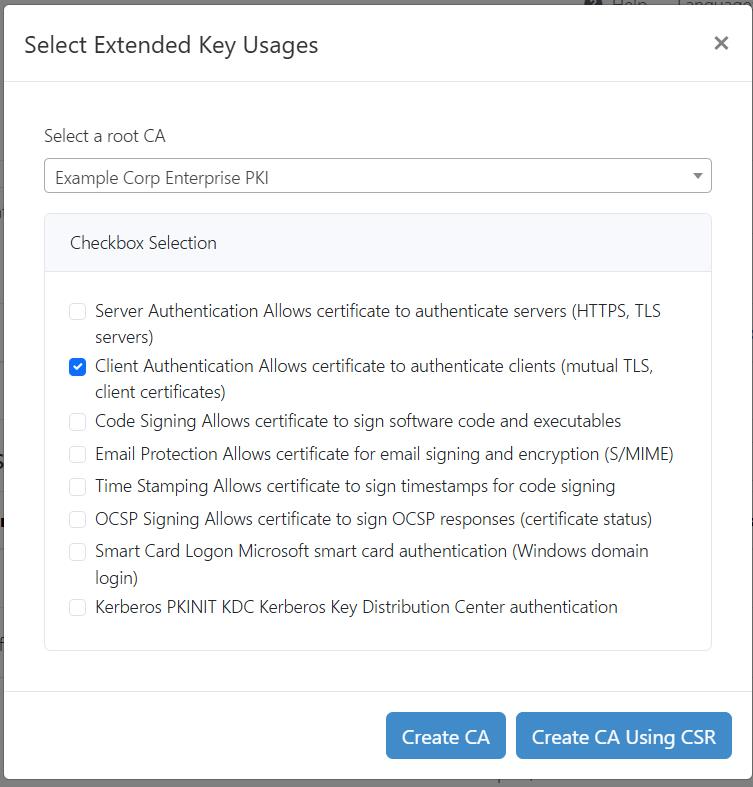
Create a Sub CA
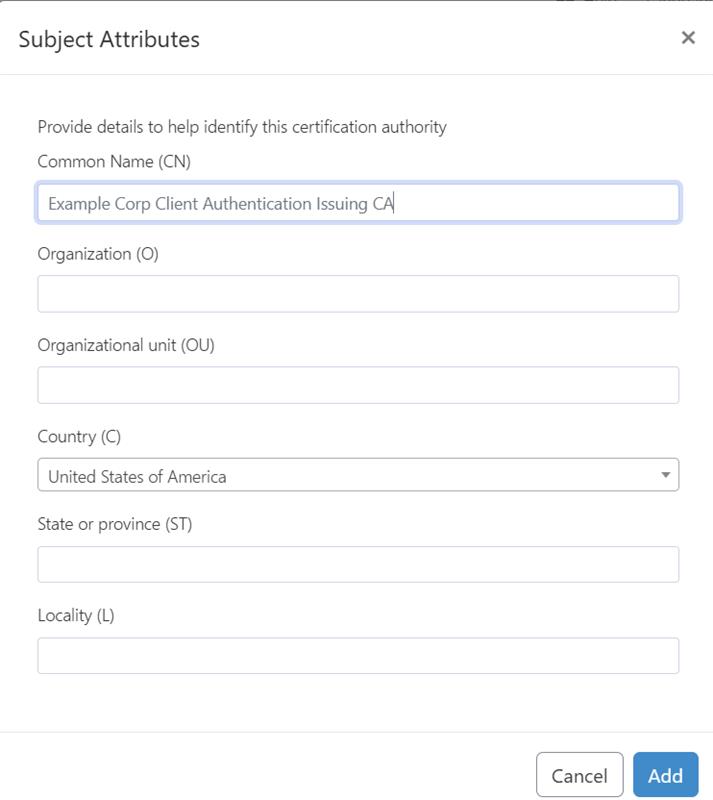
Sub CA subject information
Manage Sub CAs
The Sub CAs table shows the Common Name, serial number, CRL link, signing Root CA, EKUs, expiration date, download option, and available actions.
To copy the Certificate Revocation List (CRL) URL, locate the Sub CA and click Click to copy beside CRL Link in the Info column.
Generate a Client Certificate
-
Select the appropriate PKI.
-
In the Client Certificates section, click Generate Client Cert.
-
Enter the Certificate CN. The CN can identify a user, email address, device, or service.
-
Optionally enter an email address.
-
Select the Client Certificate Authority that will sign the certificate.
-
Select the download format: .crt/.key or .p12.
-
Click Generate Client Certificate.
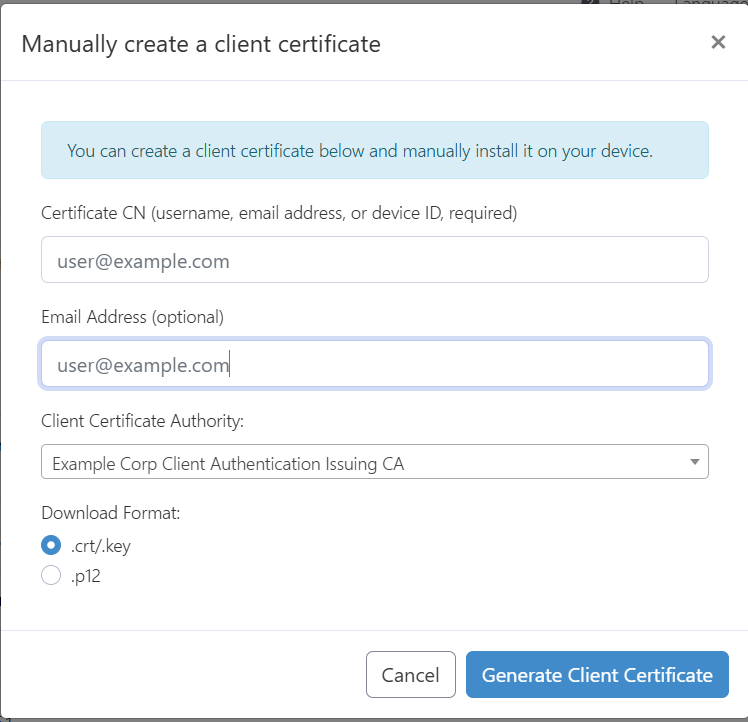
Generate a Client Certificate
Create a Client Certificate using a CSR
- Click Create Client Cert with CSR.
- Select the Client Certificate Authority.
- Upload the CSR file or paste the CSR contents into the text field.
- Click Generate Client Certificate.
View, Filter, Export, and Revoke Certificates
The Client Certificates table shows the certificate serial number, Common Name and SANs, expiration date, signing Sub CA, Root CA, status, revocation date, and available actions.
• Use the Filter field to search by serial number, Common Name, or Subject Alternative Name.
• Use Export to CSV to download certificate records.
• To revoke a certificate, locate it in the table, click Revoke, select a revocation reason, and confirm.
Use Enterprise PKI with SCEP
Enterprise PKI Sub CAs can be selected as the issuing authority for SCEP endpoints used by supported device-management platforms.
Each Sub CA can be paired with a SCEP endpoint, enabling automated certificate enrollment for MDM-managed devices so certificates can be provisioned and renewed without manual intervention.
- Go to PKI → Certificate Enrollment.
- Click Create SCEP Endpoint.
- Enter a name for the endpoint.
- Select the required Verification Type and Authentication Type.
- Under Client Certificate Authority, select the Enterprise PKI Sub CA.
- Complete the remaining settings and create the endpoint.
SCEP is commonly used with platforms such as Microsoft Intune, Jamf, and Mosyle to automatically issue certificates to managed devices.
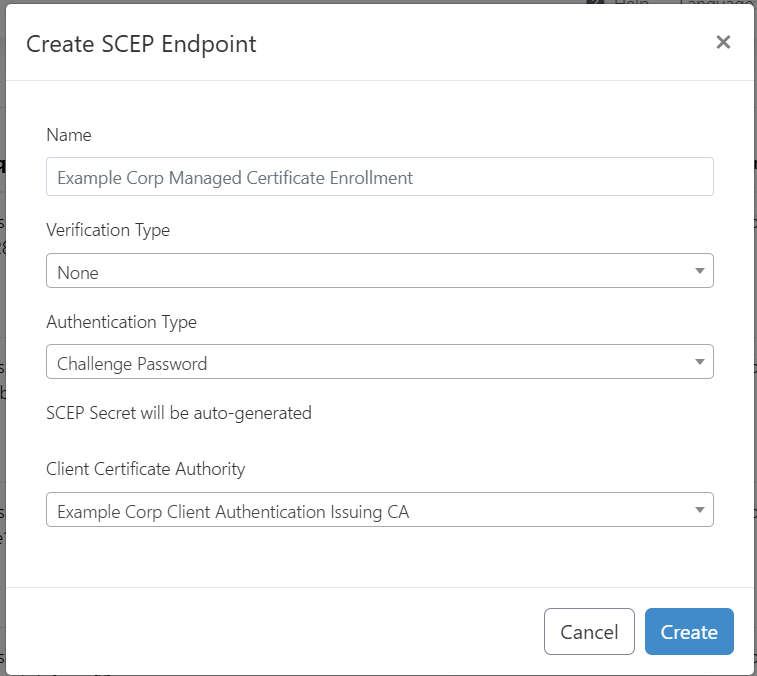
Enterprise PKI with SCEP
Enterprise PKI versus Network Certificates
Enterprise PKI versus Network Certificates
Use Enterprise PKI when you need:
• Control over Root CAs and Sub CAs
• Multiple certificate hierarchies
• Custom EKUs
• CRL management
• Certificates for purposes beyond network authentication
• Manual certificate and CSR signing
Use Network Certificates when your organization primarily needs a simpler certificate-based Wi-Fi or network-access deployment without managing the complete CA hierarchy.
Updated 27 days ago