Windows Manually
To configure EAP-TLS on Windows manually with Foxpass, you can follow the steps below:
Configure EAP-TLS on Foxpass
Please follow the EAP-TLS initial setup guide to create client CA, server CA and SCEP endpoint if not configured already.
Install Foxpass Client CA
- Go to the EAP-TLS page. Download Foxpass Client CA by clicking the 'Download CA' button located under 'Client Certificate Authorities' . Please refer to the image below for the Client CA download location.

Foxpass Client CA
- Double-click the Foxpass CA certificate file in Windows. Click Open.
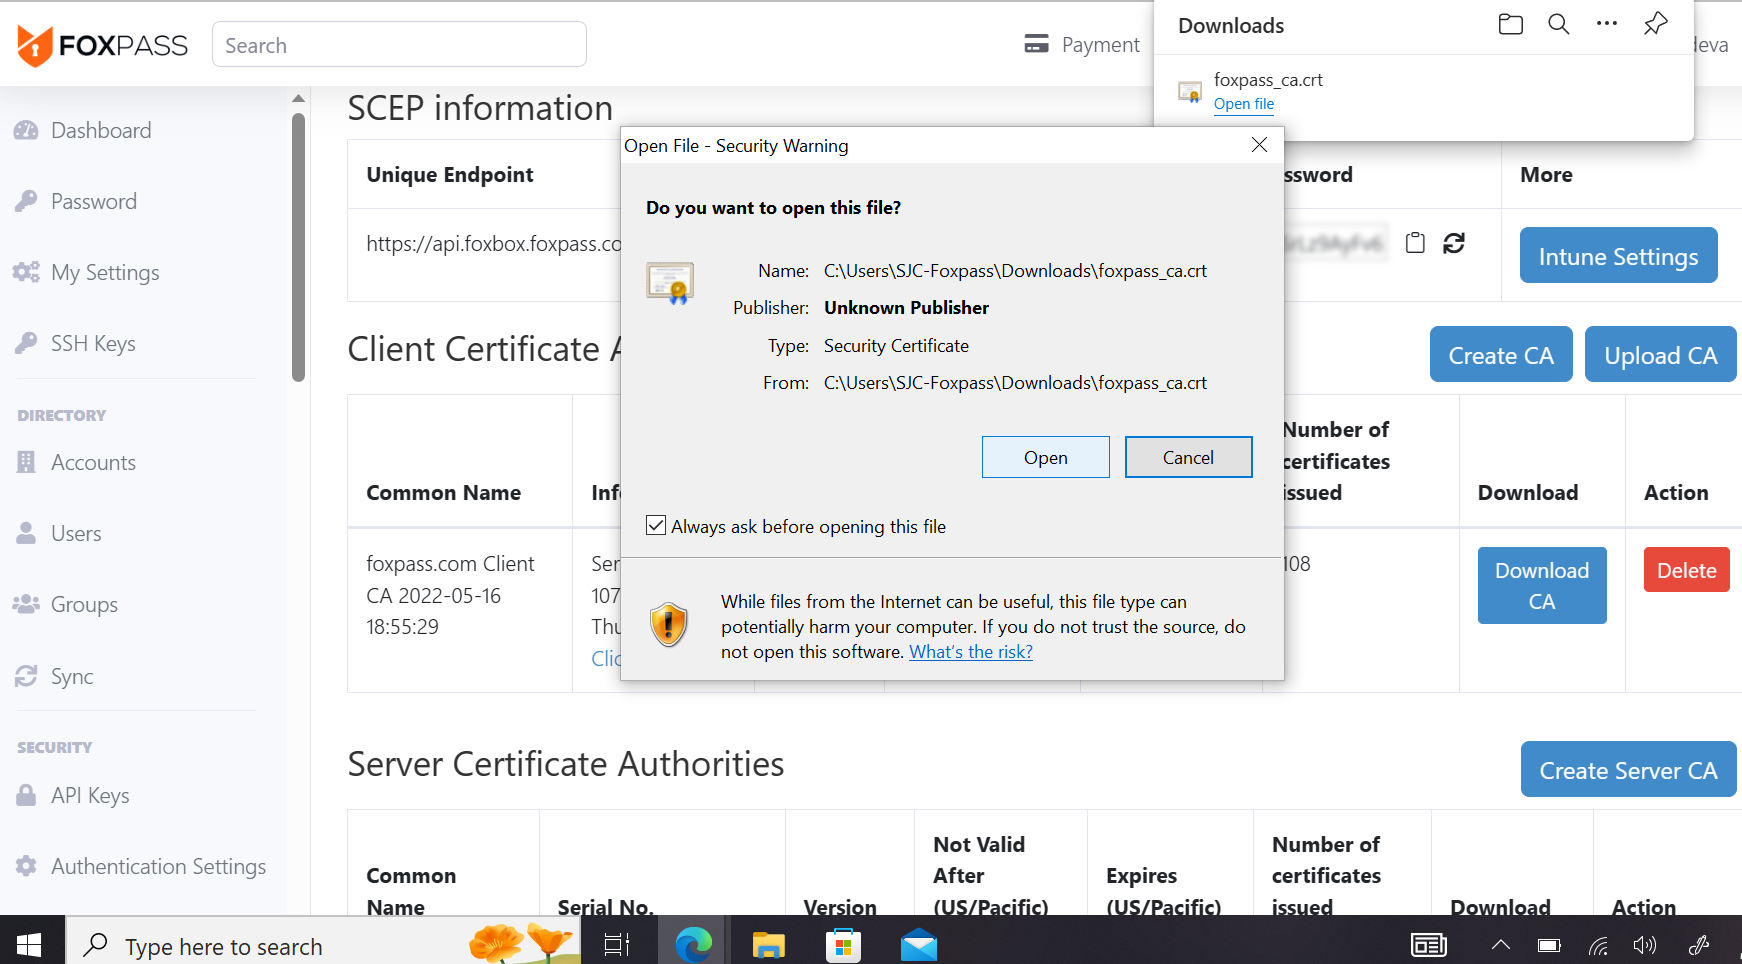
Open Foxpass Client CA
- The Certificate dialog box will appear. Click the "Install Certificate" button. Now select "Local Machine" as the store location. Click Next. You may see a prompt saying "Do you want to allow this app to make changes to your device?". Click 'Yes' to this prompt.
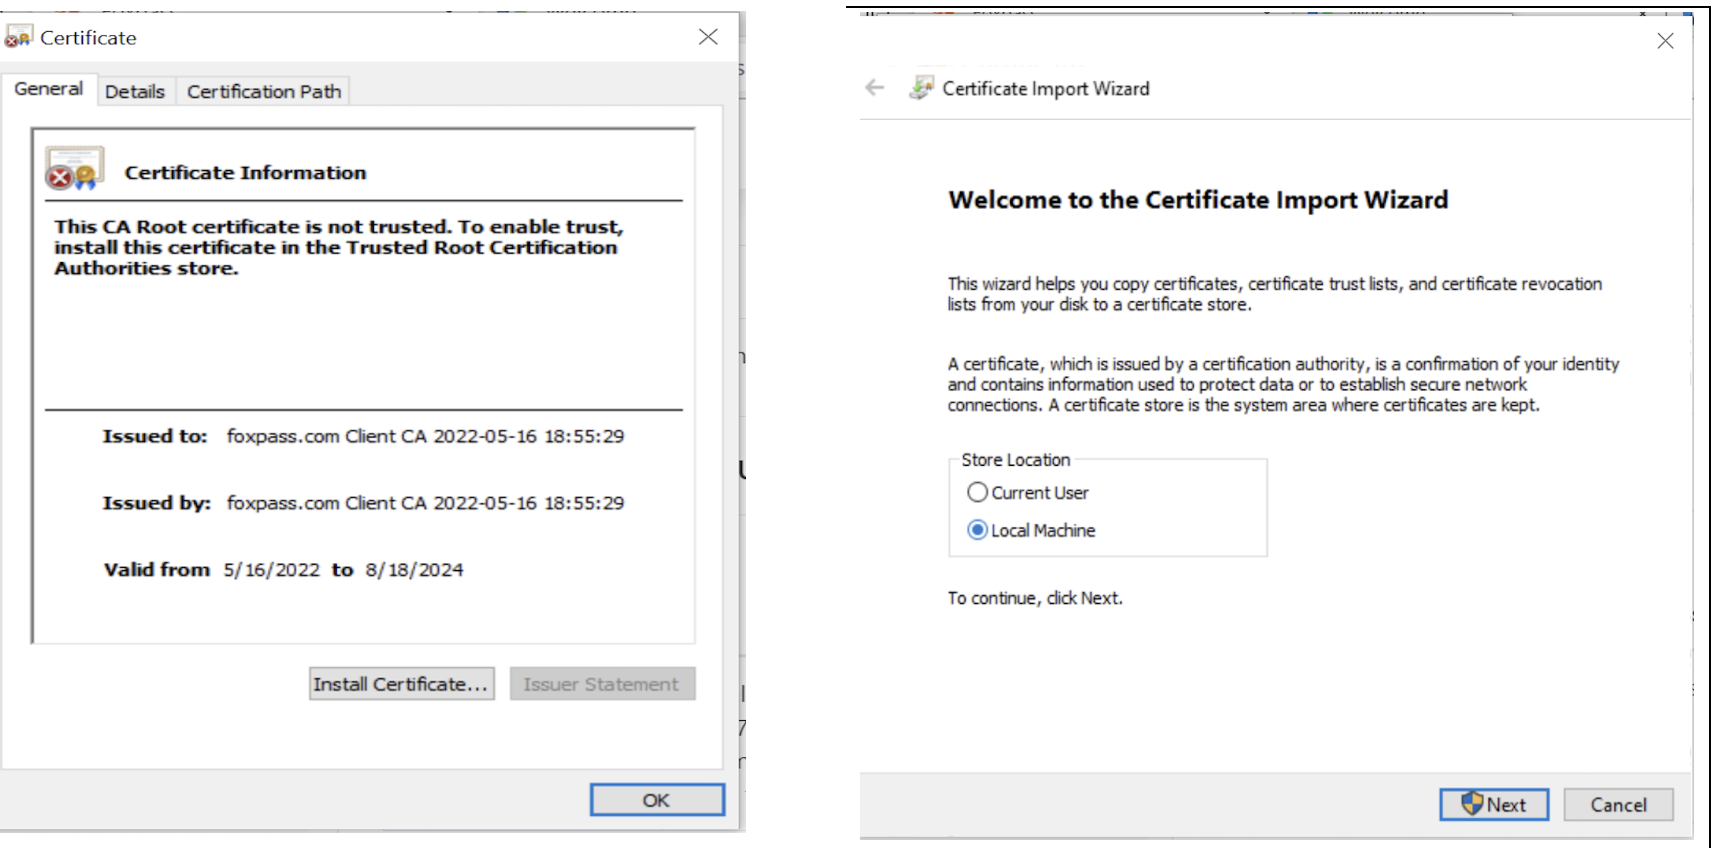
Install Certificate
- In the Select Certificate Store window, select "Place all certificates in the following store", choose "Trusted Root Certification Authorities", click "Next" and then "Finish" to complete the installation. You will see a dialog box showing 'The import was successful" indicating that the CA certificate is now installed and trusted on the Windows computer.
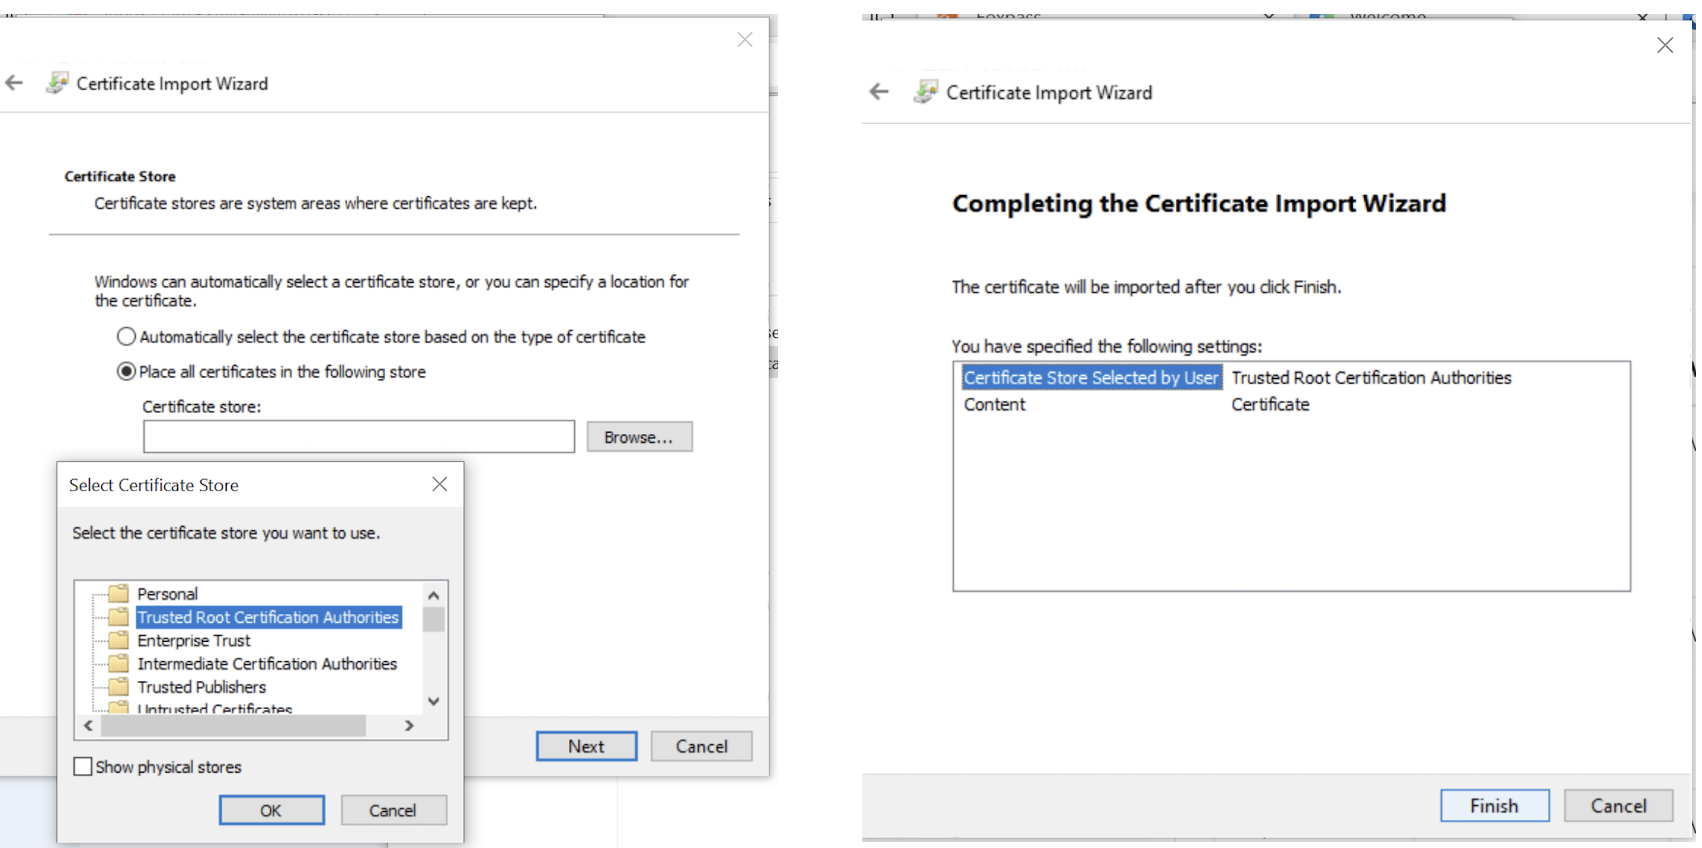
Select Certificate Store
Install Foxpass Server CA
- Go to the EAP-TLS page.
- Download Foxpass Server CA by clicking the 'Download CA' button in the active CA section, which is located under 'Server Certificate Authorities'. Please refer to the image below for the Server CA download location.

Foxpass Server CA
- Open Foxpass Server CA. Install the Foxpass Server CA in the same way as you installed Foxpass Client CA.
Install the Client Certificates
- Go to the EAP-TLS page.
- Click the 'Manually create certificate' button and type the email of the user as the Certificate CN.

- Select the .p12 in the download format and type the password to encrypt the certificate below.
- Click Generate Client Certificate, it will download the client certificate automatically.
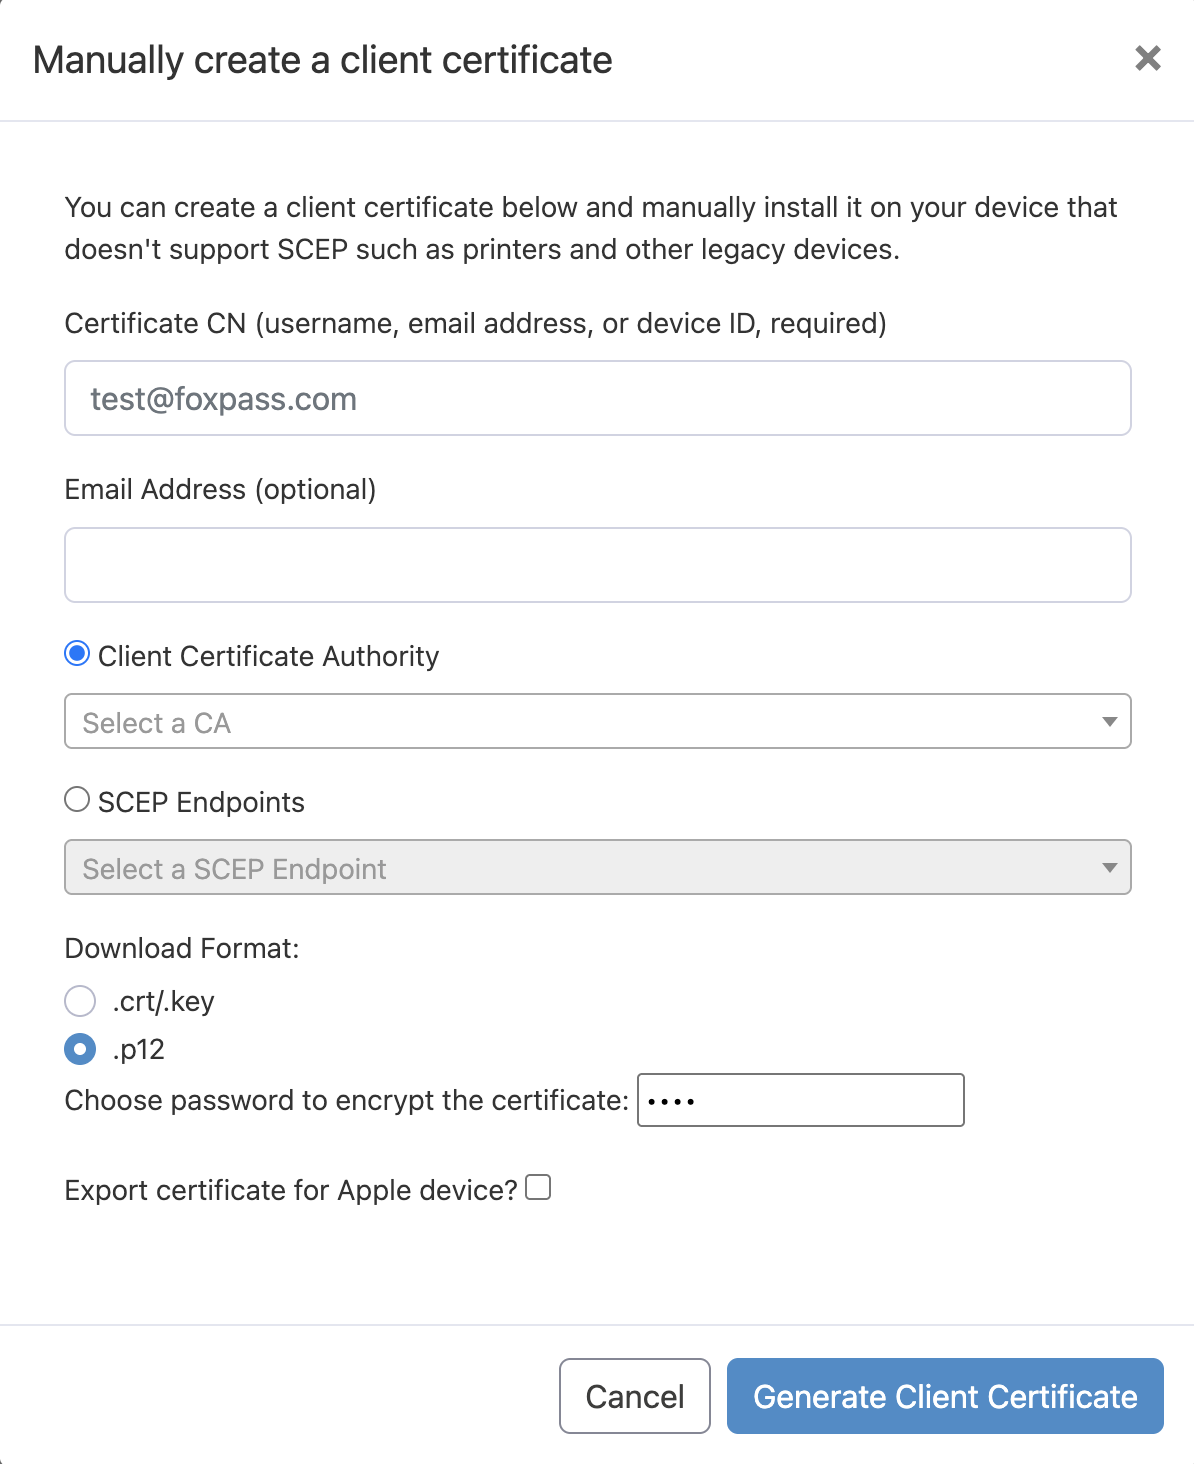
- Double click the downloaded Client certificate and install it to the Current User/Personal store
- It will ask you to supply the password used to encrypt the certificate
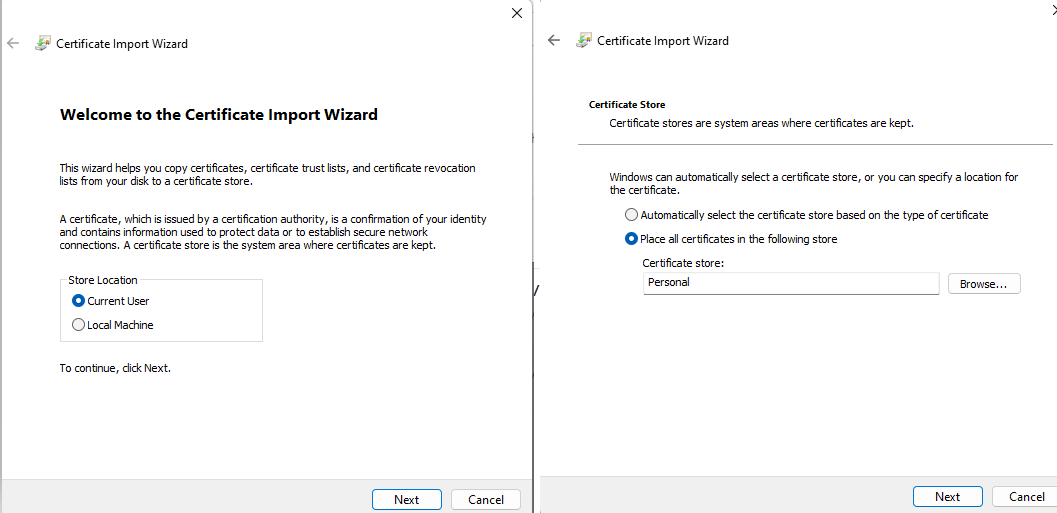
Configure the wireless network settings
- Go to Network and Sharing Center> Set up new connection or network > Manually connect to a wireless network.
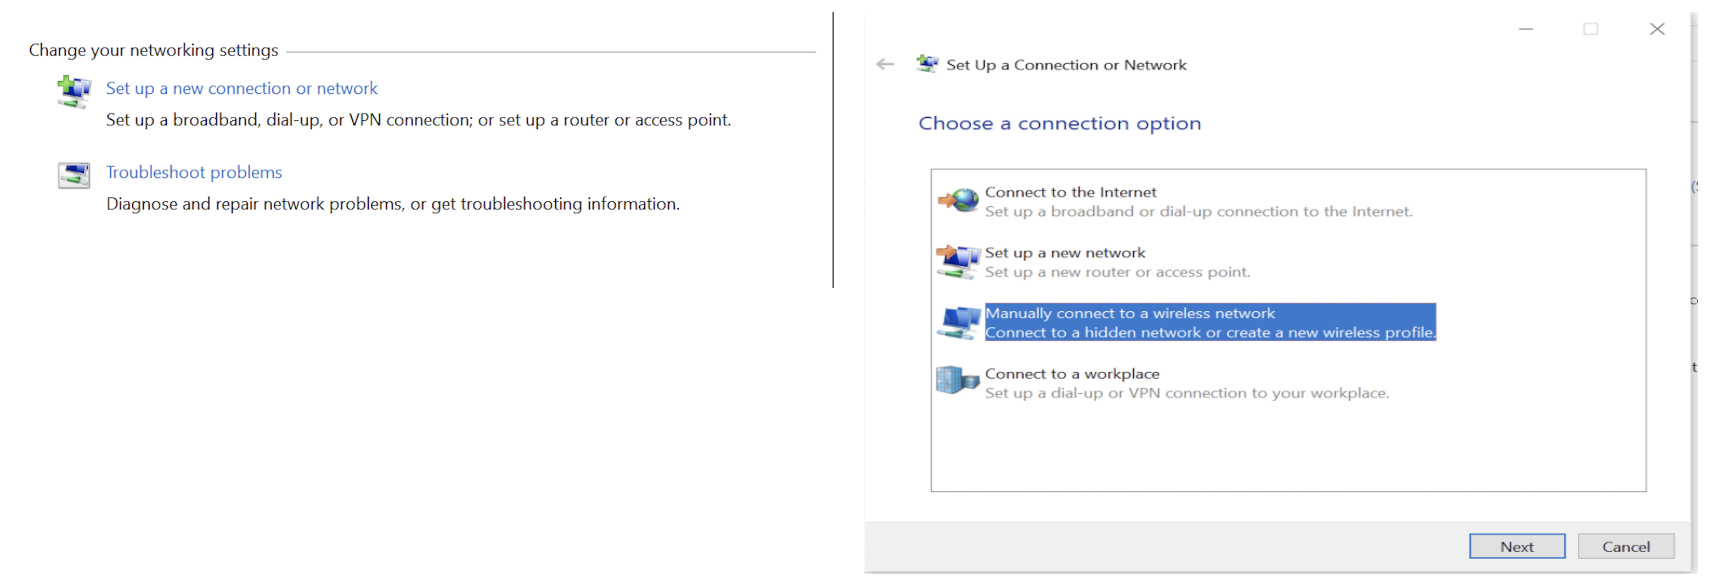
Configure Wireless Network
- Network Name - Your network's name
- Security Type - WPA2-Enterprise AES
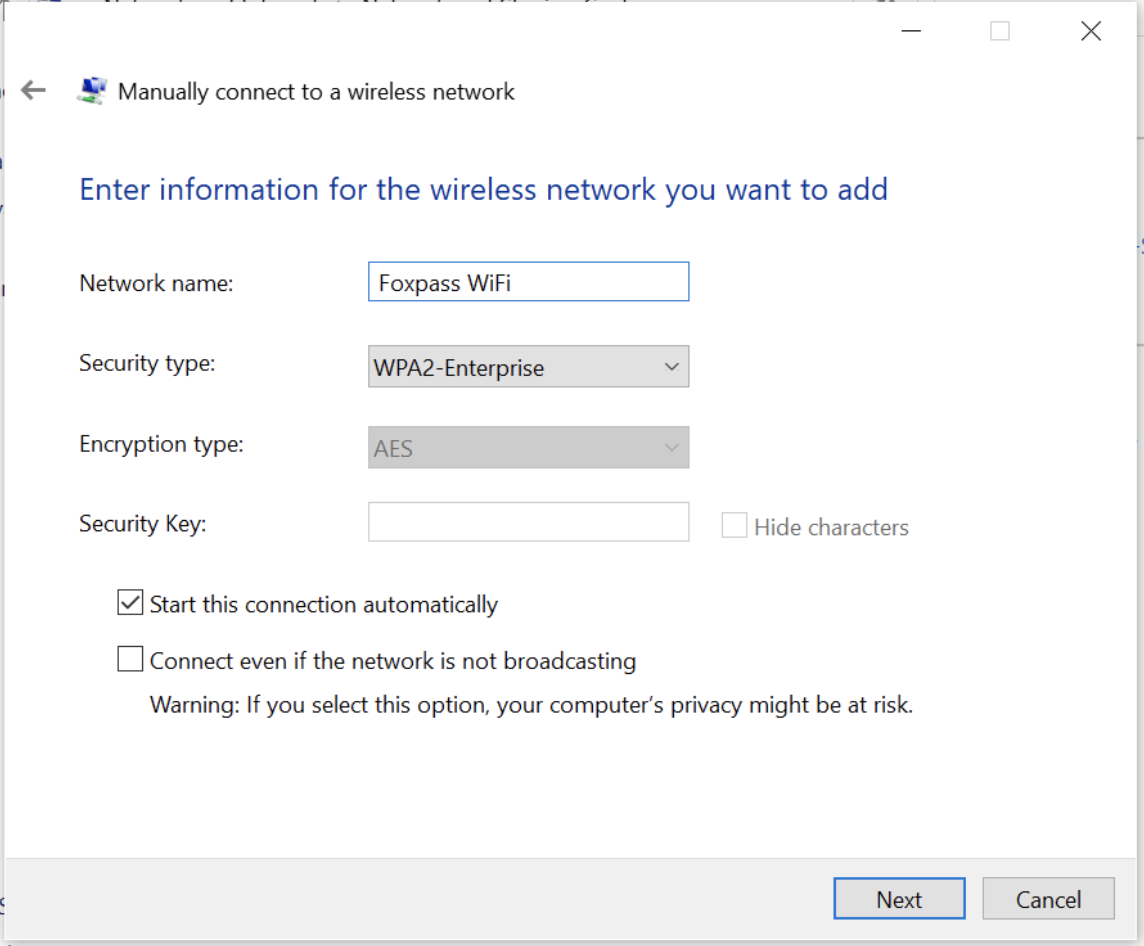
WiFi configuration
- Once the network is created, Select 'Change Connections Settings'.
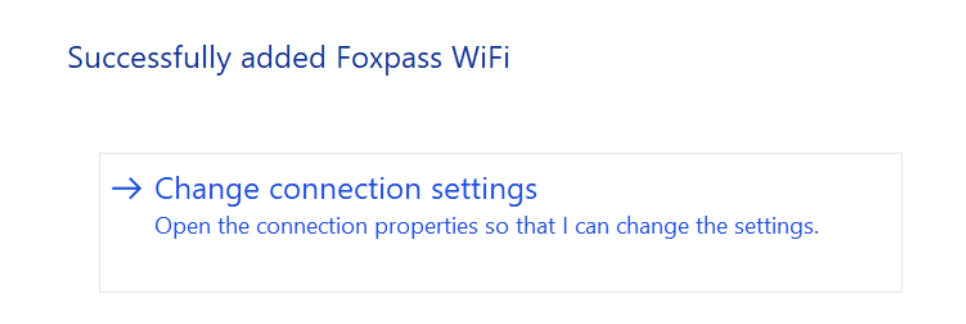
- Click the "Security" tab.
- Change the "Network authentication method" to "Microsoft: Smart Card or other certificates)".
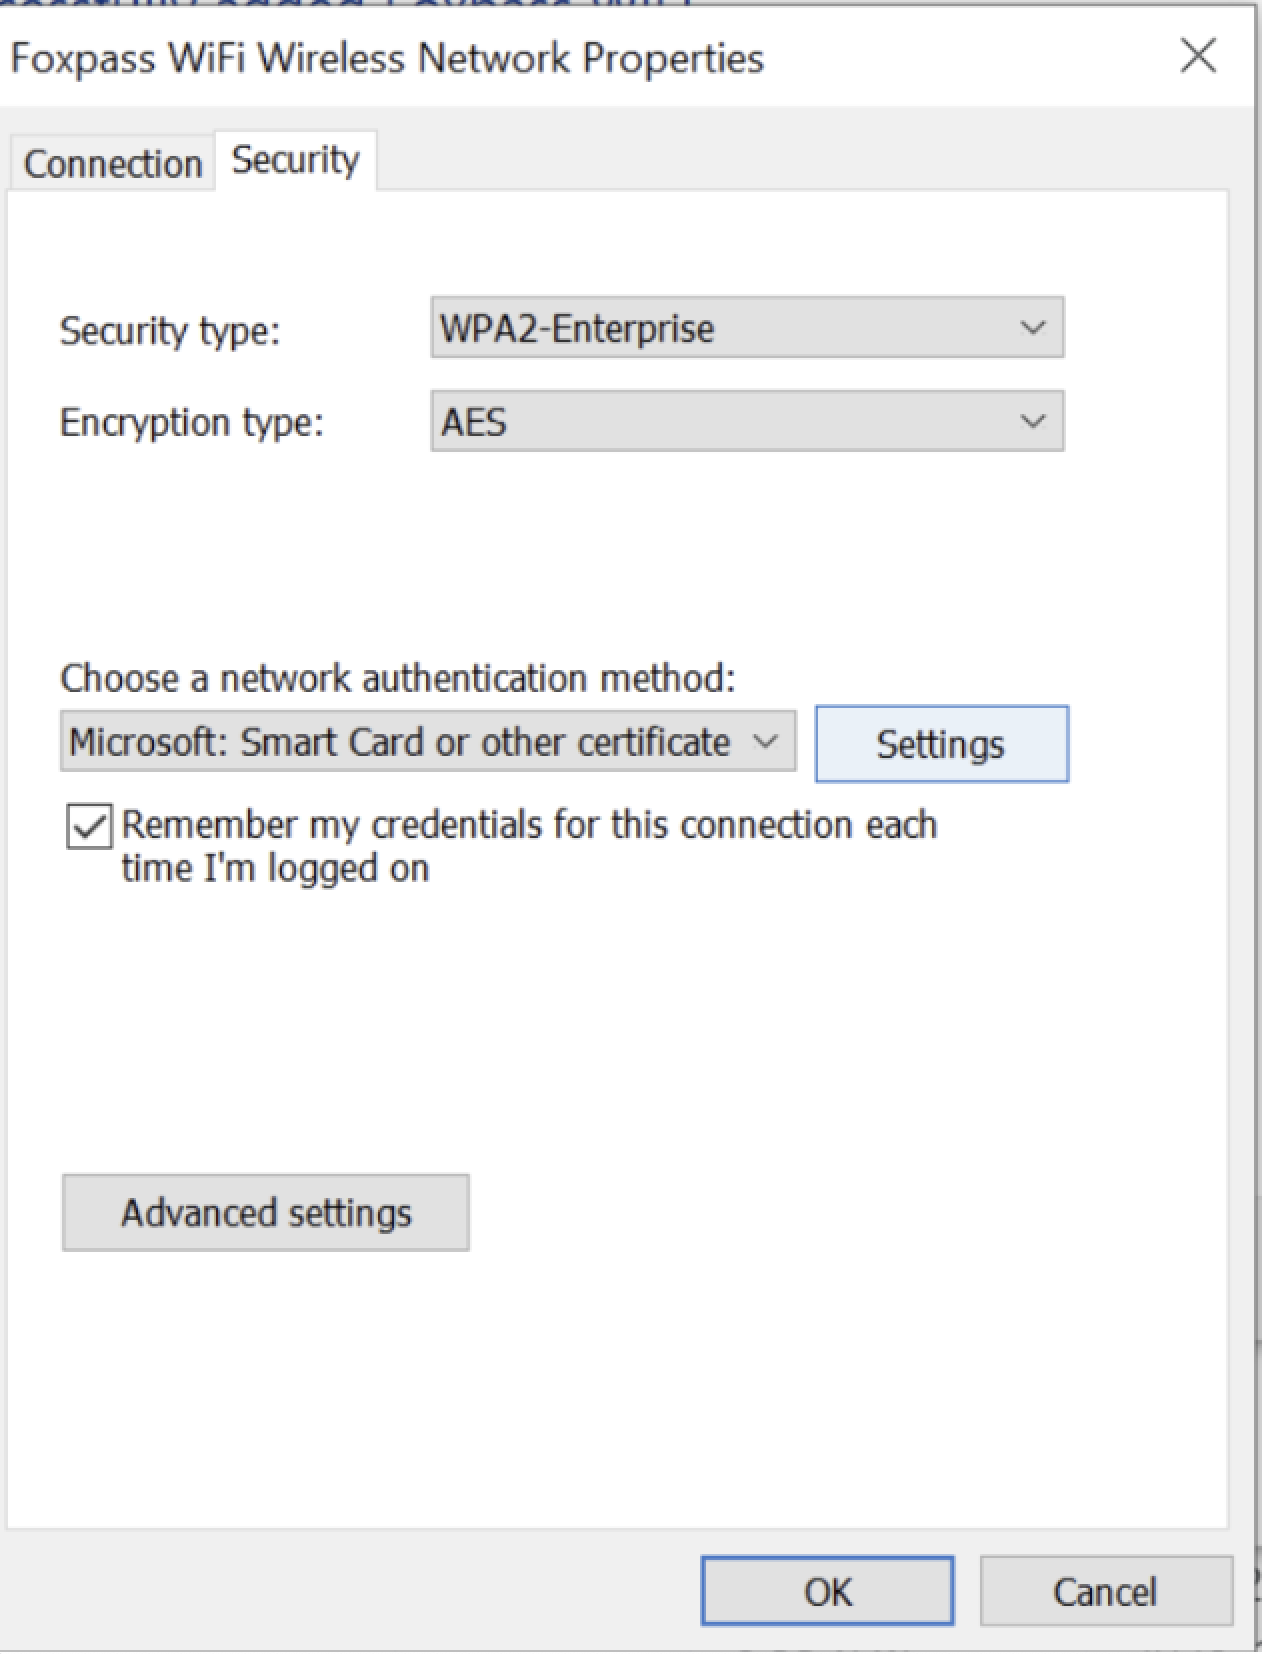
Security Settings
- Click "Settings" next to "Microsoft: Smart Card or other certificates))".
- Select both Use a certificate on this computer and Use simple certificate selection.
- Select Verify the server's identity by validating the certificate
- Select Foxpass EAP-TLS Server CA under Trusted Root Certificate Authorities.
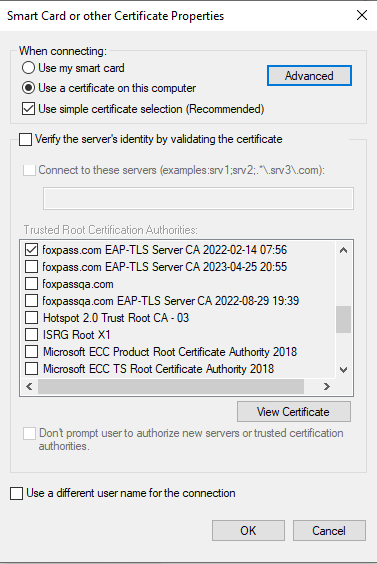
Smart card or other certificate properties
- Click Advanced.
- Select Certificate Issuer and select Foxpass Client CA.
- Click Ok.
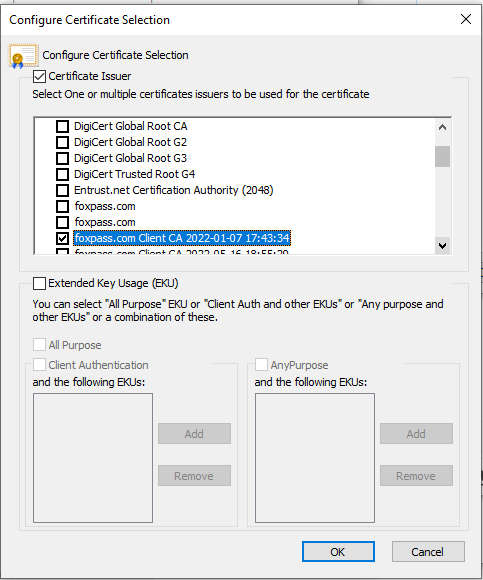
Configure Certificate selection
The setup for the Windows computer is now complete, allowing users to authenticate to Wi-Fi using their certificate instead of entering their username and password.
Updated 4 months ago
