
Foxpass RADIUS with Microsoft Intune PKI
Configuring MSPKI with Foxpass RADIUS, and ensure seamless integration for secure certificate-based authentication
For integrating MSPKI with Foxpass RADIUS, you’ll need a Wi-Fi Access Point supporting WPA-Enterprise, a RADIUS server for authentication, and a Certificate Authority (CA) like MSPKI to issue client certificates. The RADIUS server validates authentication requests against the CA's criteria, checking certificate validity through expiry dates and Certificate Revocation Lists (CRL), since MSPKI currently doesn’t support OCSP. The setup involves configuring these components for secure, certificate-based Wi-Fi access.
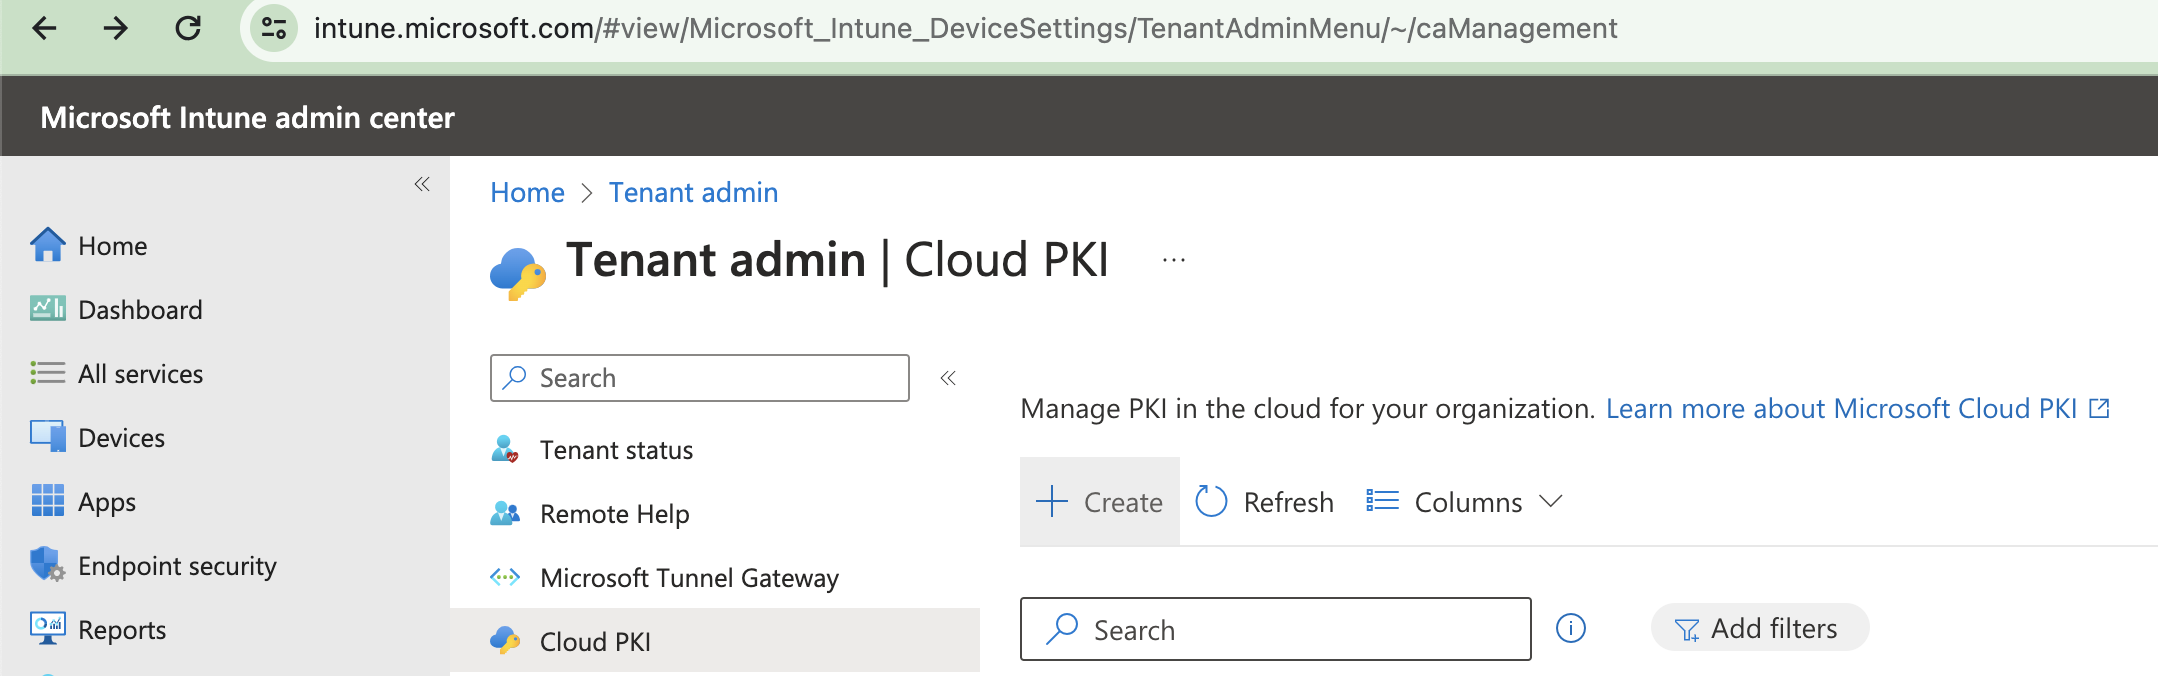
Create Root CA
- Go to Tenant Administration in Intune > Cloud PKI > Click 'Create'.
Create Root CA
- Give a name to Microsoft PKI and click 'Next'.

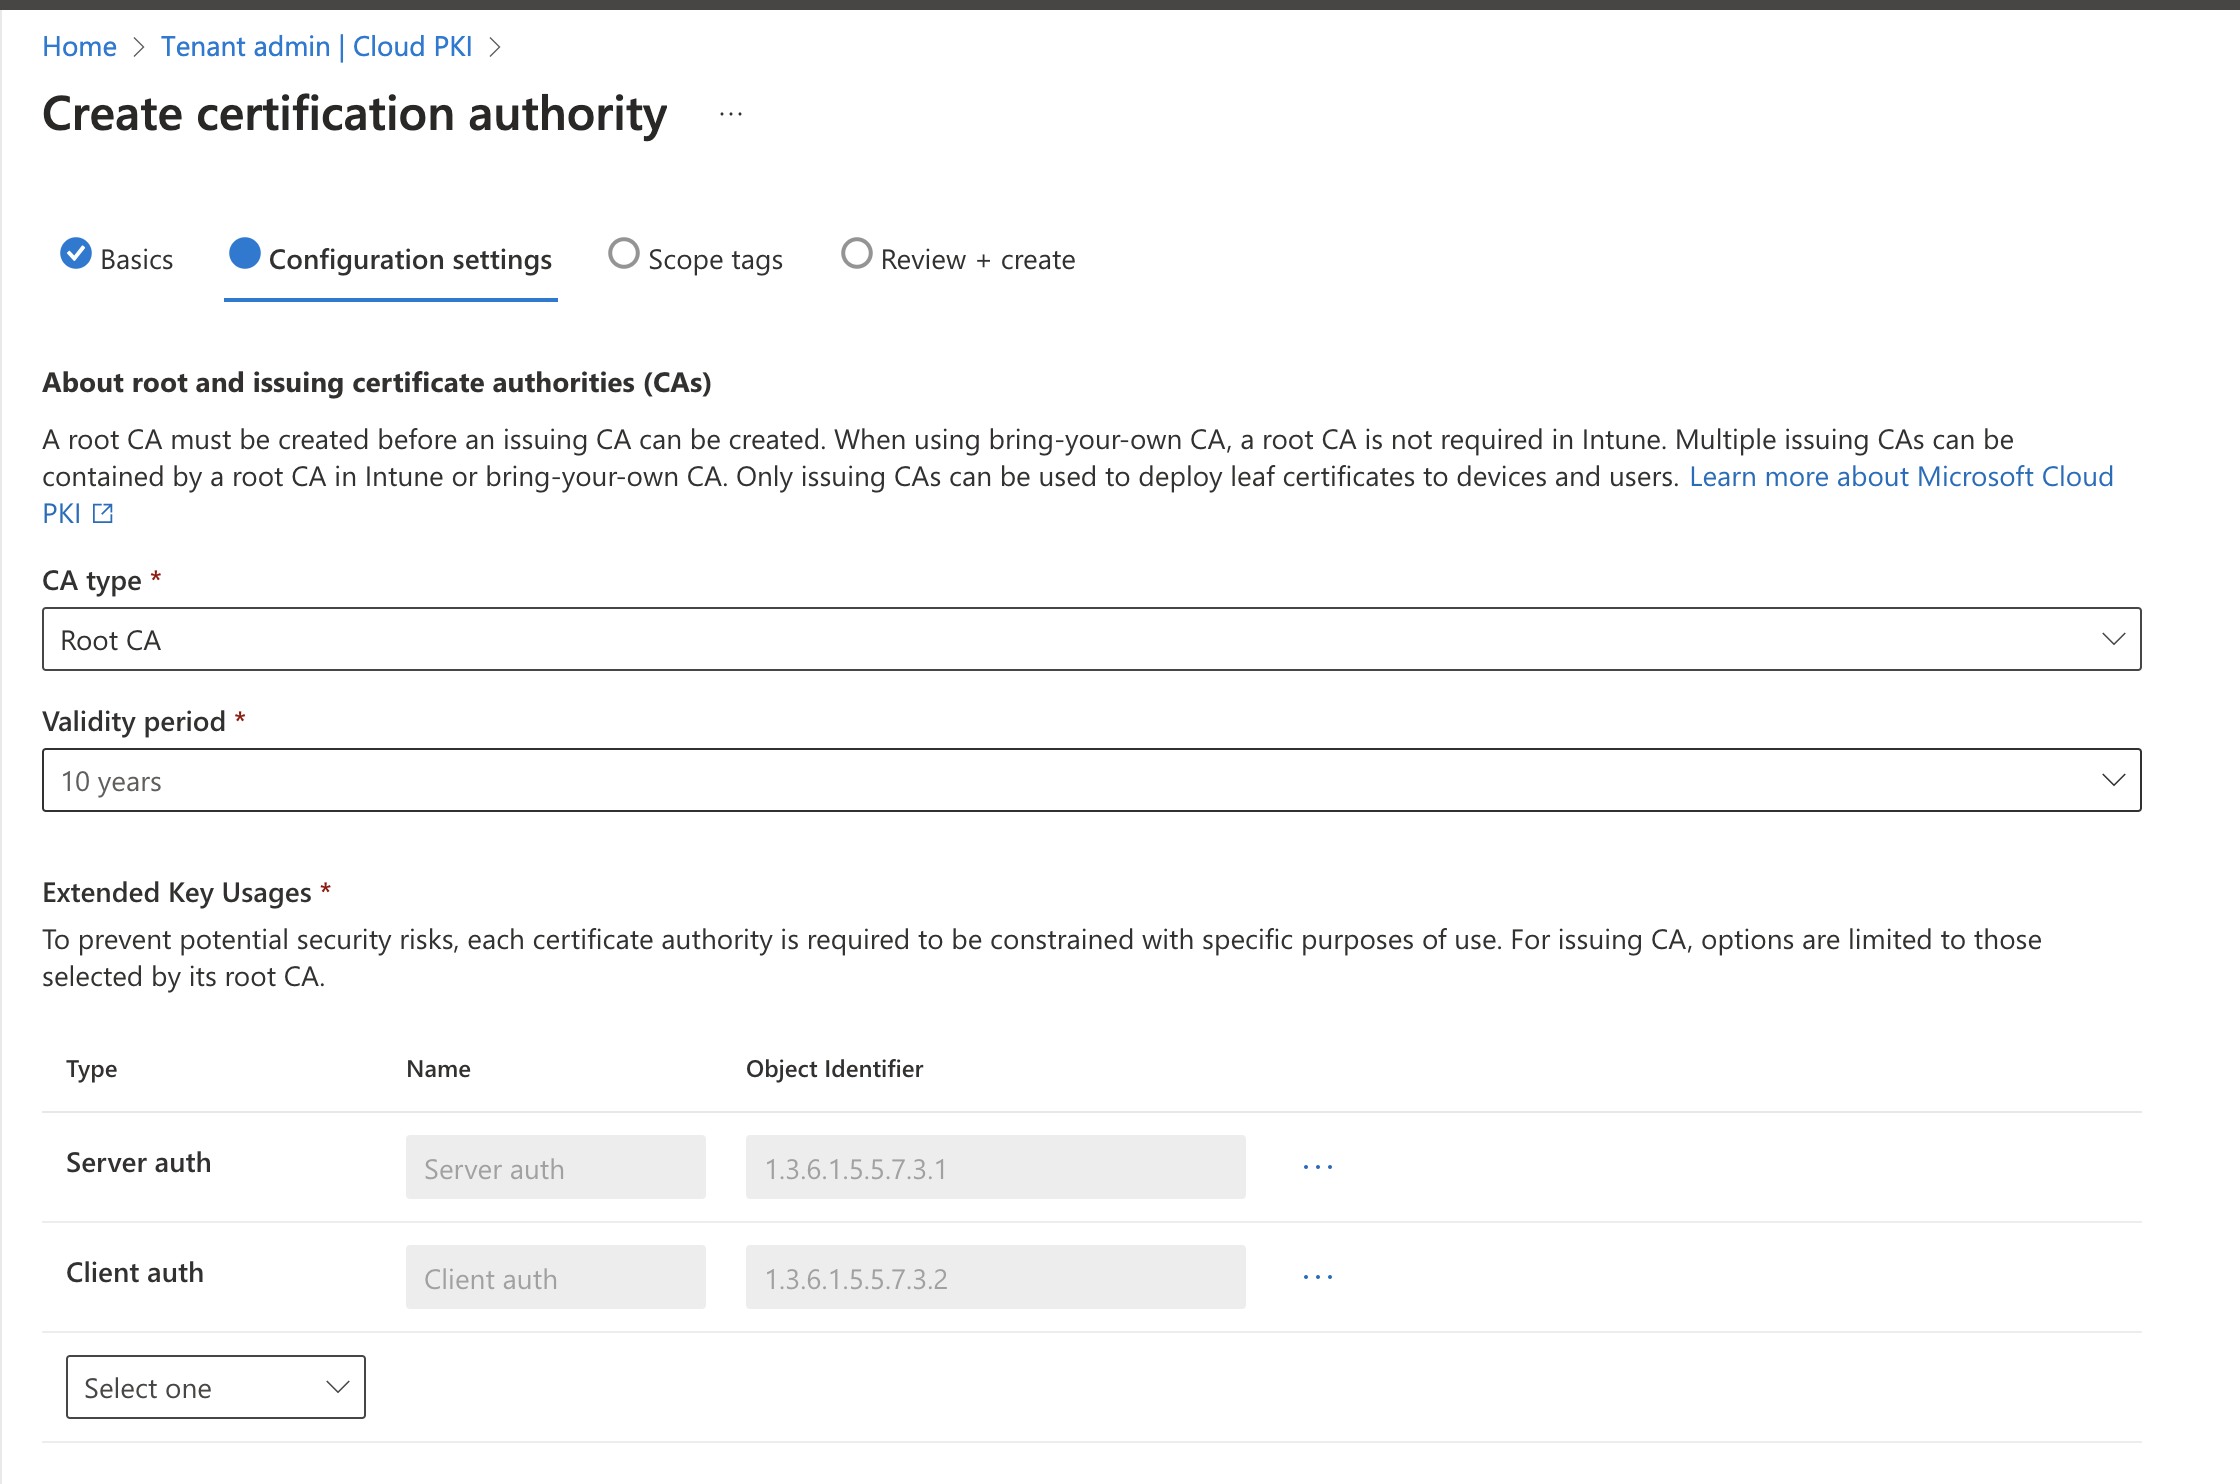
Give a name to Root CA
- CA type: Root CA
- Validity Period: 10 years
- Extended Key Usages: Server auth (1.3.6.1.5.5.7.3.1) and Client auth (1.3.6.1.5.5.7.3.2)
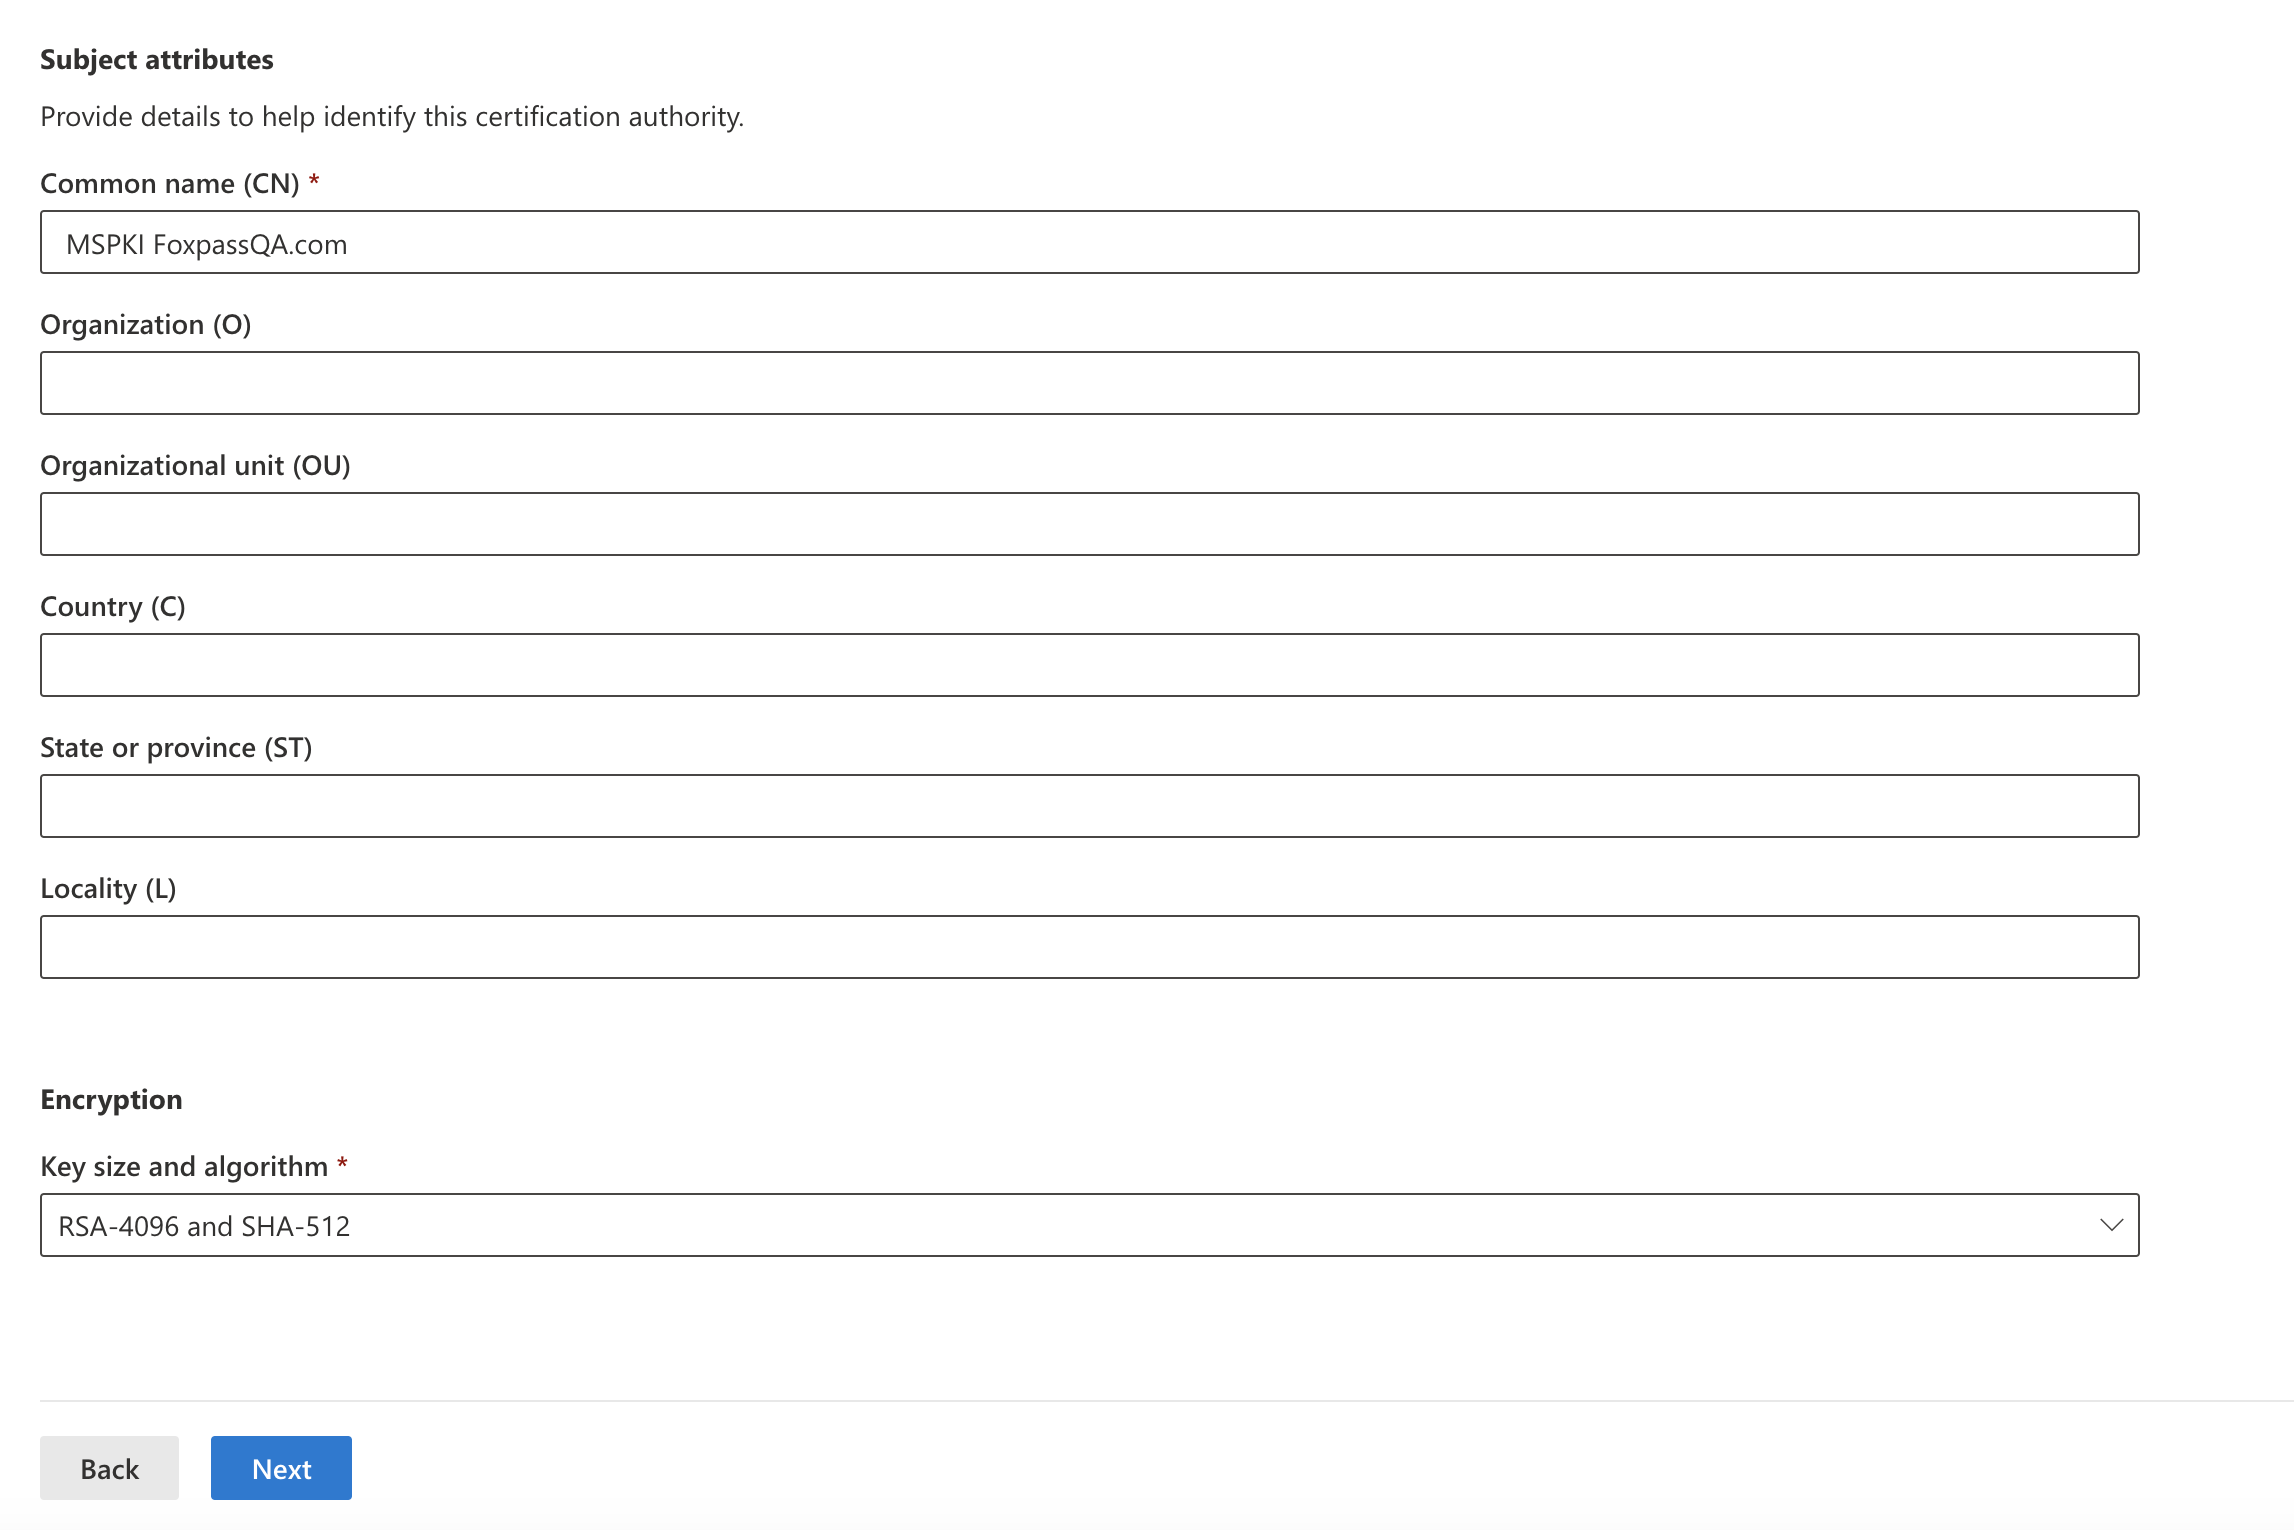
Configuration settings
- Subject attributes: CN - 'Your Microsoft Cloud Root CA name'
- Key size and algorithm: RSA-4096 and SHA-512
- Click 'Next'
Configuration Settings
- For Scope tags, default is selected automatically. Click 'Next'
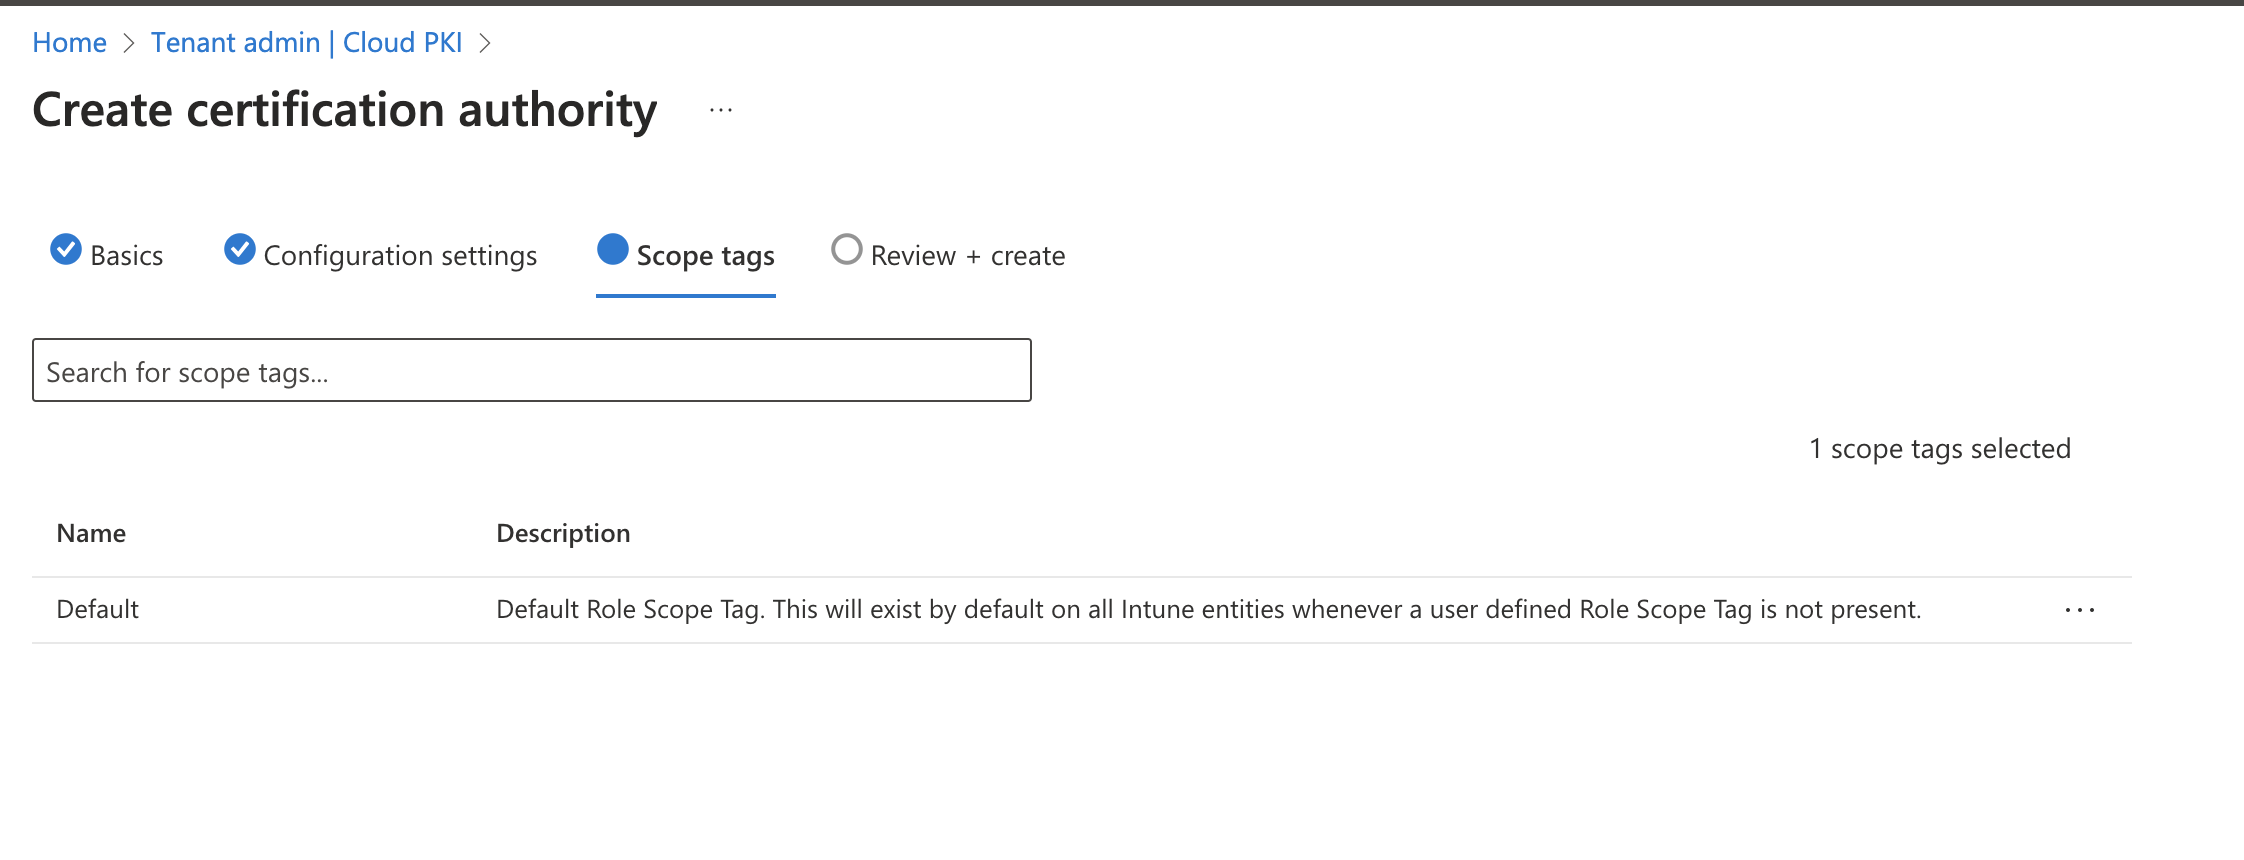
Default Scope tag
- For 'Review +create', click 'Create'. The final root CA will look like below:
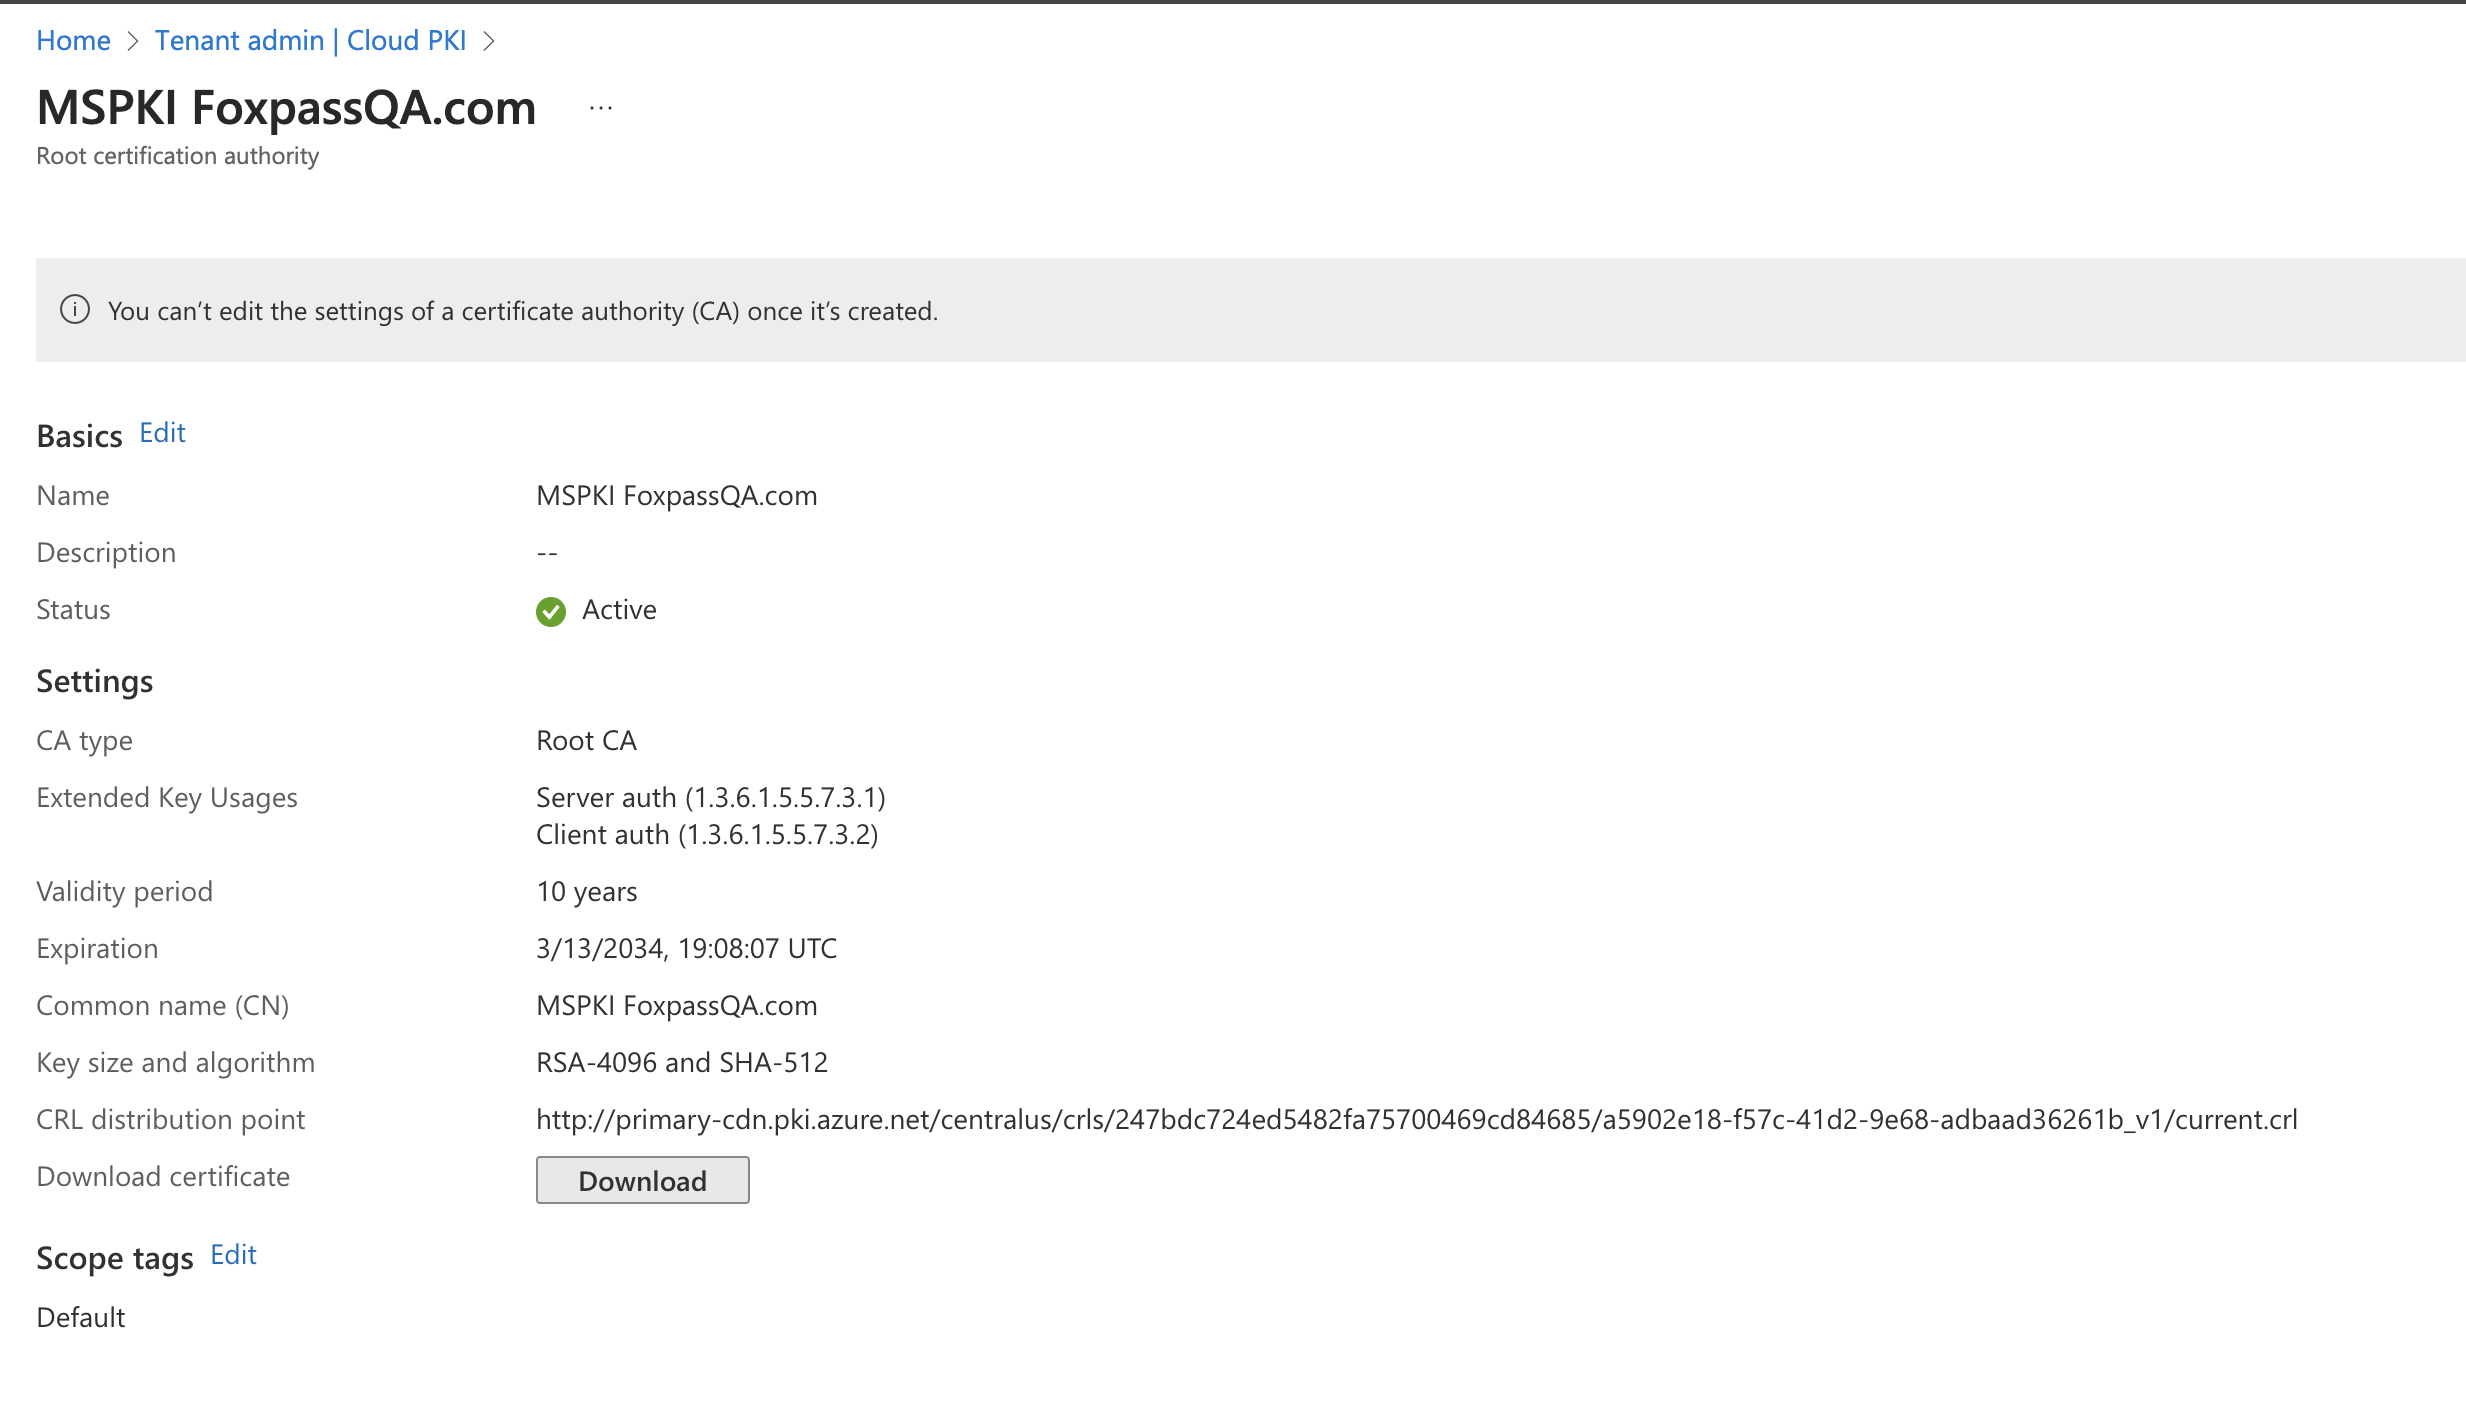
Root CA created
- Copy the CRL distribution point and make a note. This will be used and added in Foxpass while uploading client CA.
- Click 'Download' to download the root CA.
Create Issuing CA
- Click on 'Create' under Cloud PKI.
- Give a name and click 'Next'
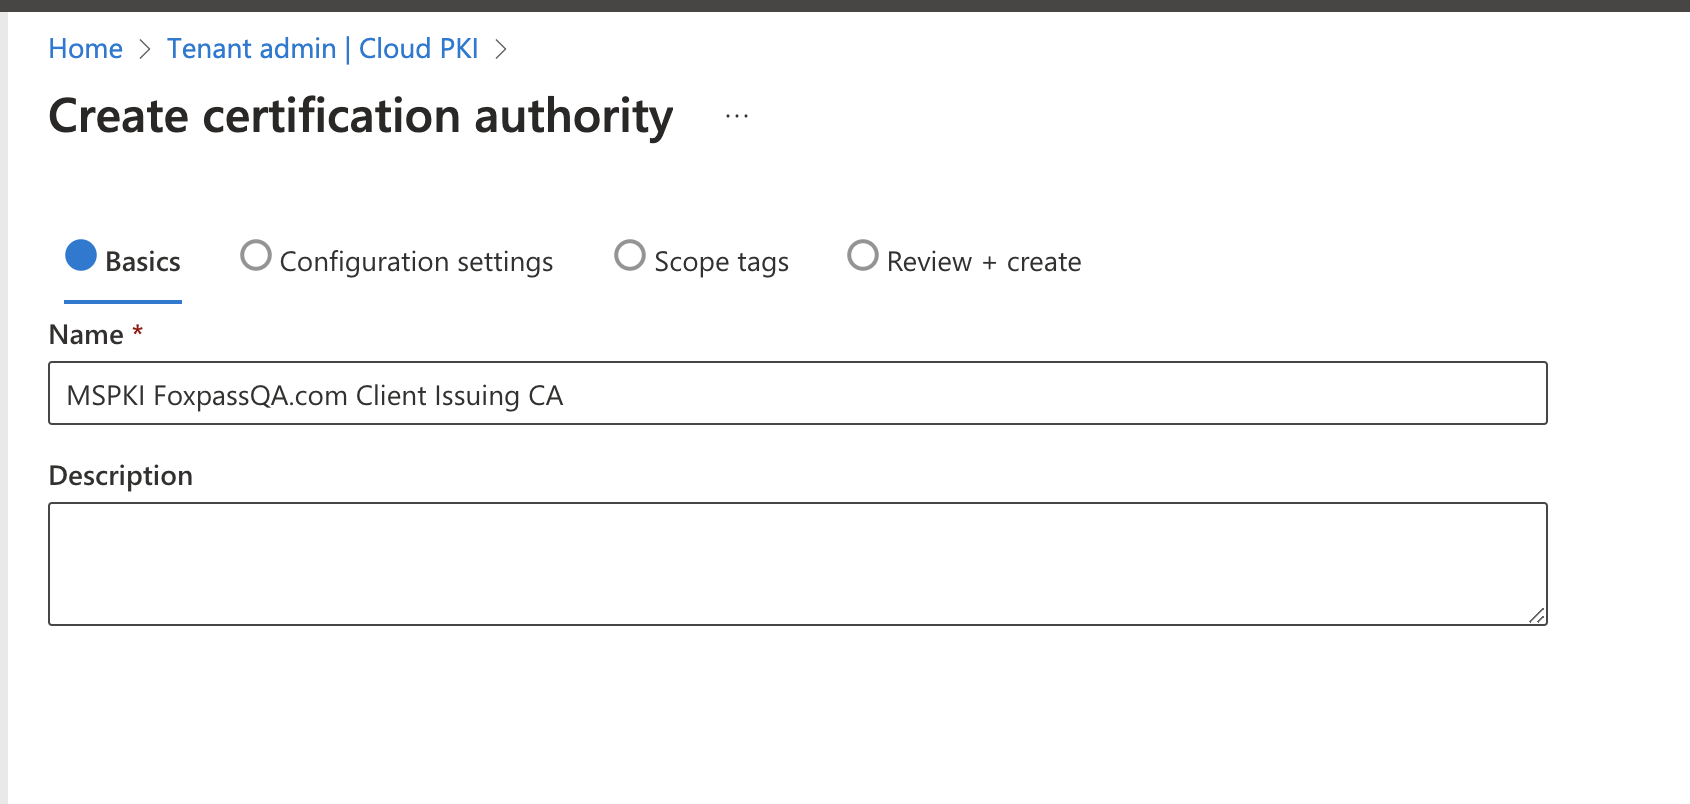
Create Issuing CA
- CA type: Issuing CA
- Root CA source: Intune
- Root CA: Select the Root CA created earlier.
- Validity period: 6 years
- Extended Key Usages: Client auth (1.3.6.1.5.5.7.3.2)
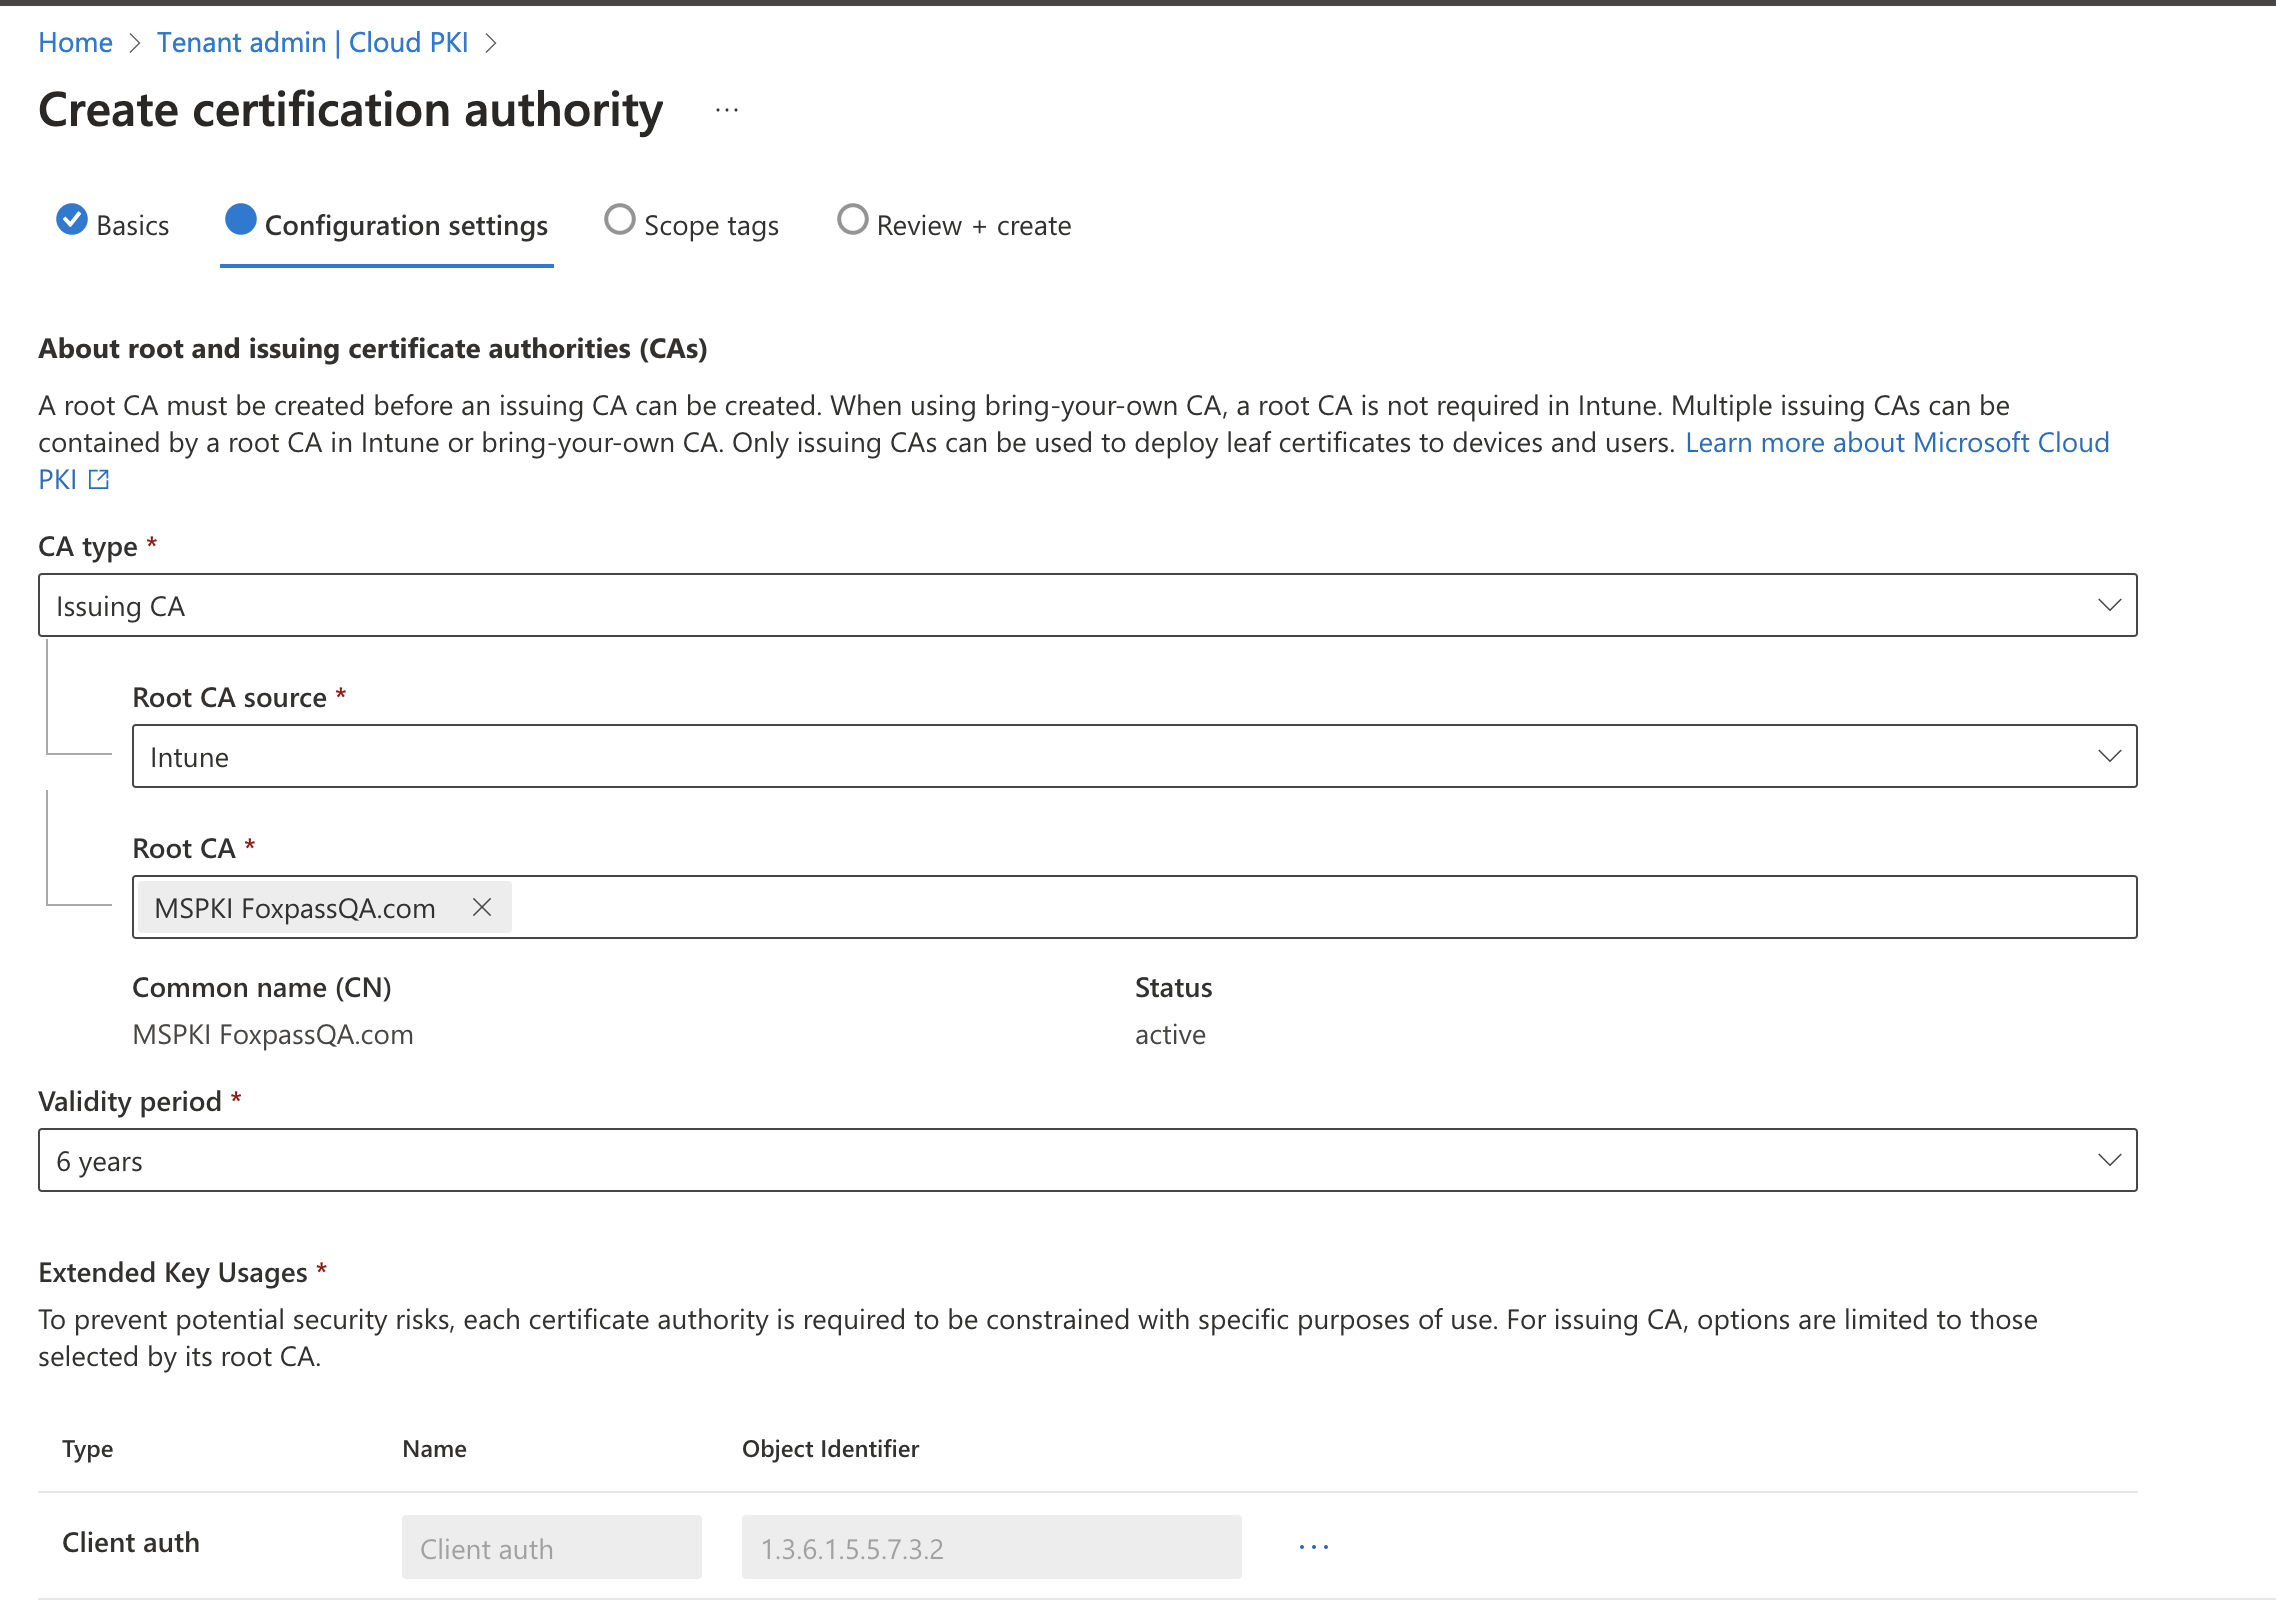
Configuration settings
- Subject attributes: Your Microsoft Cloud Issuing CA name'. Click 'Next'
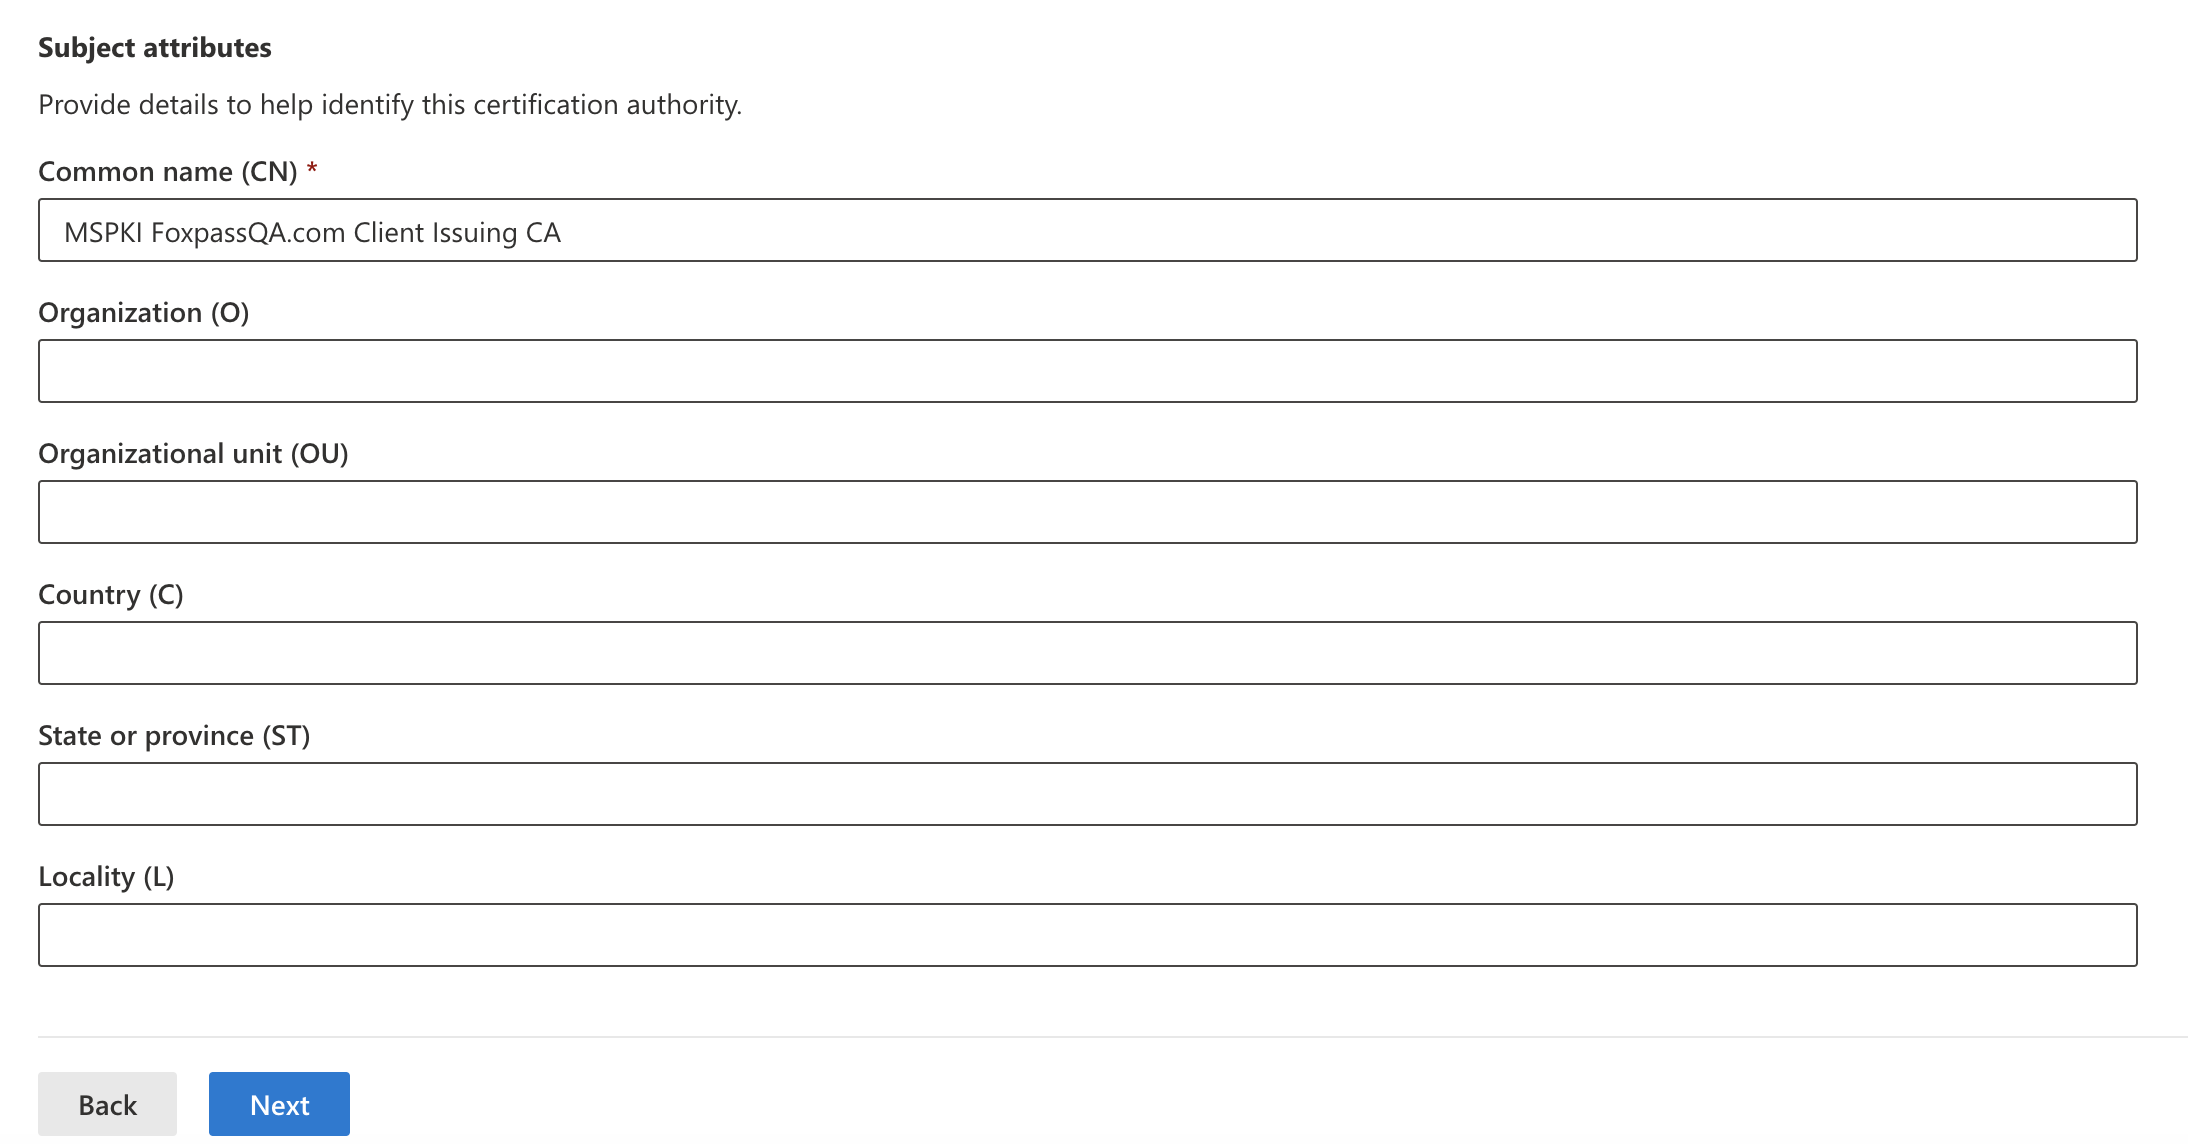
Configuration settings
- For Scope tags, default is selected automatically. Click 'Next'
Default Scope tag
- For 'Review +create', click 'Create'. The final issuing CA will look like below:
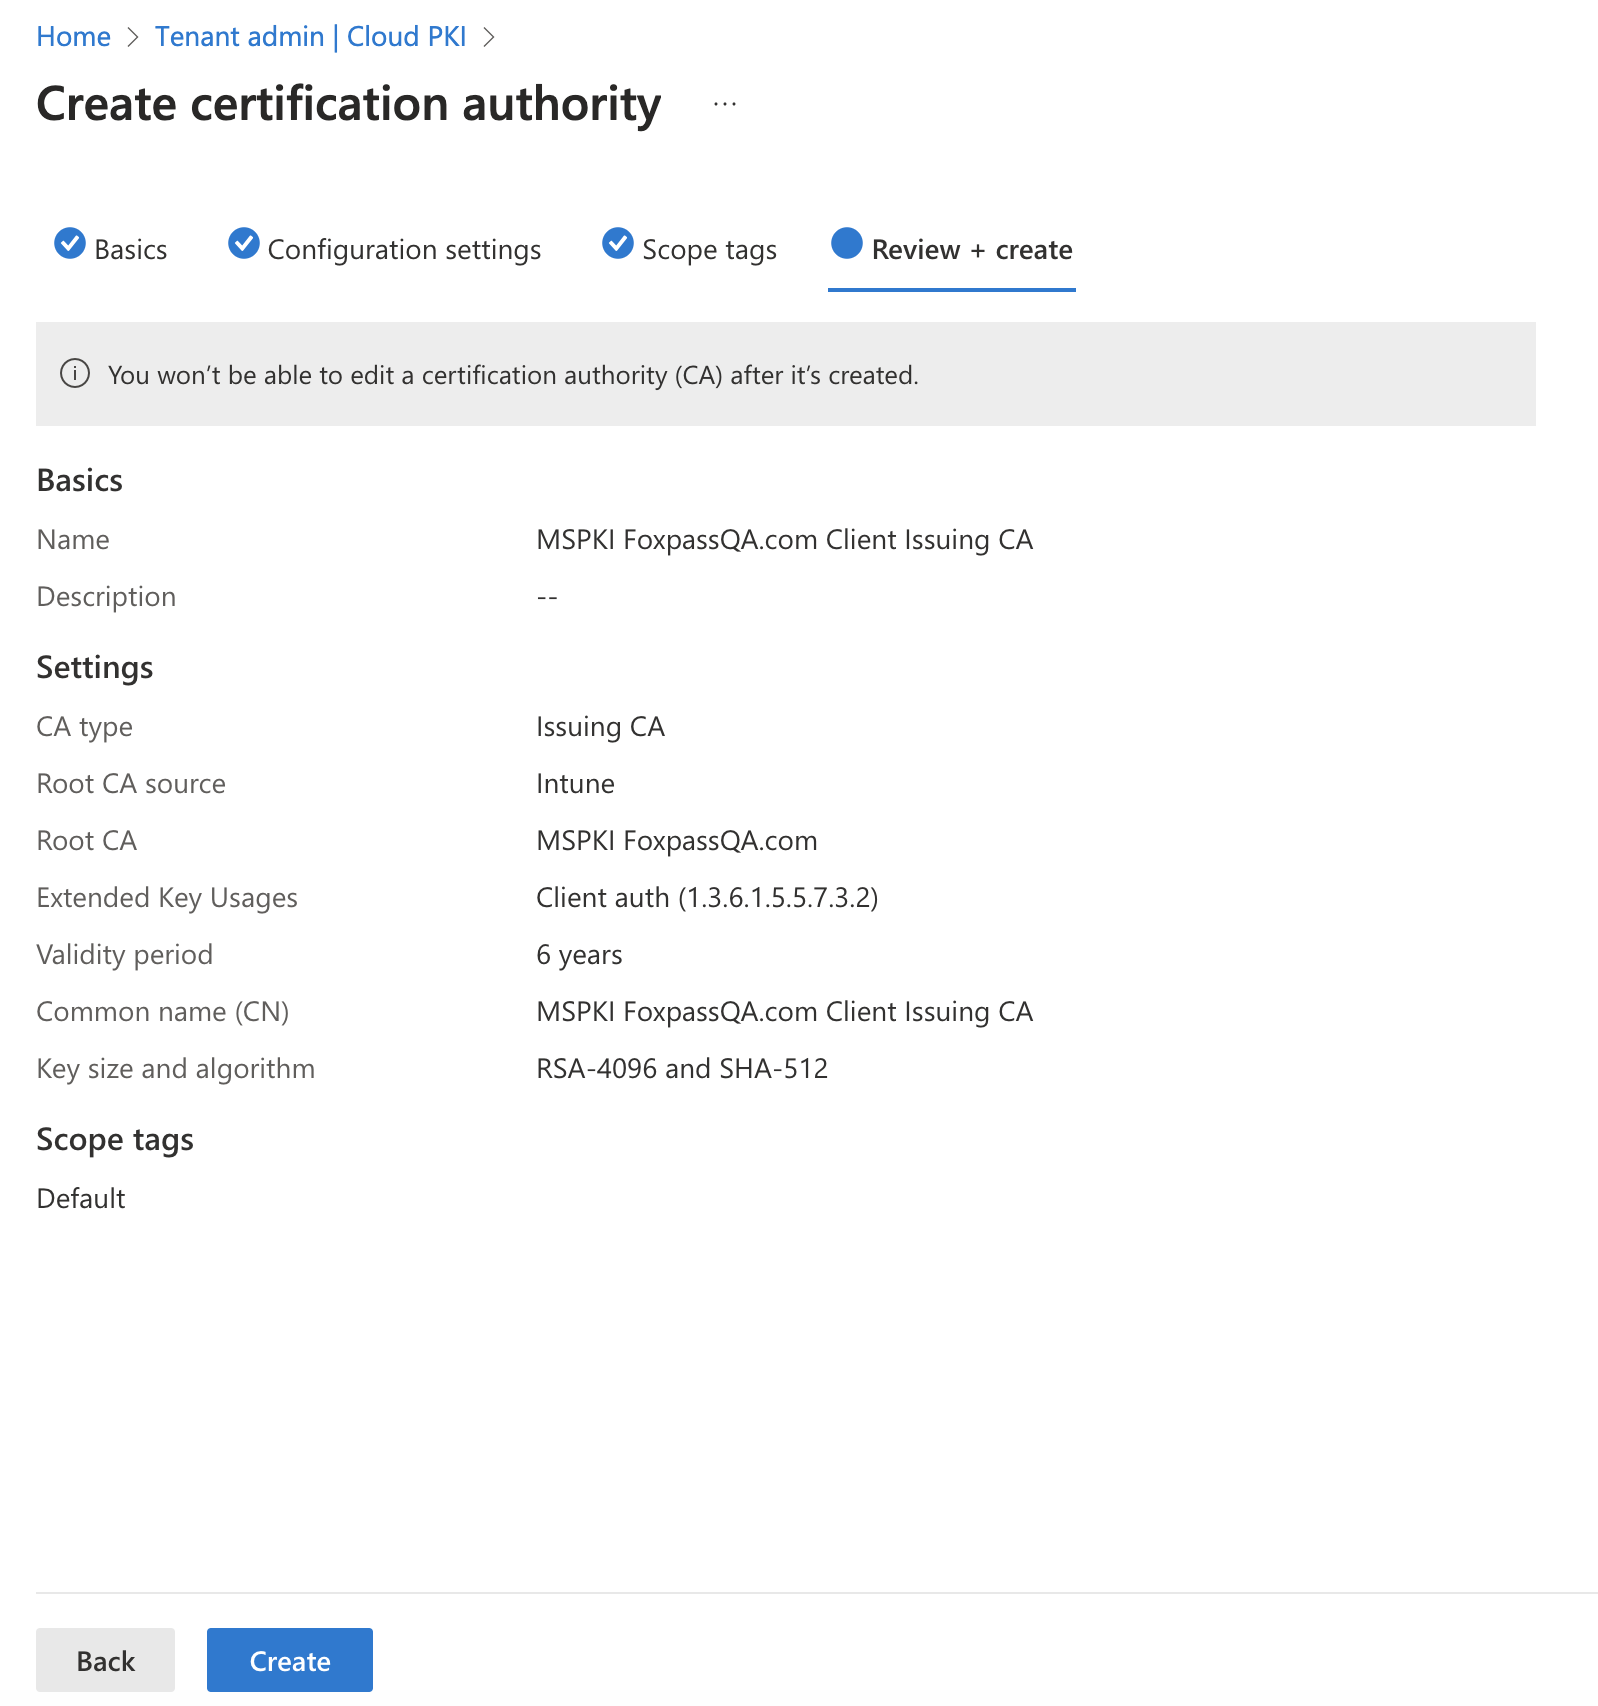
Click 'Create'
- Now you can see both CA's in Intune.

Root CA and Issuing CA
- The final issuing CA will look like below:
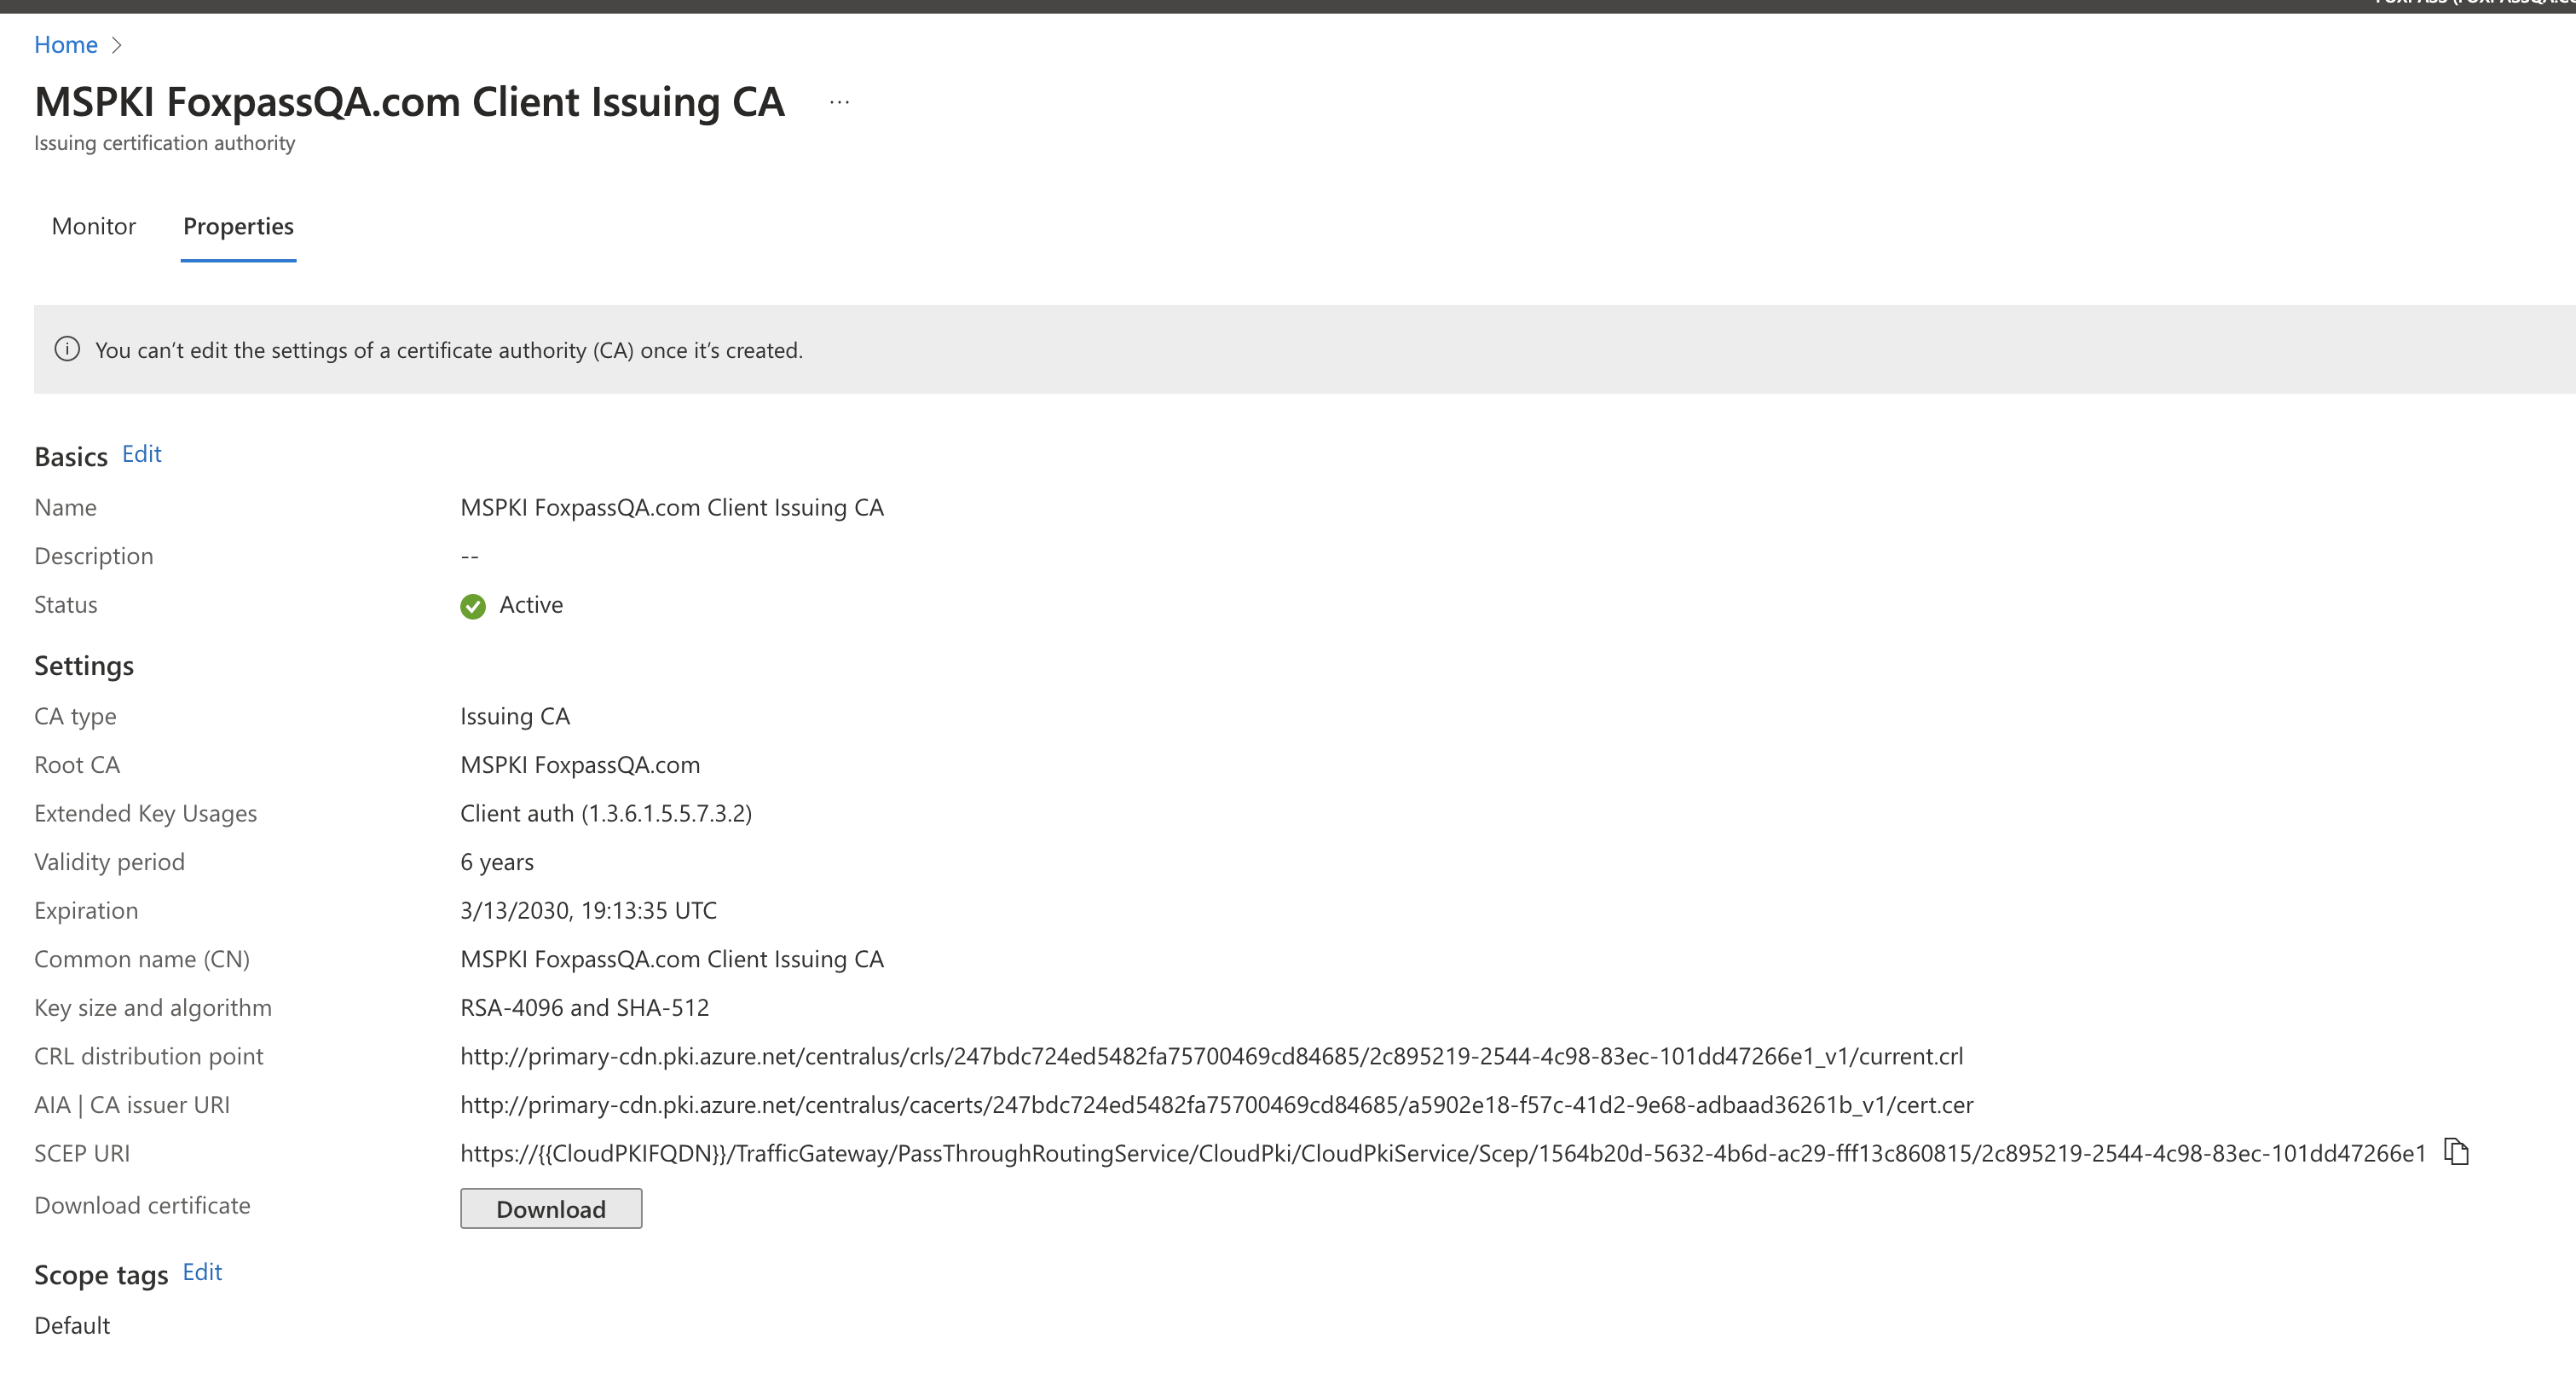
Issuing CA
- Copy the CRL distribution point and make a note. This will be used and added in Foxpass while uploading client CA.
- Copy the SCEP URI and make a note. This will be used later while configuring SCEP profile.
- Click ' Download' to download the issuing CA.
Upload CA's to Foxpass
- Go to Foxpass EAP-TLS page and click on 'Upload Client CA' button.
- Upload the Root CA downloaded earlier. Paste the CRL URL which was previously noted.
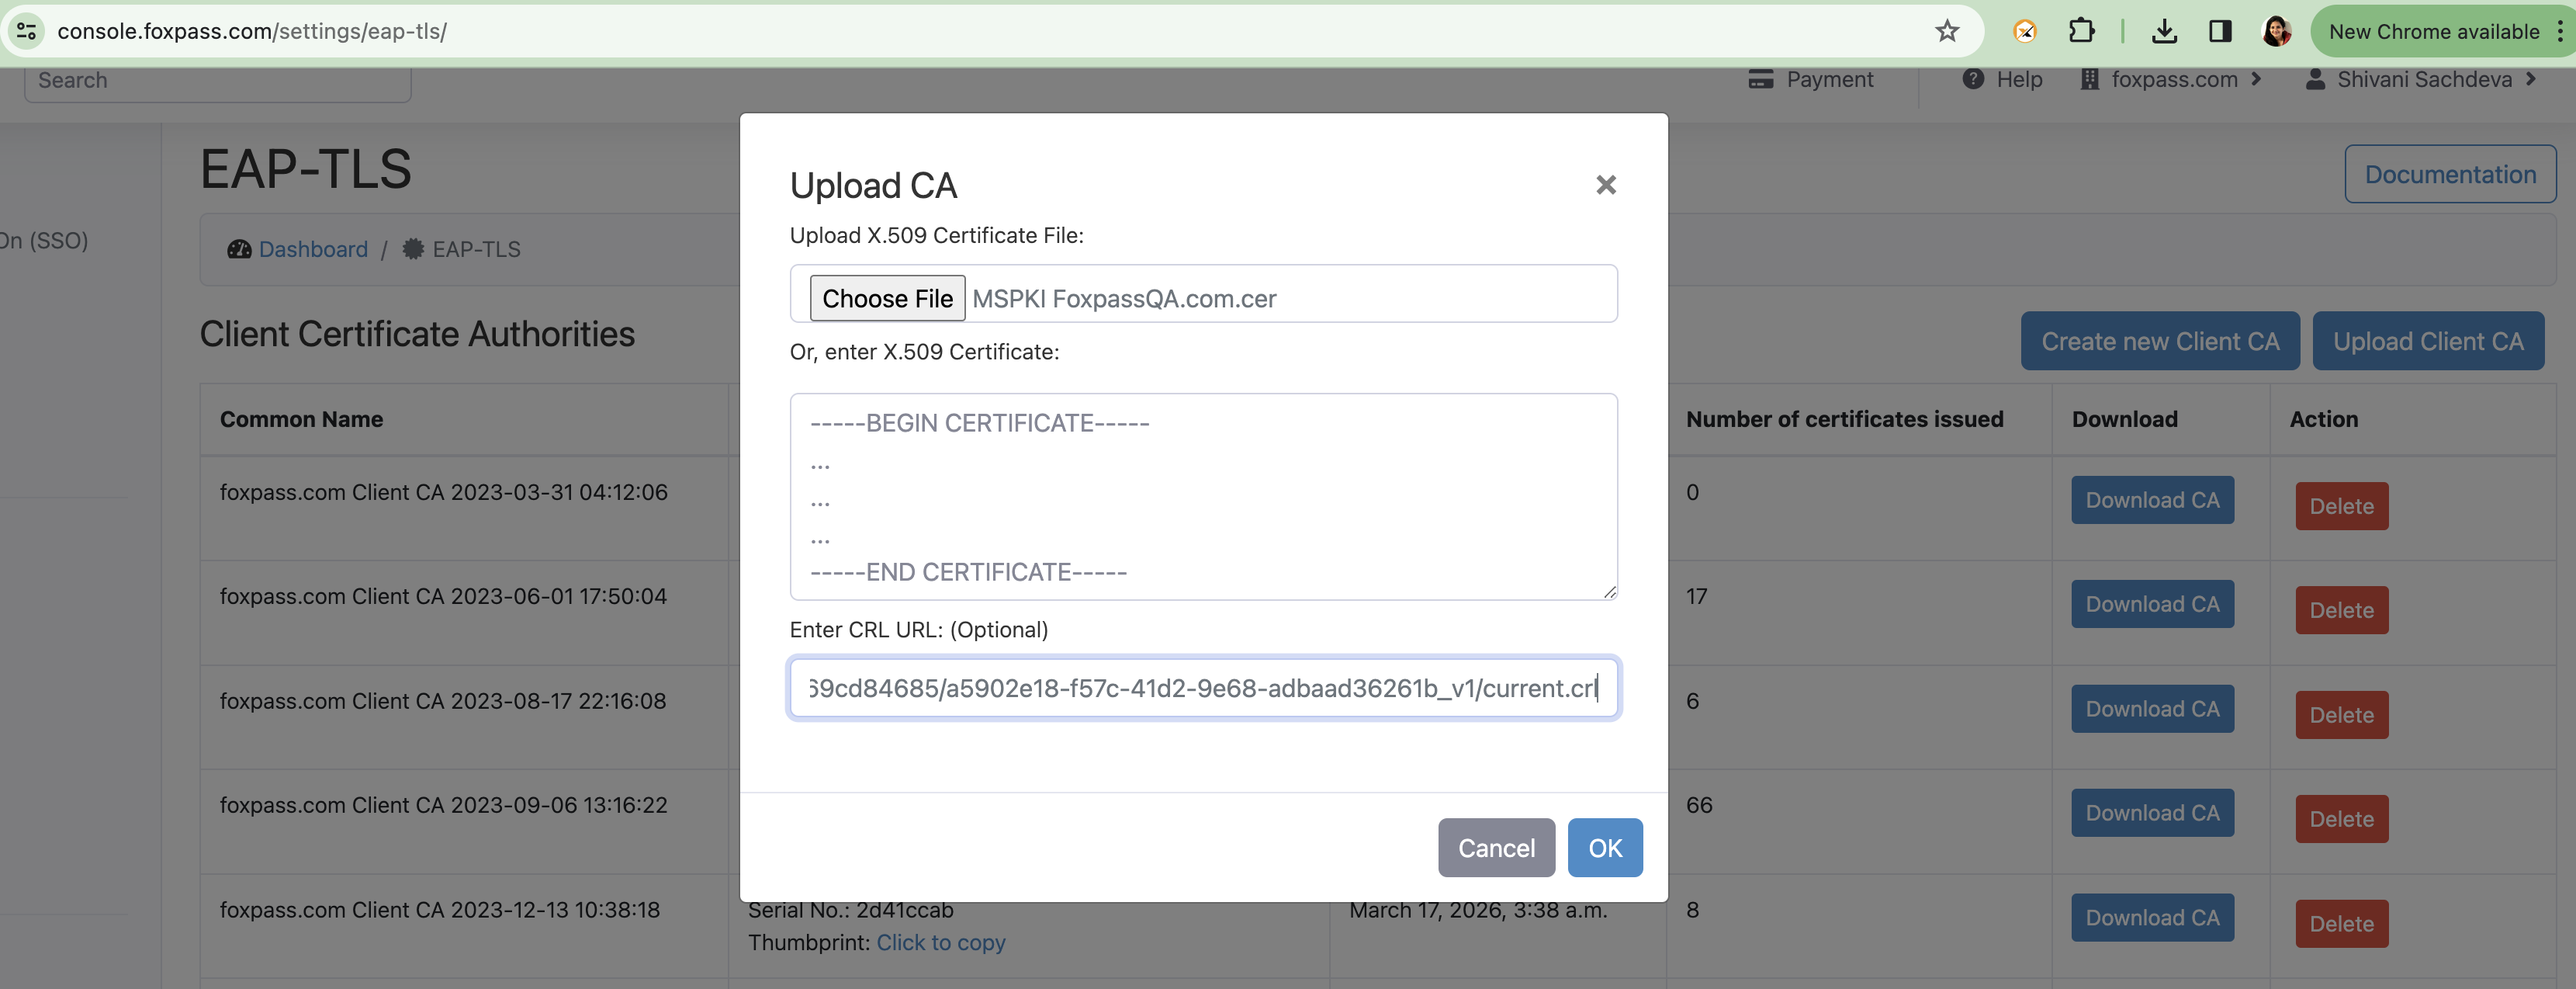
Upload Root CA
- Click on 'Upload Client CA' button again.
- Upload the Issuing CA downloaded earlier. Paste the CRL URL which was previously noted.
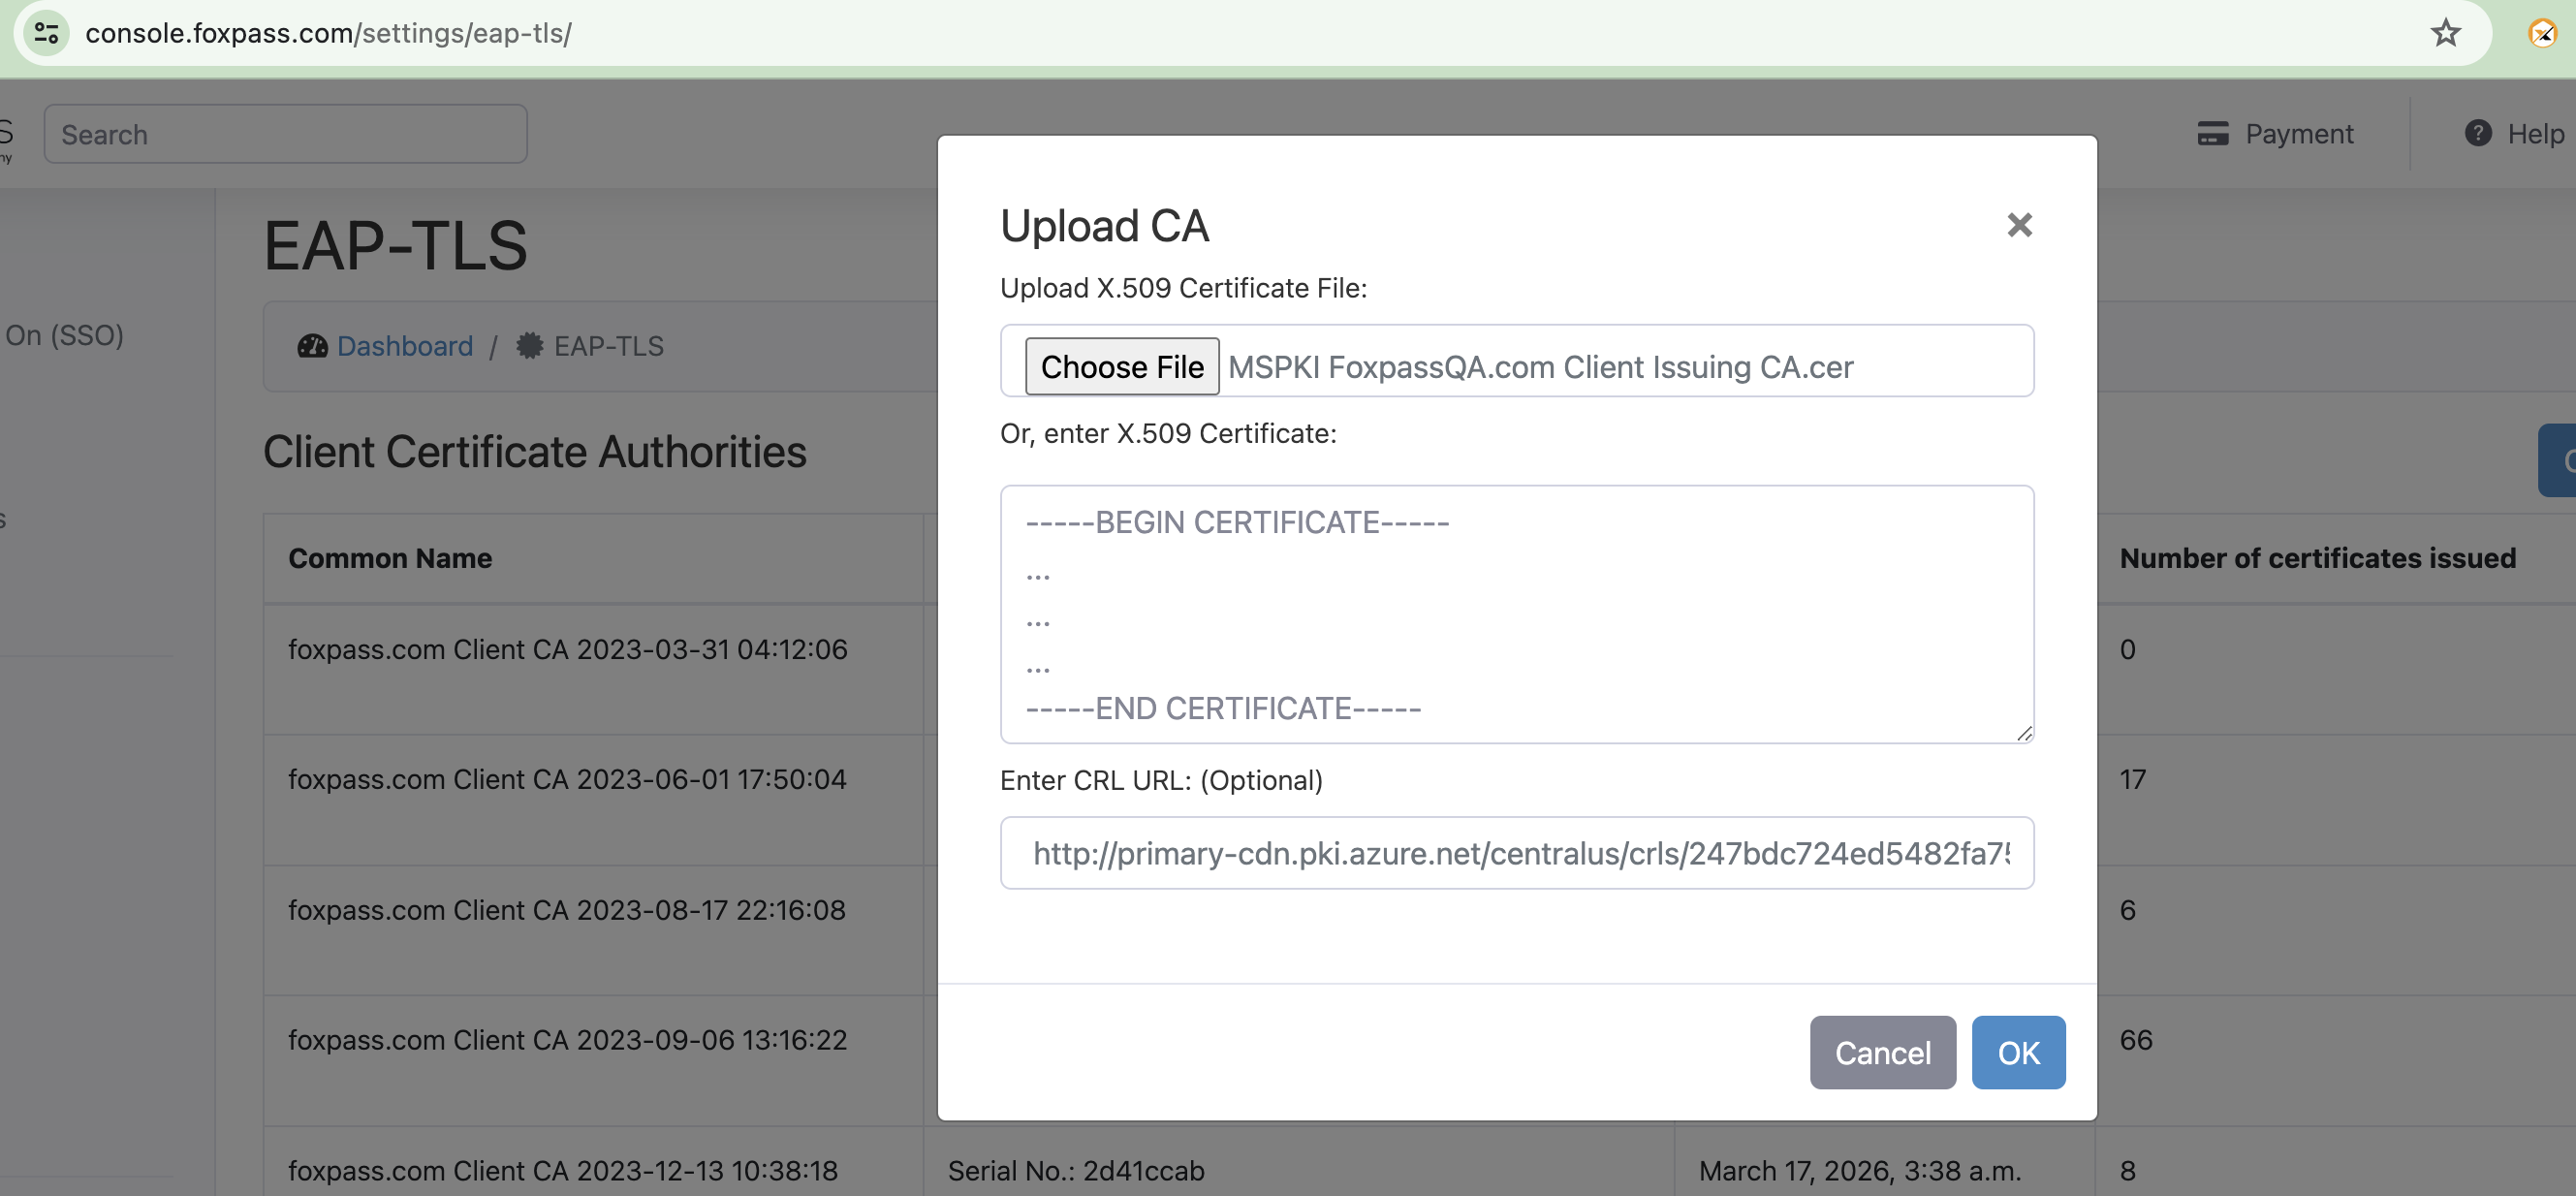
Upload Issuing CA
Create Configuration Profiles
Create Trusted certificate profile for Root CA
- Go to the Configuration Profiles in Intune.
- Click on 'Create' > 'New Policy'.
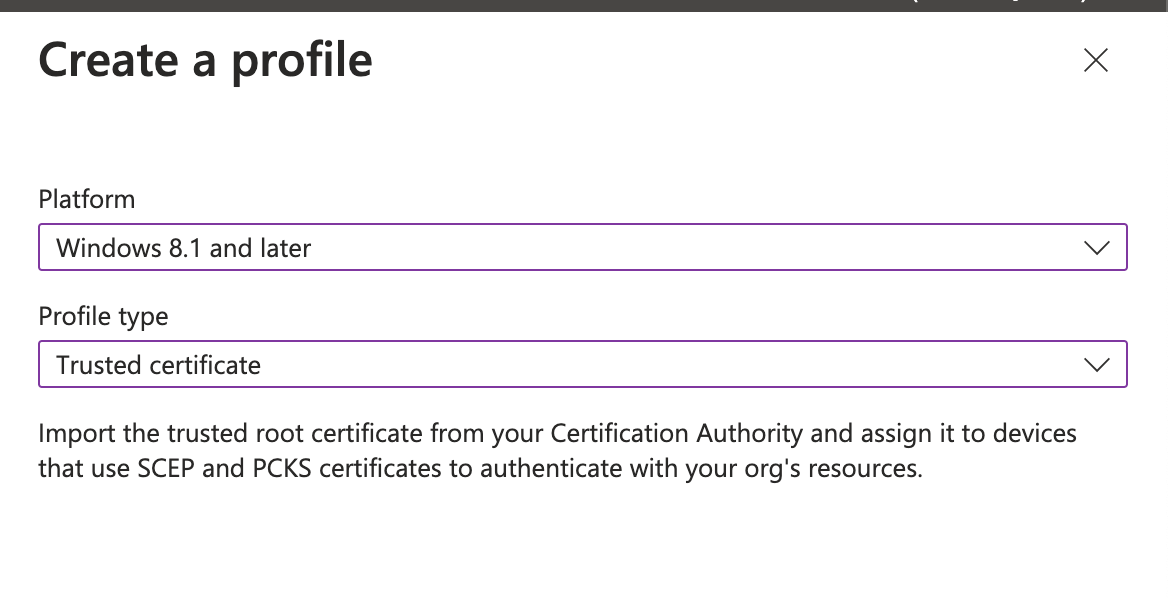
- Platform: Windows 8.1 and later and Profile Type: Trusted certificate.
- Click 'Create'.
Create profile for Root
- Give a name to your profile and click 'Next'.
- Upload the root CA which was downloaded in earlier step when Root CA was created.

Upload root CA
- Destination store: Computer certificate store - Root
- Add users/ groups/ devices and choose assignment according to your use case.
- Review your settings and click 'Create'.

Review settings
Create SCEP Profile
- Go to the Configuration Profiles in Intune.
- Click on 'Create' > 'New Policy'.
- Platform: Windows 8.1 and later and Profile Type: SCEP certificate.
- Click 'Create'.

Create SCEP Profile
- Give a name to your SCEP profile. Click 'Next'.
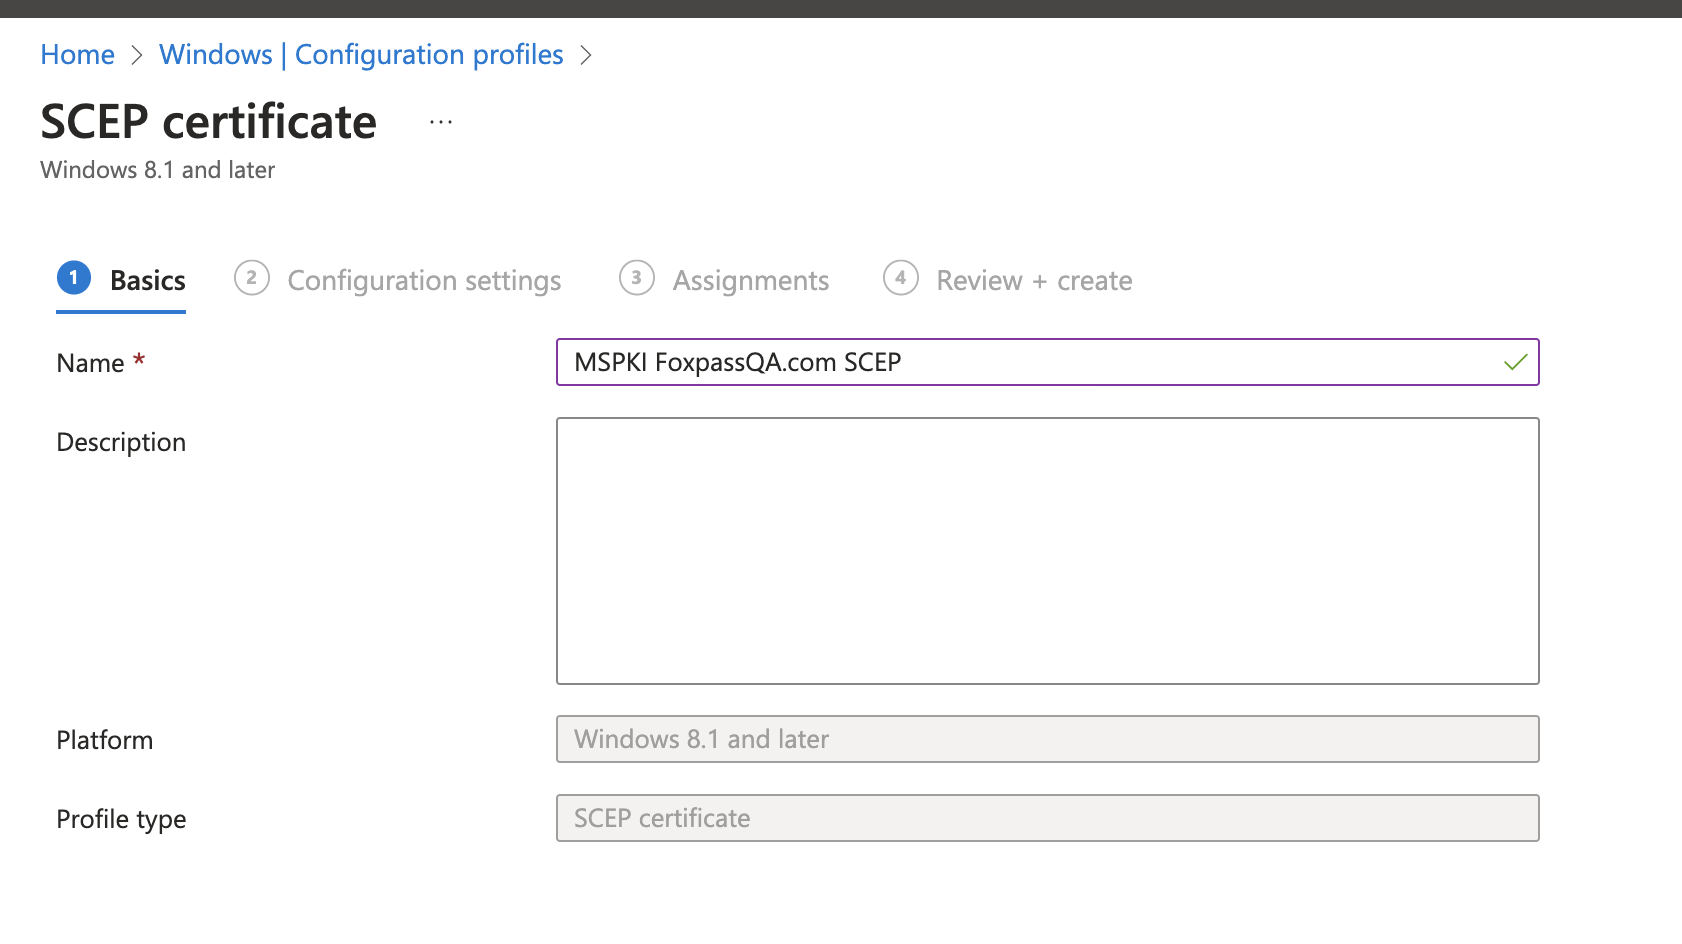
Name your profile
- Certificate type: User
- Subject name format: CN={{UserName}},E={{EmailAddress}}
- Subject alternative name: Attribute - Email address and Value - {{EmailAddress}}
- Certificate Validity Period - 1 year
- Key storage Provider: Enroll to Software KSP
- Key usage: Select both Digital Signature and Key encipherment
- Key size: 4096
- Hash algorithm: SHA-2
- Root certificate: Select Root certificate from the dropdown.
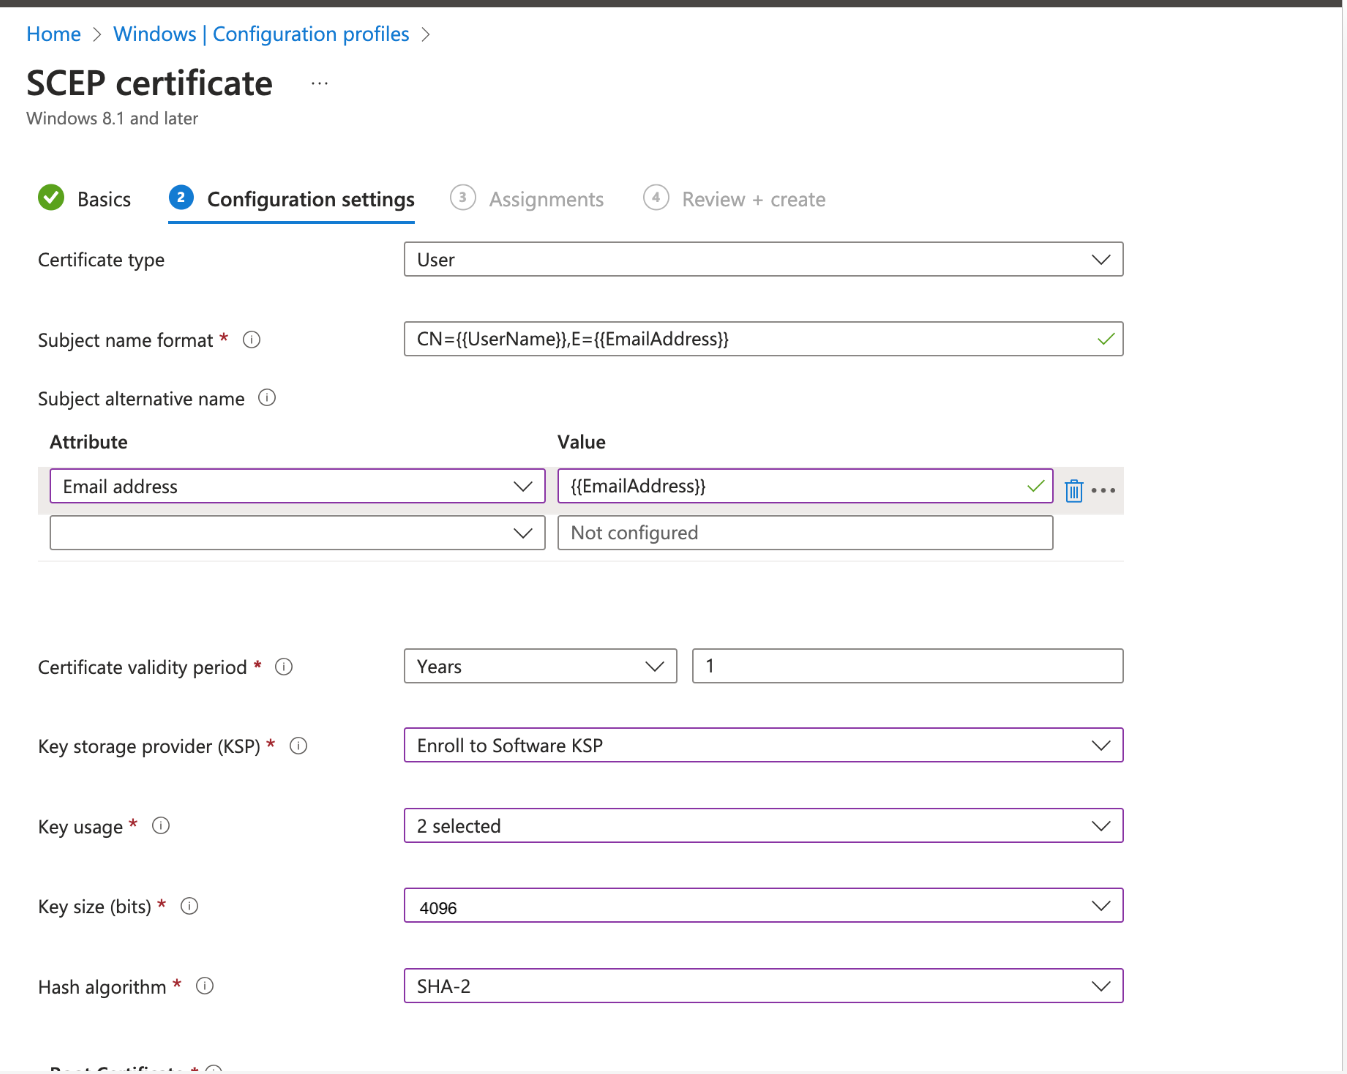
Configuration settings
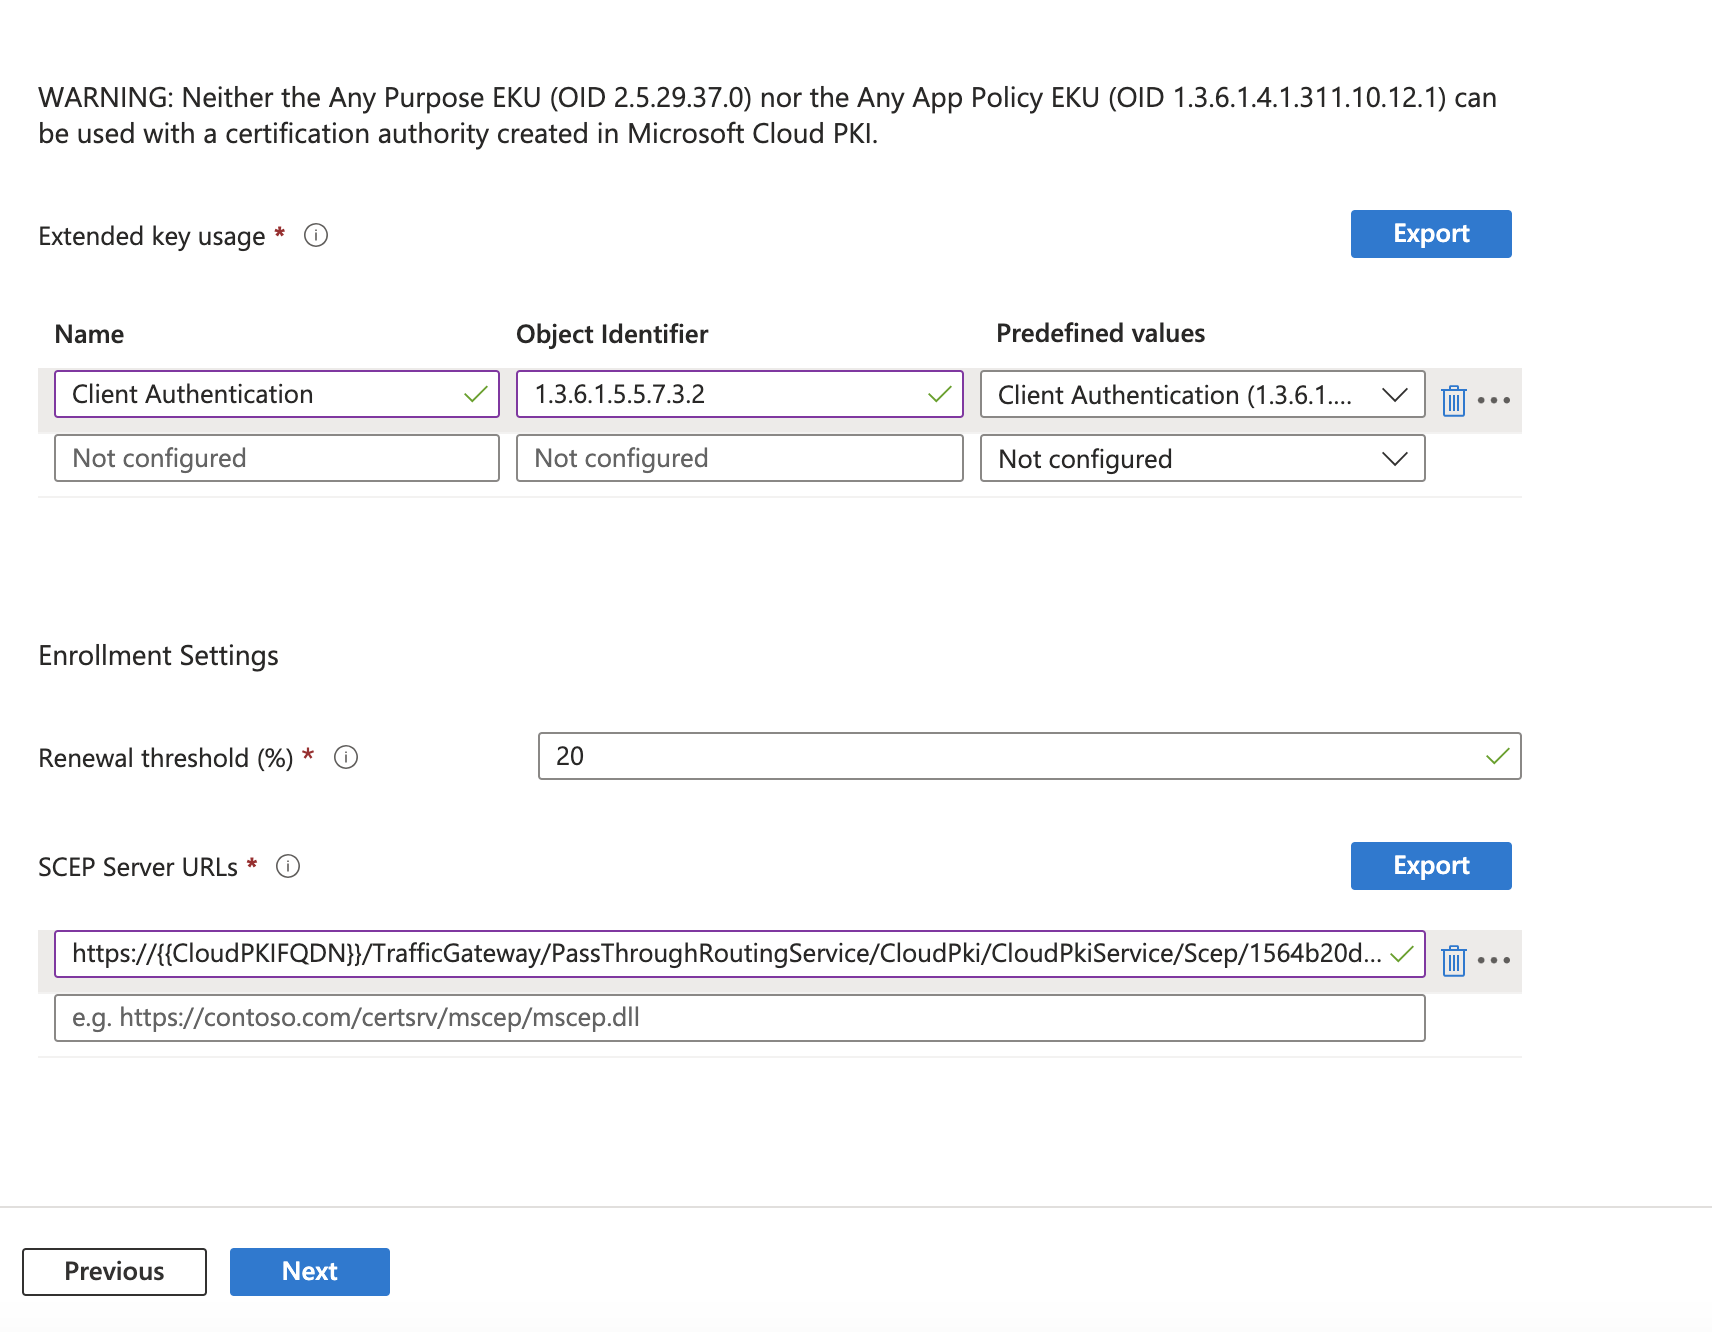
- Extended key usage: Select Client Authentication(1.3.6.1.5.5.7.3.2) from the dropdown of Predefined values
- Renewal threshold: 20
- SCEP Server URLs: Paste the SCEP URI noted earlier when Issuing CA was created. Reference screenshot below:
- Click 'Next' button.
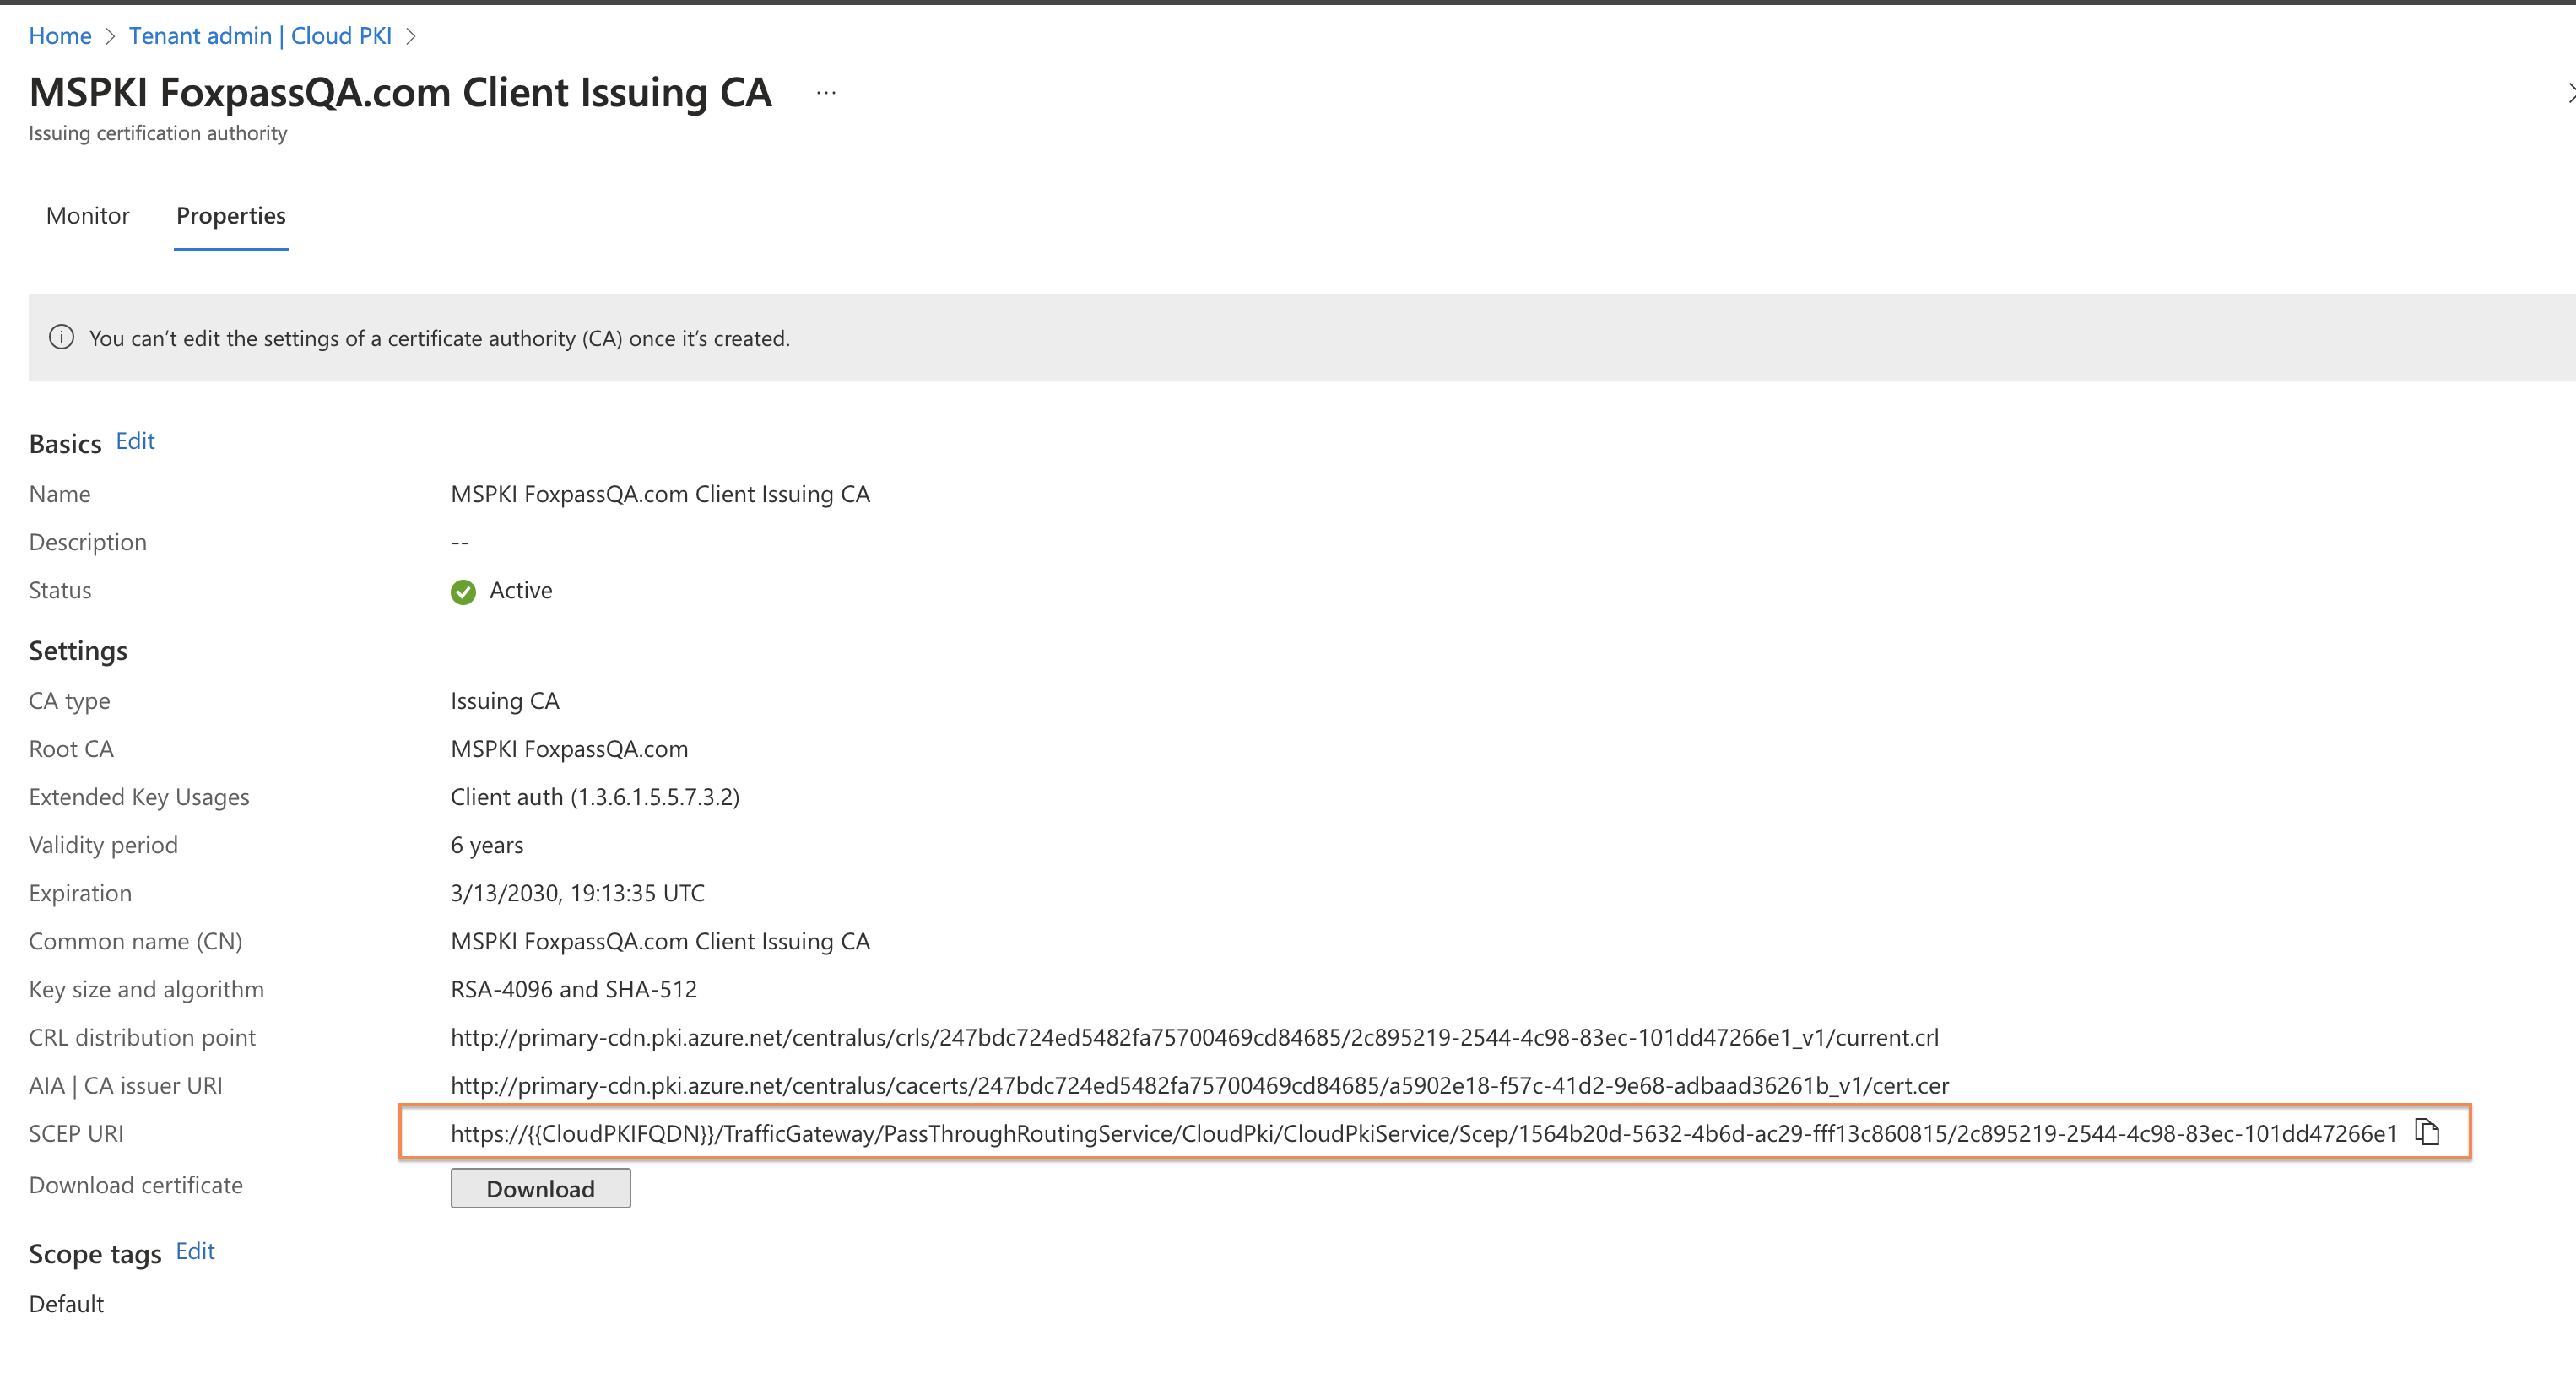
SCEP URI location
Configuration settings
- Add users/ groups/ devices and choose assignment according to your use case.
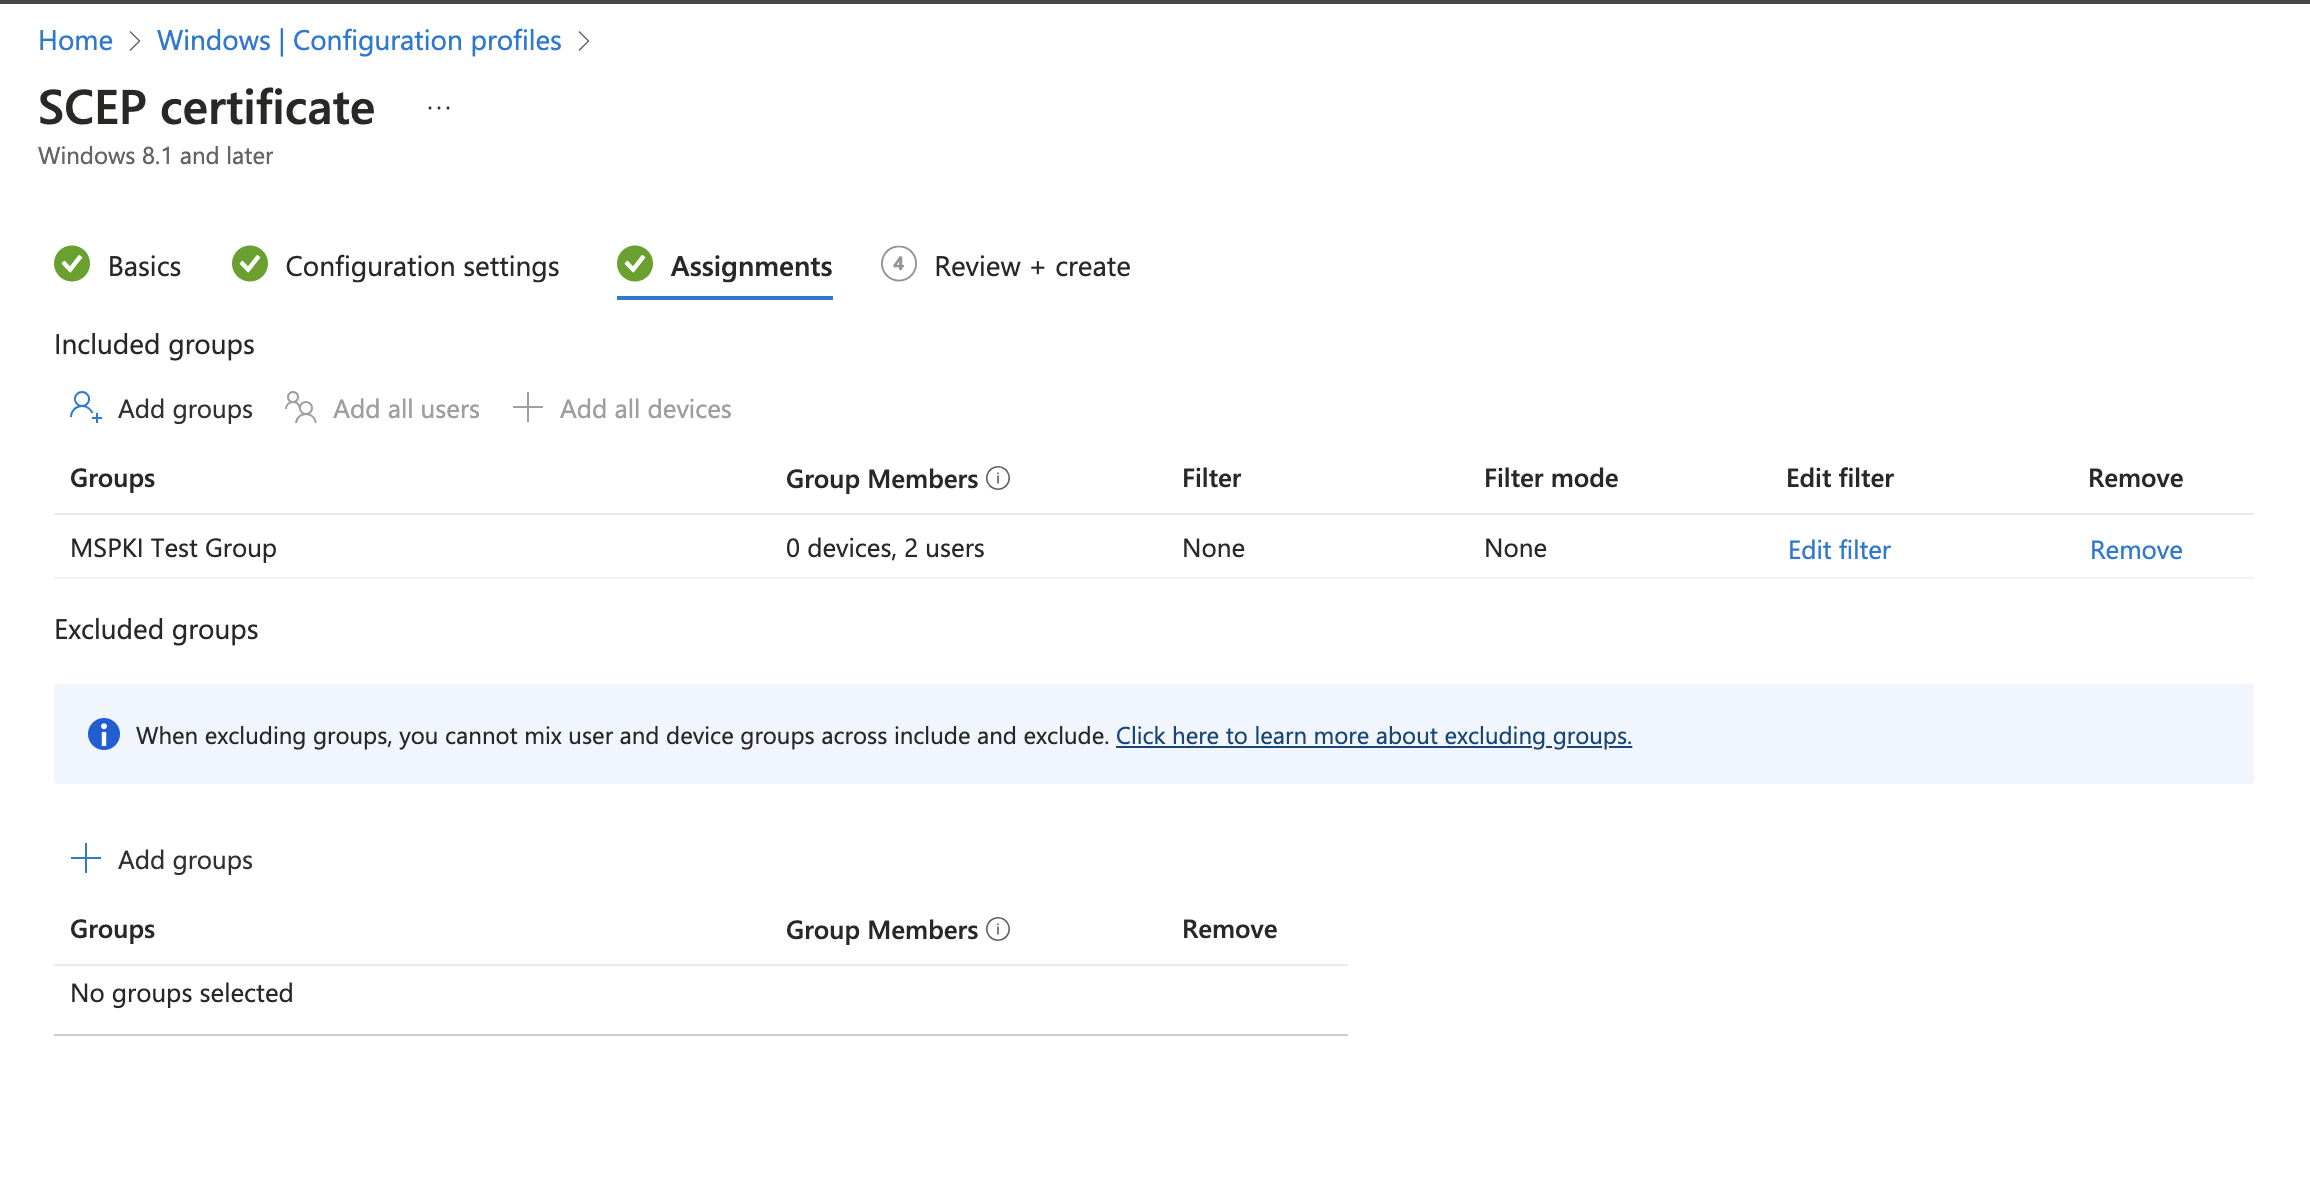
Sample Assignment
- Review your settings and click 'Create'.
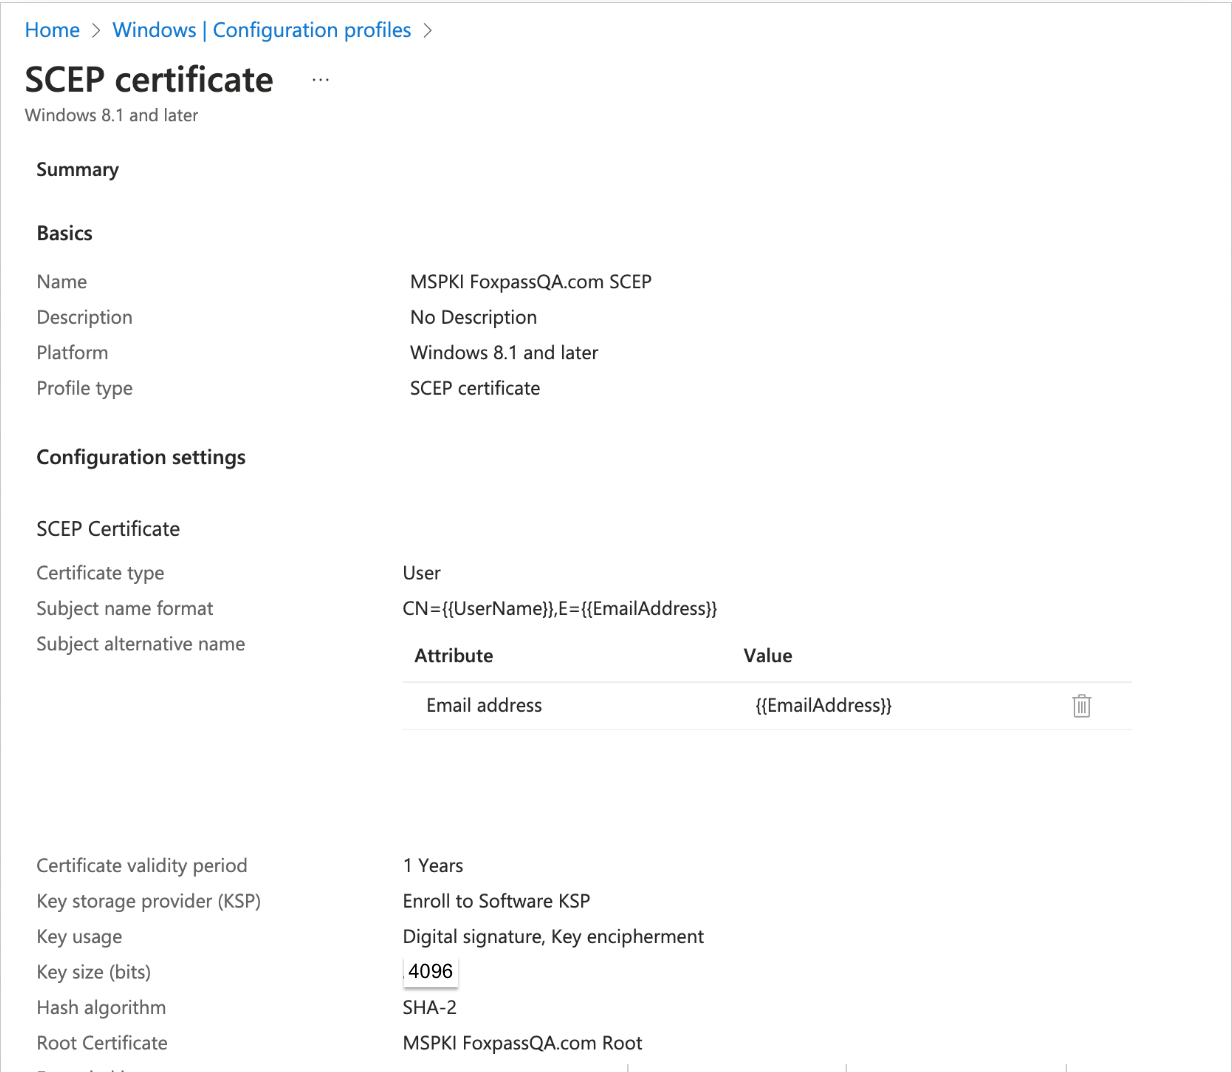
Review settings
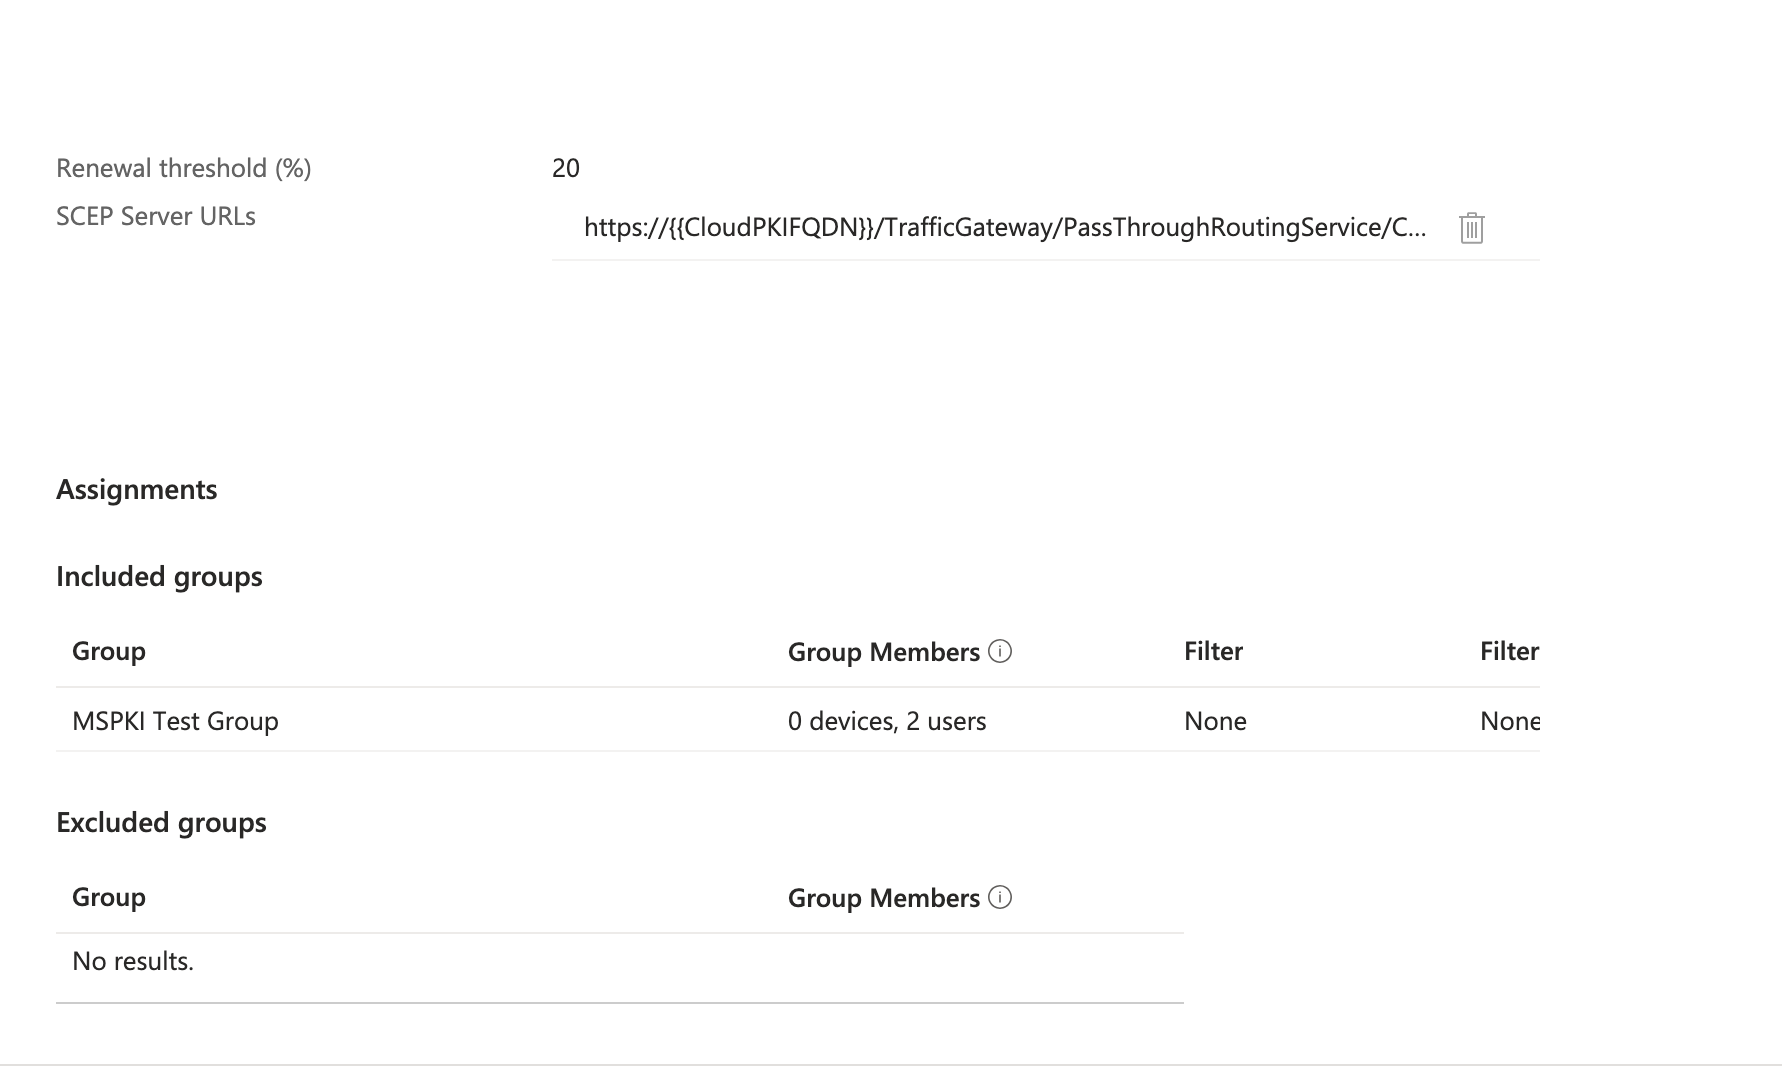
Review settings
Create profile for Foxpass Server CA
- Go to Foxpass EAP-TLS page.
- Download the active server CA by clicking 'Download CA' button which is located under 'Server Certificate Authorities'.

Download Active Server CA
- Go to the Configuration Profiles in Intune.
- Click on 'Create' > 'New Policy'.
- Platform: Windows 8.1 and later and Profile Type: Trusted certificate.
- Click 'Create'.
- Create a new profile using the Trusted certificate template. Upload the Foxpass Server CA cert download earlier in the server profile.
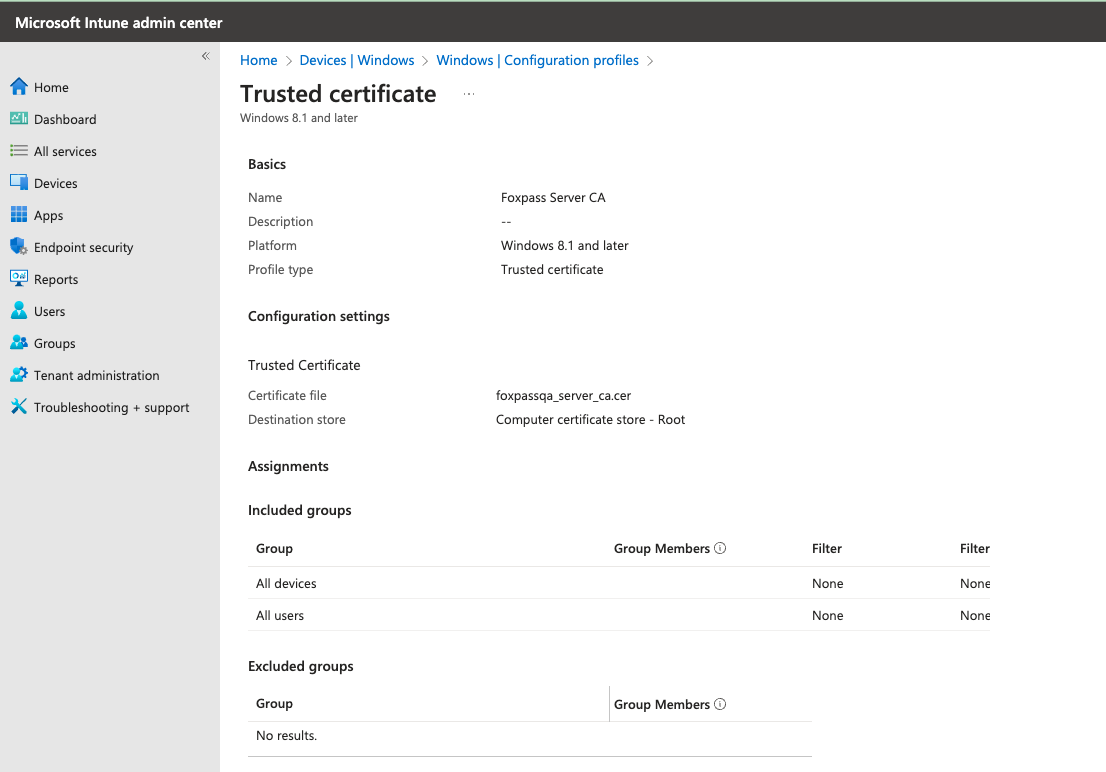
Foxpass Server CA Profile
Create Trusted certificate profile for Issuing CA
- Go to the Configuration Profiles in Intune.
- Click on 'Create' > 'New Policy'.
- Platform: Windows 8.1 and later and Profile Type: Trusted certificate.
- Click 'Create'.
- Give a name to your profile and click 'Next'.
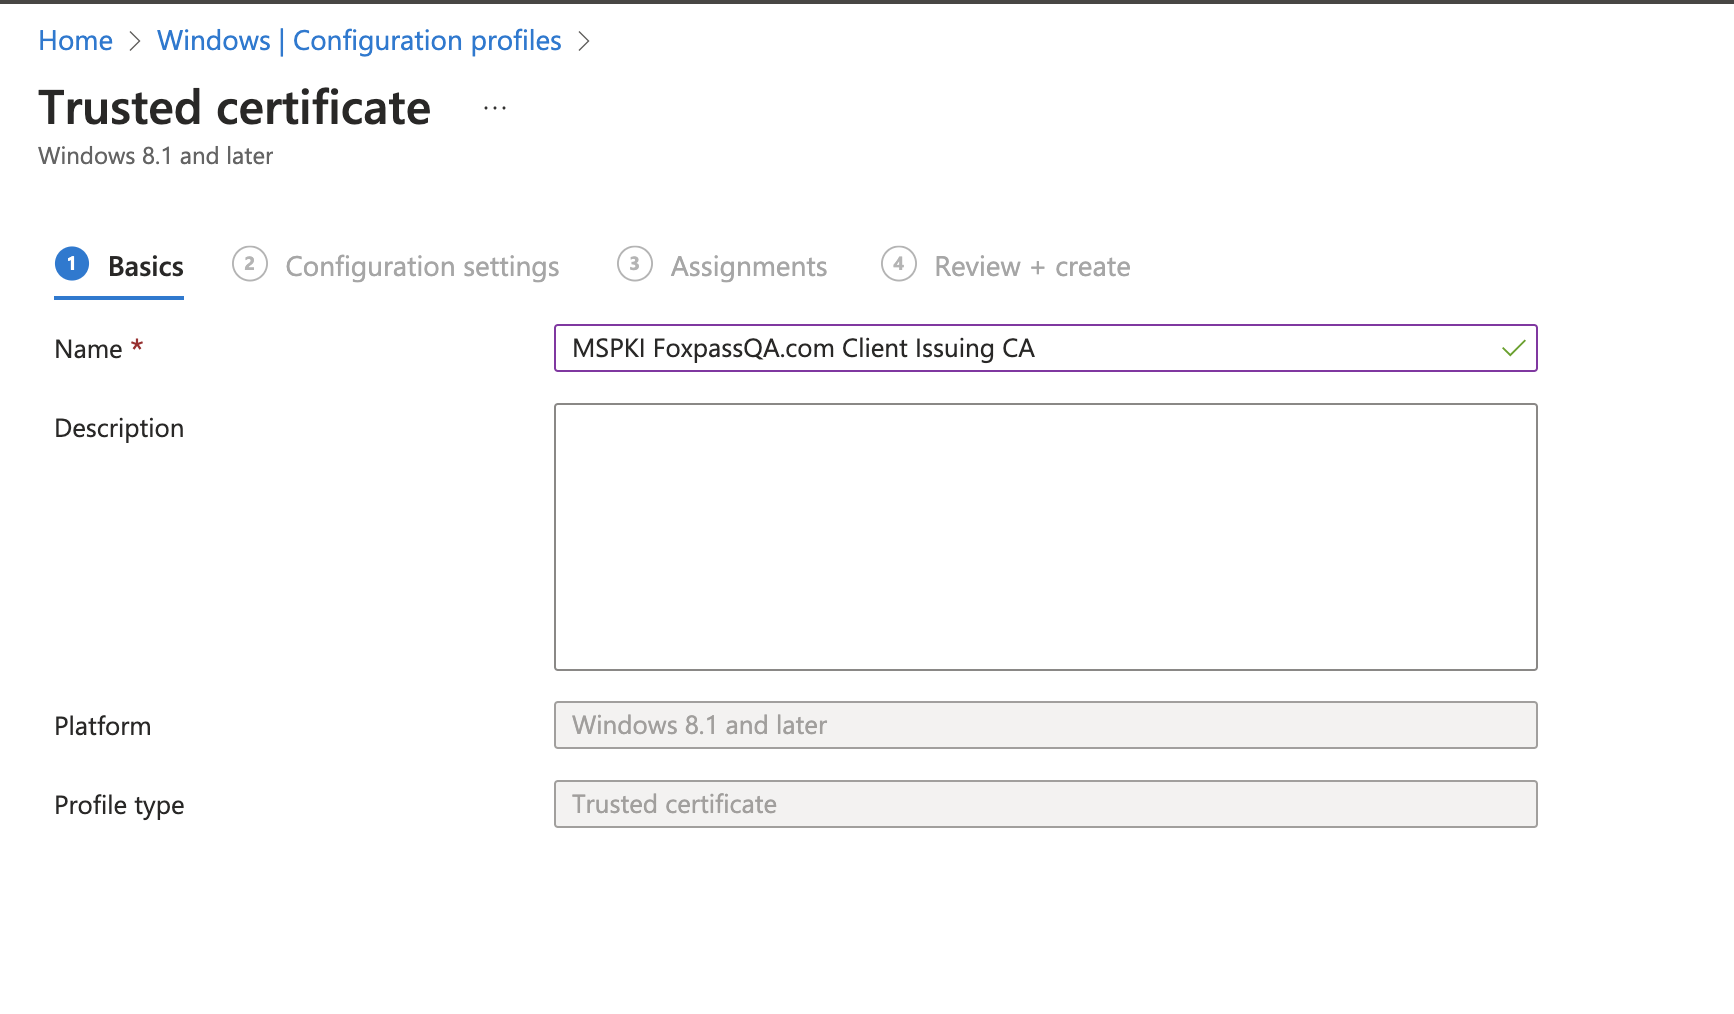
Name your profile
- Upload client issuing CA downloaded previously when Issuing CA was created.
- Destination store: Computer certificate store - Root
- Click 'Next'
- Add users/ groups/ devices and choose assignment according to your use case.
- Review your settings and click 'Create'
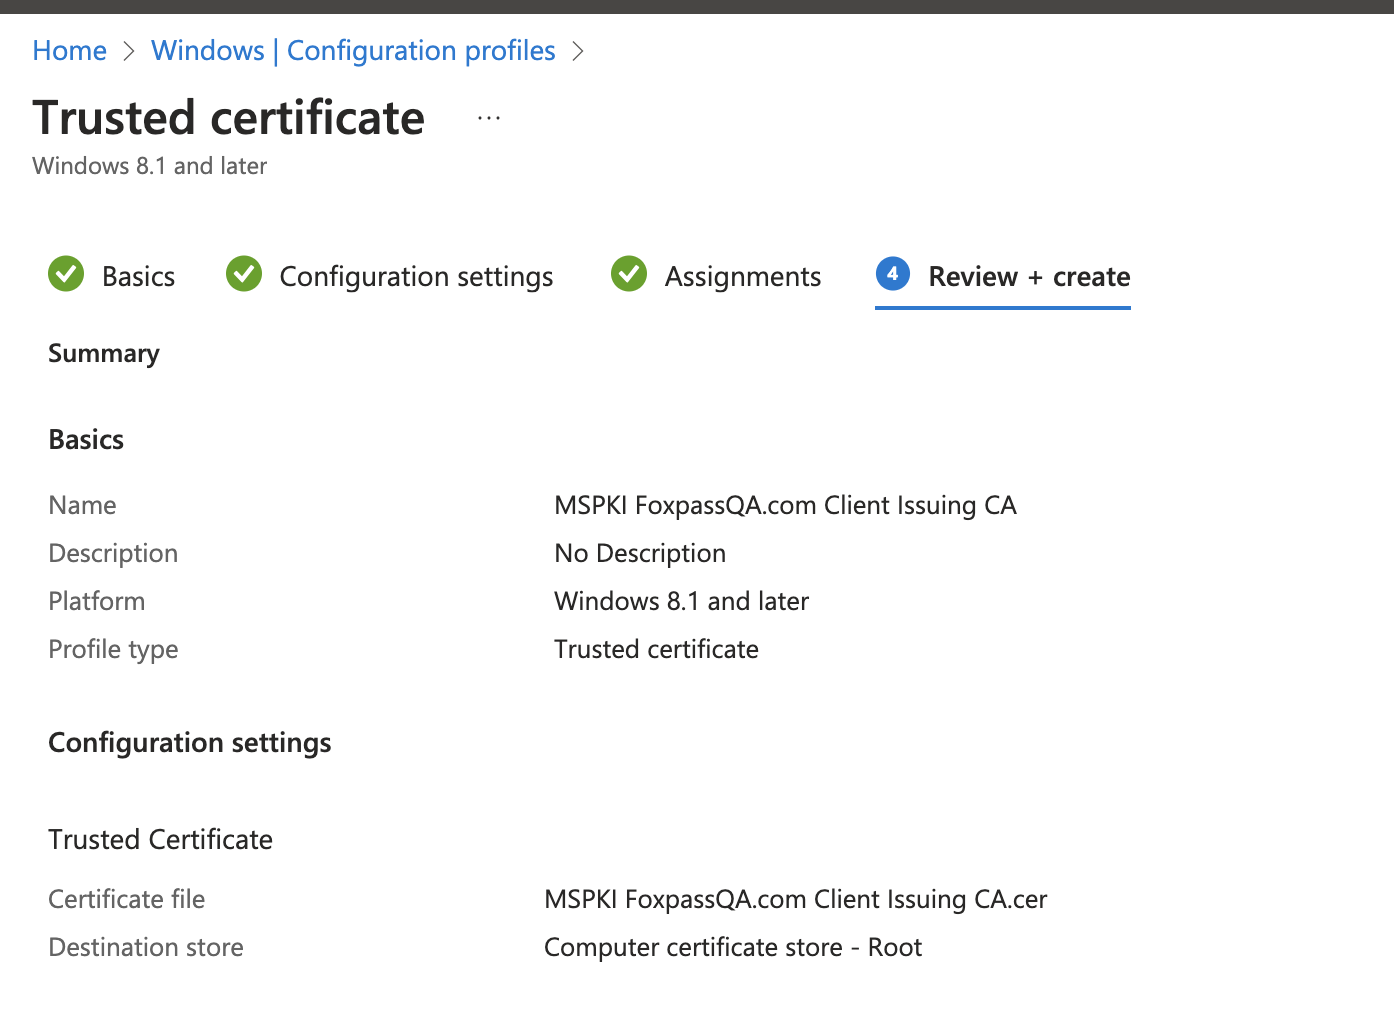
Review settings
Create Wi-Fi profile
- Go to the Configuration Profiles in Intune.
- Click on 'Create' > 'New Policy'.
- Platform: Windows 10 and later and Profile Type: Templates and choose Wi-Fi
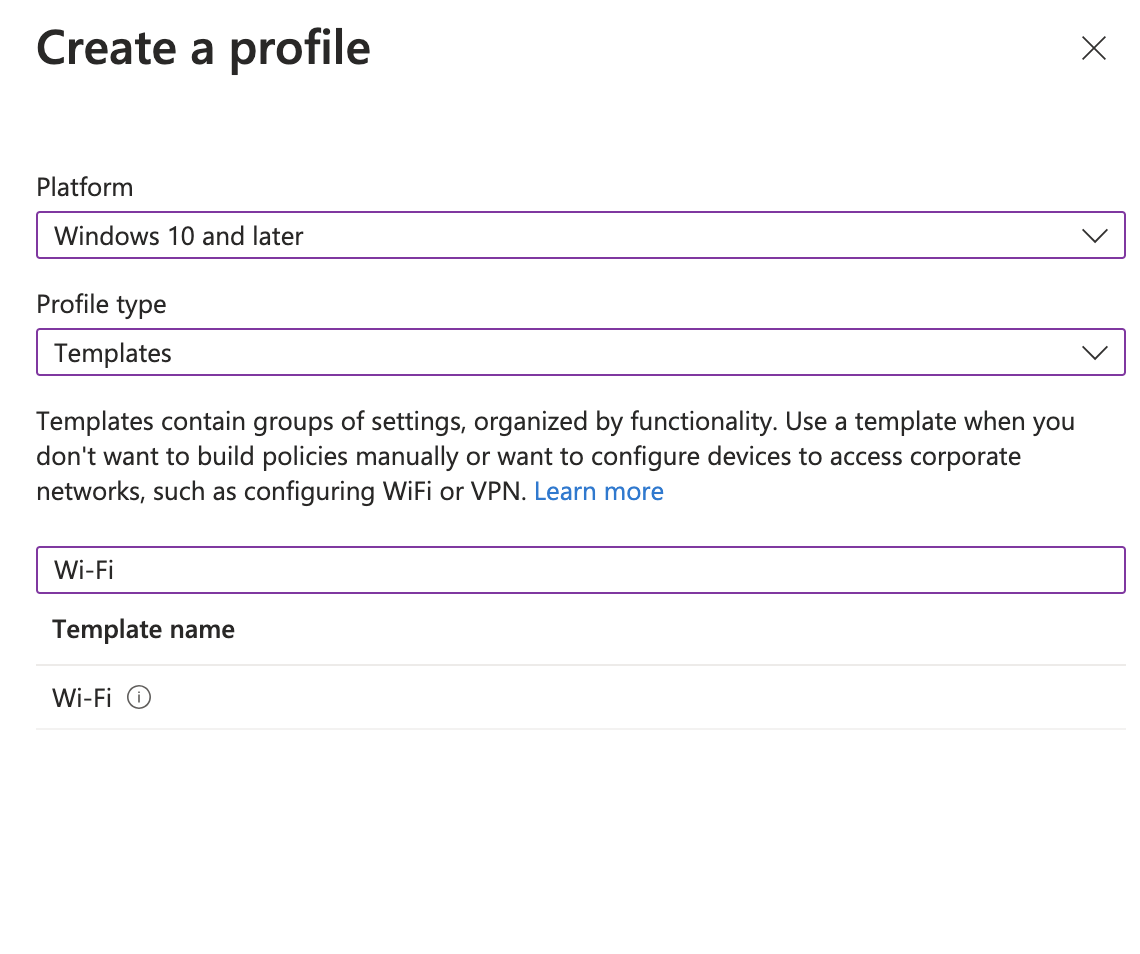
- Click 'Create'.
- Give a name to your profile and click 'Next'.
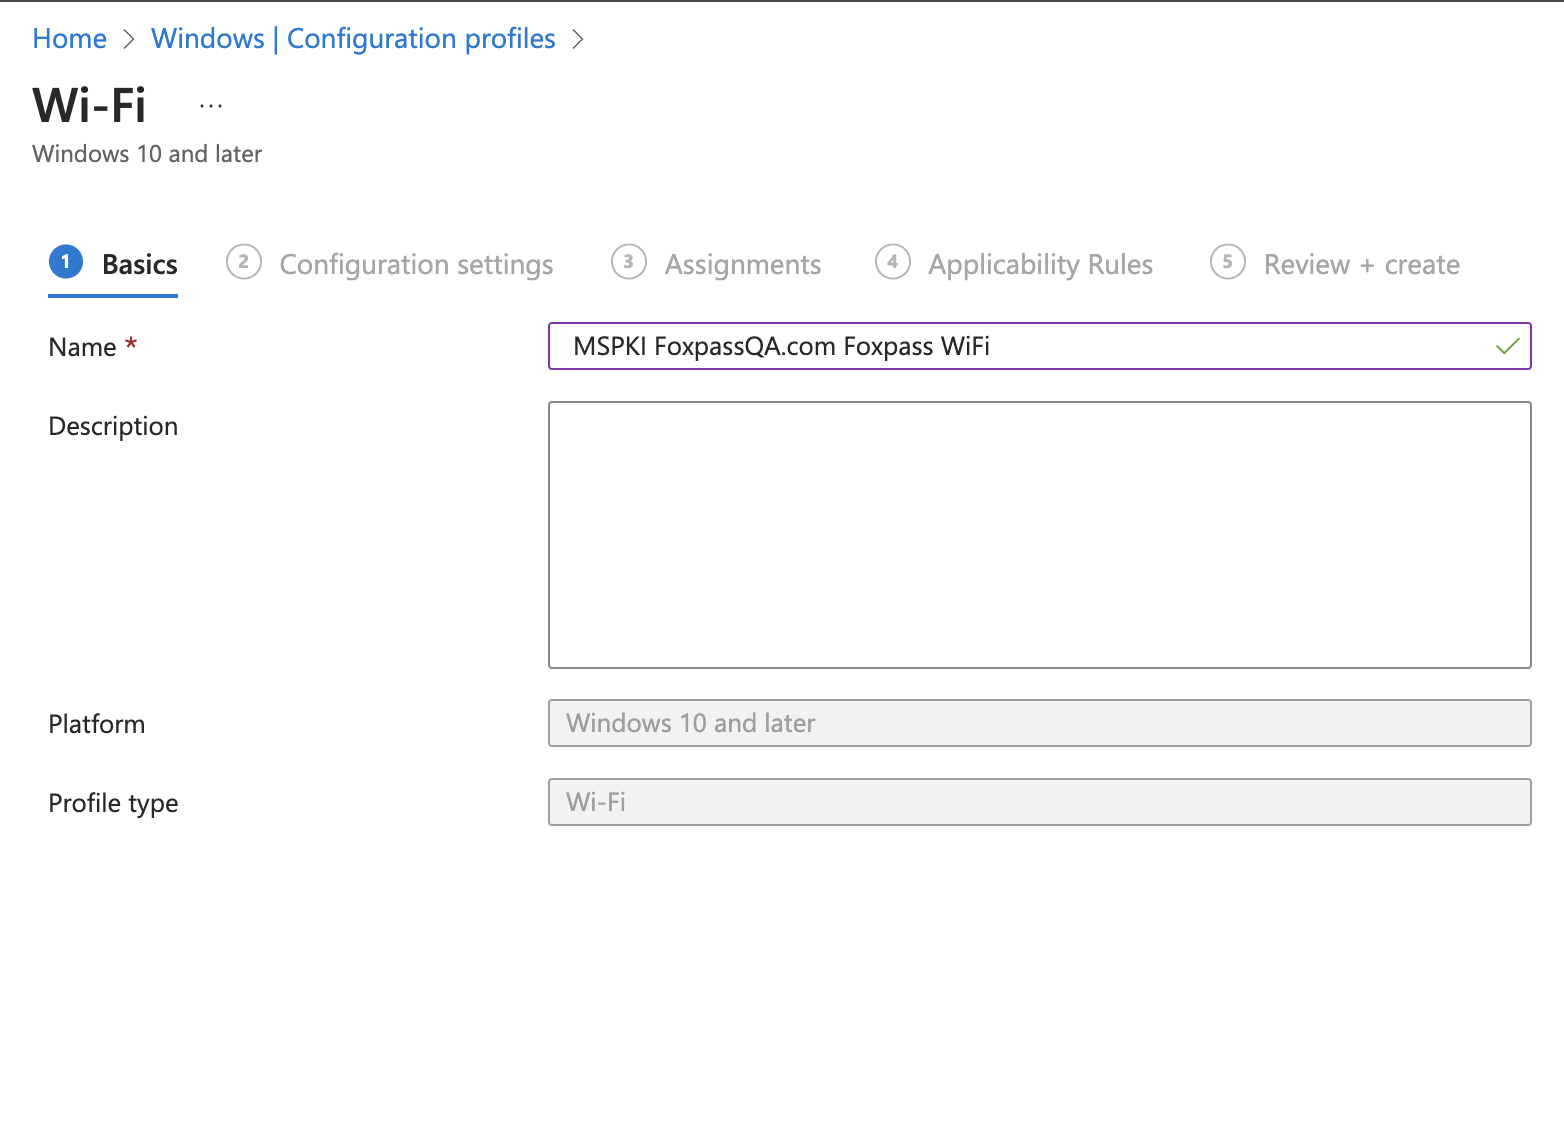
Name your profile
- Wi-Fi type: Enterprise
- Wi-Fi name (SSID): 'Your SSID name'
- Connection name: 'Your SSID name'
- EAP type: EAP-TLS
- Root certificates for server validation: Upload the Foxpass server CA downloaded earlier.
- Authentication method: SCEP certificate
- Client certificate for client authentication (Identity certificate): Select MSPKI SCEP profile created earlier.

Configure profile
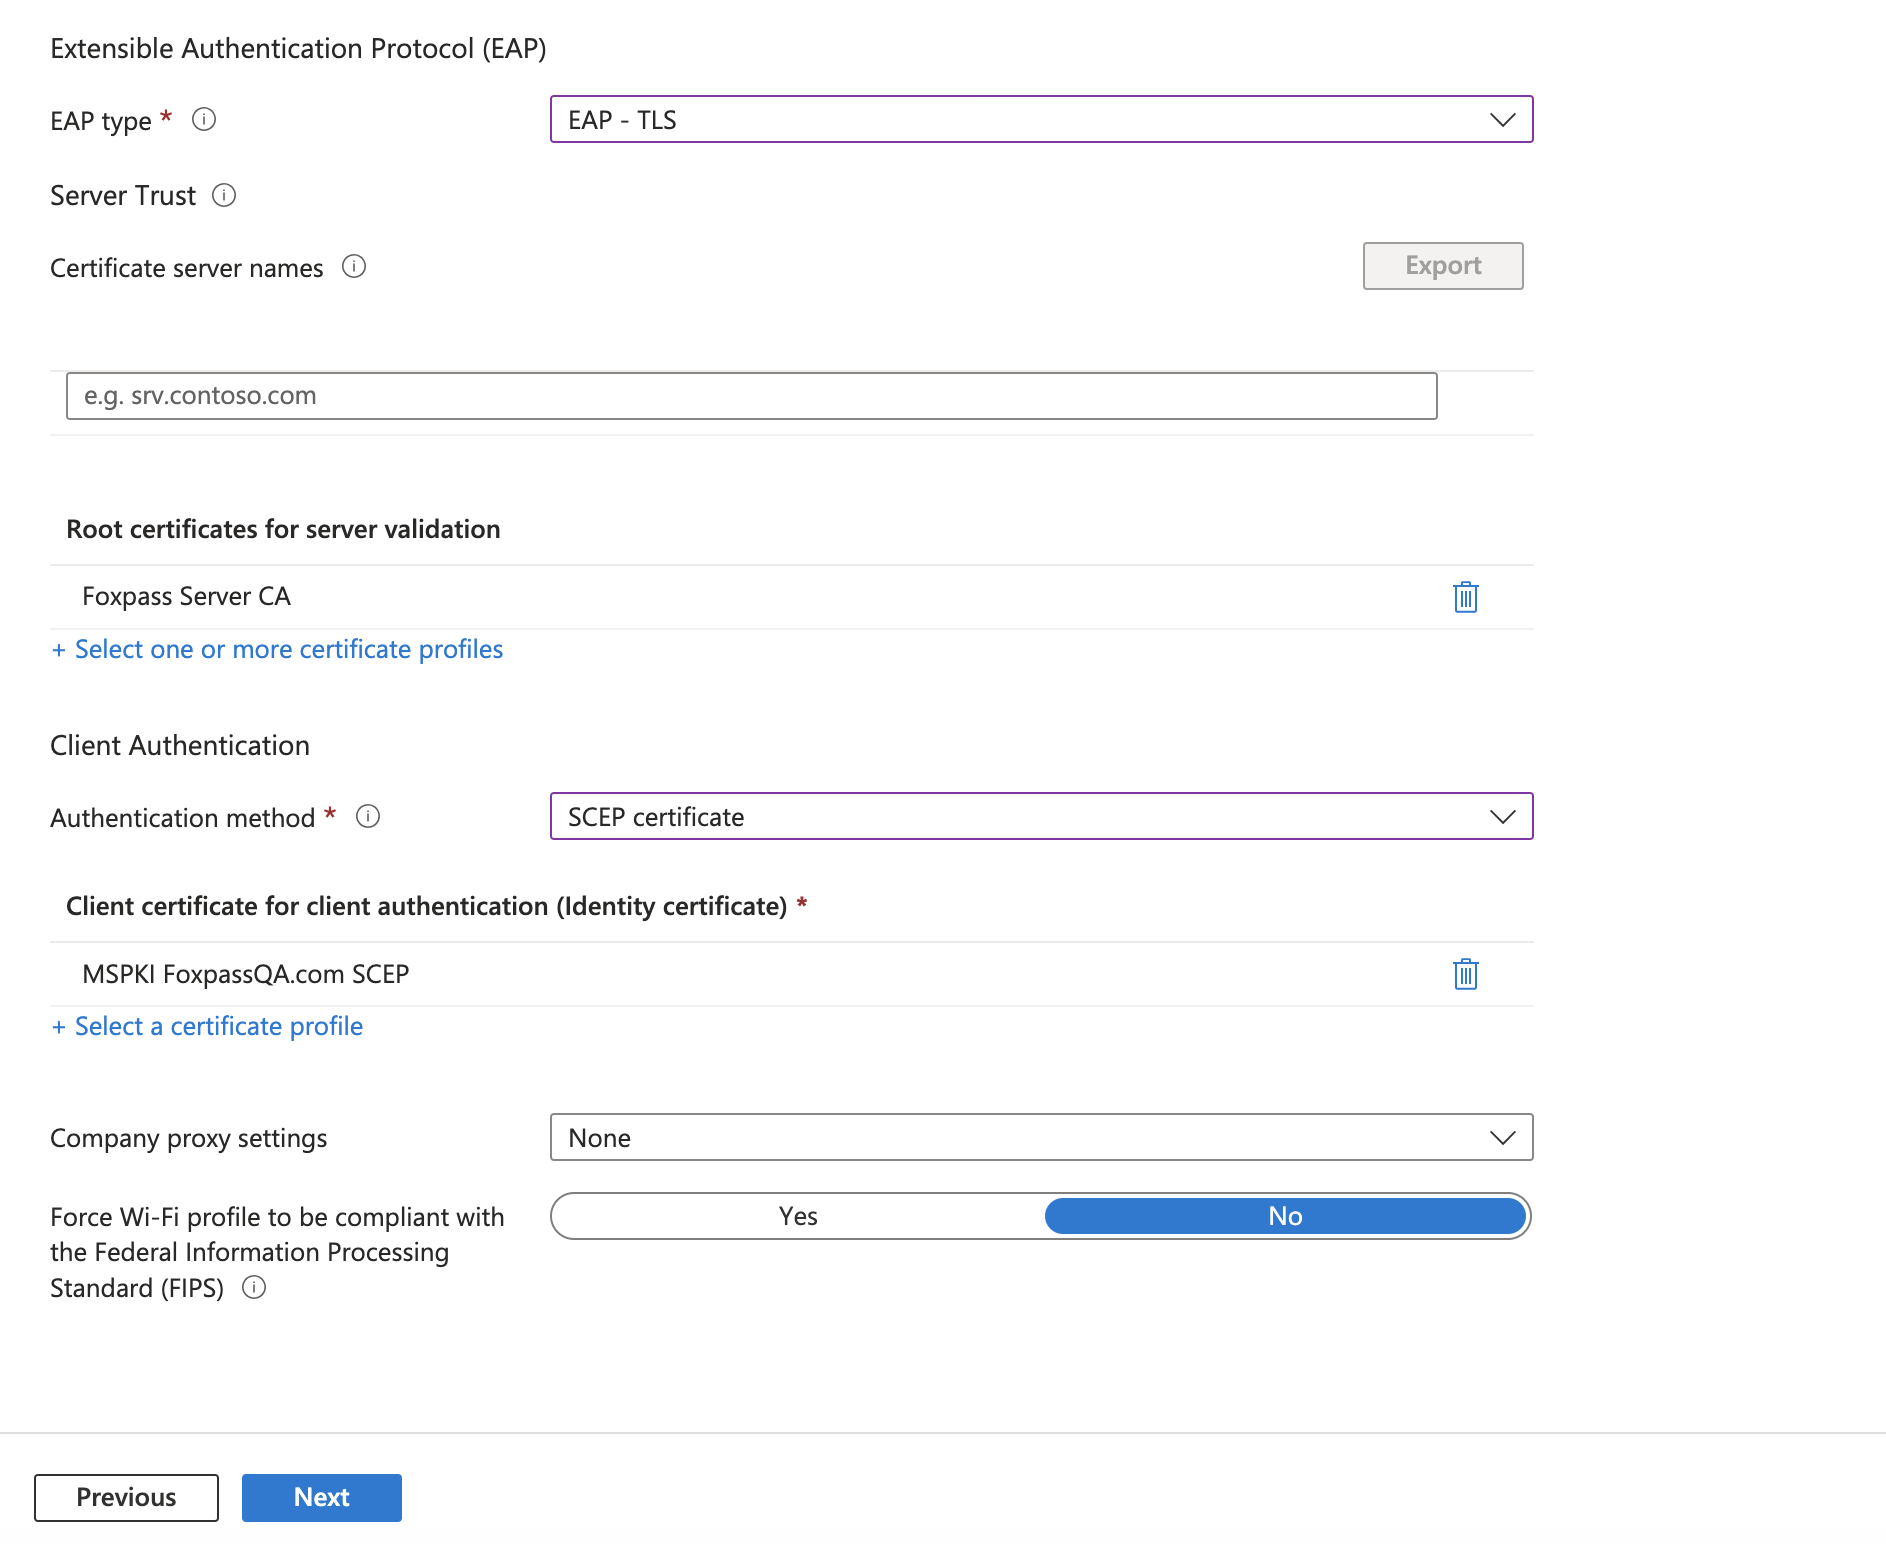
Configure profile
- Add users/ groups/ devices and choose assignment according to your use case.
- Review your profile and click 'Create'.
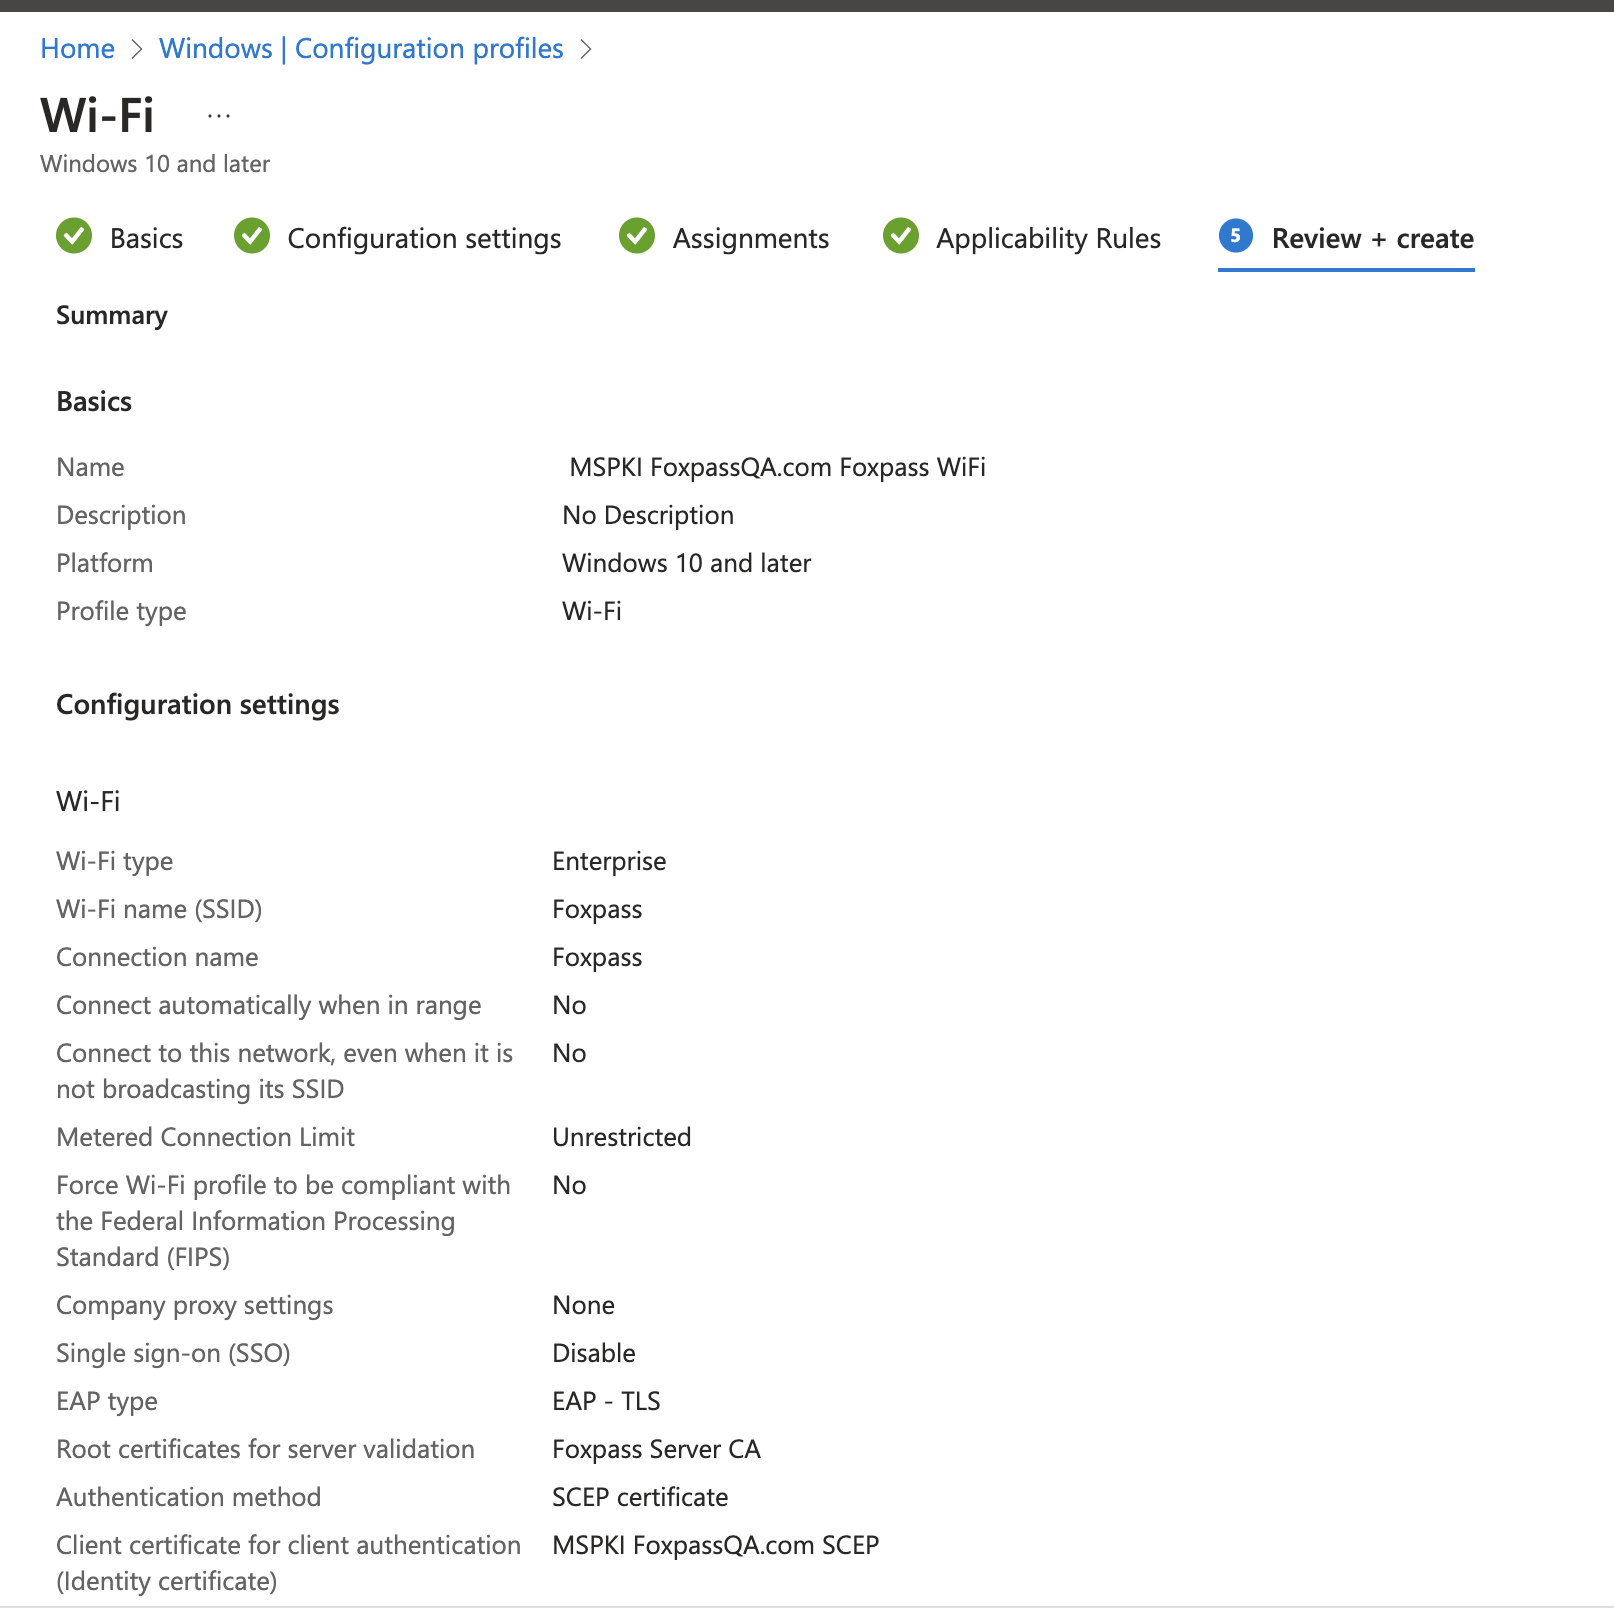
Review settings
Connect to a Windows device
Test by enrolling a sample Windows 10 device: Open settings → Access work or school → Enroll device MDM → Enter your company email and proceed to login to Azure. This will kick off the enrollment process that takes a little while.
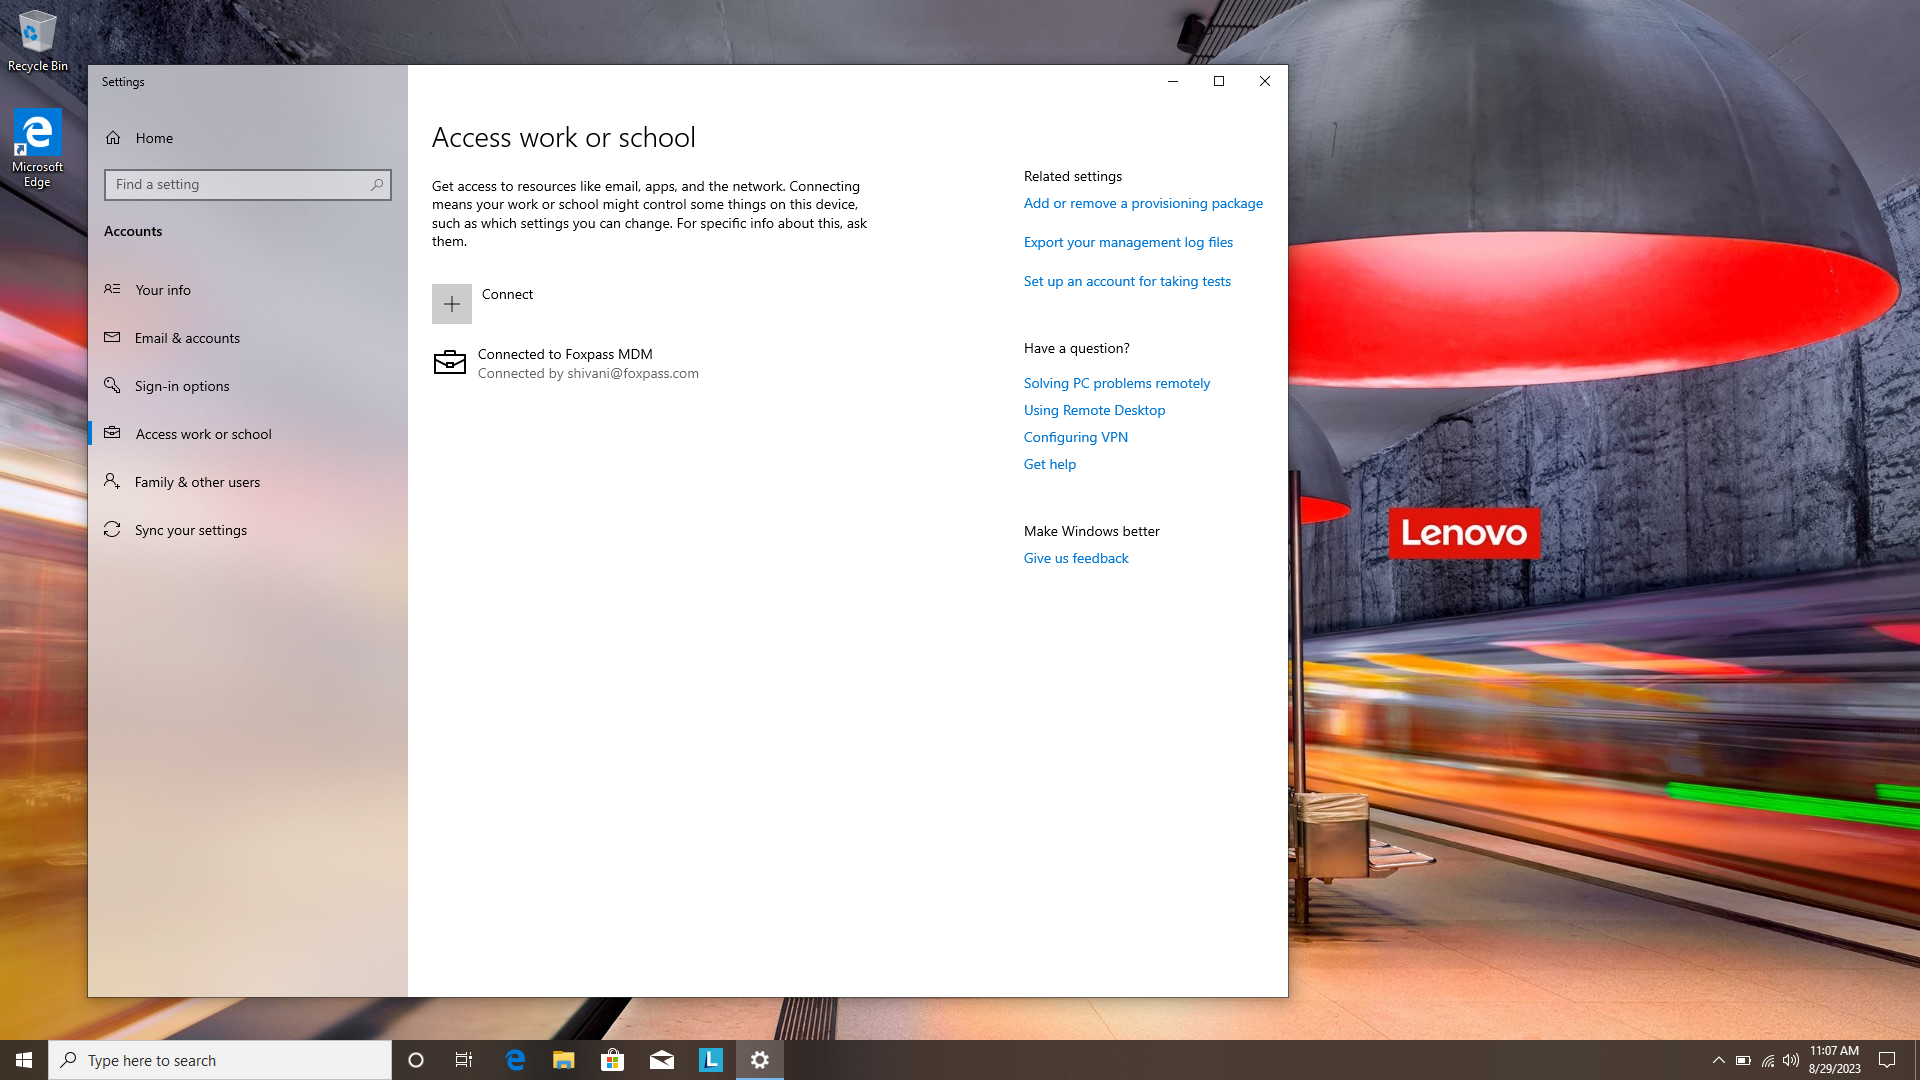
Connected to Foxpass MDM
If all goes well, you will be able to connect to your configured SSID.