
Mist (Juniper) RadSec Setup
Setting up a Juniper Mist equipment to work with Foxpass RadSec
Foxpass RadSec allows a RADIUS connection via TLS for an additional layer of security. This setup guide will help you configure Mist equipment with Foxpass RadSec.
You’ll complete:
Foxpass certificate setup
Mist WLAN (SSID) configuration
RadSec certificate configuration in Mist
👉 Go to:
RADIUS → RadSec page in the Foxpass console
1.1 Download Server CA
Under Server CAs, download the certificate. This will be used by Mist to trust Foxpass

Download Server CA
1.2 Create & Download Client Certificate
Click Create Client Certificate
Download:
Certificate (.crt)
Private Key (.key)

Create & Download Client Certificate
💡 You’ll use this later for Mist AP authentication.
-
Mist WLAN (SSID) Configuration
-
Create a New WLAN
Go to: Site → WLANs
Click Add WLAN
-
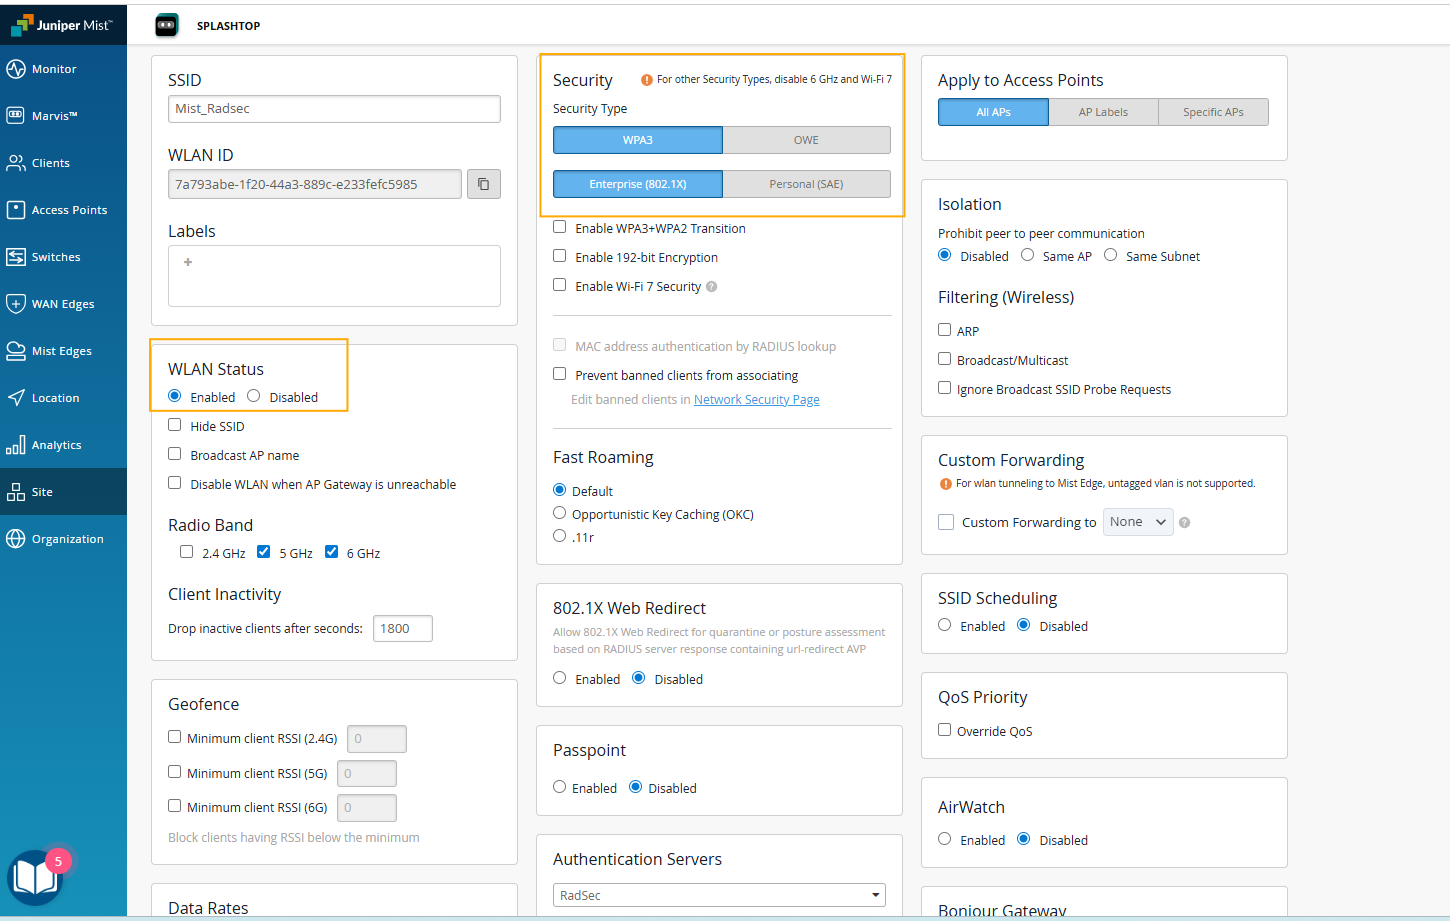
Configure SSID
Set the SSID name
Enable WLAN Status
-
Security Settings
Security Type: WPA2 or WPA3
Select: Enterprise (802.1X)
Mist WLAN (SSID) Configuration
-
Configure Authentication Server (RadSec)
In Authentication Servers:
Select: RadSecServer Name: radius.foxpass.com
Click Add Server
-
Server Details
Hostname: radius.foxpass.com
Port: 2083

Configure Authentication Server (RadSec)
-
Save using the ✔️ checkmark
-
Create WLAN
Click Create to finalize SSID
RadSec requires mutual certificate authentication.
-
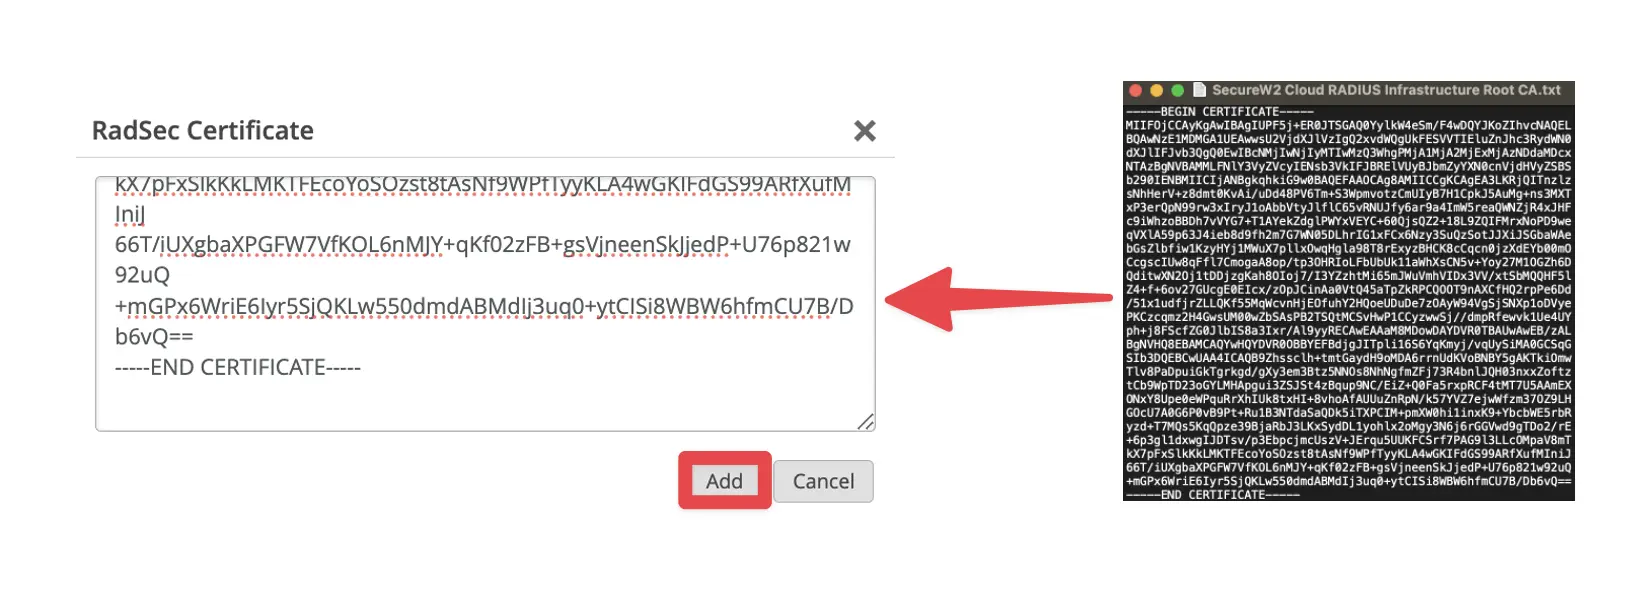
Upload Foxpass Server CA
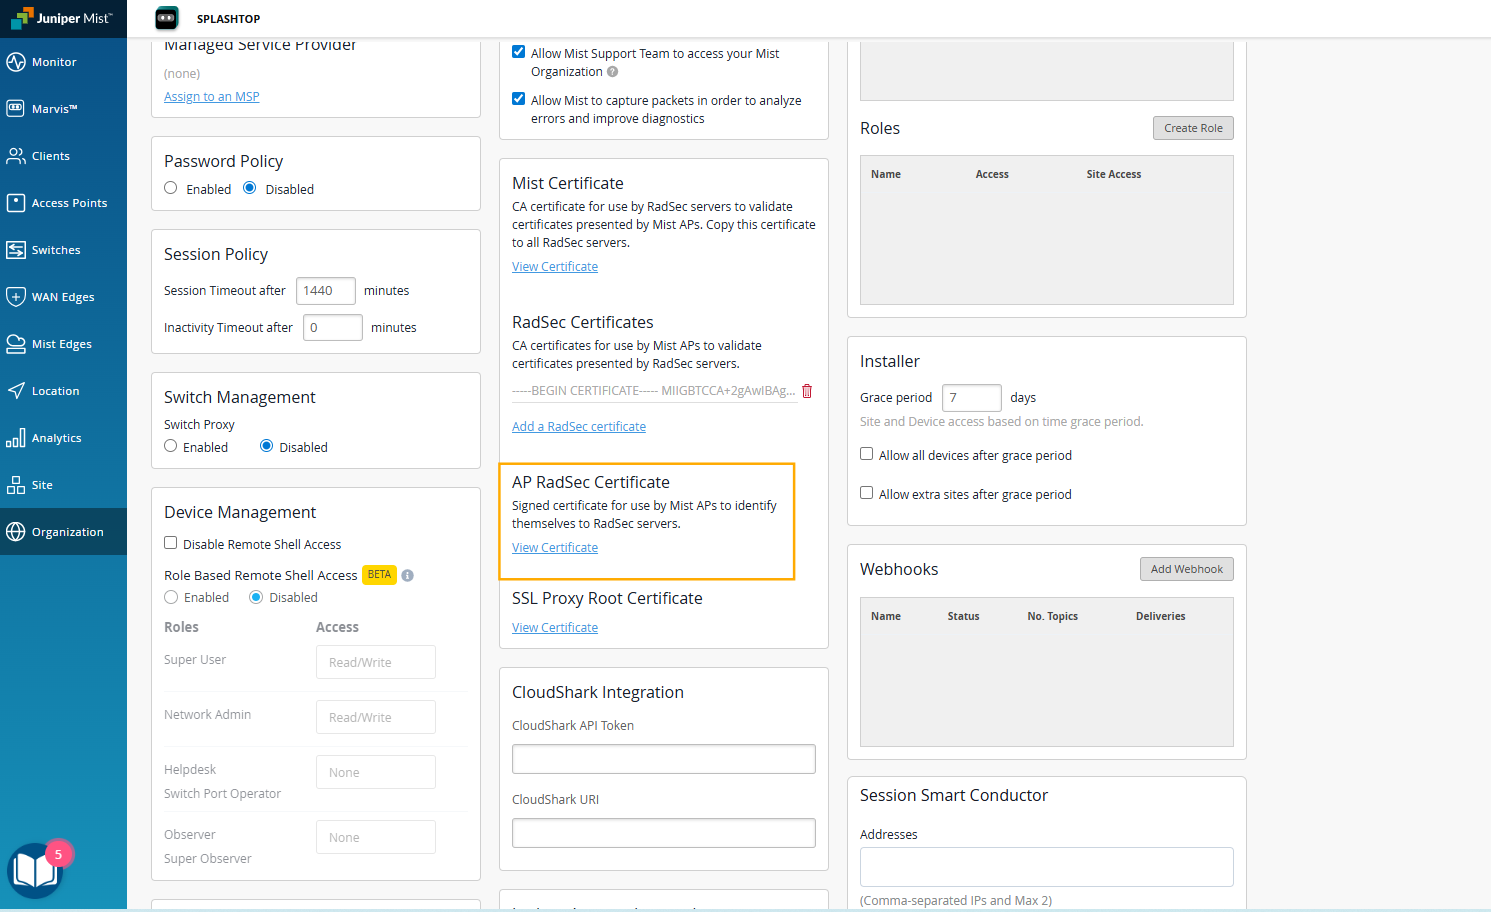
Go to: Organization → Settings → RadSec Certificates
Open the downloaded Server CA file
Copy & paste into the field and then click Add

Upload Foxpass Server CA
Upload Foxpass Server CA
📌 This allows Mist to trust Foxpass
-
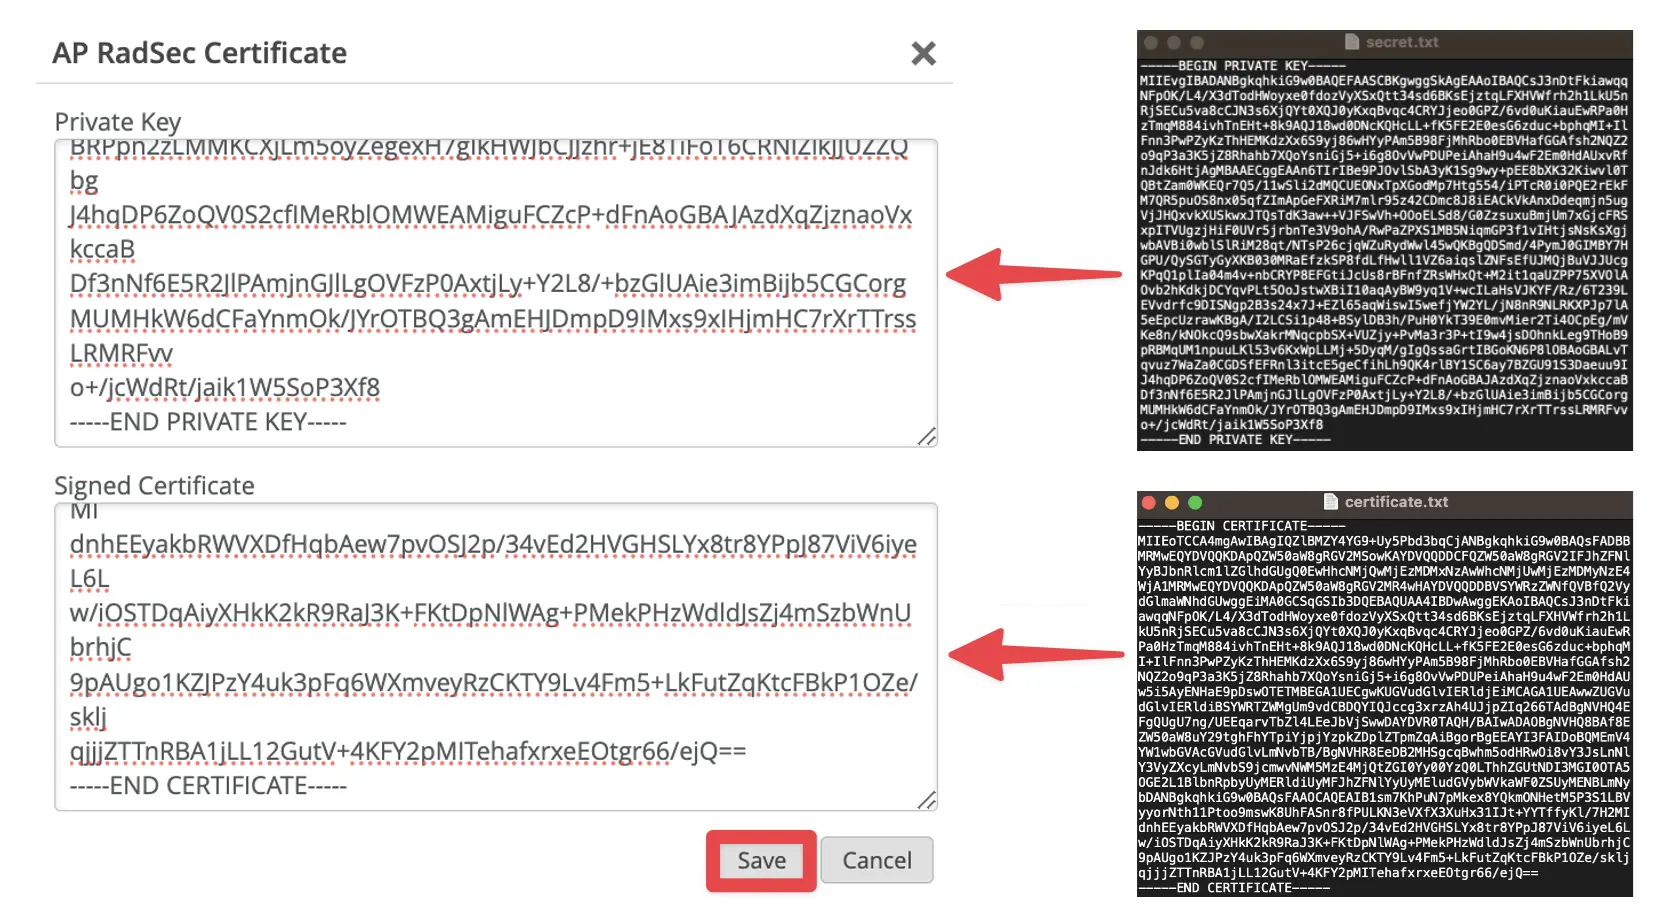
Upload AP RadSec Certificate
Click Add AP RadSec Certificate
Paste:
Private Key → from .key file
Signed Certificate → from .crt file
Click Save
Upload AP RadSec Certificate
Upload AP RadSec Certificate
-
Save Configuration
Click Save in the top right
Updated 4 months ago