pfSense LDAP
Create an LDAP Binder
Create a new LDAP Binder named 'pfsense' from the 'LDAP Binders' page. Copy the binder password and save it for later.
Enter Certificate Authority Information
Check your pfSense versionYou do not need to enter Certificate Authority Information for pfSense 2.4.2 and above.
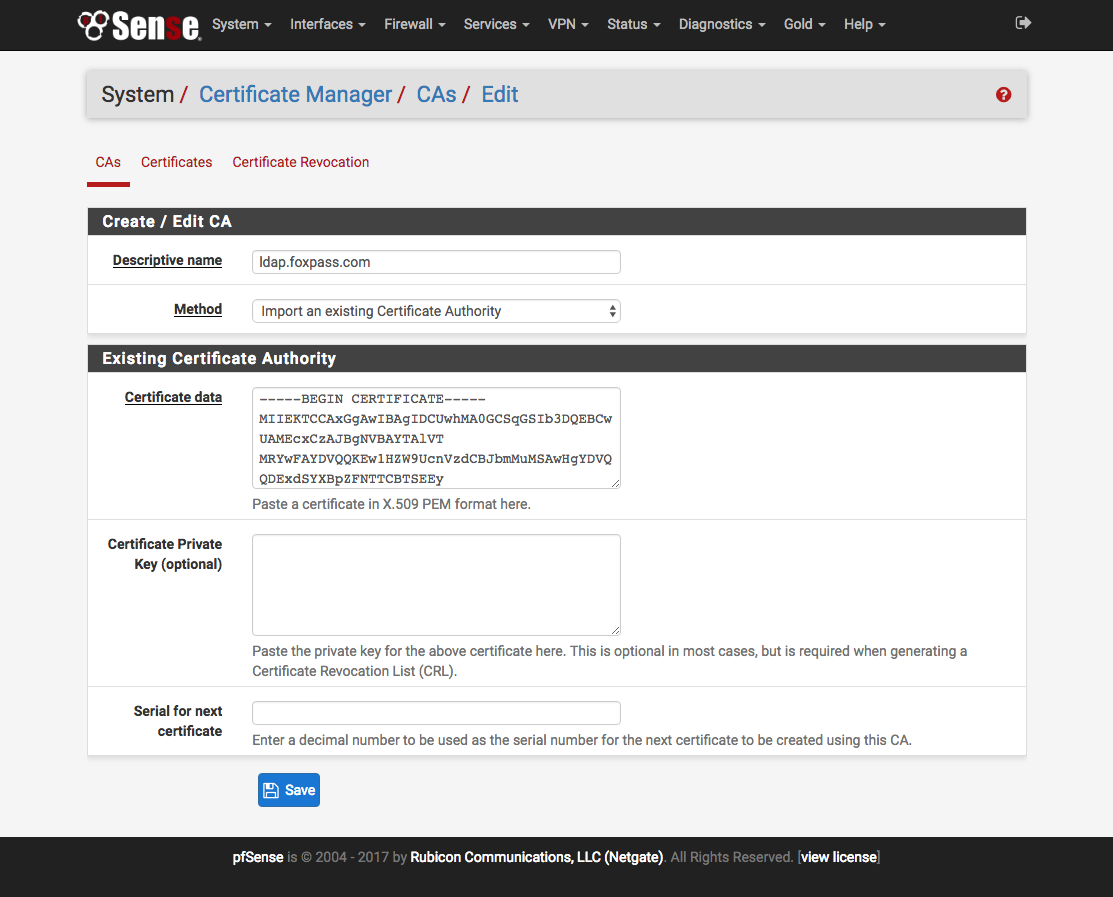
Next you need to add the Foxpass Certificate Authority to pfSense. Download the CA Certificate from the 'LDAP Certificates' page and paste its contents into the 'Certificate data' field.
Configure the Authentication Server
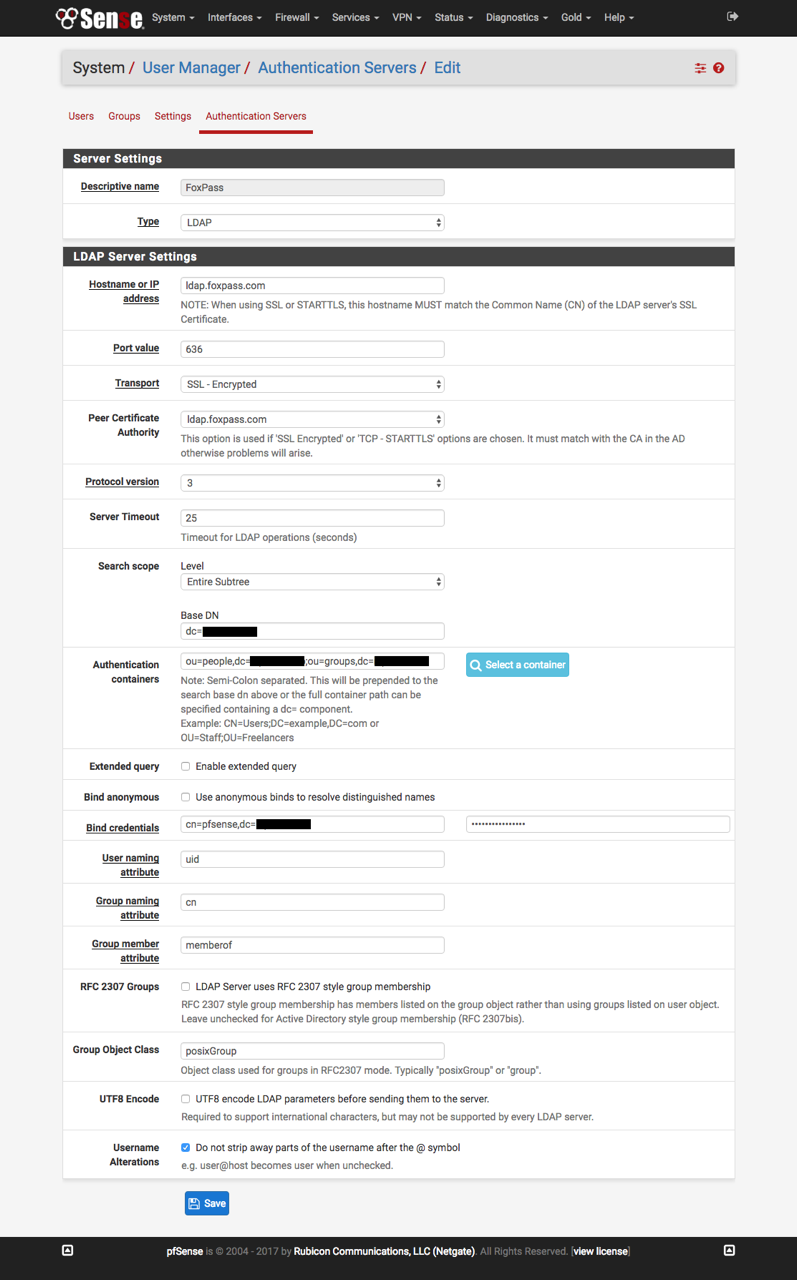
Next fill out info on the 'Authentication Servers' page.
Base DN: taken from your foxpass.com dashboard page
Peer certificate authority: This is the CA that was created in the step above
Bind credentials: Same as the ones created for the 'pfsense' LDAP binder in Foxpass
Username Alterations: Uncheck this box
Set Up LDAP Groups
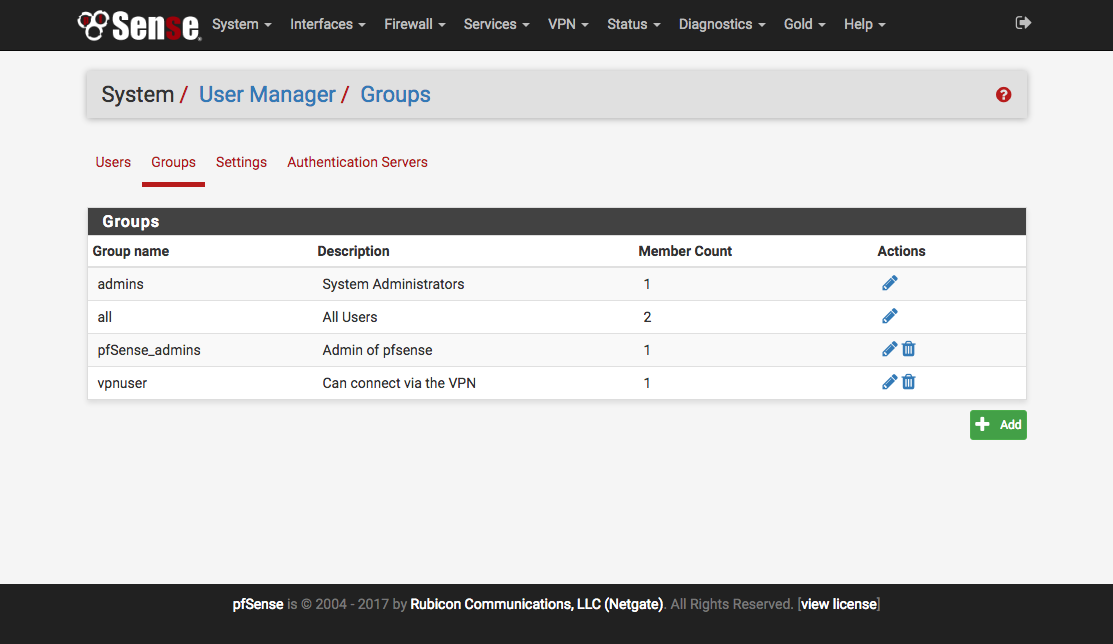
Now you need to mirror your Foxpass LDAP groups in pfSense. Make sure that the groups are set to 'Posix enabled.' In this example there is a group to allow vpn access and a second group to allow admin access to the device.
Within pfsense, create the matching groups and assign the desired permissions according the the documentation. 'Scope' must be set to 'Remote'
Change Authentication Service
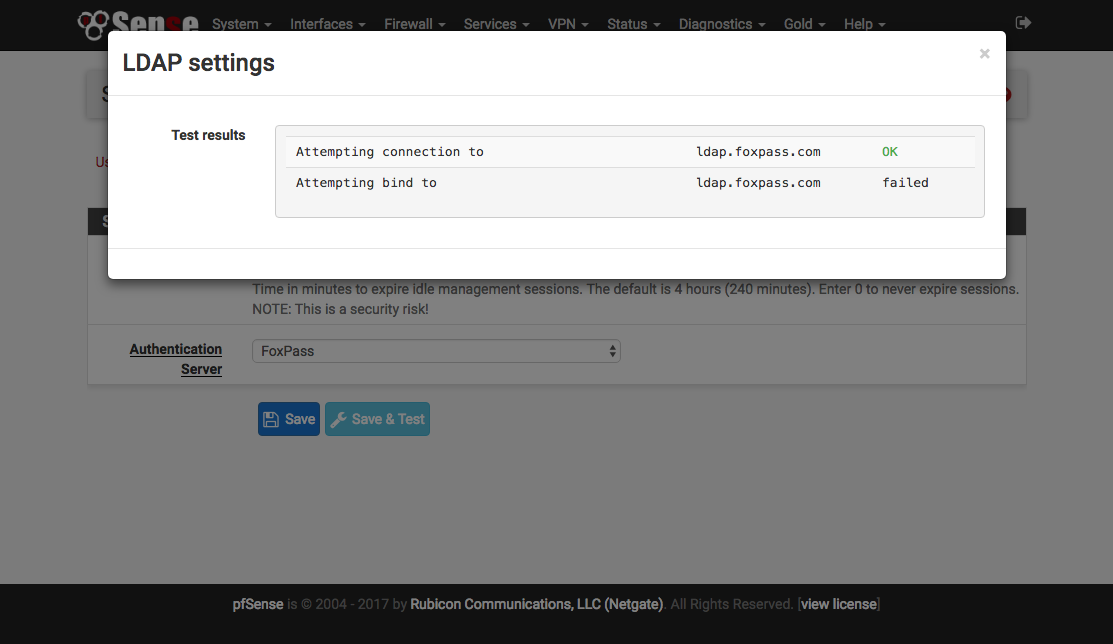
Within System / User Manager / Setting change the 'Authentication Server' to be 'Foxpass' and click 'Save & Test.' As shown in the image the bind test will fail, but this is a pfsense ldap implementation issue and does not reflect a problem with your setup. On the Foxpass 'LDAP Logs' you can check to see if the bind worked correctly.
Test User Configuration
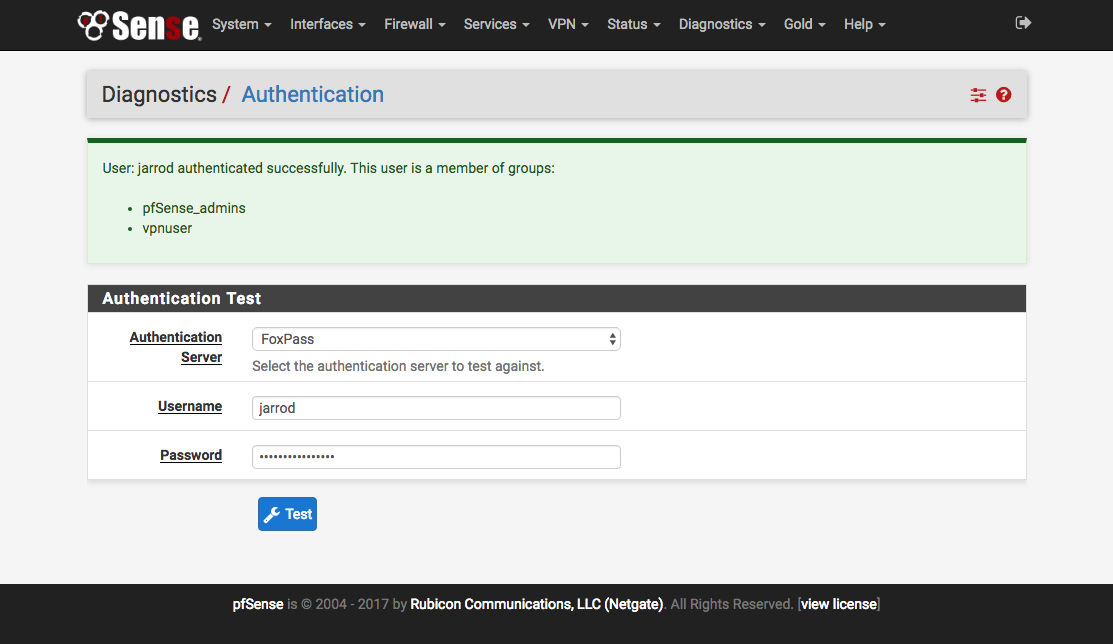
To test what groups a user is a member of go to Diagnostics / Authentication. This handy interface is great for troubleshooting.
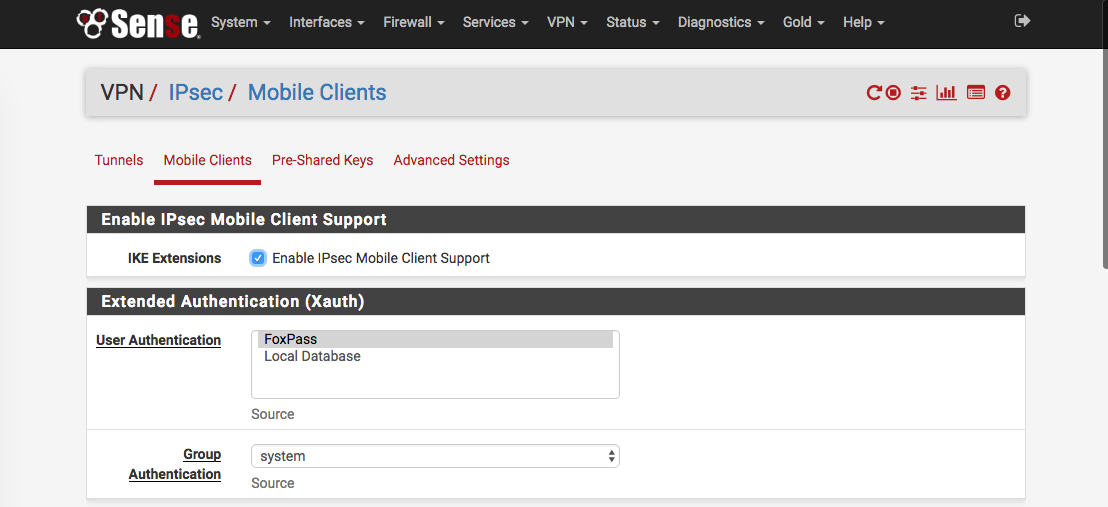
Configure IPsec VPN
Before setting up ldap authentication, it's best to have a working VPN tunnel tested against a system account.
Updated 3 months ago
