
Windows using Workspace ONE UEM
Add Certificate Authority and Template
If you are configuring SCEP certificates for both Windows and macOS, you only need to follow the initial setup documentation once
- Please refer the Initial Setup documentation to add certificate authority and certificate template in Workspace one.
Add Device Profile for Windows
- Go to Resources > Profiles and Baselines > Profiles and click Add > Add Profile.
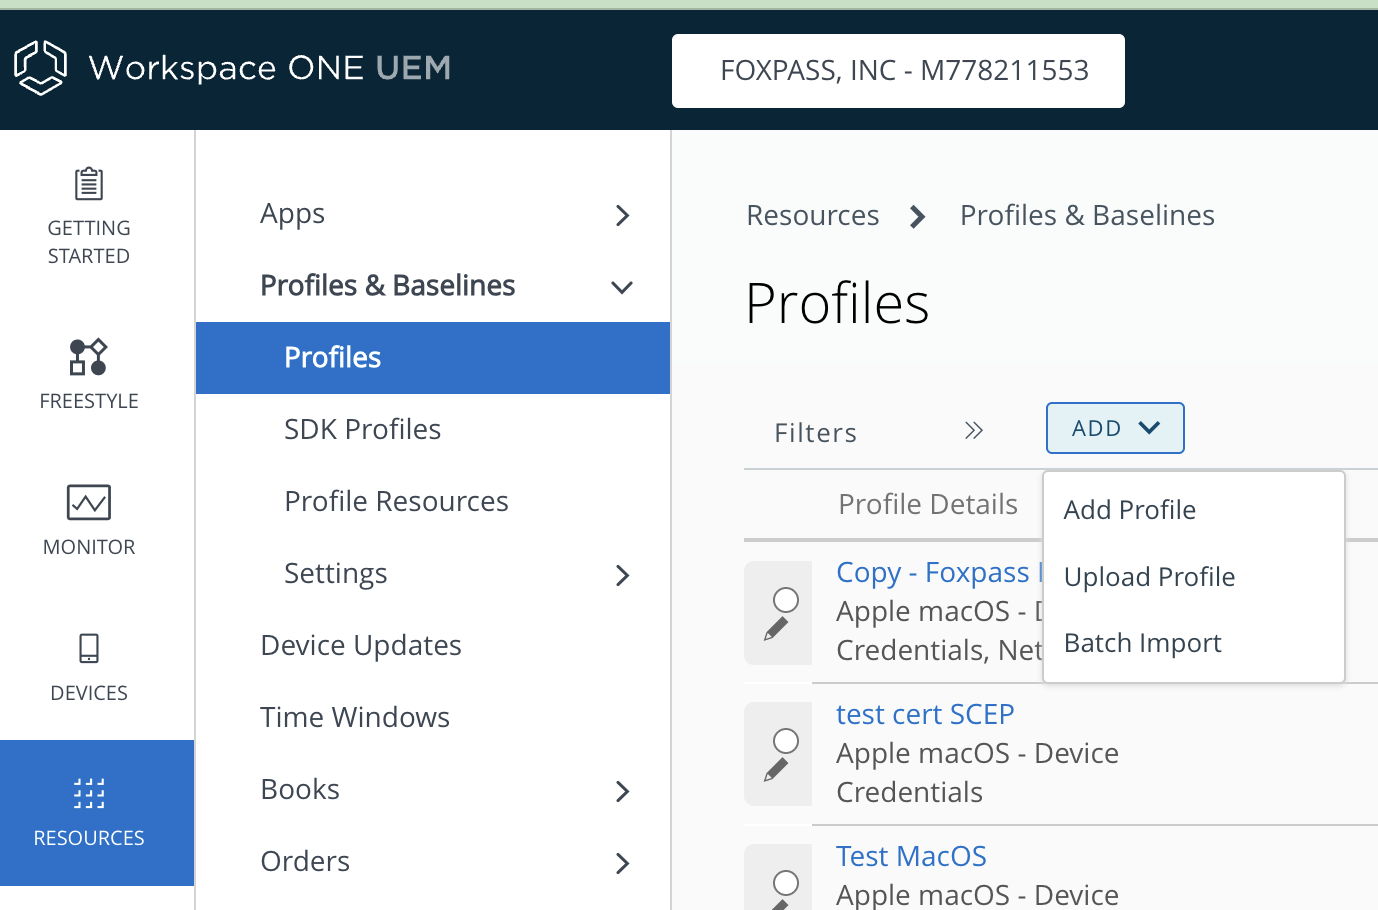
Add Profile
- Select Windows > Widows Desktop > Device Profile
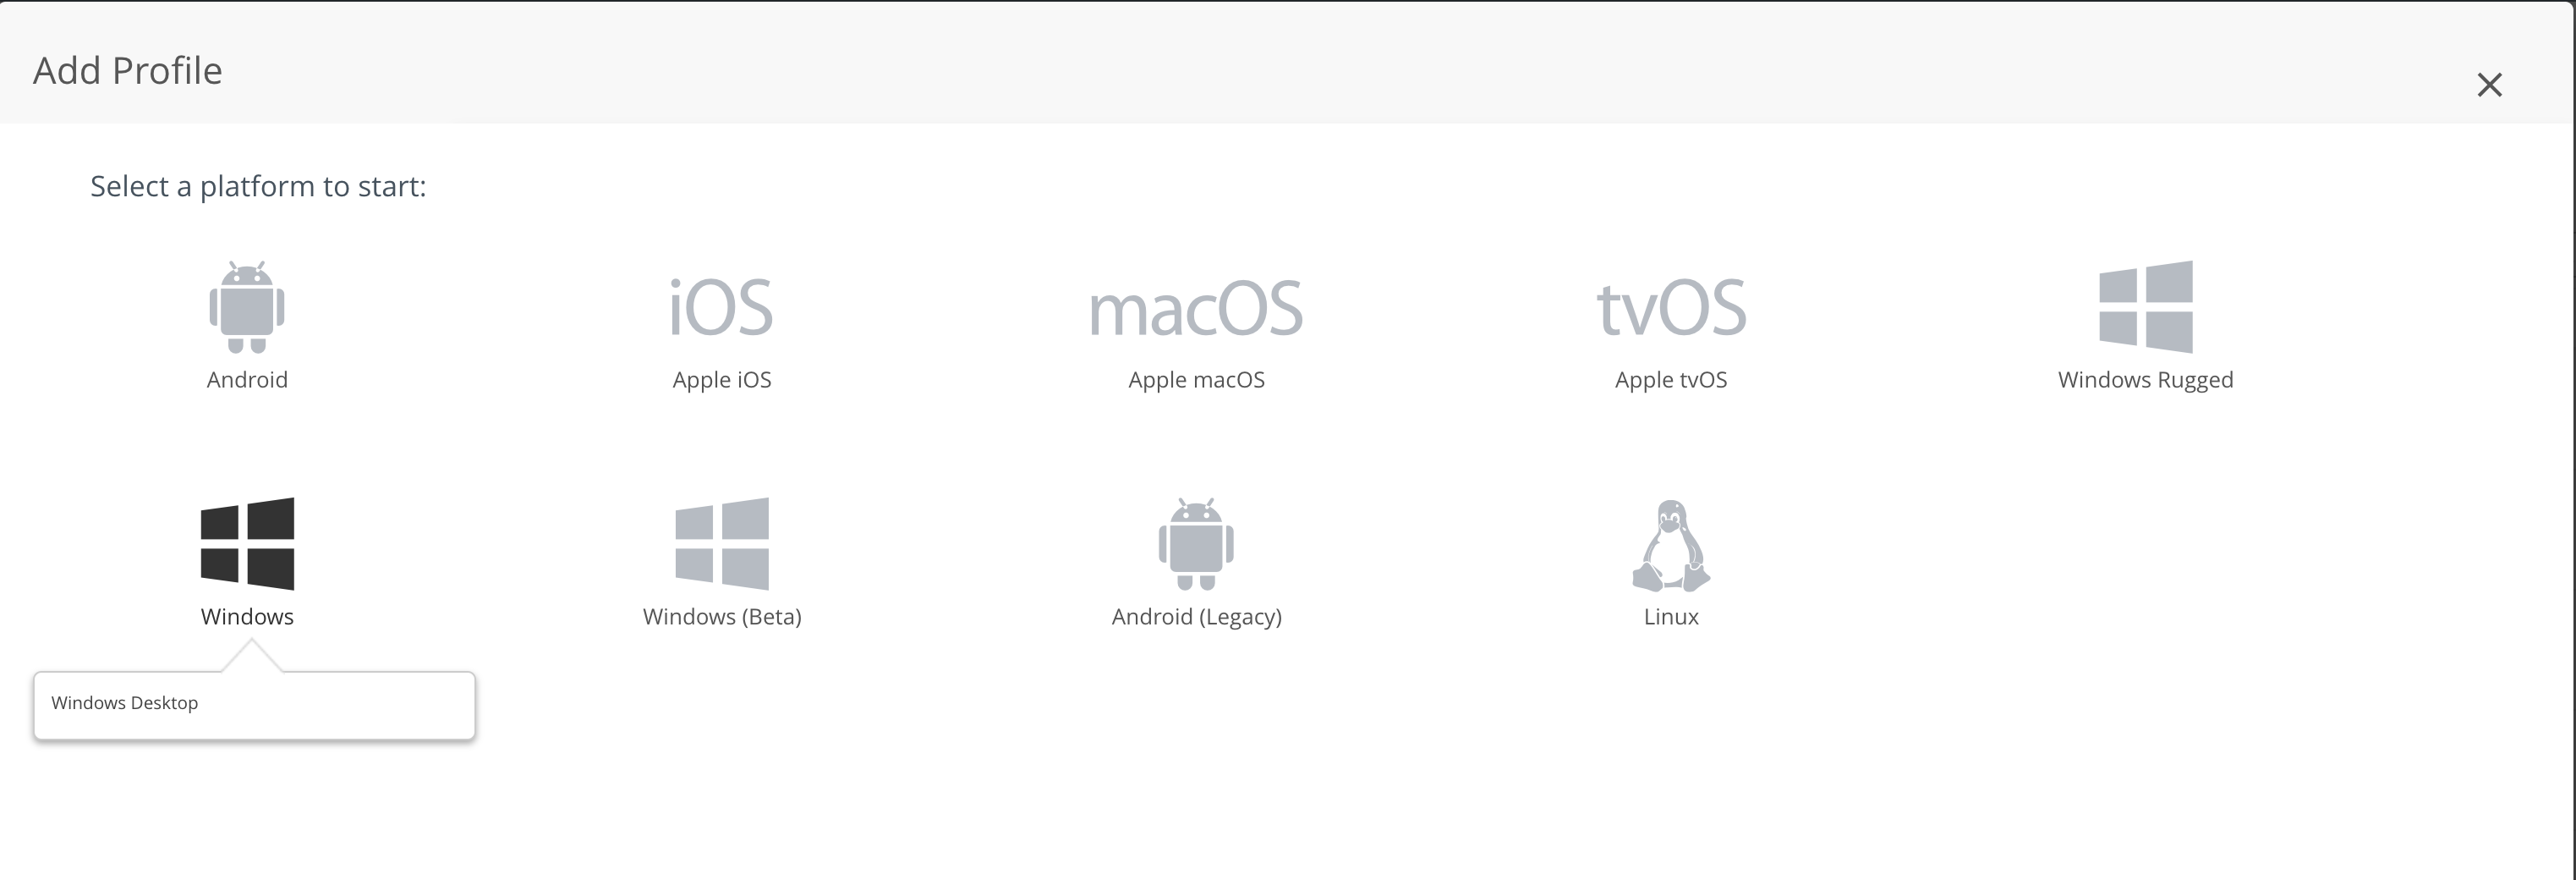
Add Windows Desktop Device Profile
- Enter details for the profile as below:
- For General, Name: You choice
- Smart Groups: Assign to respective smart groups according to your needs.
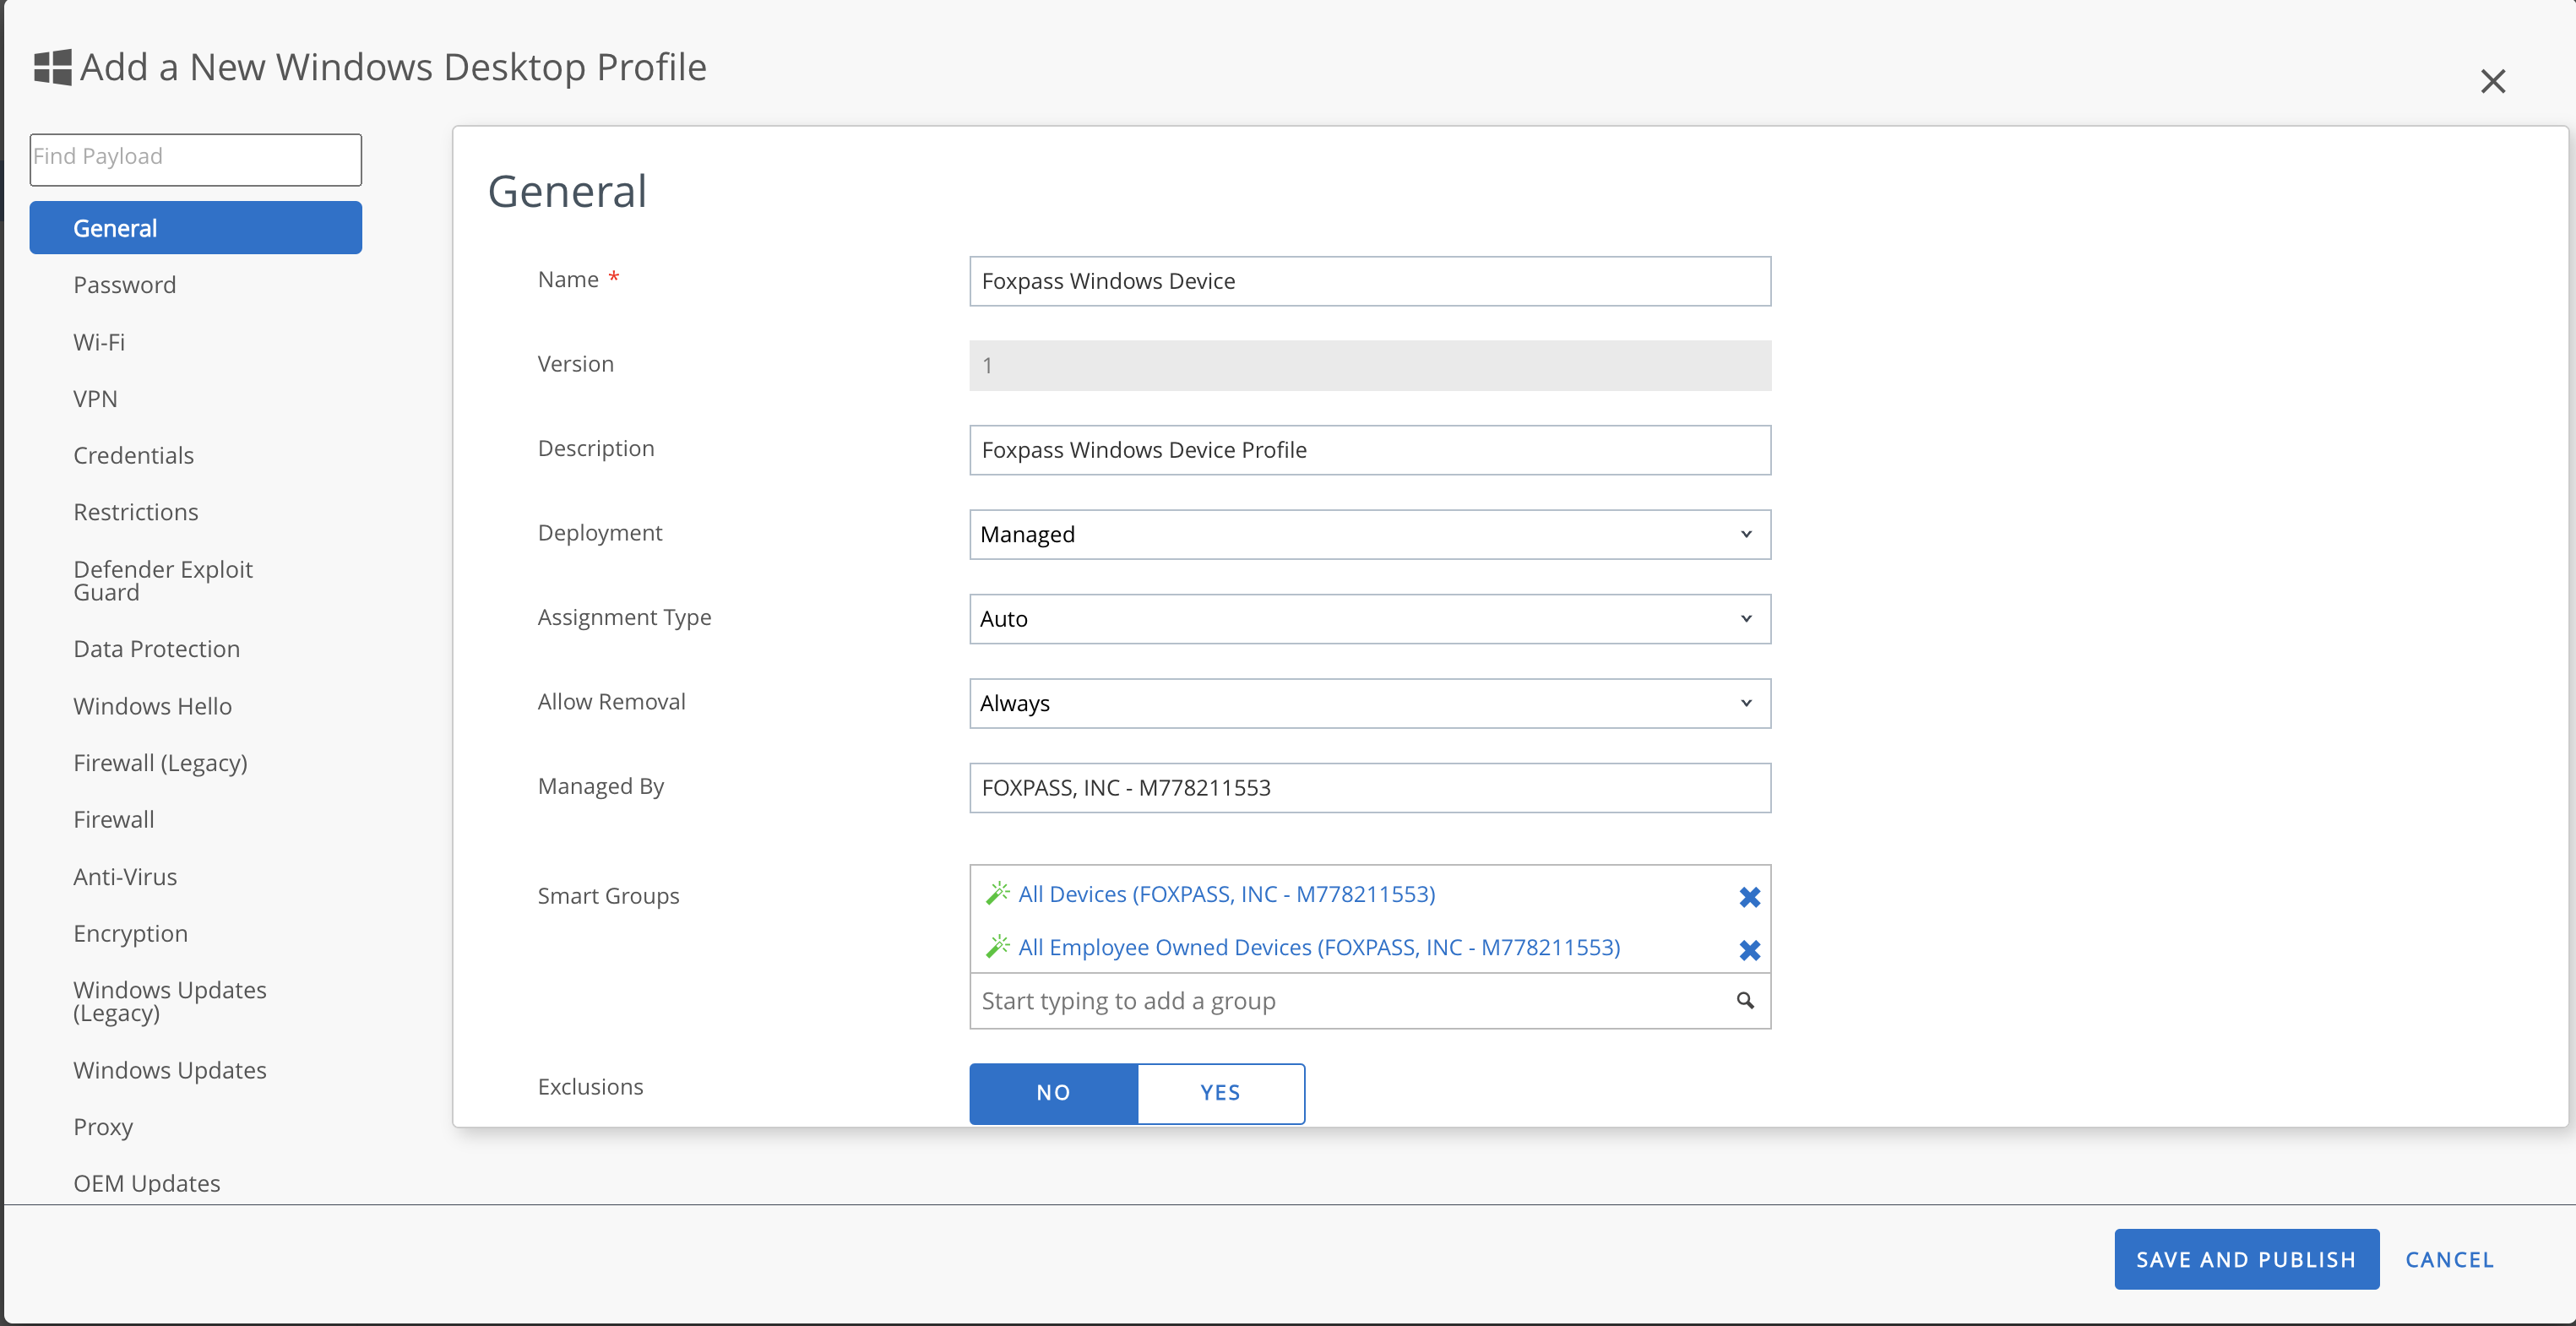
Configure device profile
- Go to Credentials:
- Credential Source: Select 'Defined Certificate Authority' from the dropdown.
- Certificate Authority: Select the CA configured in the Initial Setup documentation.
- Certificate Template: Select the template configured in the Initial Setup documentation.
- Key Location: Software
- Certificate Store: Personal
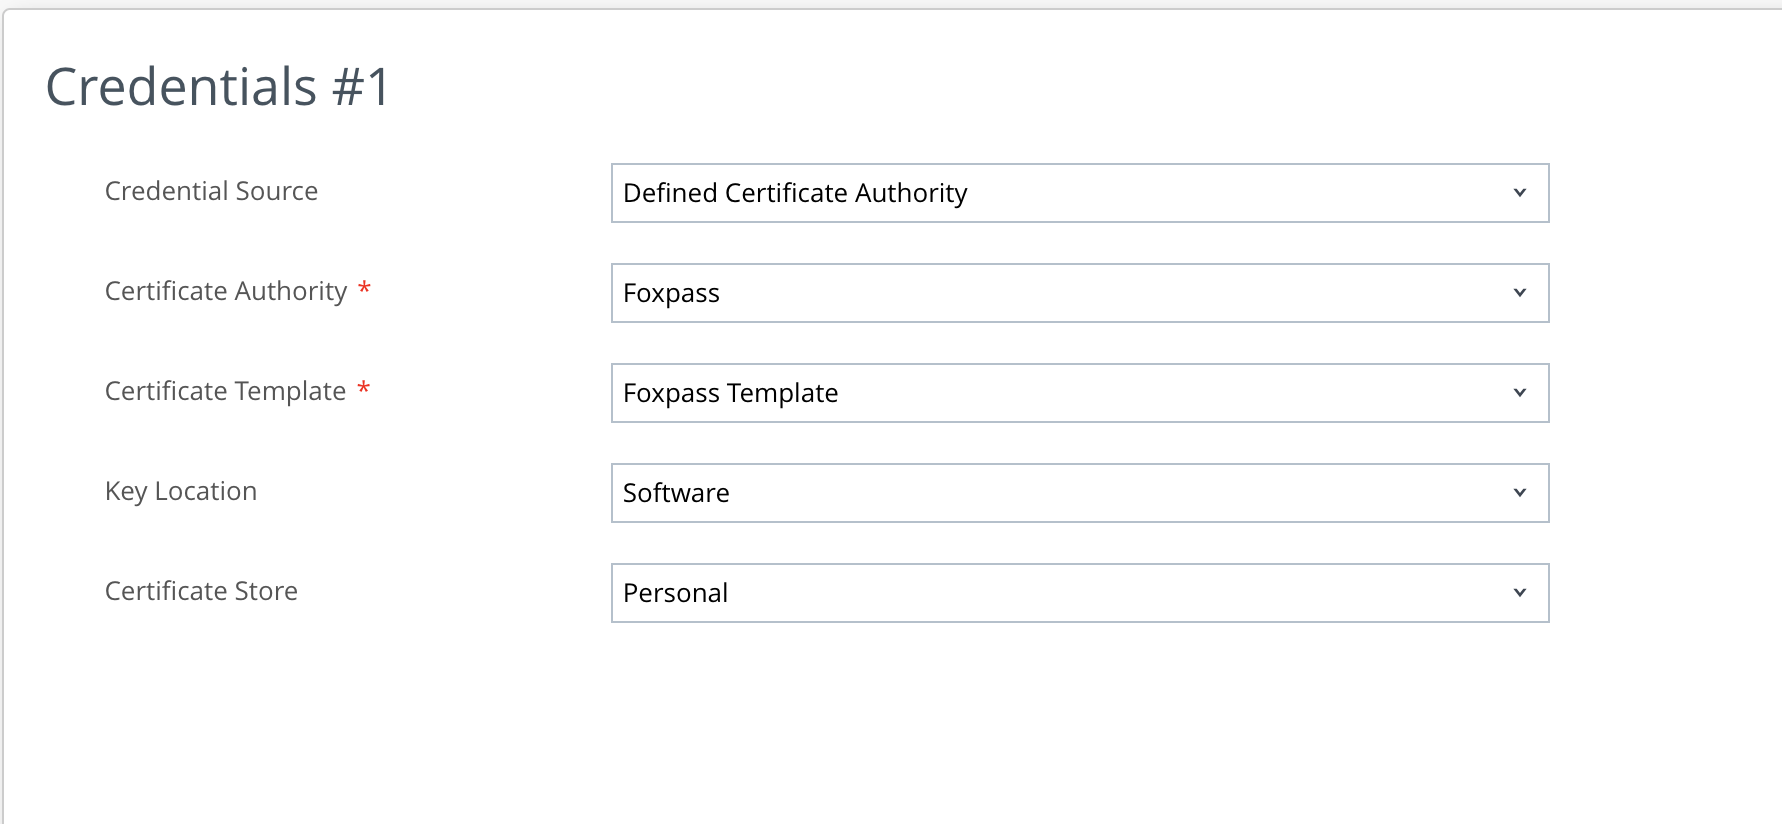
Add Credentials #1
- Click on + on the bottom right and add credentials #2:
- Credential Source: Upload
- Certificate: Download the Client CA from the EAP-TLS page of foxpass and upload it here.
- Key Location: TPM if present
- Certificate Store: Trusted Root
Add Credentials #2
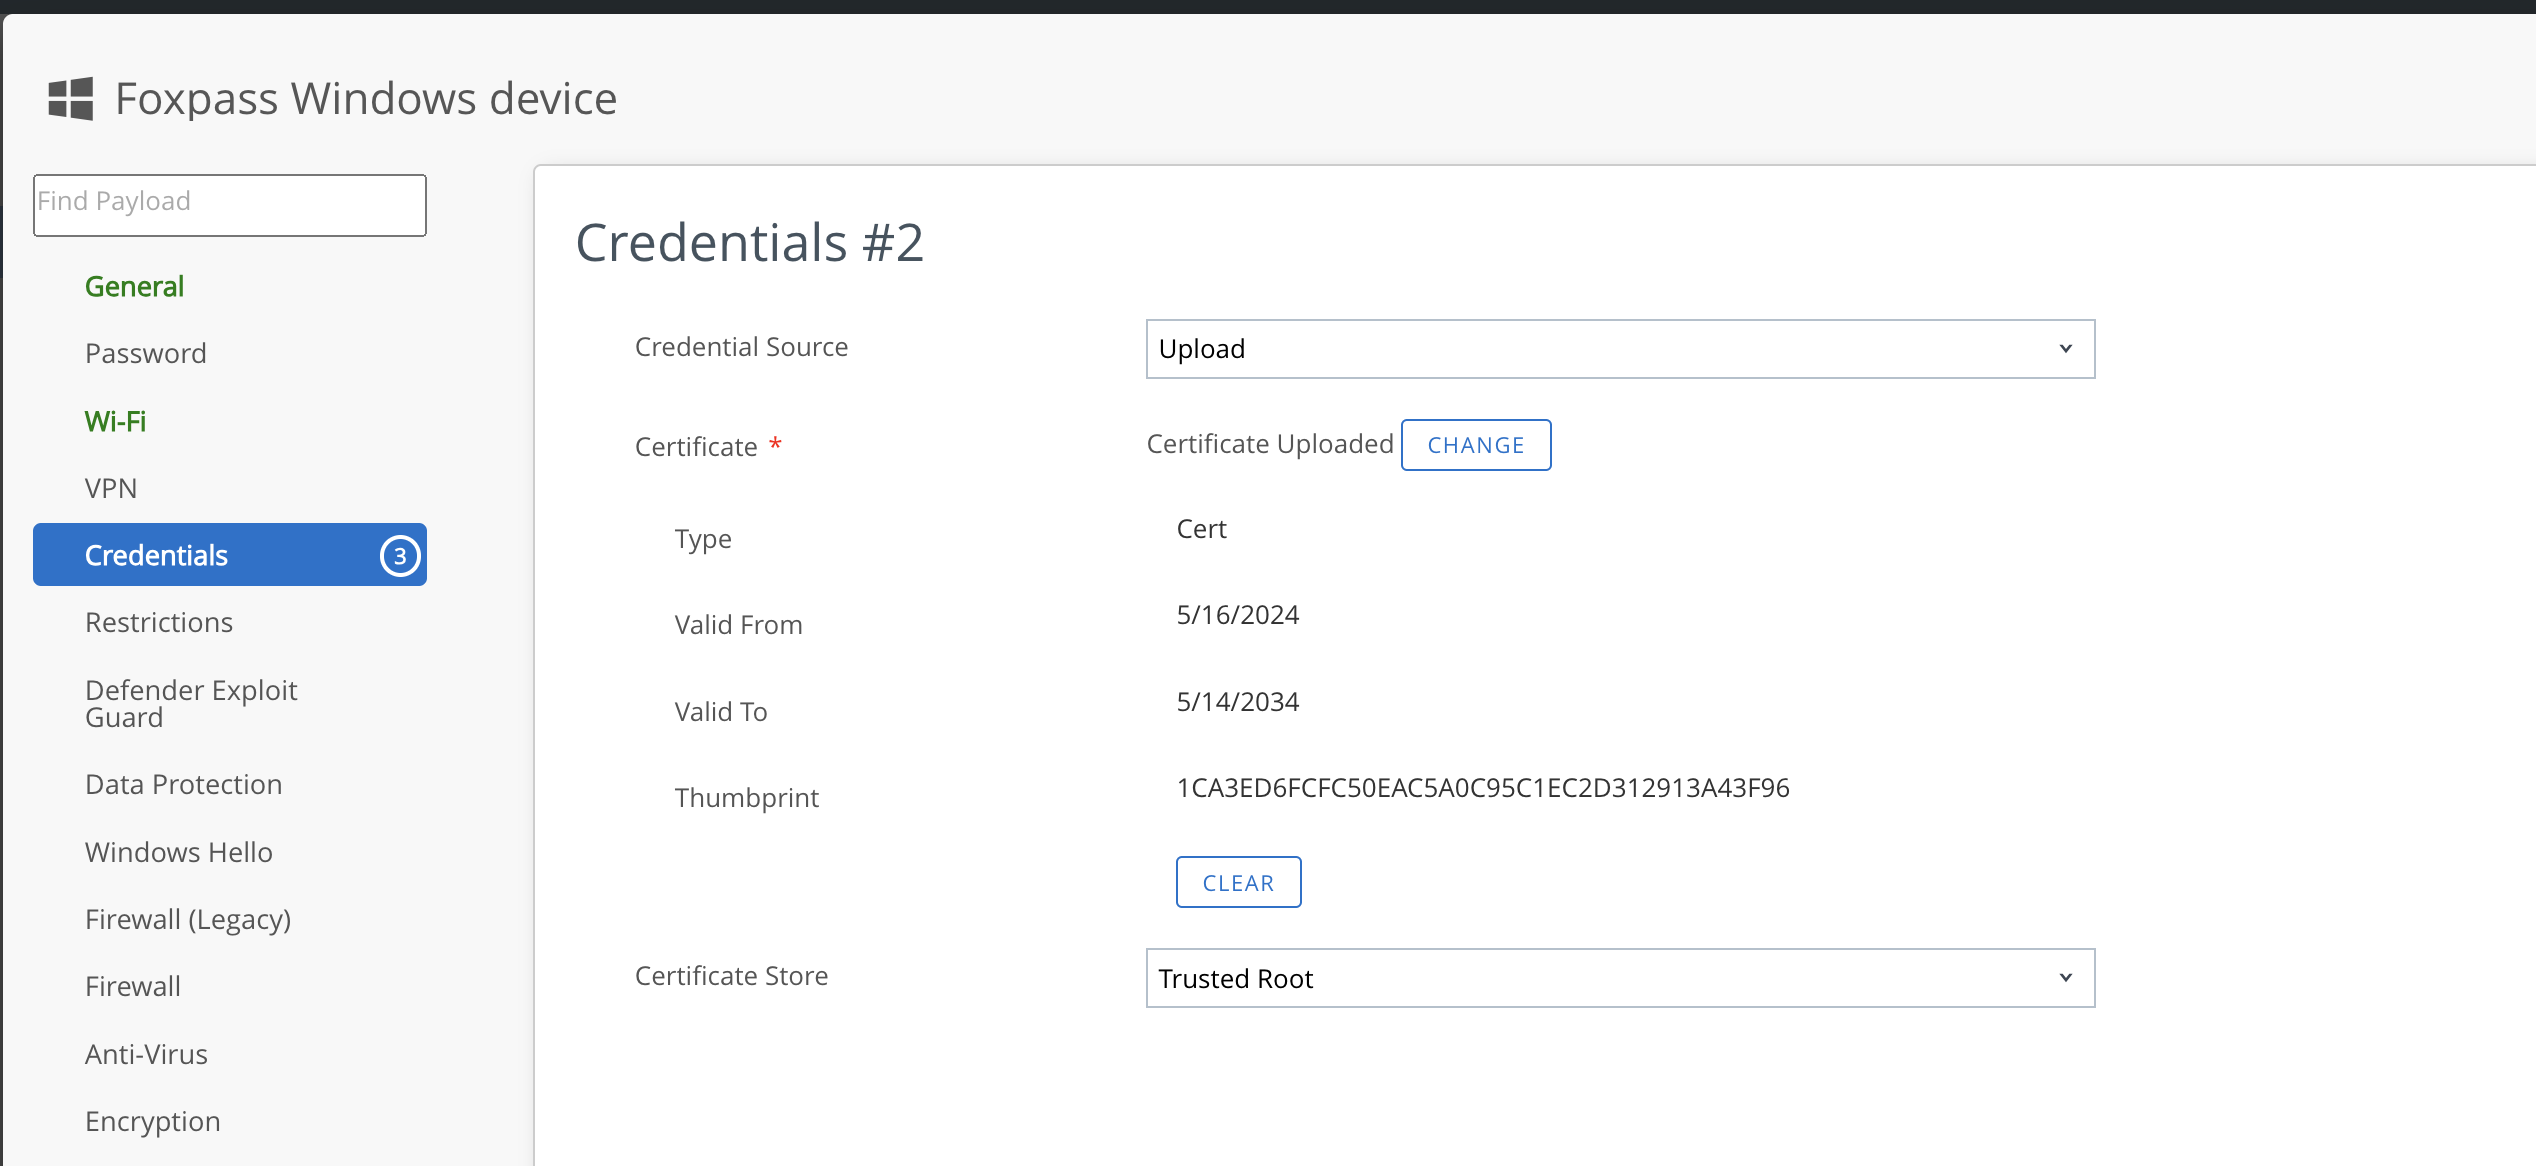
- Click on + on the bottom right and add credentials #3:
- Credential Source: Upload
- Certificate: Download the active server CA from the EAP-TLS page of foxpass and upload it here.
- Key Location: TPM if present
- Certificate Store: Trusted Root
- Note the thumbprint.
- Click 'SAVE AND PUBLISH'
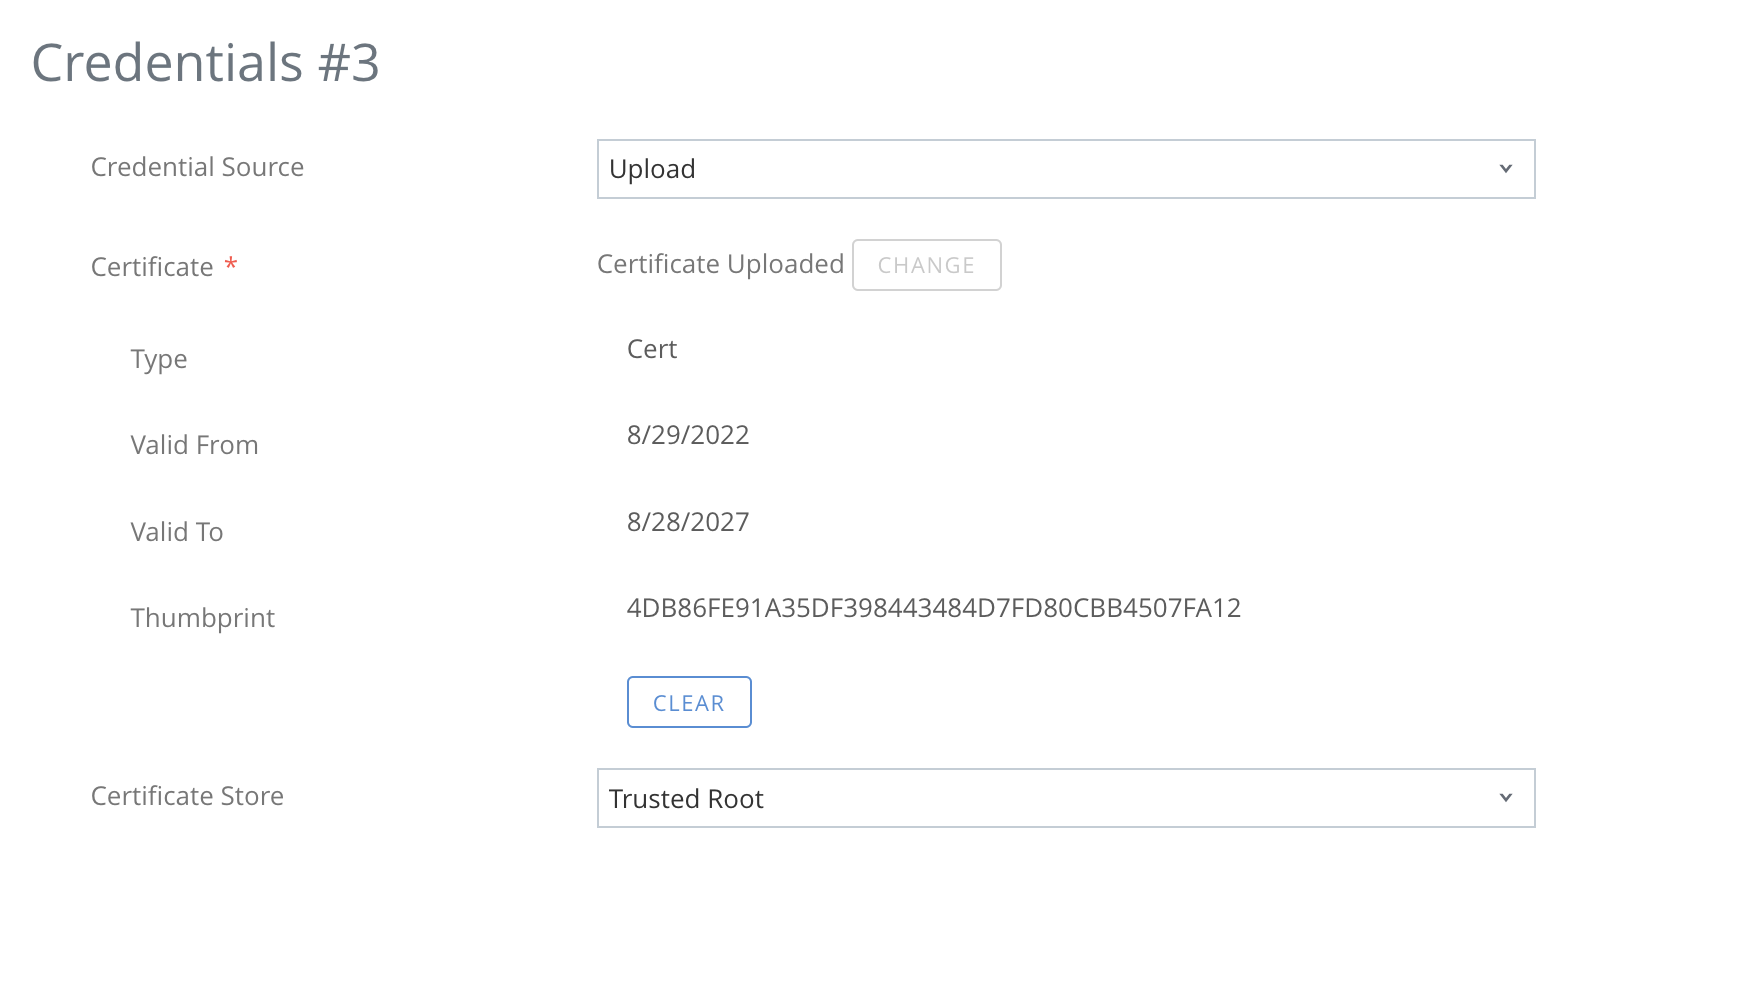
Add Credentials #3
- Configure Wi-Fi payload:
- Service Set Identifier: Your SSID
- Security Type: WPA2 Enterprise
- Encryption: AES
- Protocols: Certificate
- Identity Certificate: Choose Certificate #1
- Trusted Certificates: Choose Certificate #3
- Paste the thumbprint copied in earlier step.
- Click 'SAVE AND PUBLISH'
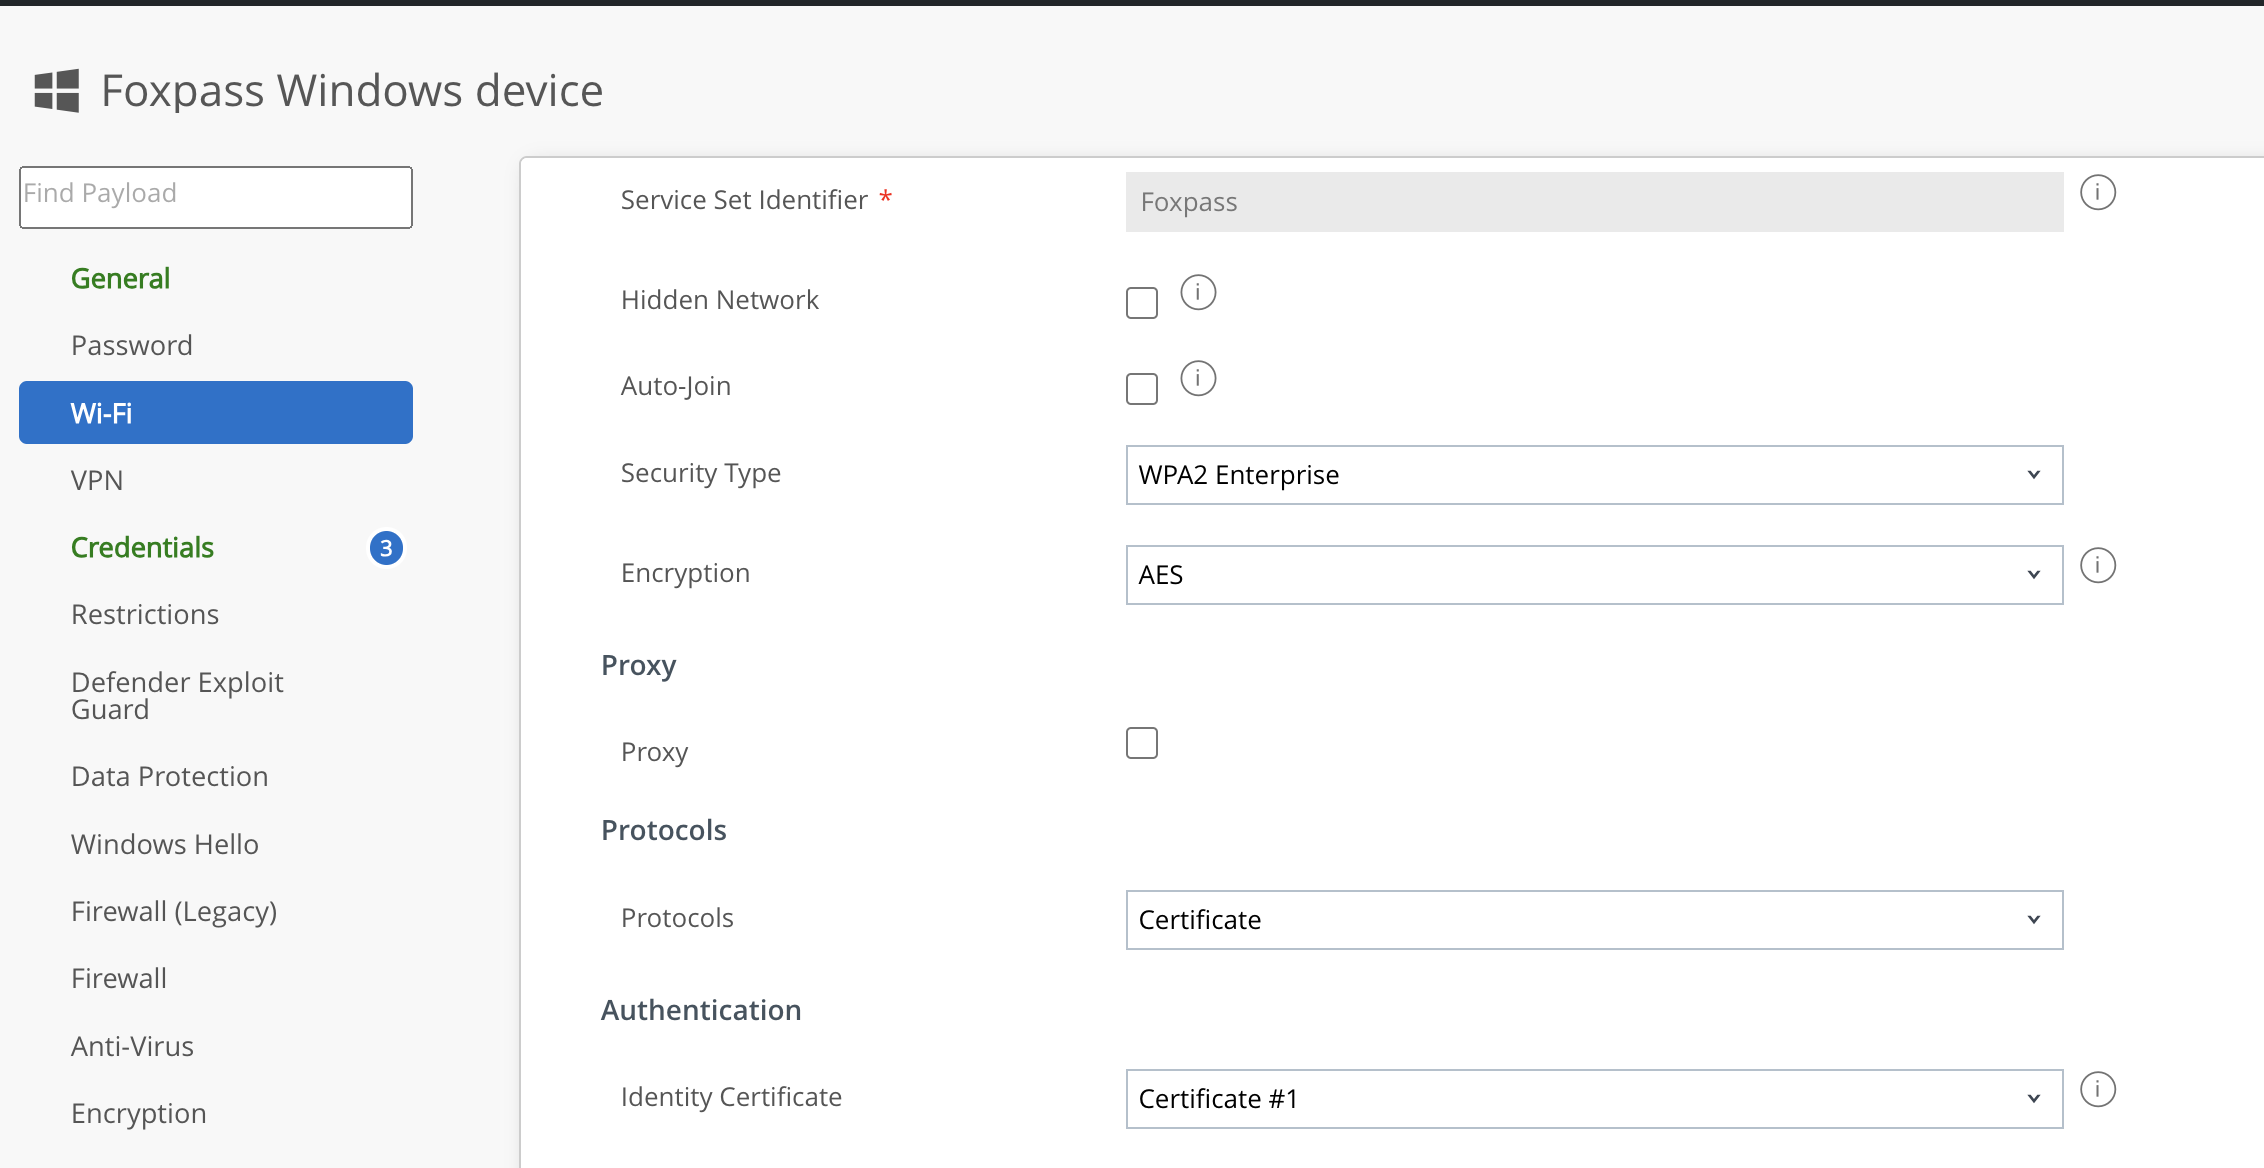
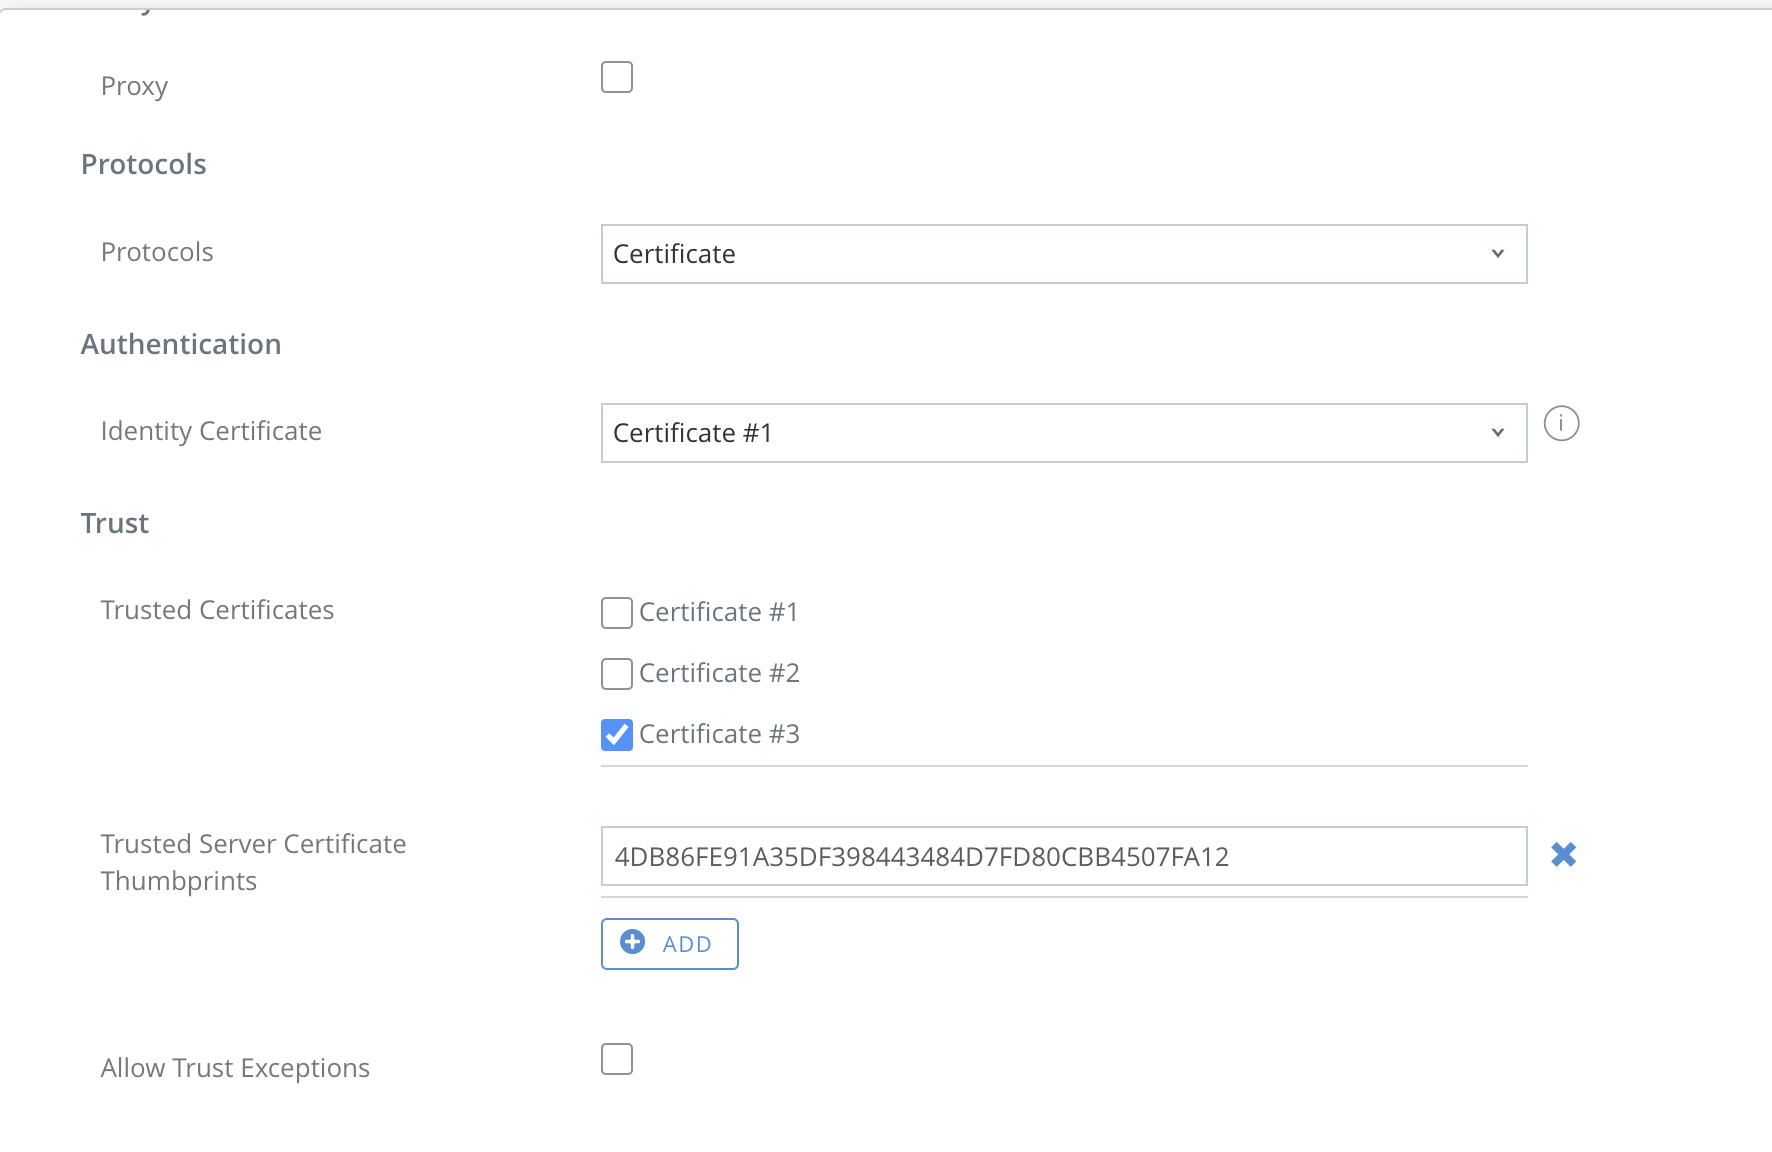
Configure Wi-Fi
Add User Profile for Windows
- Click on the Devices → Profiles and Resources → Profiles → Add
- Click on Add Profile and Select Windows and then Windows Desktop and select User Profile.
- Select General and configure:
- Name - ‘Any reference name’
- Smart Groups - Add all the possible groups from the dropdown.

User profile - General
- Select Credentials from the left.
- Credential Source - Select ‘Defined Certificate Authority from the dropdown.
- Certificate Authority - Select CA created in the Initial setup from the dropdown.
- Certificate Template - Select the template configured earlier.
- Key Location - TPM if present
- Certificate Store - Personal
- Click Save and Publish

User Profile - Credentials
Enroll Windows to Workspace one
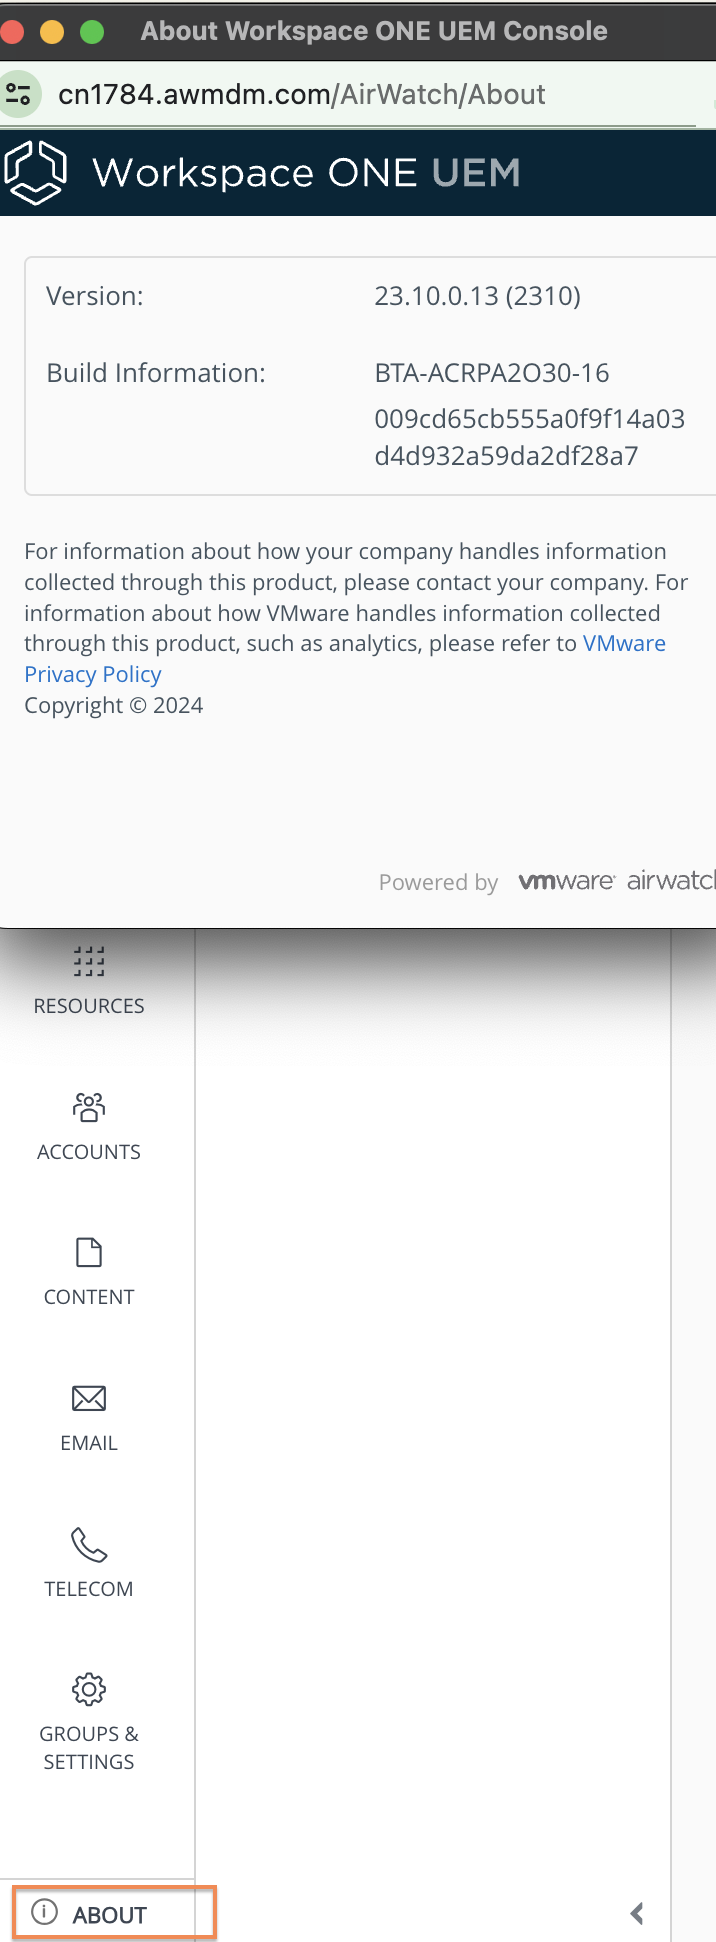
- Make a note of the console version by clicking About of your Workspace one's console page.
- Go to resources.worskspaceone.com.
- Download the appropriate intelligent hub according to the console version on your Windows machine.
- Follow the setup wizard and install hub.
- Intelligent hub will open. Now enter your server address. Click 'Next'. Note : The server address in the screenshot is just an example, the server address and Group ID was sent to your email by Workspace ONE upon your registration of the user.
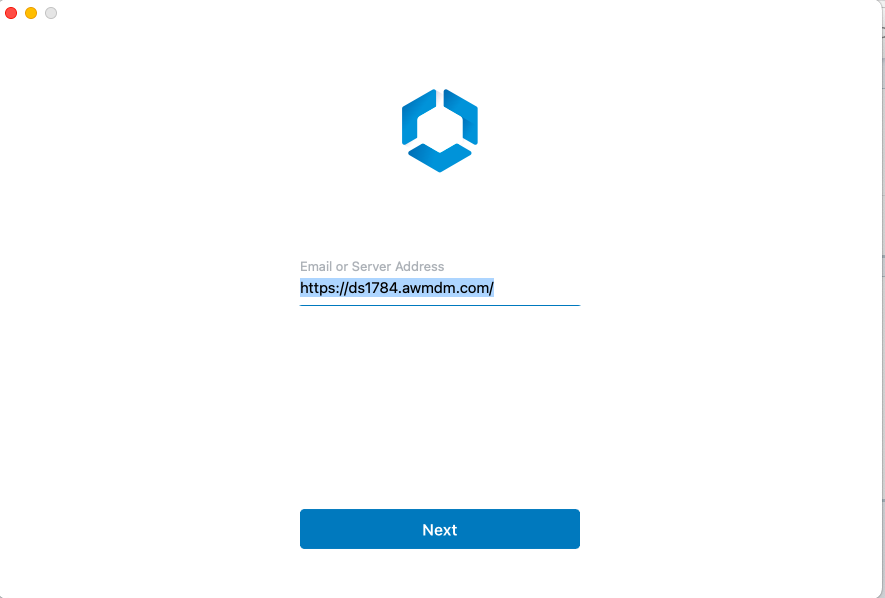
Sample server address
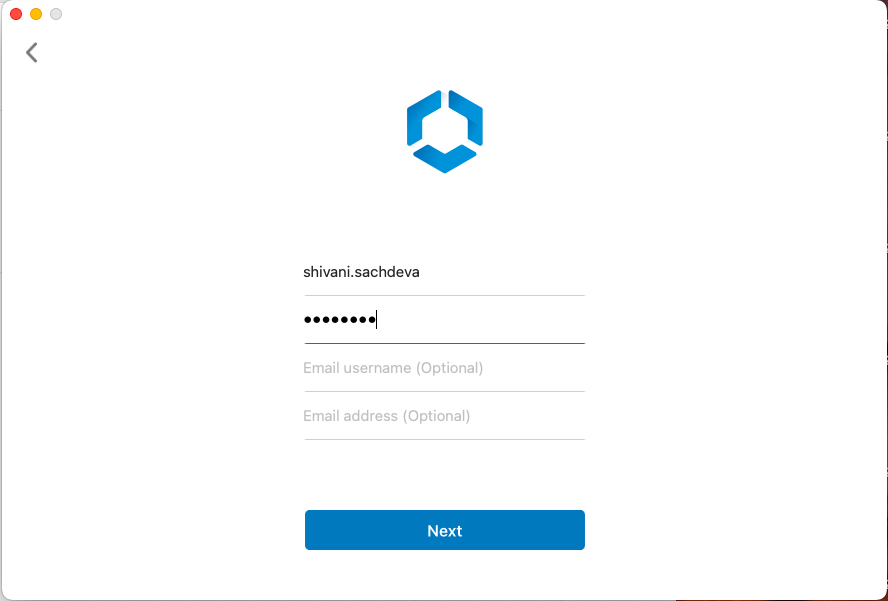
- Enter your Group ID and click 'Next'.
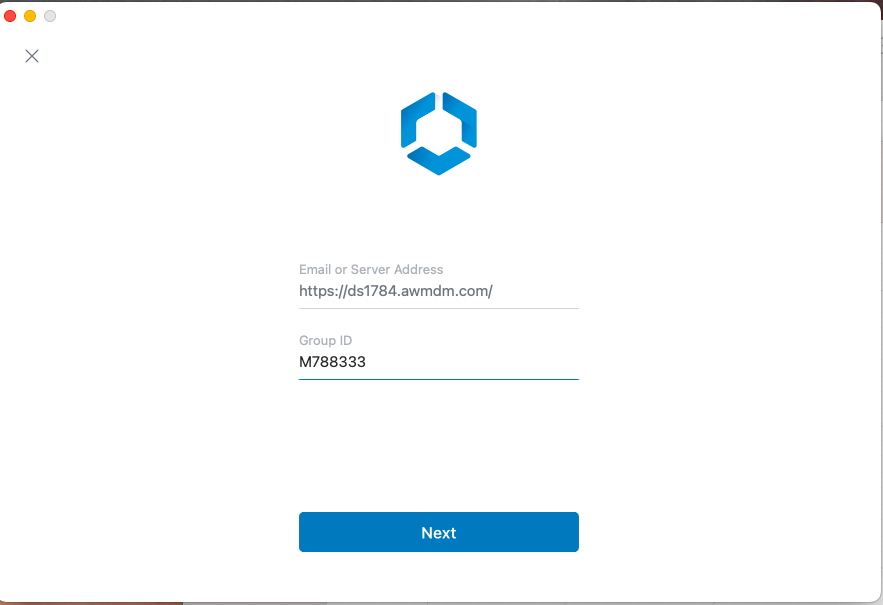
Enter Group ID
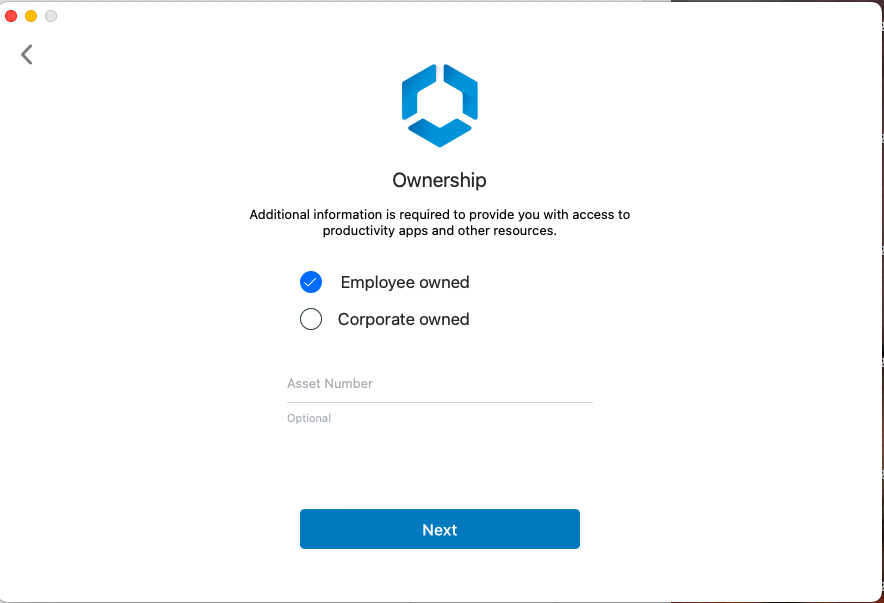
Choose ownership according to your settings
- You can see successful/unsuccessful RADIUS logs on the RADIUS logs page.
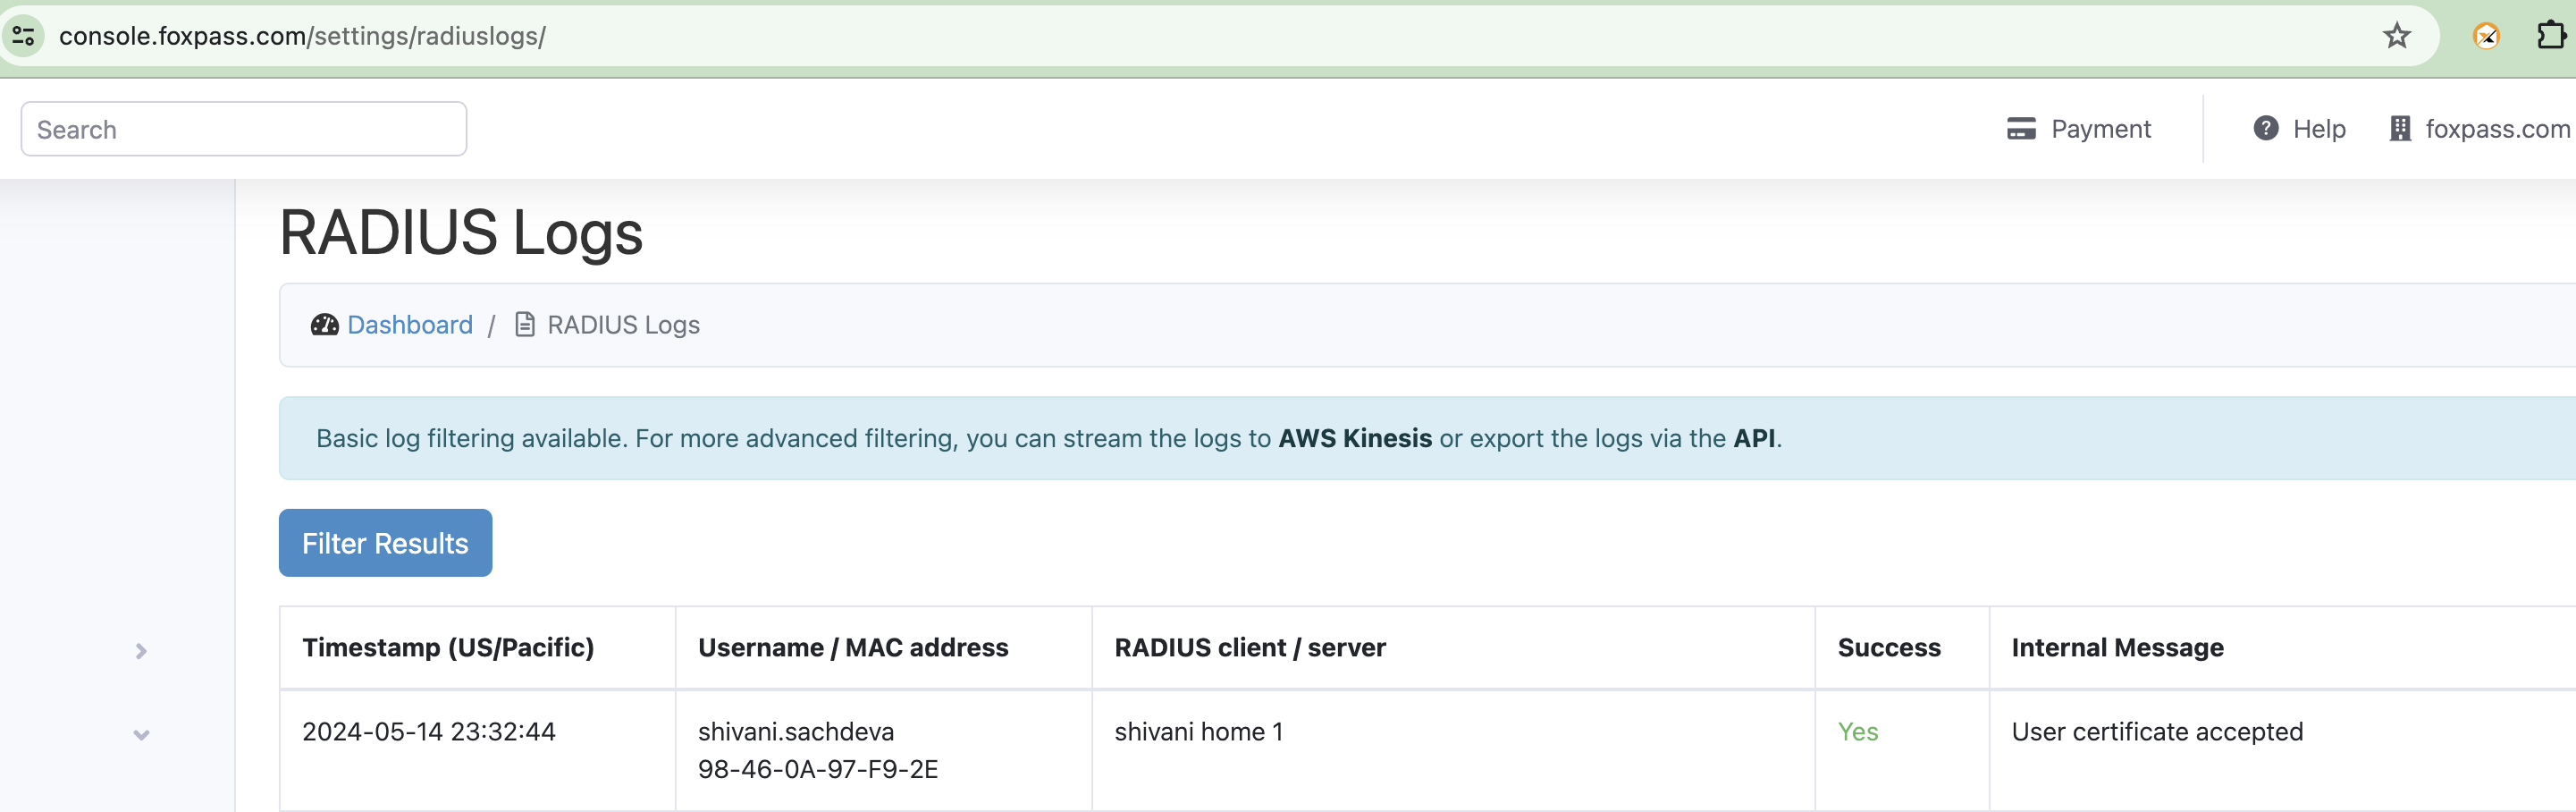
RADIUS logs
- If there are no SCEP errors, 'No errors' will be displayed in green color under Last error column for the respective endpoint on the SCEP page.

SCEP page
If there are any SCEP errors, it would be shown under the 'Last error' column for the respective endpoint on the Foxpass SCEP page.
Updated 8 months ago