
Chromebook SCEP Certificate Authority Configuration
This guide describes how to configure automatic certificate provisioning for ChromeOS devices using Foxpass SCEP
and Google's Certificate Provisioning API, enabling passwordless EAP-TLS Wi-Fi authentication
Chromebook Enterprise License
- Buy the Chromebook Enterprise license as required via your Google Workspace here
Step 1: Configure EAP-TLS on Foxpass
- Please follow the EAP-TLS initial setup guide to create Client CA and Server CA. Download both.
Step 2: Create a SCEP endpoint
Go to the Foxpass Console's SCEP page, click on Create SCEP endpoint.
-
Name - Give a name to your endpoint. (E.g., Google SCEP)
-
Verification Type – None
-
Authentication Type - Challenge Password
-
Client Certificate Authority - Created in the EAP-TLS initial setup guide
-
Click 'Create' button.
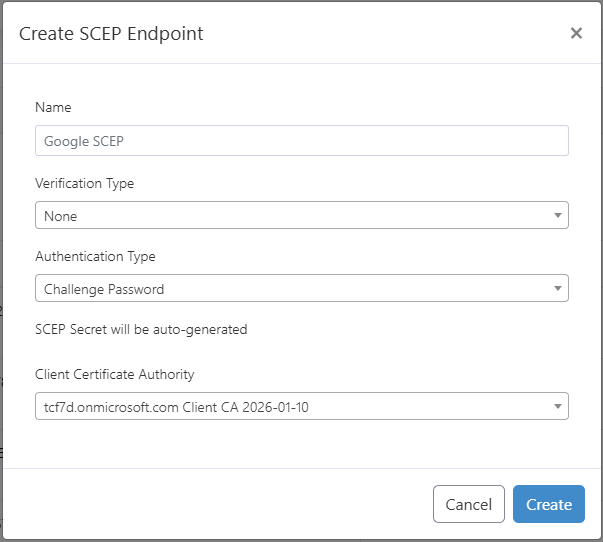
Create a SCEP endpoint
Step 3: Upload Client CA and Server CA Certificates
Add Client CA in your Google Workspace here Networks > Certificates.
Click Add Certificate. Name it "Foxpass Client CA". Click Upload. Upload the client CA downloaded earlier. Check the following options and then click 'ADD'.
- Enabled for Chromebook
- Enabled for Imprivata App on Chromebooks
- Enabled for Endpoint Verification
Add Server CA in your Google Workspace here Networks > Certificates.
Click Add Certificate. Name it "Foxpass Server CA". Click Upload. Upload the server CA downloaded earlier. Check the following options and then click 'ADD'.
- Enabled for Chromebook
- Enabled for Imprivata App on Chromebooks
- Enabled for Endpoint Verification
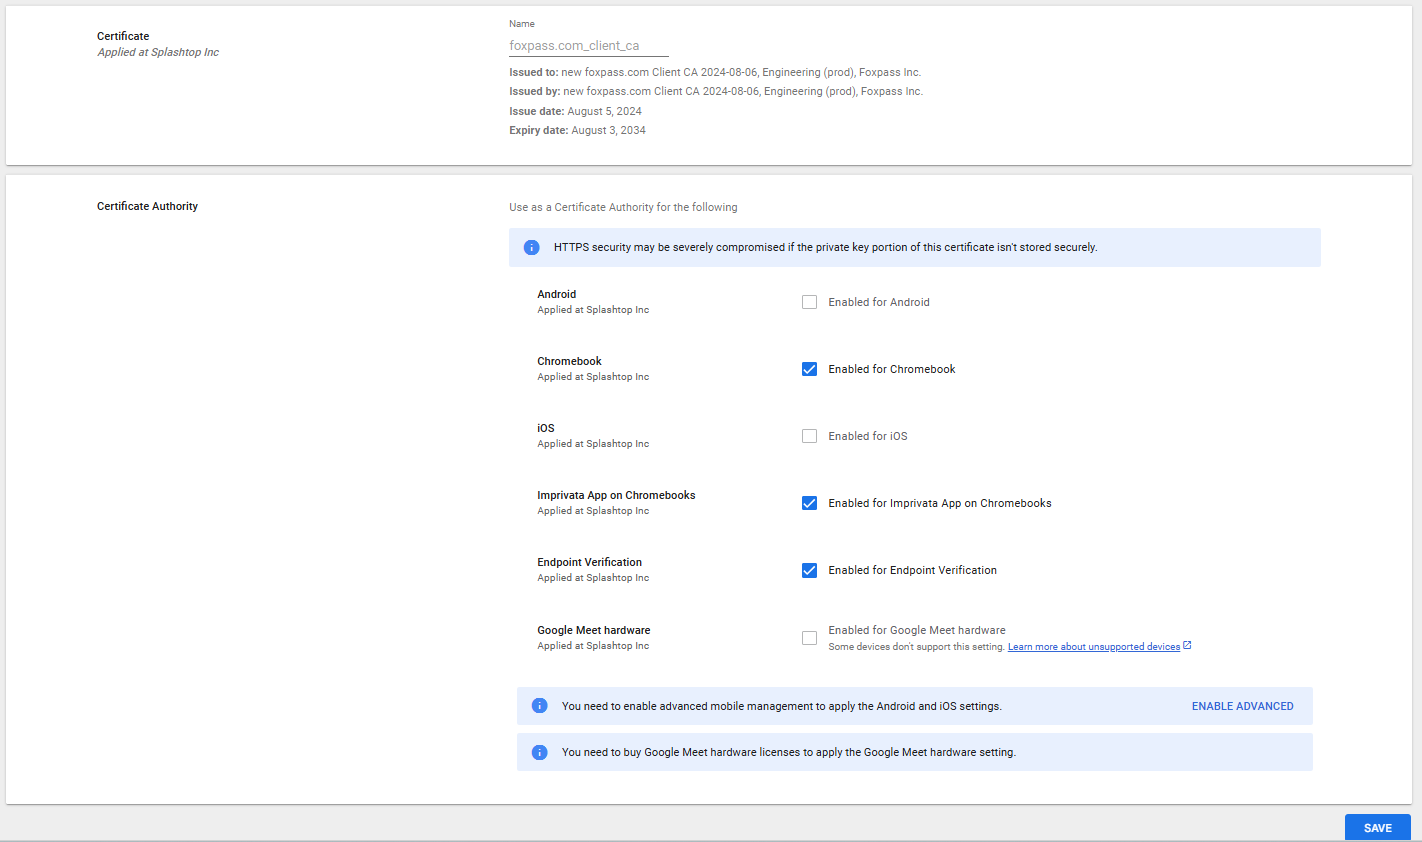
Client CA Certificate
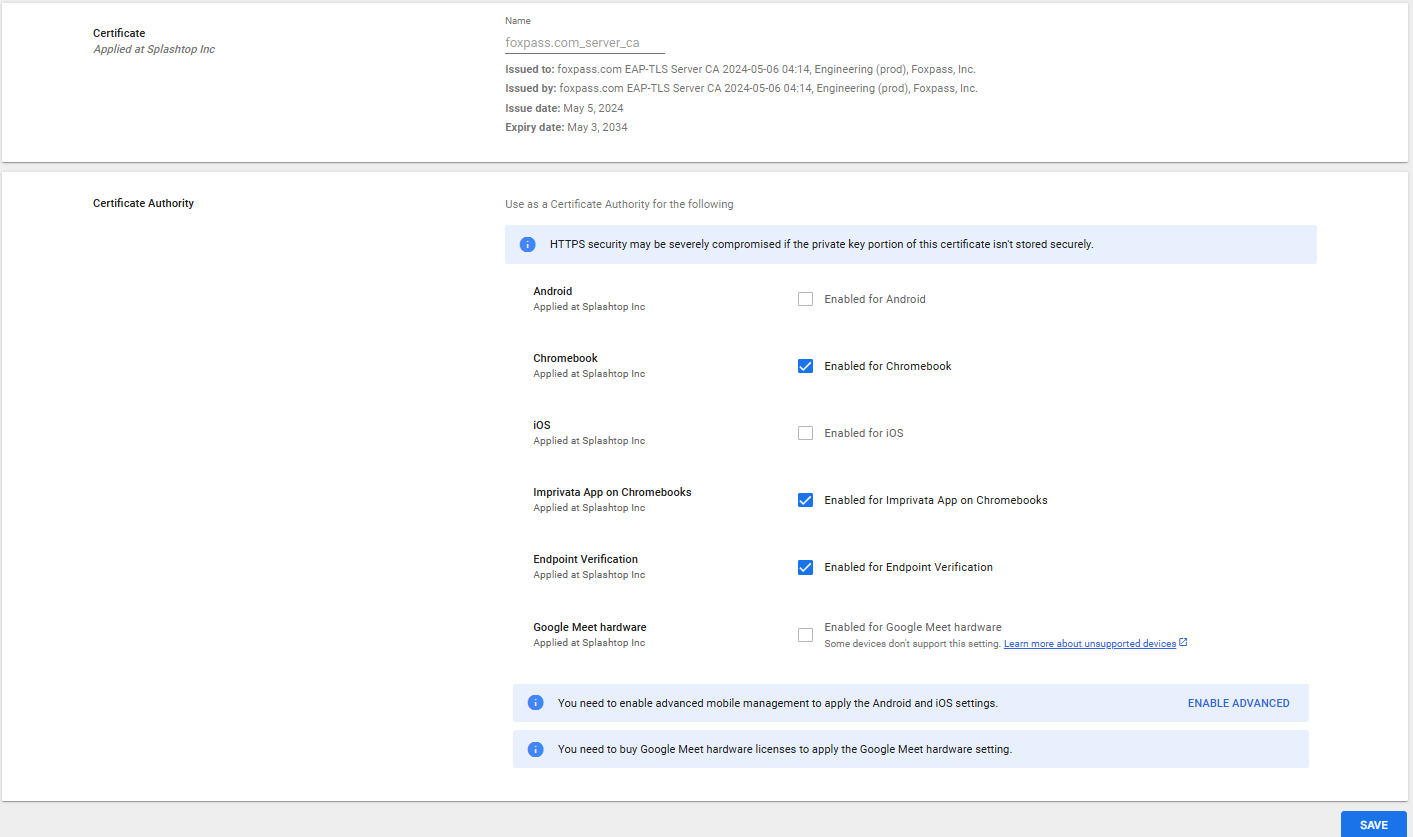
Server CA Certificate
Step 4: Add Certificate Authority connection
Add the connection here Networks > Certificates > Certificate Authority connection.
Note: The Certificate Authority connection can only be done in the Root OU
-
Click Add Connection
-
GUID – Generated after profile is saved
-
Certificate Authority connection type – SCEP Certificate Authority connection
-
Certificate Authority connection name – Foxpass Google SCEP
-
Service account - cert-prov-sa@certificate-provisioning-prod.iam.gserviceaccount.com
-
Pub/Sub topic:
- Select one (1) based on your region:
- Global Stack (foxpass.com): projects/certificate-provisioning-prod/topics/cert-prov-use-1
- EU Stack (foxpass.eu): projects/certificate-provisioning-prod/topics/cert-prov-euc-1
- AU Stack (au.foxpass.com): projects/certificate-provisioning-prod/topics/cert-prov-ap-se-2
- Select one (1) based on your region:
-
Certificate Authority connection configuration identifier – Input SCEP UUID of the domain that's created in the SCEP Page.
-
Click ‘Add’

SCEP UUID of the domain that's created in the SCEP Page
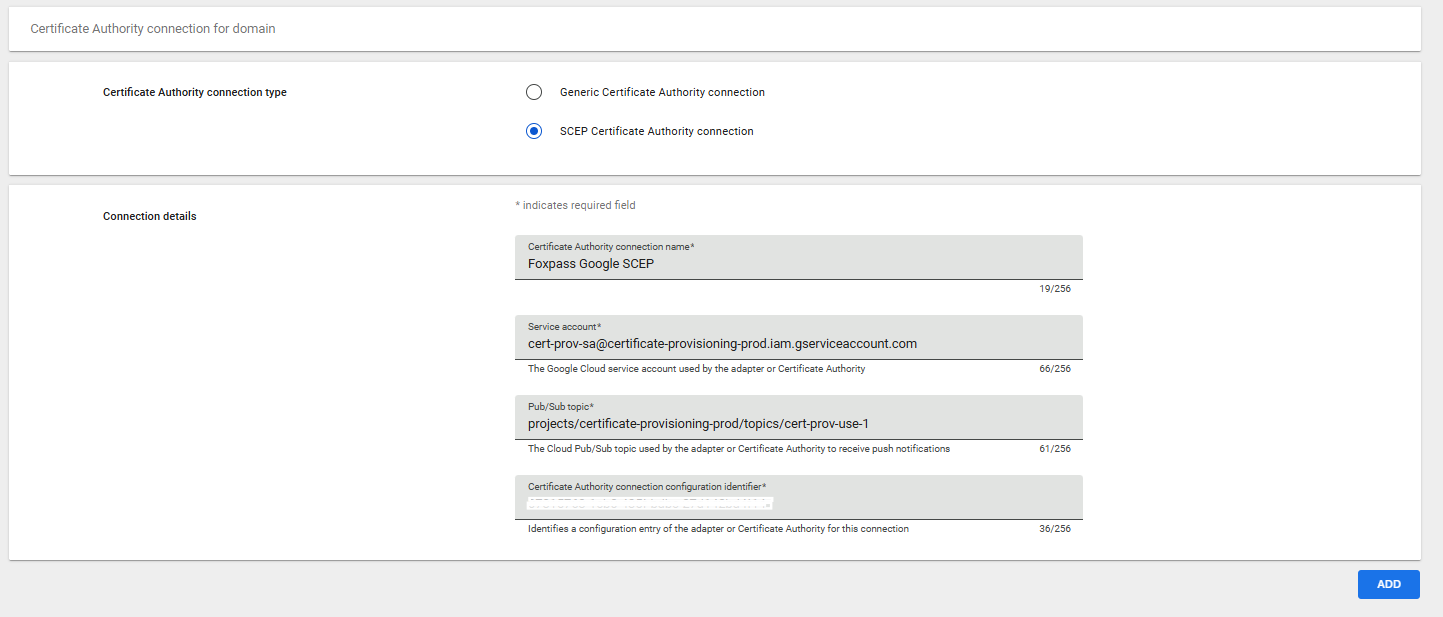
Add Certificate Authority connection
-
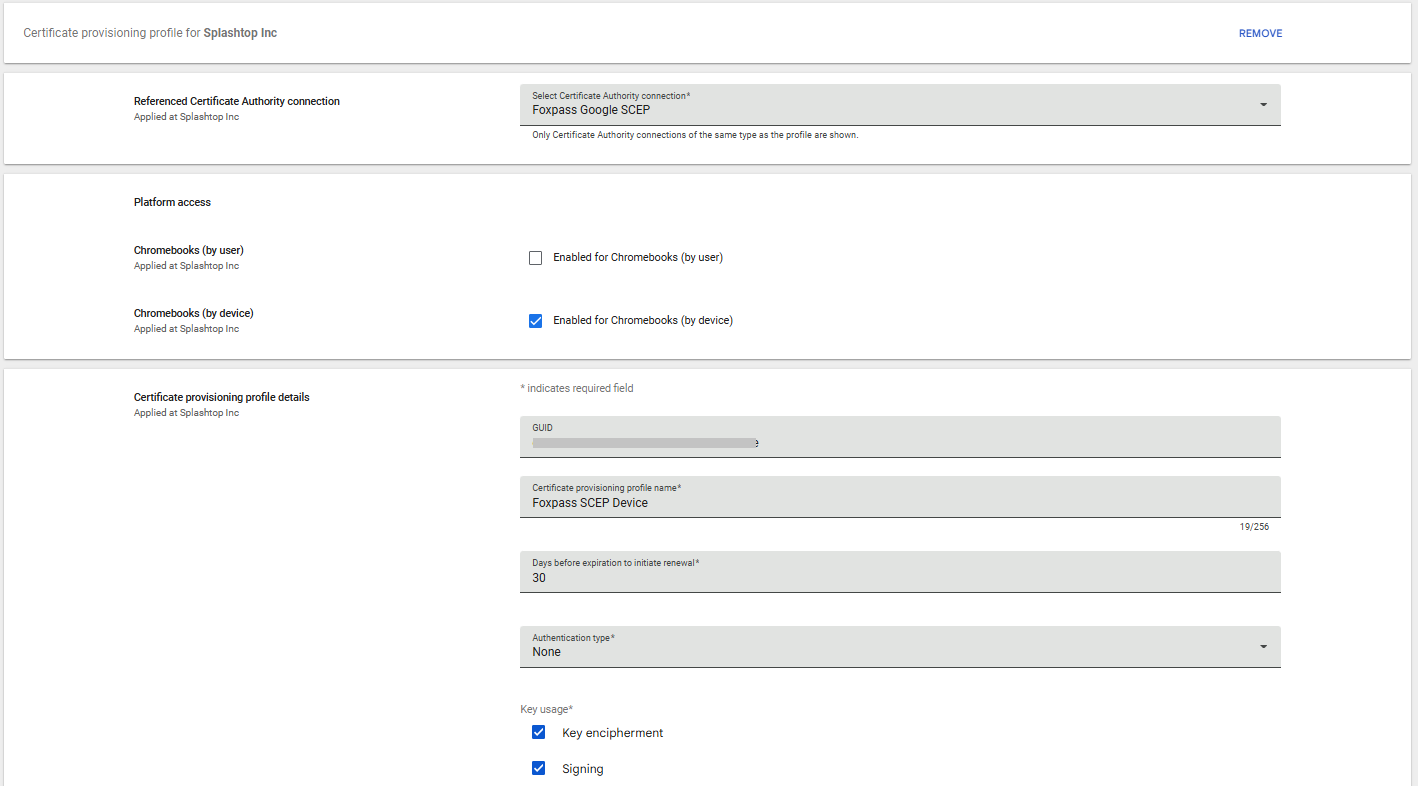
Step 5: Add Certificate Provision Profile
Add the profile here: Network > Certificates > Certificate provisioning profiles.
- Click Add Profile
-
Referenced Certificate Authority Connect – Select the SCEP Connector created earlier
-
Platform Access/Chromebooks (by Device) – Enabled for Chromebooks (by Device)
-
GUID – Generated after profile is saved
-
Certificate provisioning profile name – Foxpass Chromebook SCEP - Device
-
Days before expiration to initiate renewal – 30
-
Authentication type – None
-
Key Usage
- Enable Key Encipherment
- Enable Signing
-
Subject Common Name -
${DEVICE_DIRECTORY_API_ID} -
Encryption Key Type – RSA Key – 2048bit
-
Click ‘Add’

Add Certificate Provision Profile
-
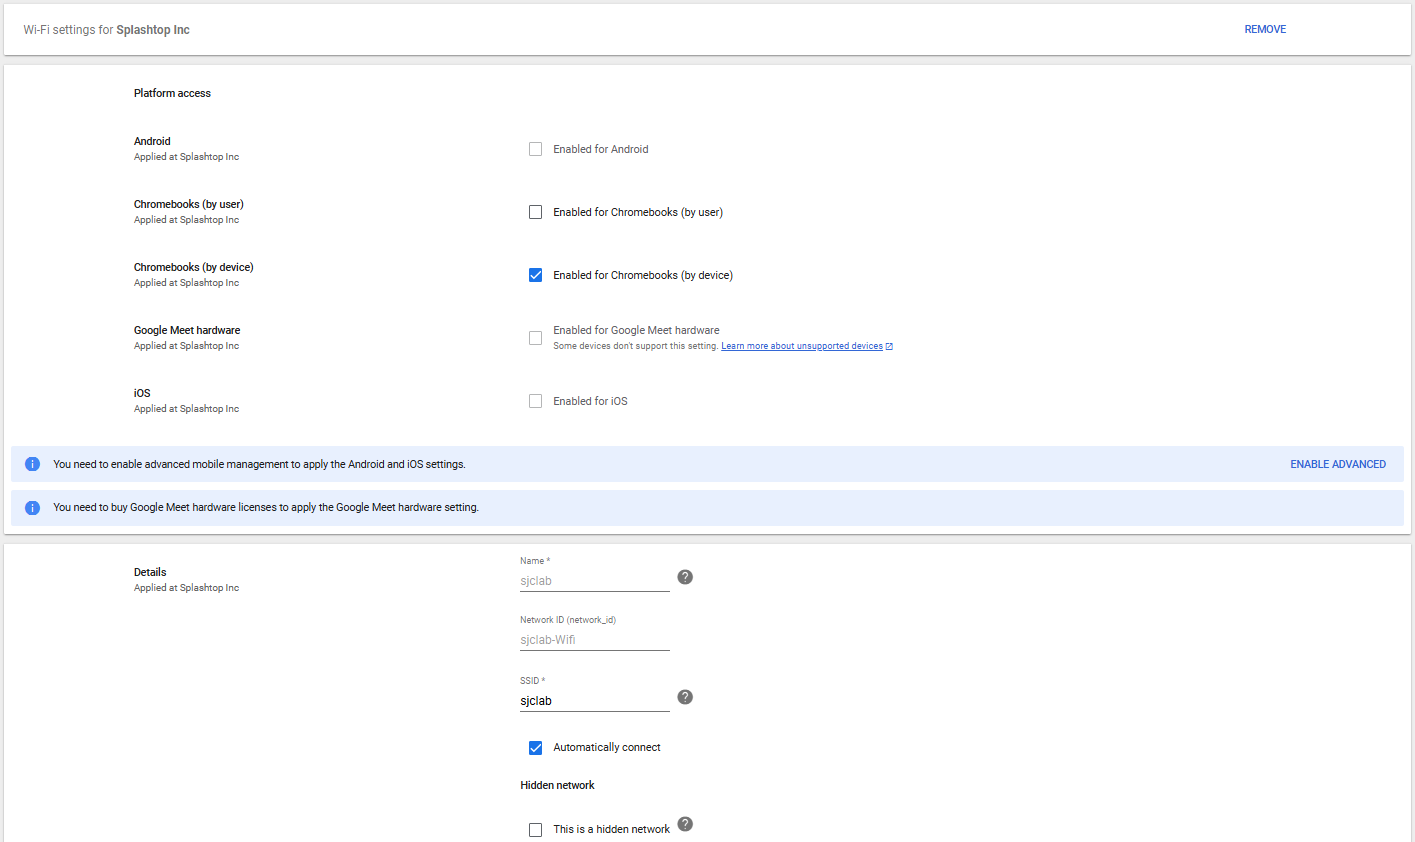
Step 6: Add Wi-Fi Profile
Add a WiFi Profile by going to Networks > Wi-Fi.
- Add Wi-Fi.
-
Select Chromebooks (by device).
-
Name - "Your SSID"-Foxpass
-
Network - “Your SSID”
-
SSID - "Your SSID" (case-sensitive, make sure it exactly matches the configured SSID)
-
Automatically Connect – Enabled
-
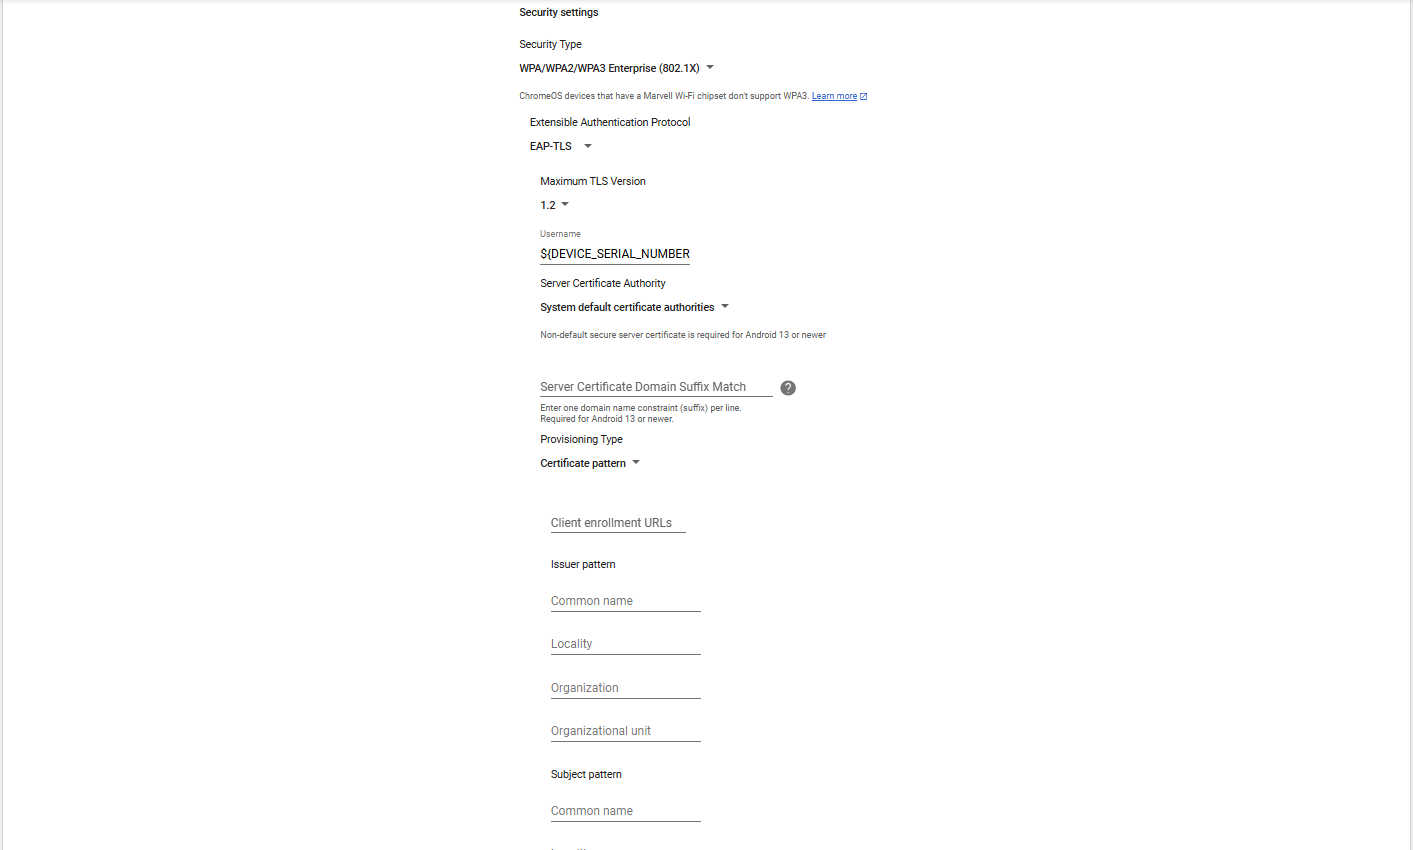
Security Type – WPA/WPA2/WPA3 Enterprise (802.1X)
- Extensible Authentication Protocol – EAP-TLS
- Maximum TLS Version – 1.2
- Username - ${DEVICE_SERIAL_NUMBER}
- Alternative: ${MAC_ADDRESS}
-
Server Certificate Authority – Foxpass Server CA
-
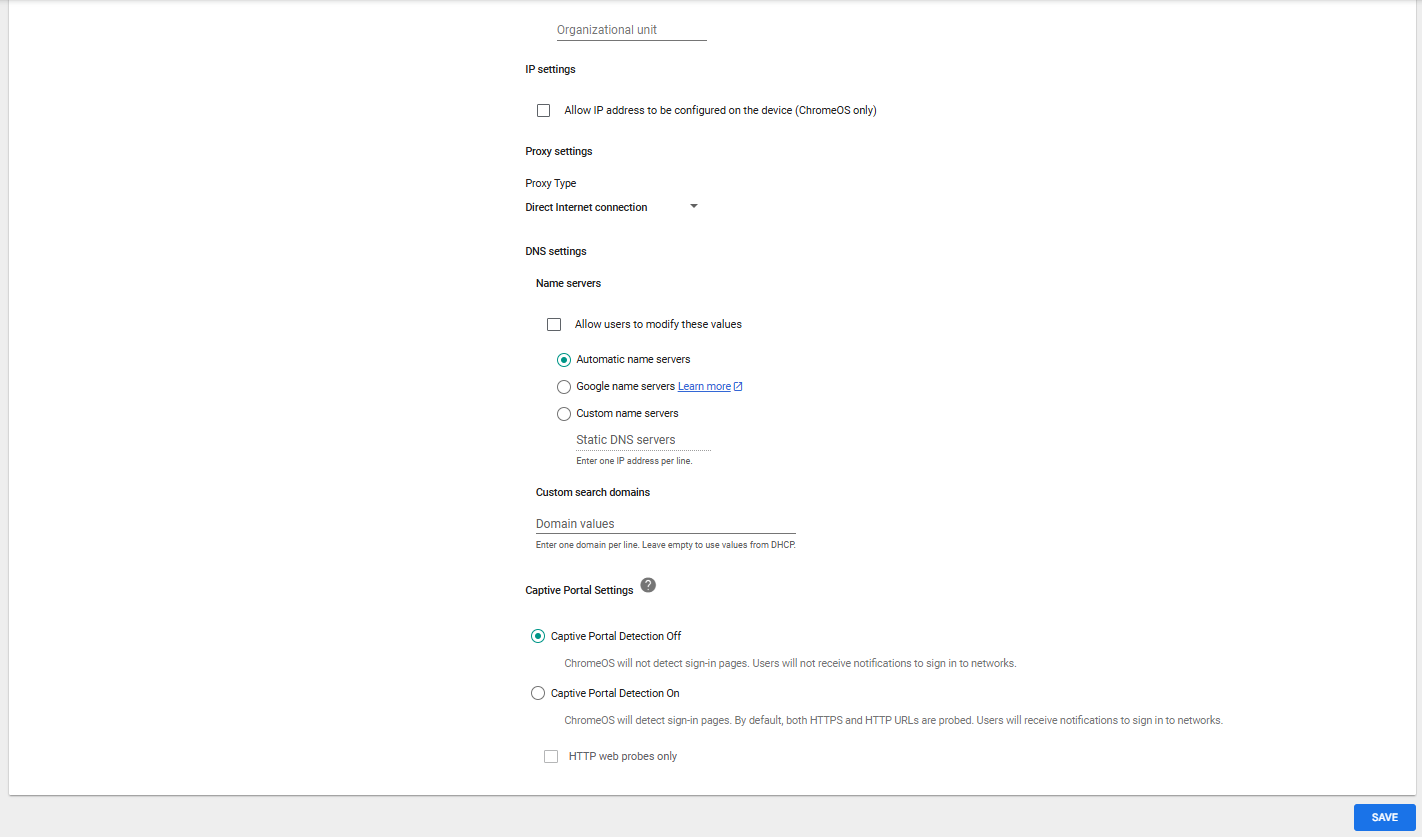
Proxy Settings
- Proxy Type – Direct Internet Connection
-
DNS Settings
- Name Servers – Automatic Name Servers
-
Click ‘Save’
Add WiFi Profile
-
Step 7: Add Connector to Foxpass Console
-
Add Connector by going to the Foxpass Console> RADIUS > SCEP.
-
Click Add Certificate Connector
-
Google Workspace Customer ID – Retrieve Customer ID from Google Admin > Account > Account Settings page.
-
Click ‘Create’

Google Customer ID
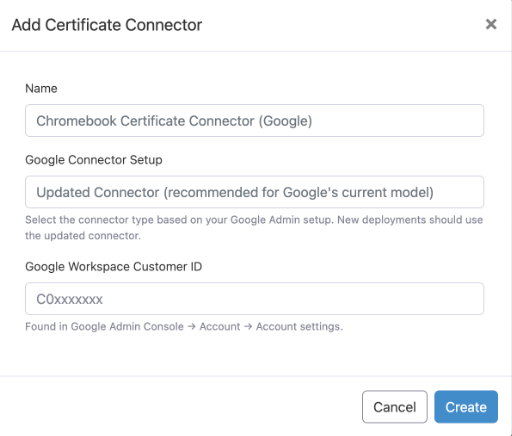
Add Certificate Connector in Foxpass
Chromebook Login
If the settings and configuration of the profiles are correct, you will be automatically connected to your Wi-Fi.
- To review certificates, go to chrome://certificate-manager in Google Chrome.
- Next to the request that contains the name of the SCEP profile that you just set up, click More. You can visually see the progress of getting the certificate, if it hasn’t already completed.
- The new issued Certificate will also show up under Client certificates section of the EAP-TLS page in Foxpass Console.
Updated 15 days ago