
Intune (Initial Setup)
Setting up Intune for the first time
Create a new Azure AD Application that can verify your Intune requests.
Register an application
In your Azure Portal, go to App Registrations and create a new Registration.
You may name it Foxpass-Intune-Verification and select this option 'Accounts in this organizational directory only (<Your Company> only - Single tenant)'.
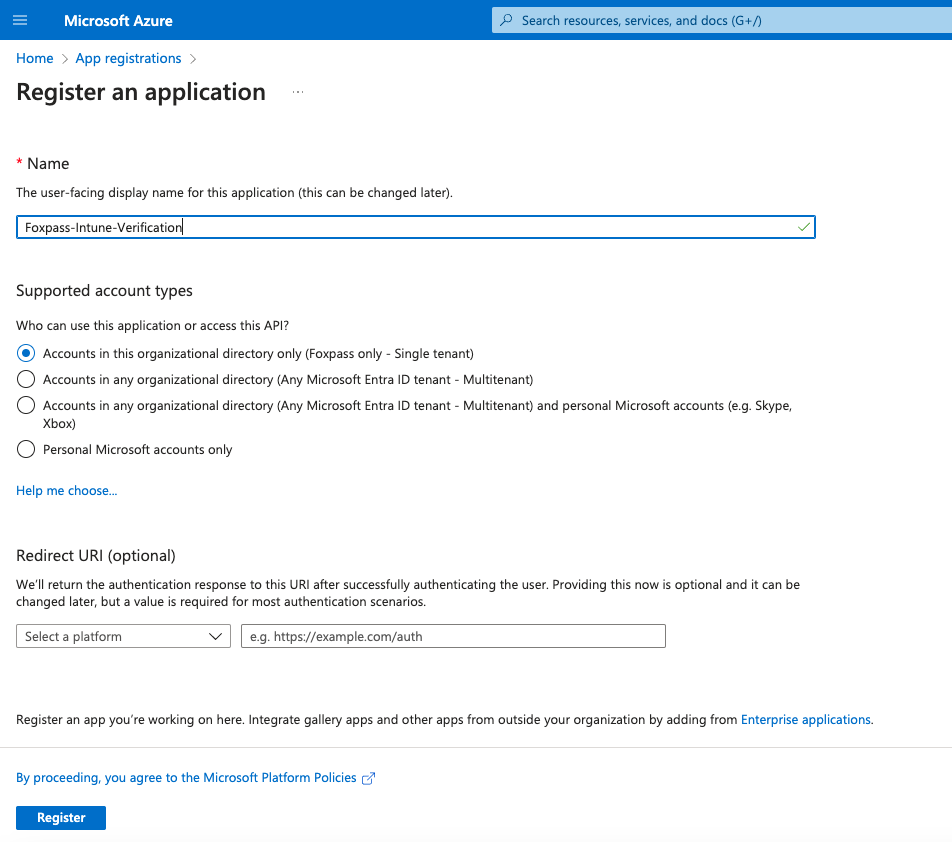
Register an application
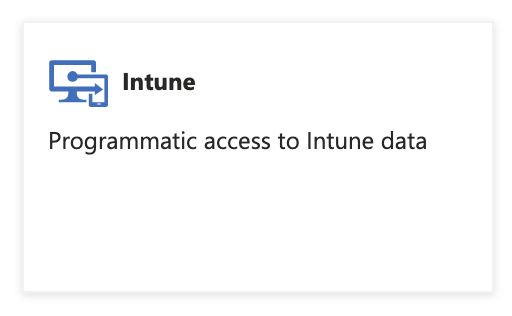
Add permissions
Now, from the list in App Registrations, click on the newly created App. Go to the "API Permissions" page.
Click "Add a Permisson." In the window that appears, choose "Intune"
Then choose Application permissions, and select "scep_challenge_provider"
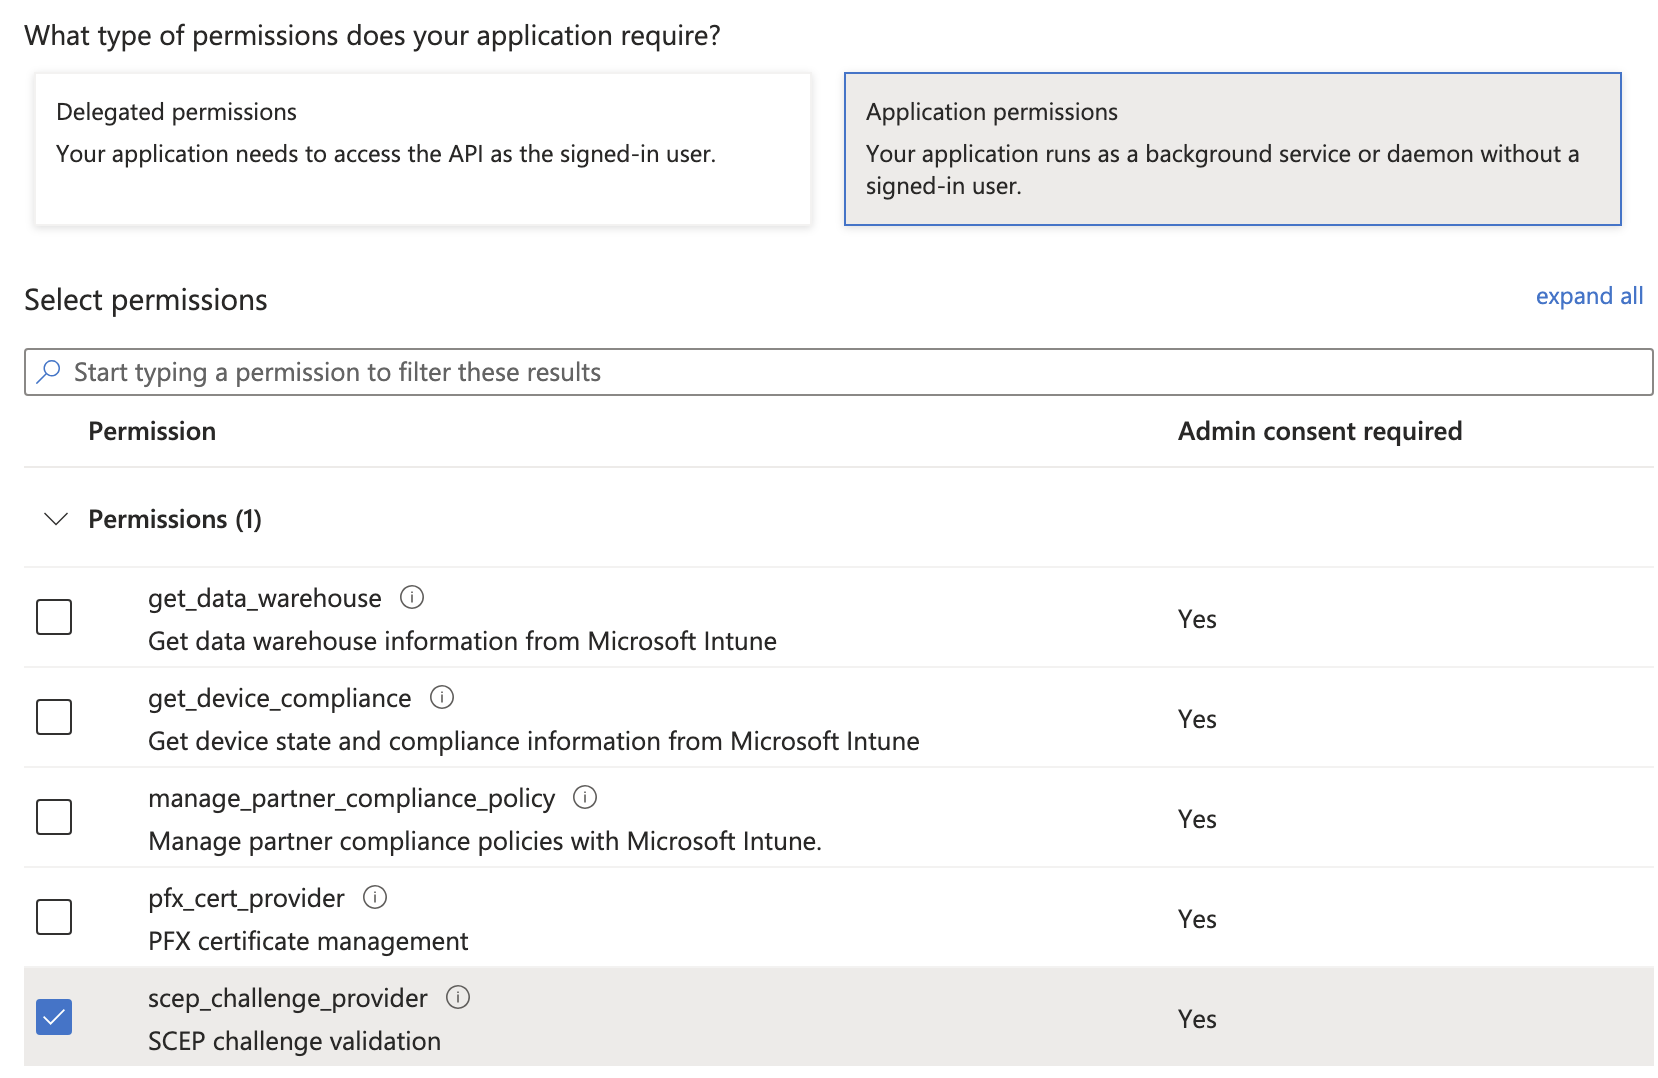
Click the "Add permission" button.
Now add the Application.Read.All permisson. Click "Add a Permission" again.
Click Microsoft Graph

Click "Application permissions"
Then choose Application.Read.All

Push the "Add Permissions" button.
Back on the "API permissions" screen, click on the "Grant admin consent" button on the top of the Permissions page and click 'Yes'.
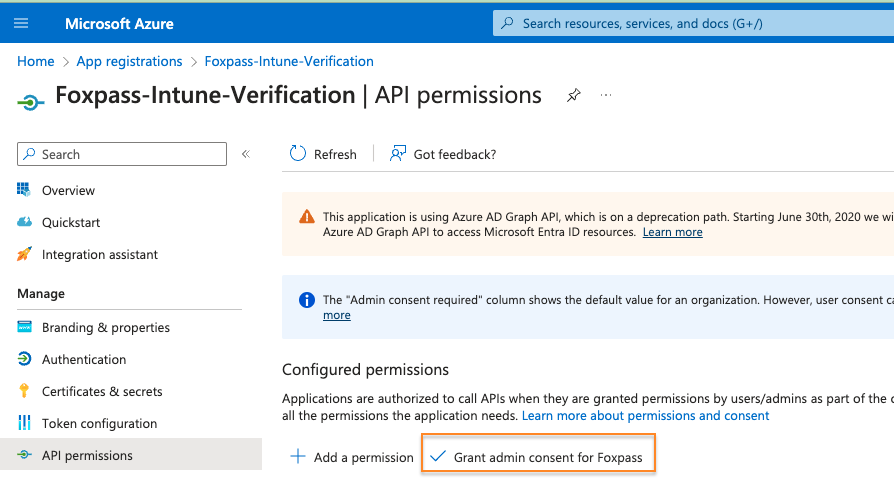
Grant admin consent for Foxpass
Copy Tenant ID, Client ID and Secret value
- Go to the 'Overview' section of your App and copy the Application (client) ID and Directory (tenant) ID.
- Go to the 'Certificates & secrets' section of your App and under 'Client secrets', click on the 'New client secret' button. Copy the secret value - this is your client's secret. Note - Make sure you copy the secret value and not the secret ID.
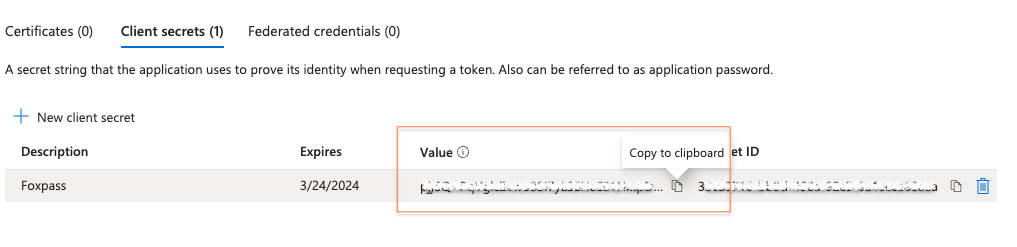
Copy secret value
Create a SCEP endpoint
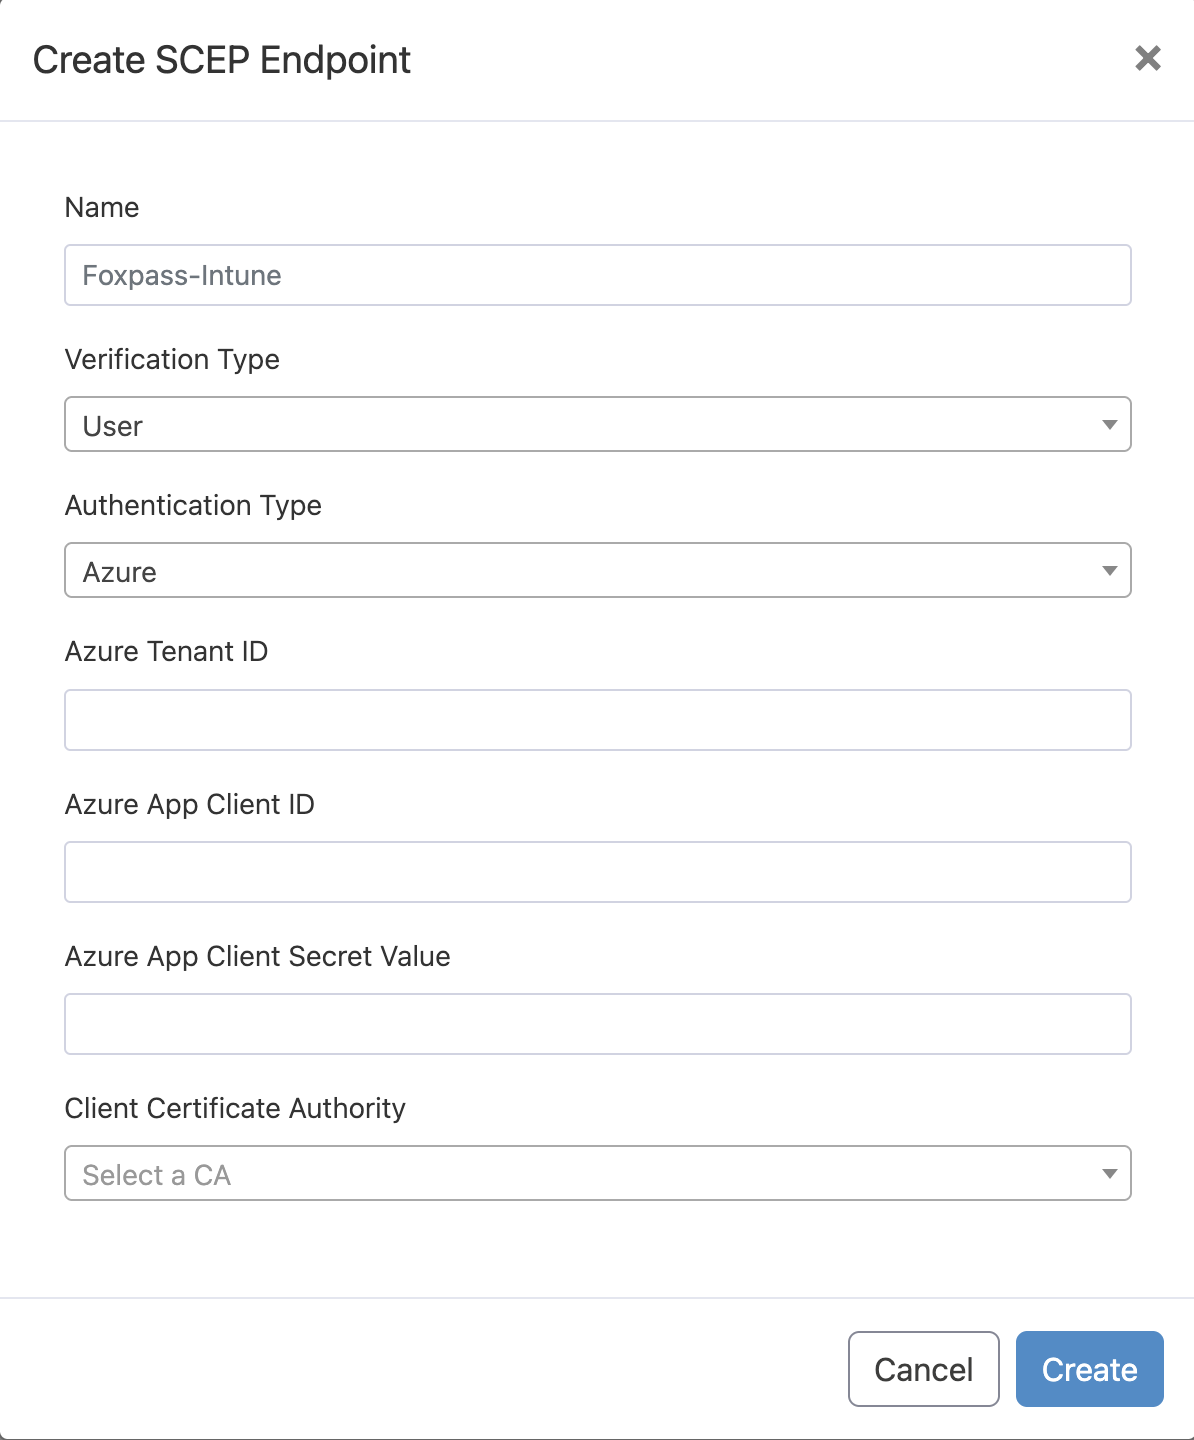
- Go to the Foxpass Console's SCEP page, click on Create SCEP endpoint.
- Name - Give a name to your endpoint.
- Verification type - User
- Authentication type = 'Azure'
- Azure Tenant ID - Paste the Tenant ID copied from Azure
- Azure Client ID - Paste the Client ID copied from Azure
- Azure app client secret - Paste the secret copied from Azure
- Client Certificate Authority - Created in the EAP-TLS Initial setup guide here
- Click 'Create' button.
Create Azure SCEP endpoint
Updated 9 months ago