JAMF PRO SCEP Configuration
Configure EAP-TLS on Foxpass
Please follow the EAP-TLS initial setup guide to create client CA, server CA and SCEP endpoint if not configured already.
SCEP endpoint
Note the SCEP URL and challenge password for SCEP endpoint(if created already) from the SCEP page and proceed to Configure Profile section of this documentation. If SCEP endpoint is not configured refer below for the steps.
- Click 'Create SCEP endpoint' button.
- For JAMF, set verification type to 'None'.
- Authentication Type - Challenge password
- Client Certificate Authority - Select Client CA from the dropdown.
- Click 'Create' button.
- SCEP endpoint is created.
- Note the unique endpoint. It will be mentioned below 'Unique Endpoint' heading.
- Note the challenge password.

Note the URL and challenge password
Configure Profile - User or Device
Depending on your use case, you can configure either a user certificate or a device certificate.
Option 1: User certificate
If you wish to configure a user certificate profile, settings are below:
- In JAMF, go to Computers > Configuration Profiles > Click 'New'.

Create new Profile for User certificate
- Name - <e.g. Foxpass >
- Level - User Level
- Distribution Method - Install Automatically
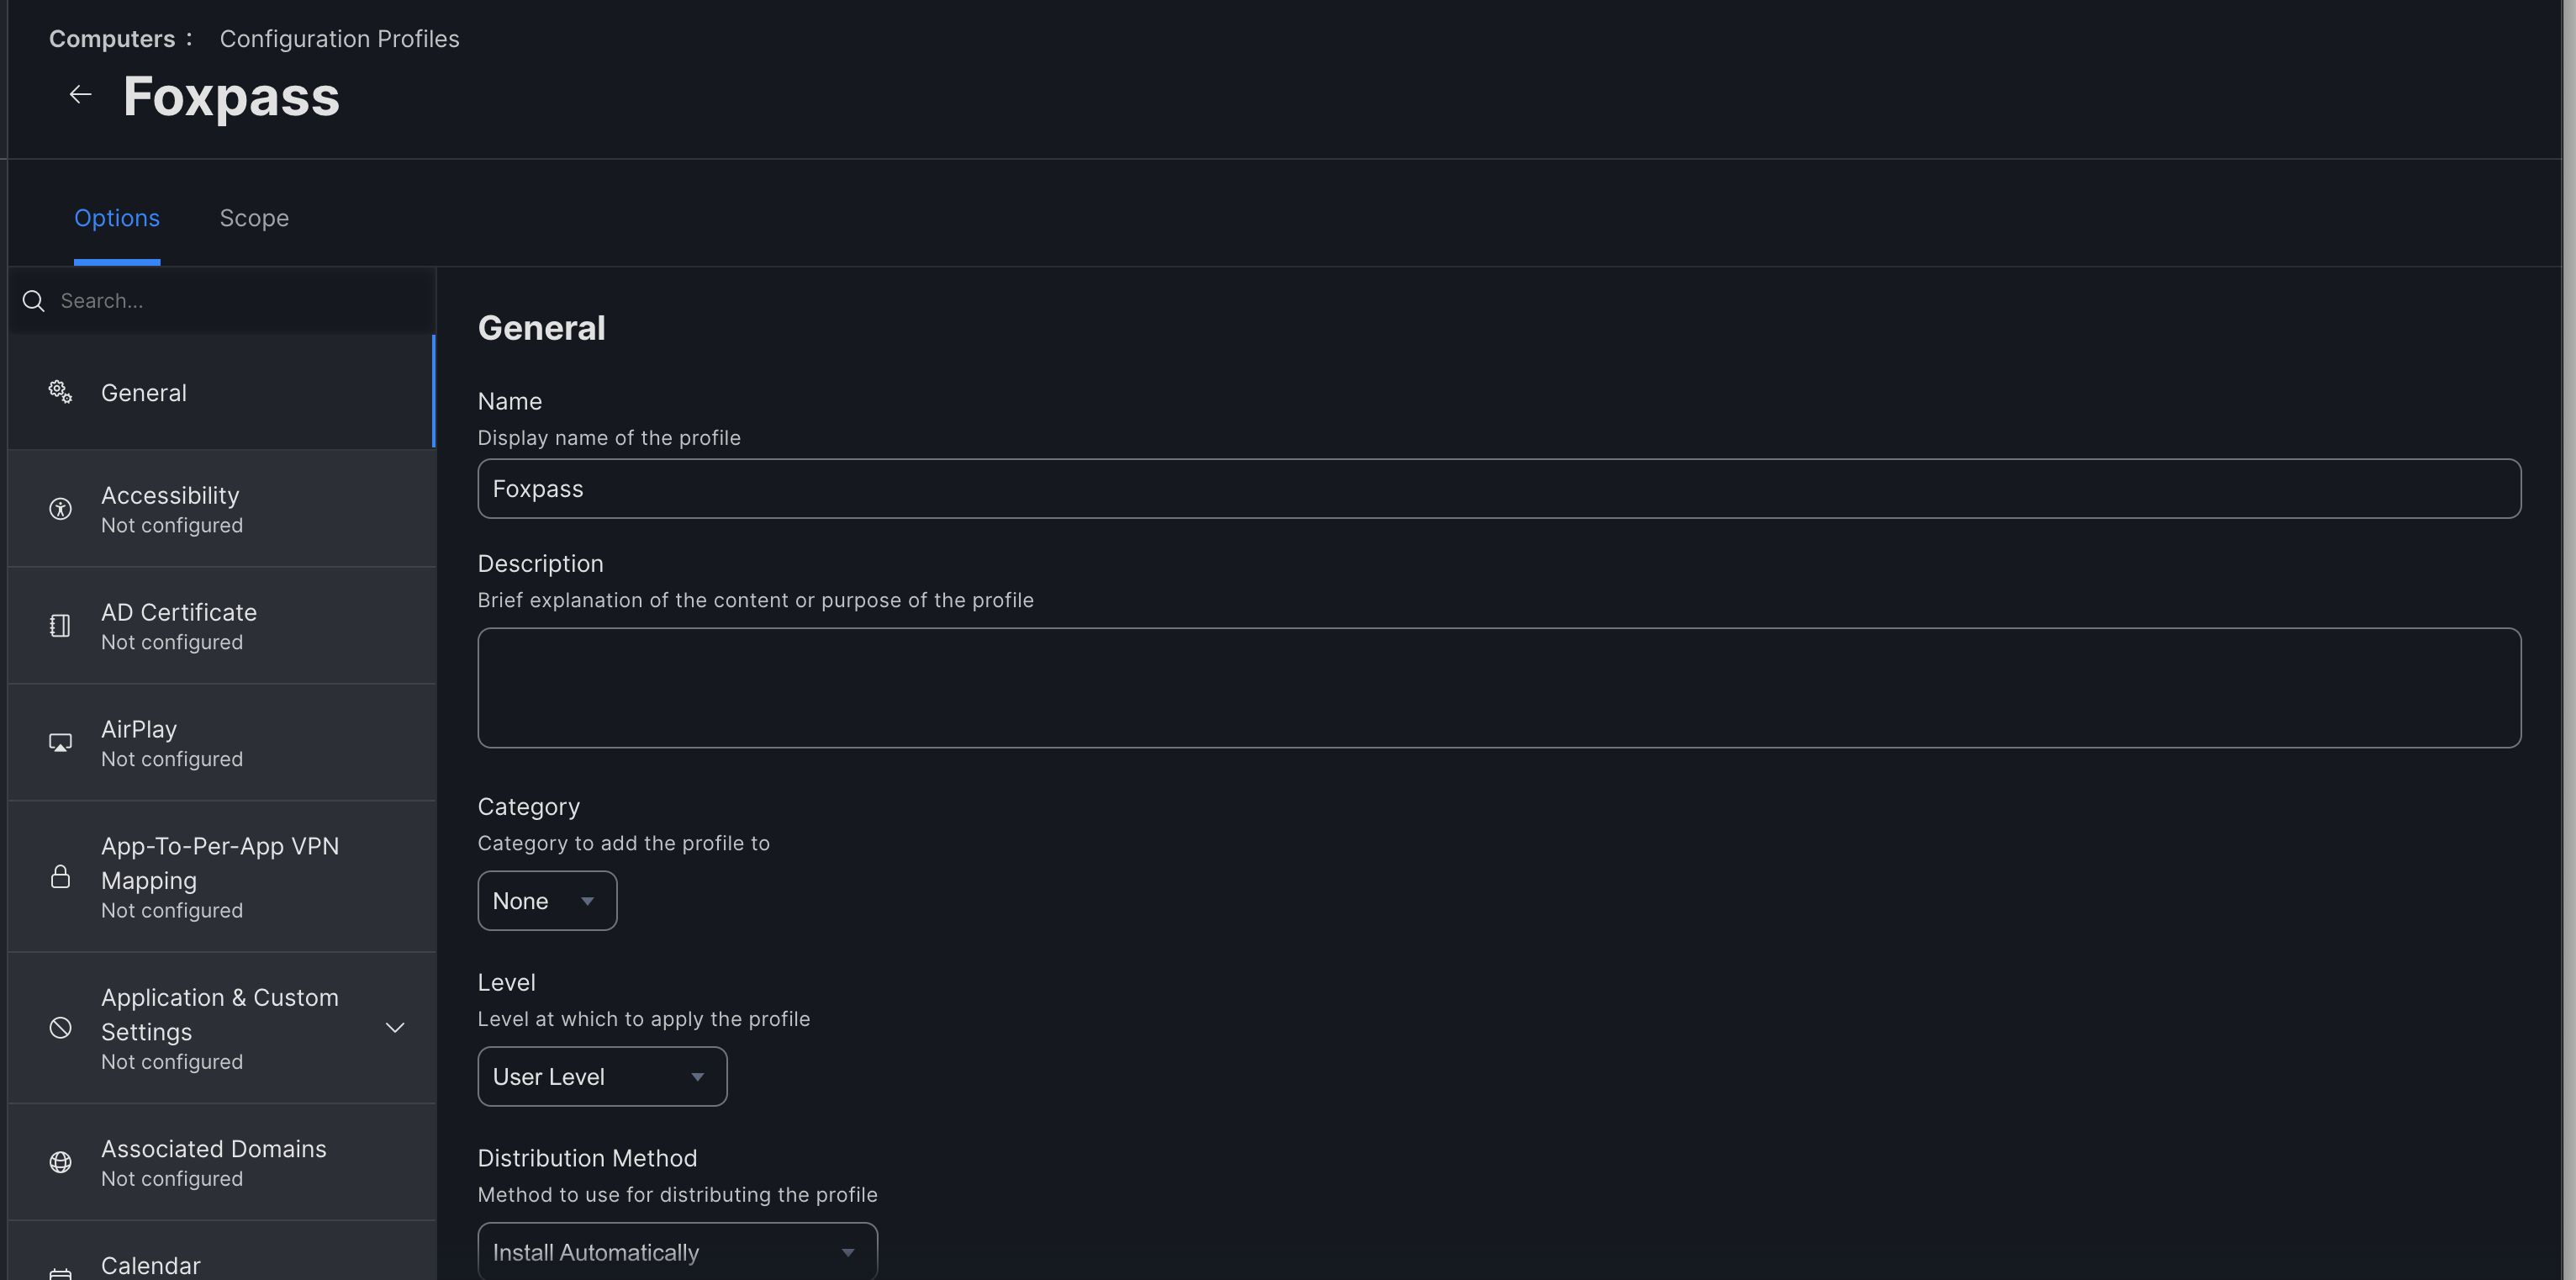
Configure Profile
Configure SCEP Payload
- Click on the SCEP option > Configure.
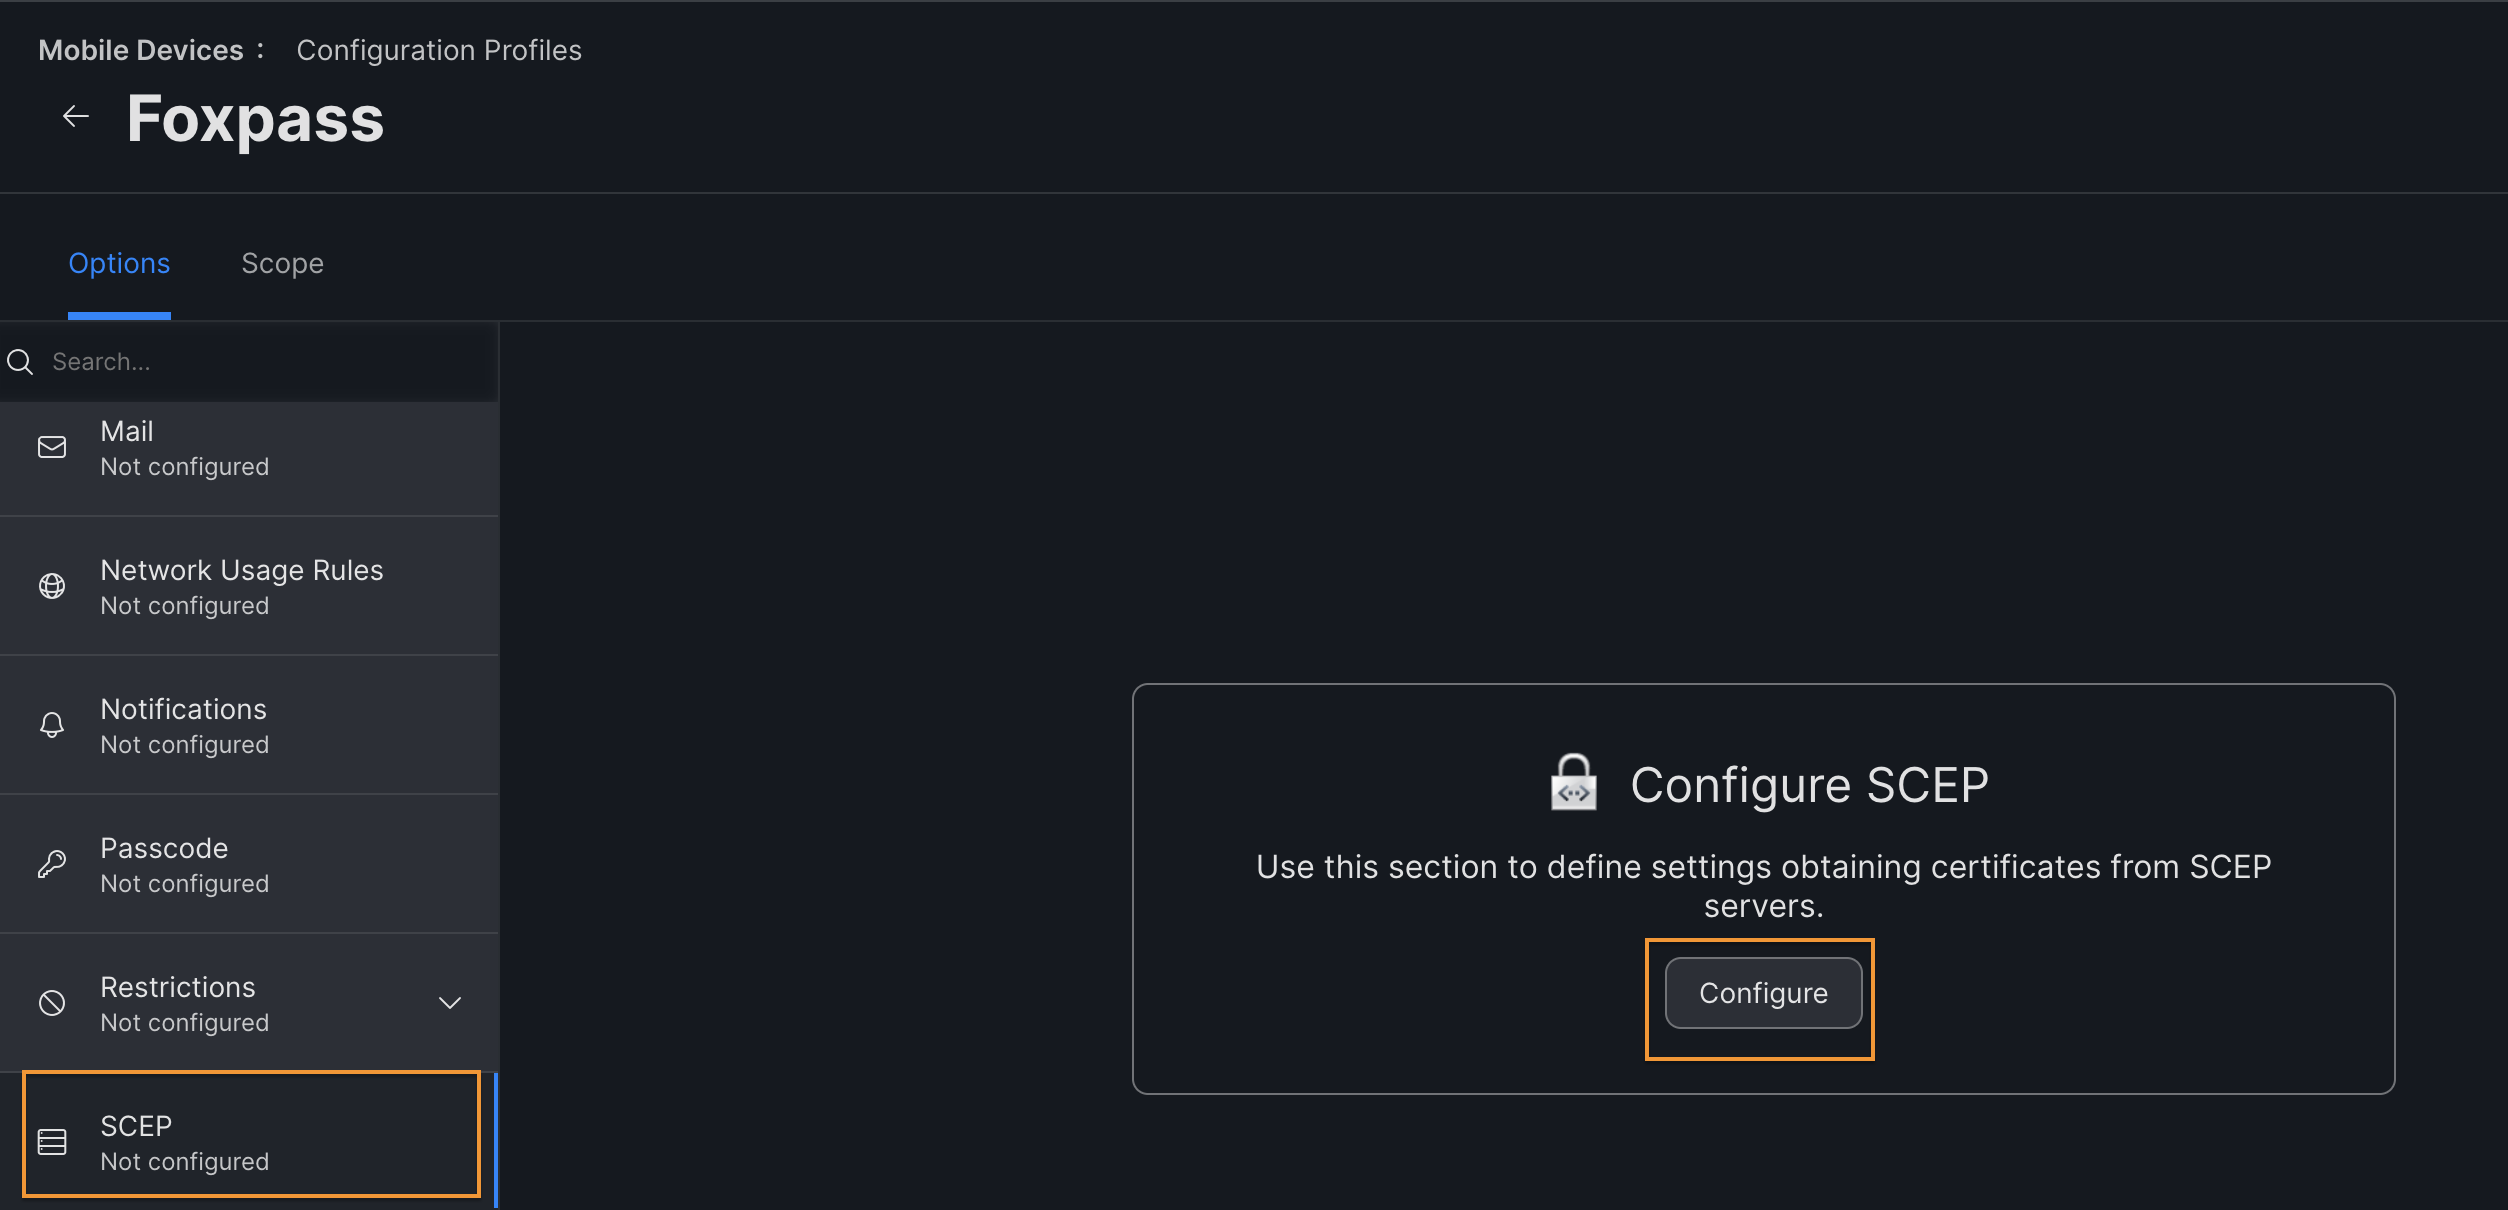
Configure SCEP
Email Address is required!Make sure that every user in JAMF has an email address associated with their profile.
- Name - Name of your choice
- Redistribute profile - 30 days
- Subject - CN=$EMAIL
- Subject Alternative Name Type - RFC 822 Name
- Subject Alternative Name Value - $EMAIL
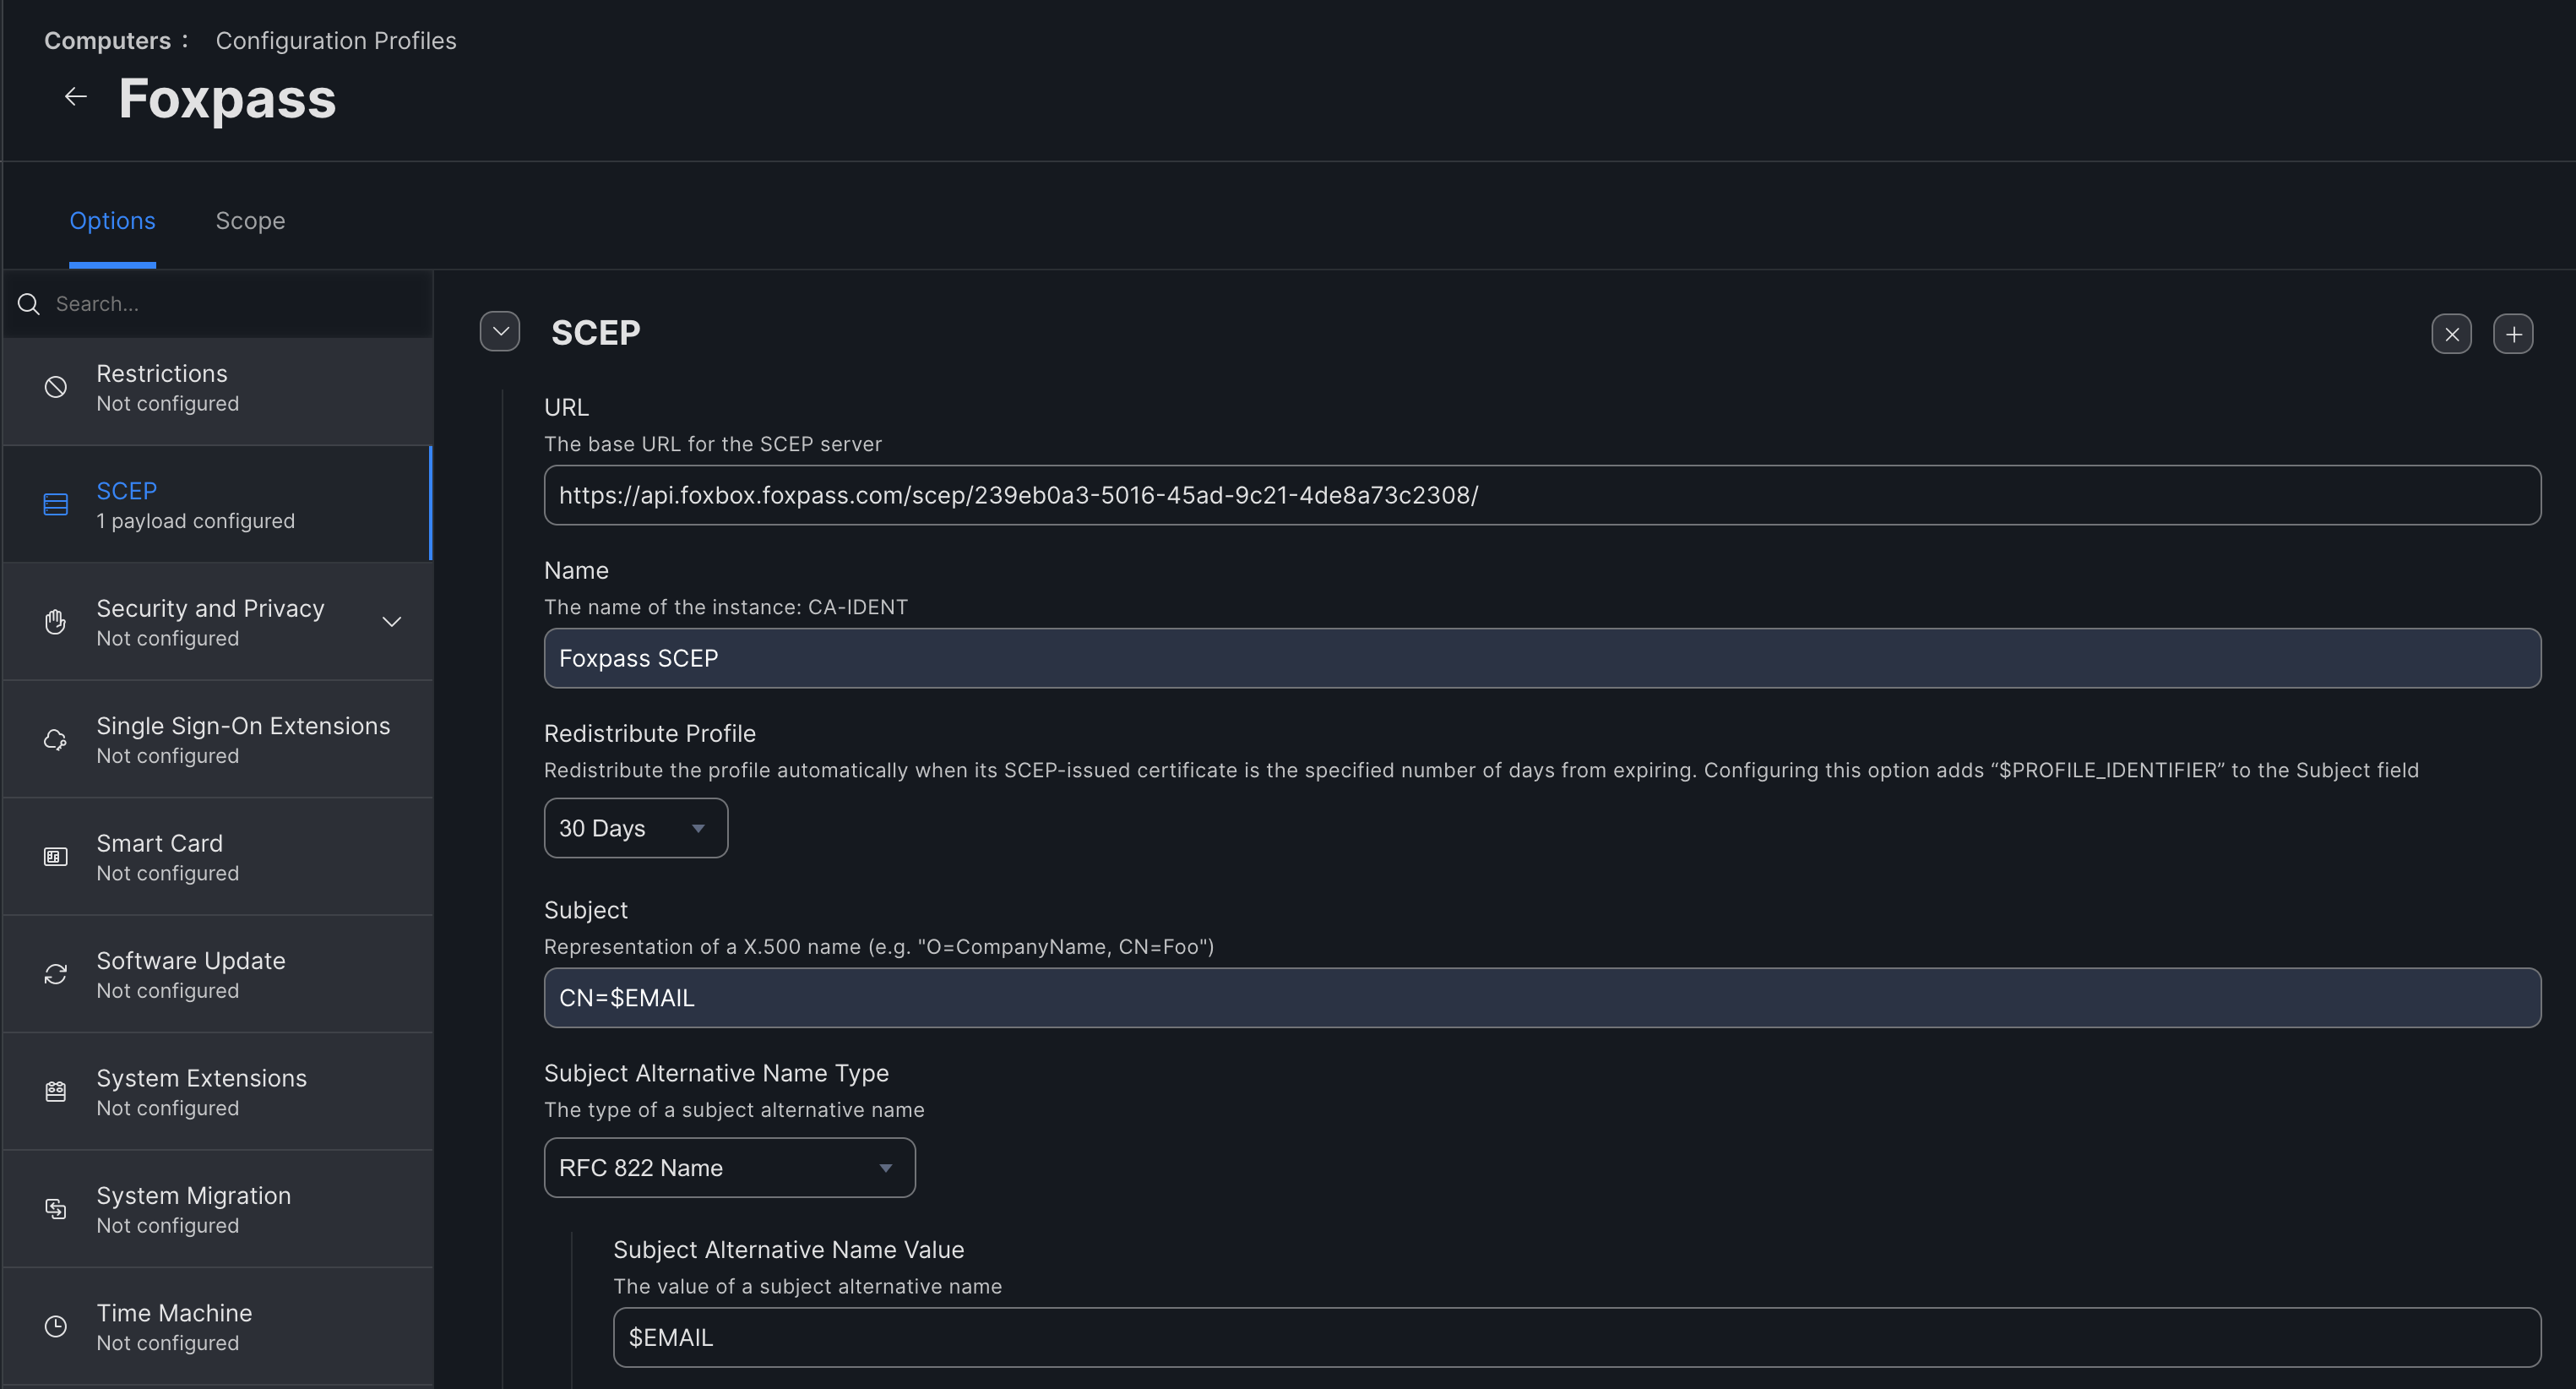
Configure SCEP
- Challenge Type - Static
- Challenge - Copy the challenge password from the SCEP page and paste.
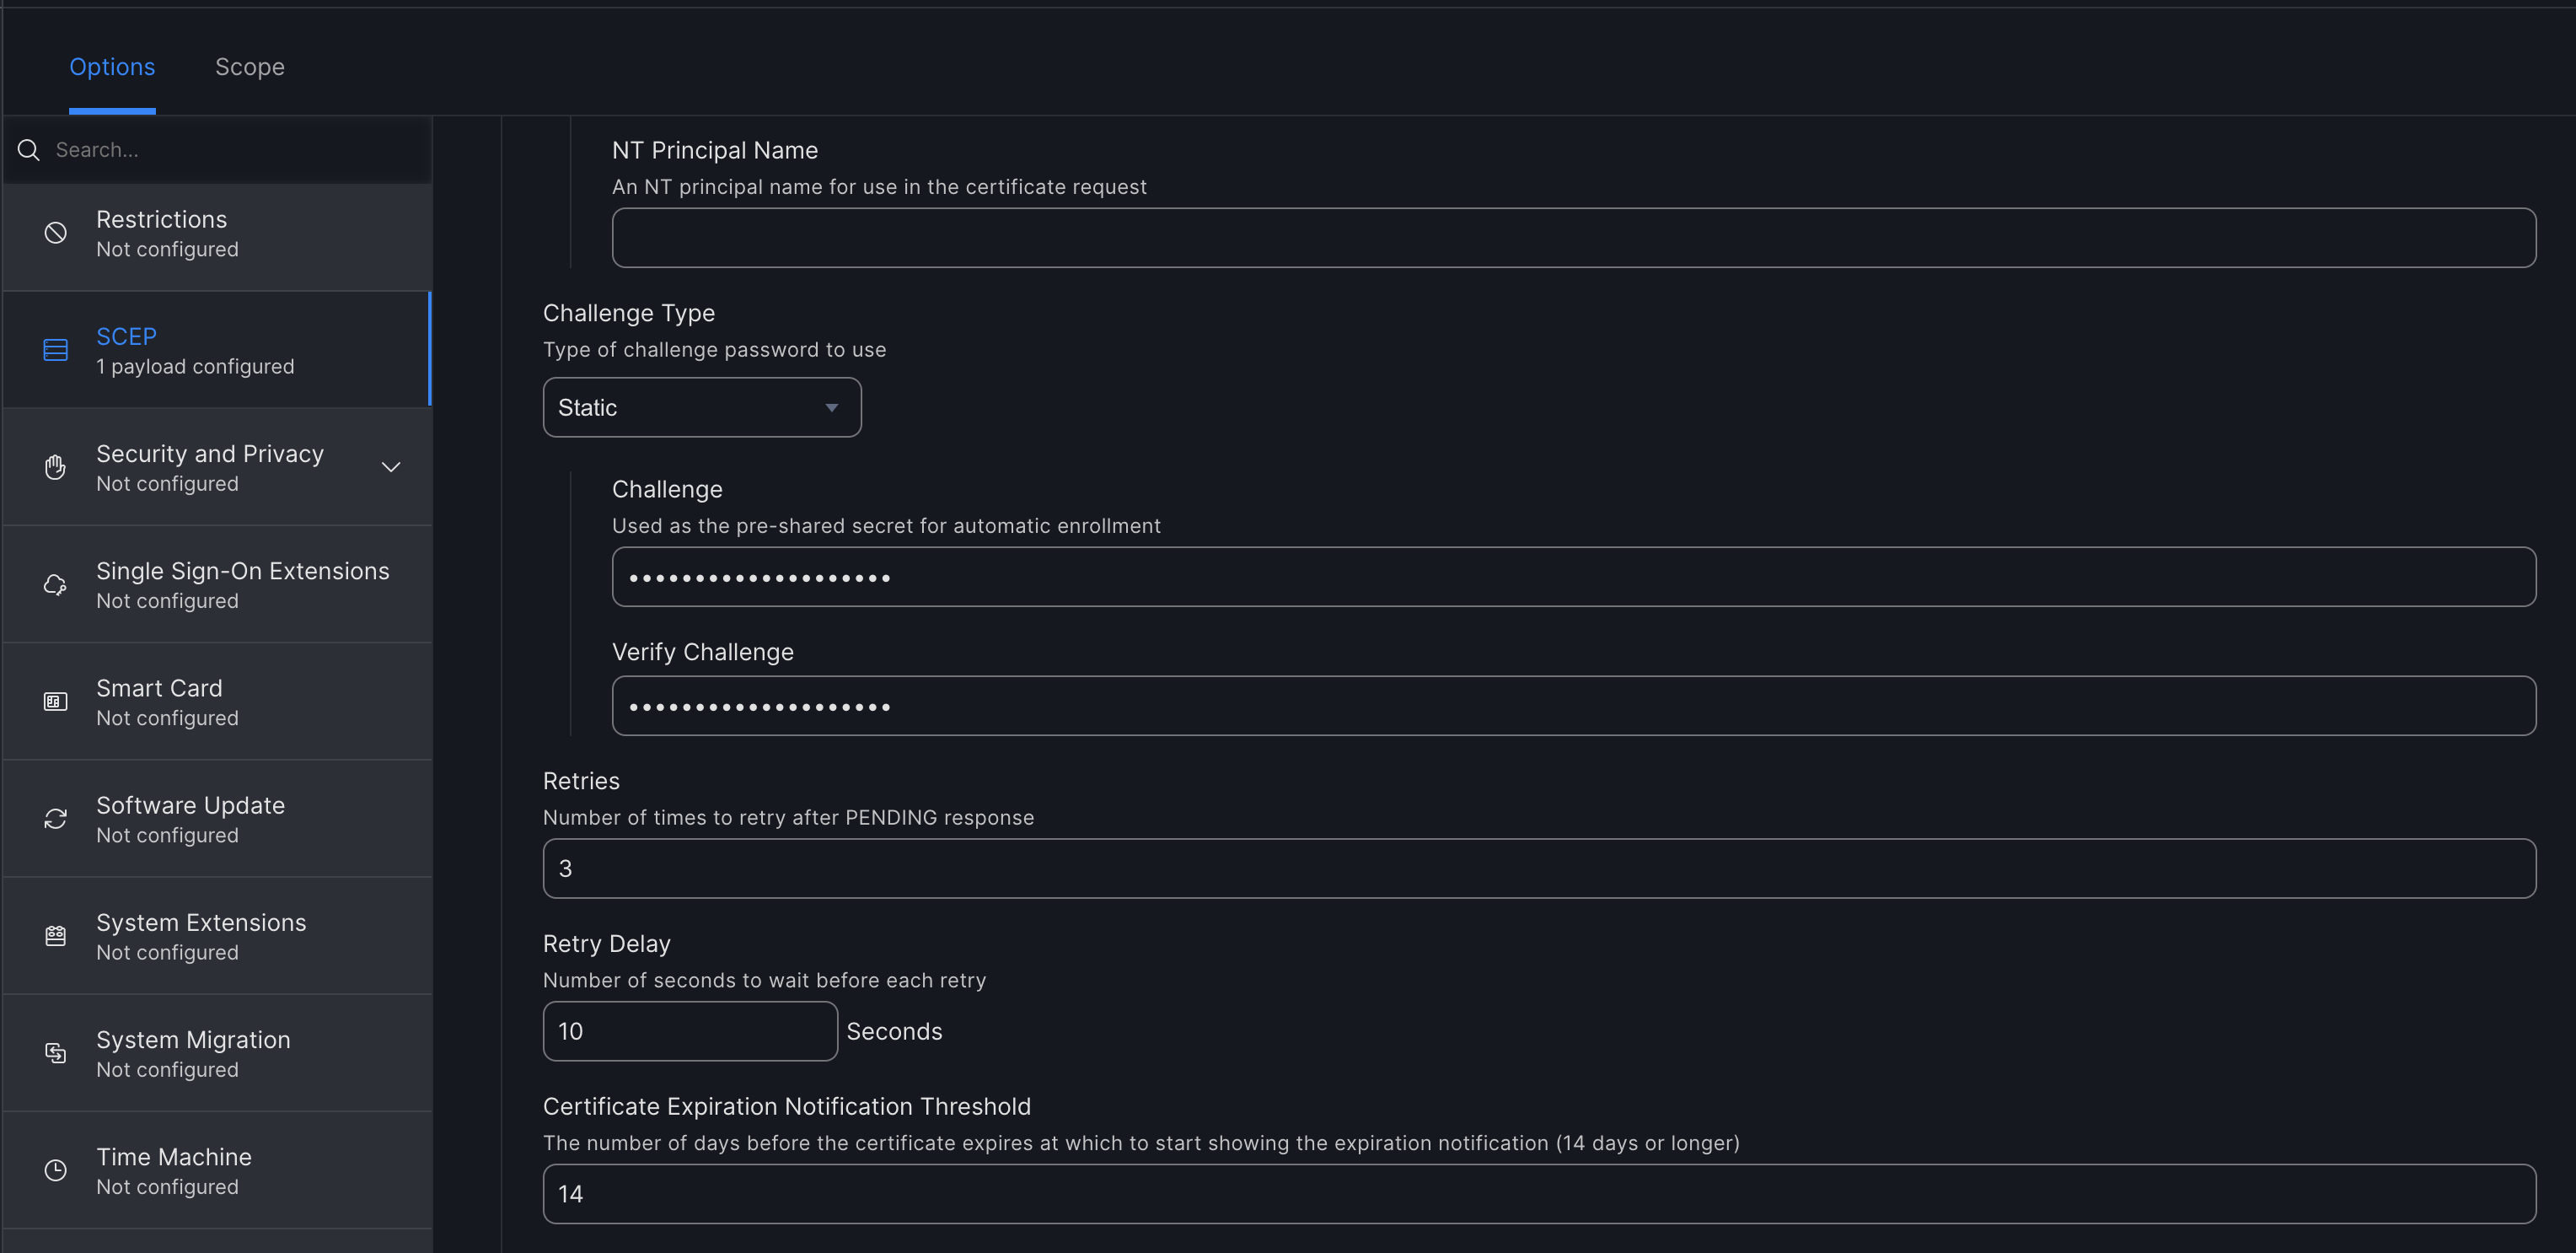
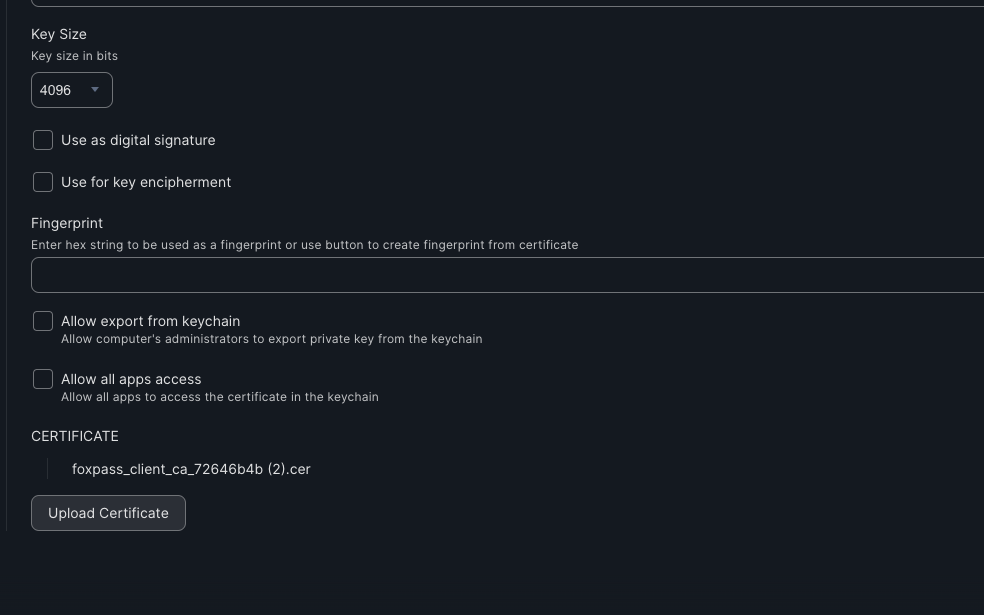
- Key Size - 4096
- Make sure "Allow export from keychain" is unchecked.
- Fingerprint - Click 'Upload Certificate' and select the client CA certificate you downloaded earlier.
- Click 'Save'.
Option 2: Device certificate
To configure the Device certificate type, you have two options: either Sync devices from JAMF on the Devices page, or select 'None' for the verification type when creating an SCEP endpoint on the SCEP page.
If you wish to configure a device certificate profile, settings are below:
- In JAMF, go to Computers > Configuration Profiles > Click 'New'.

Create new Profile for device certificate
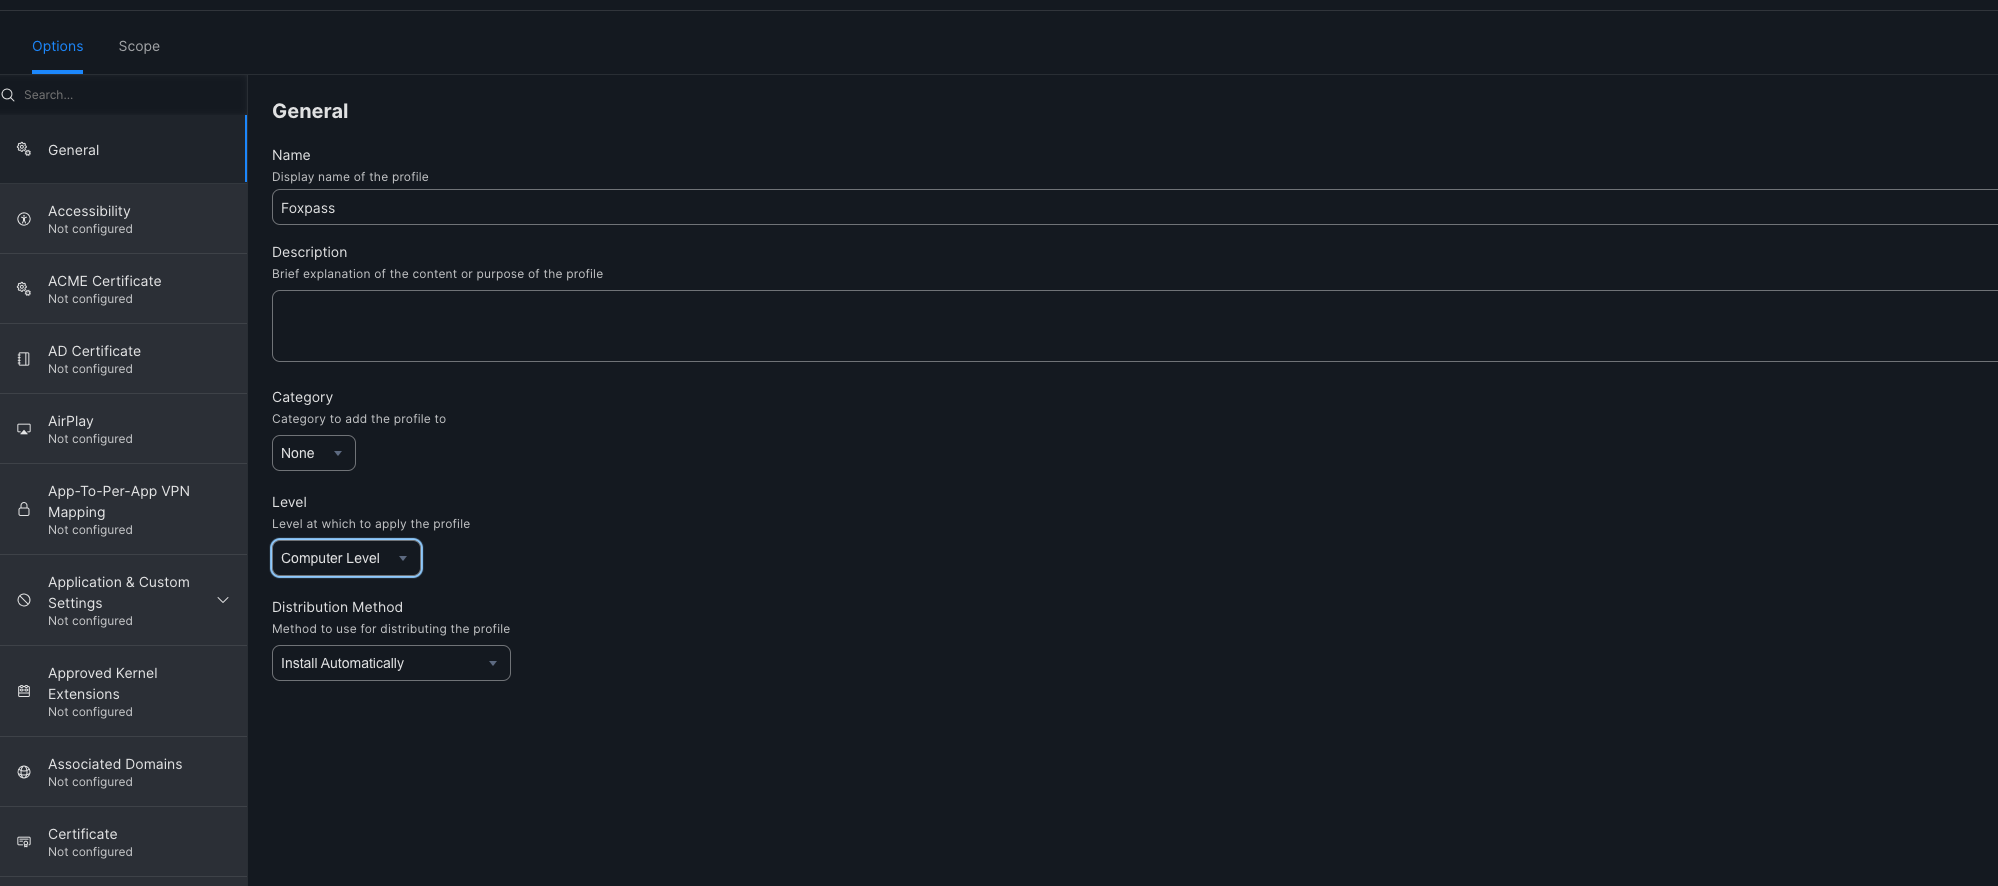
- Name - <e.g. Foxpass >
- Level - Computer Level
- Distribution Method - Install Automatically
Configure Profile
Configure SCEP Payload
- Click on the SCEP option > Configure.

Configure SCEP
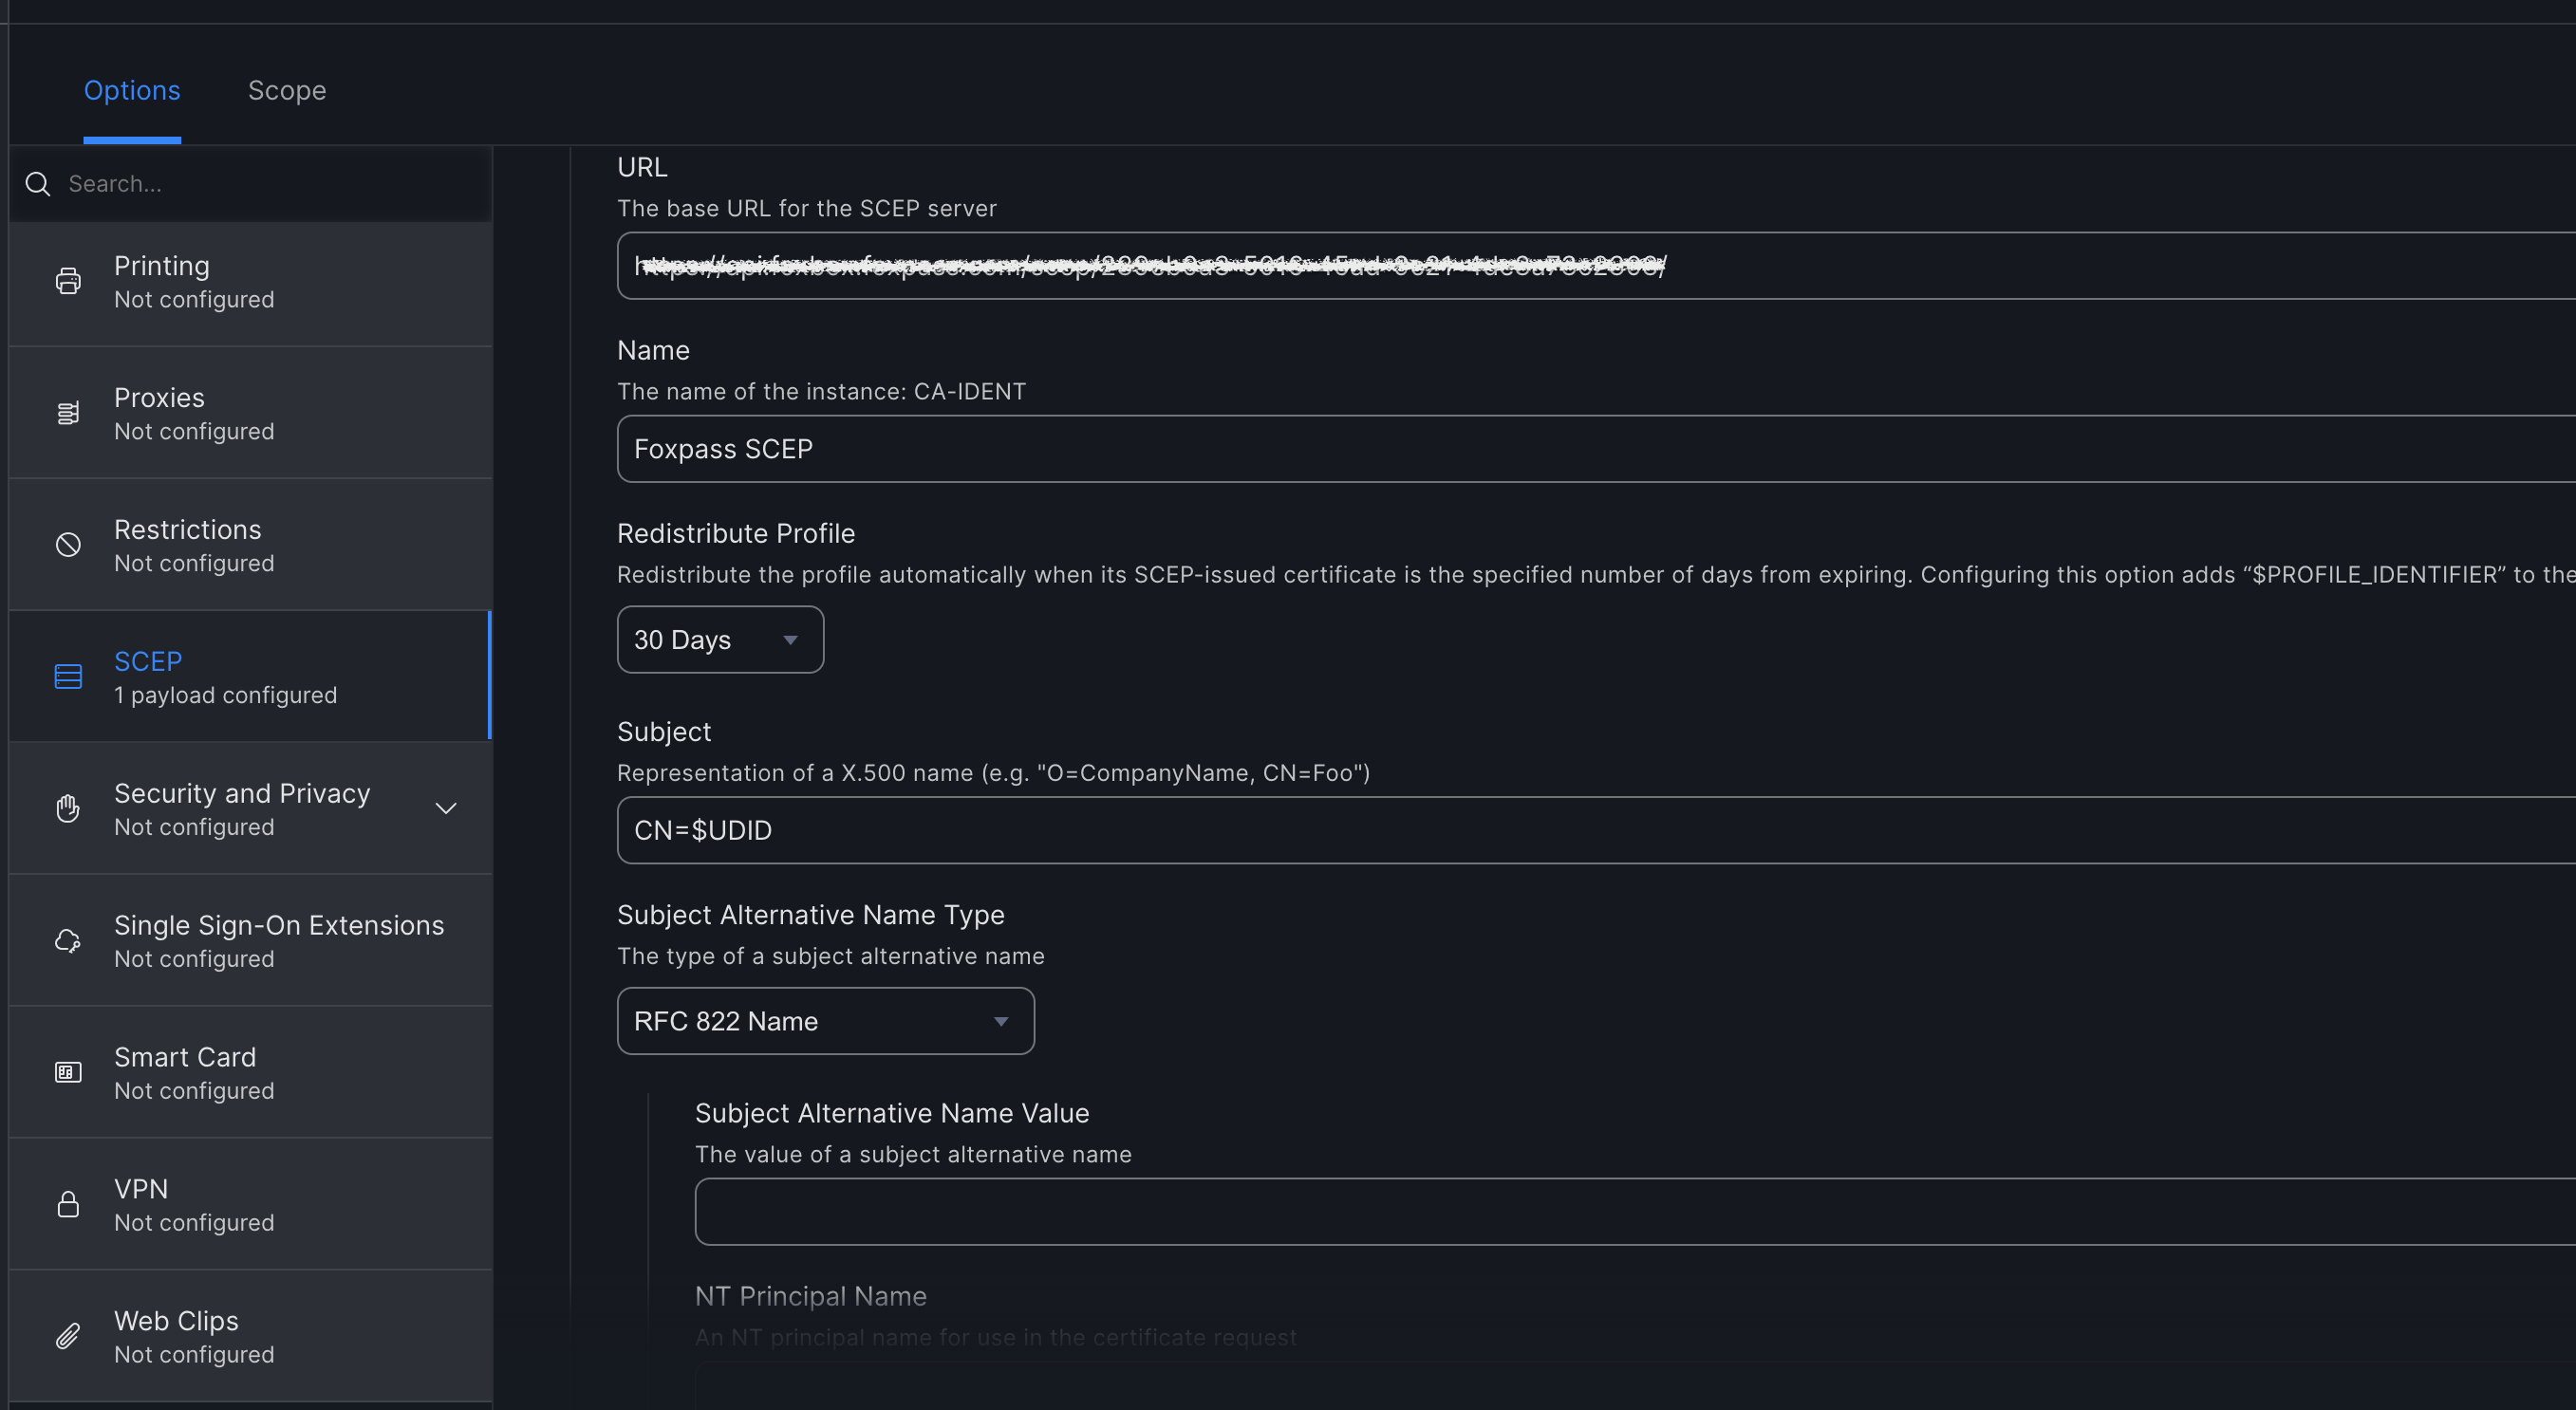
- URL - Paste the SCEP unique endpoint URL noted earlier.
- Name - Name of your choice. For e.g. <Foxpass SCEP>
- Redistribute profile - Never
- Subject - CN=$UDID
- Subject Alternative Name Type - RFC 822 Name
- Subject Alternative Name Value - Leave it blank
Configure SCEP
- Challenge Type - Static
- Challenge - Paste the challenge password noted earlier.

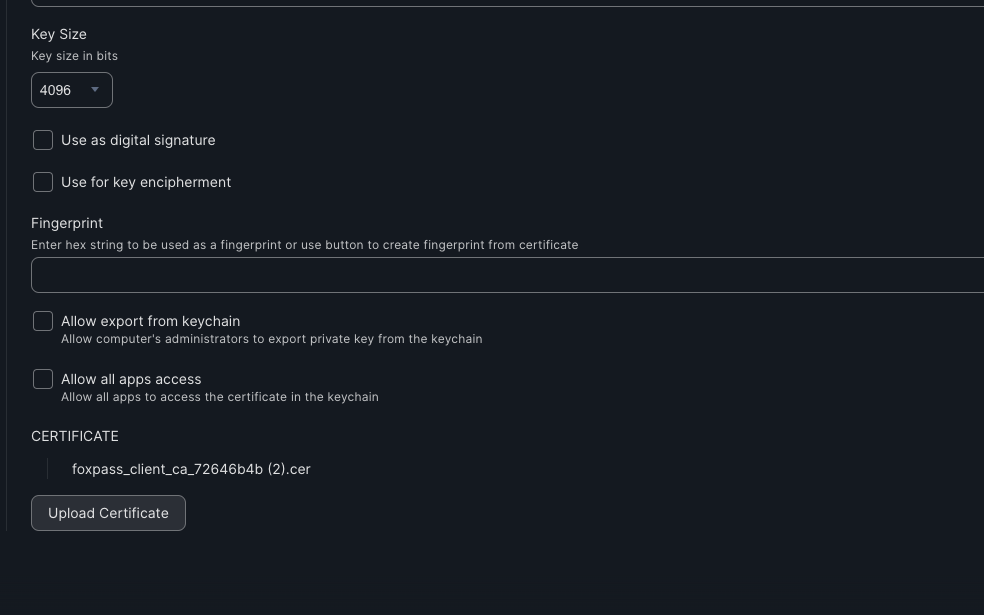
- Key Size - 4096
- Make sure "Allow export from keychain" is unchecked.
- Fingerprint - Click 'Upload Certificate' and select the client CA certificate you downloaded earlier. Note : Make sure you upload the client CA referenced in your SCEP endpoint.
- Click 'Save'.
Configure Certificate Payload
After configuring profile for user level or device level, proceed to certificate payload.
- Click on 'Certificate' option and then Configure.
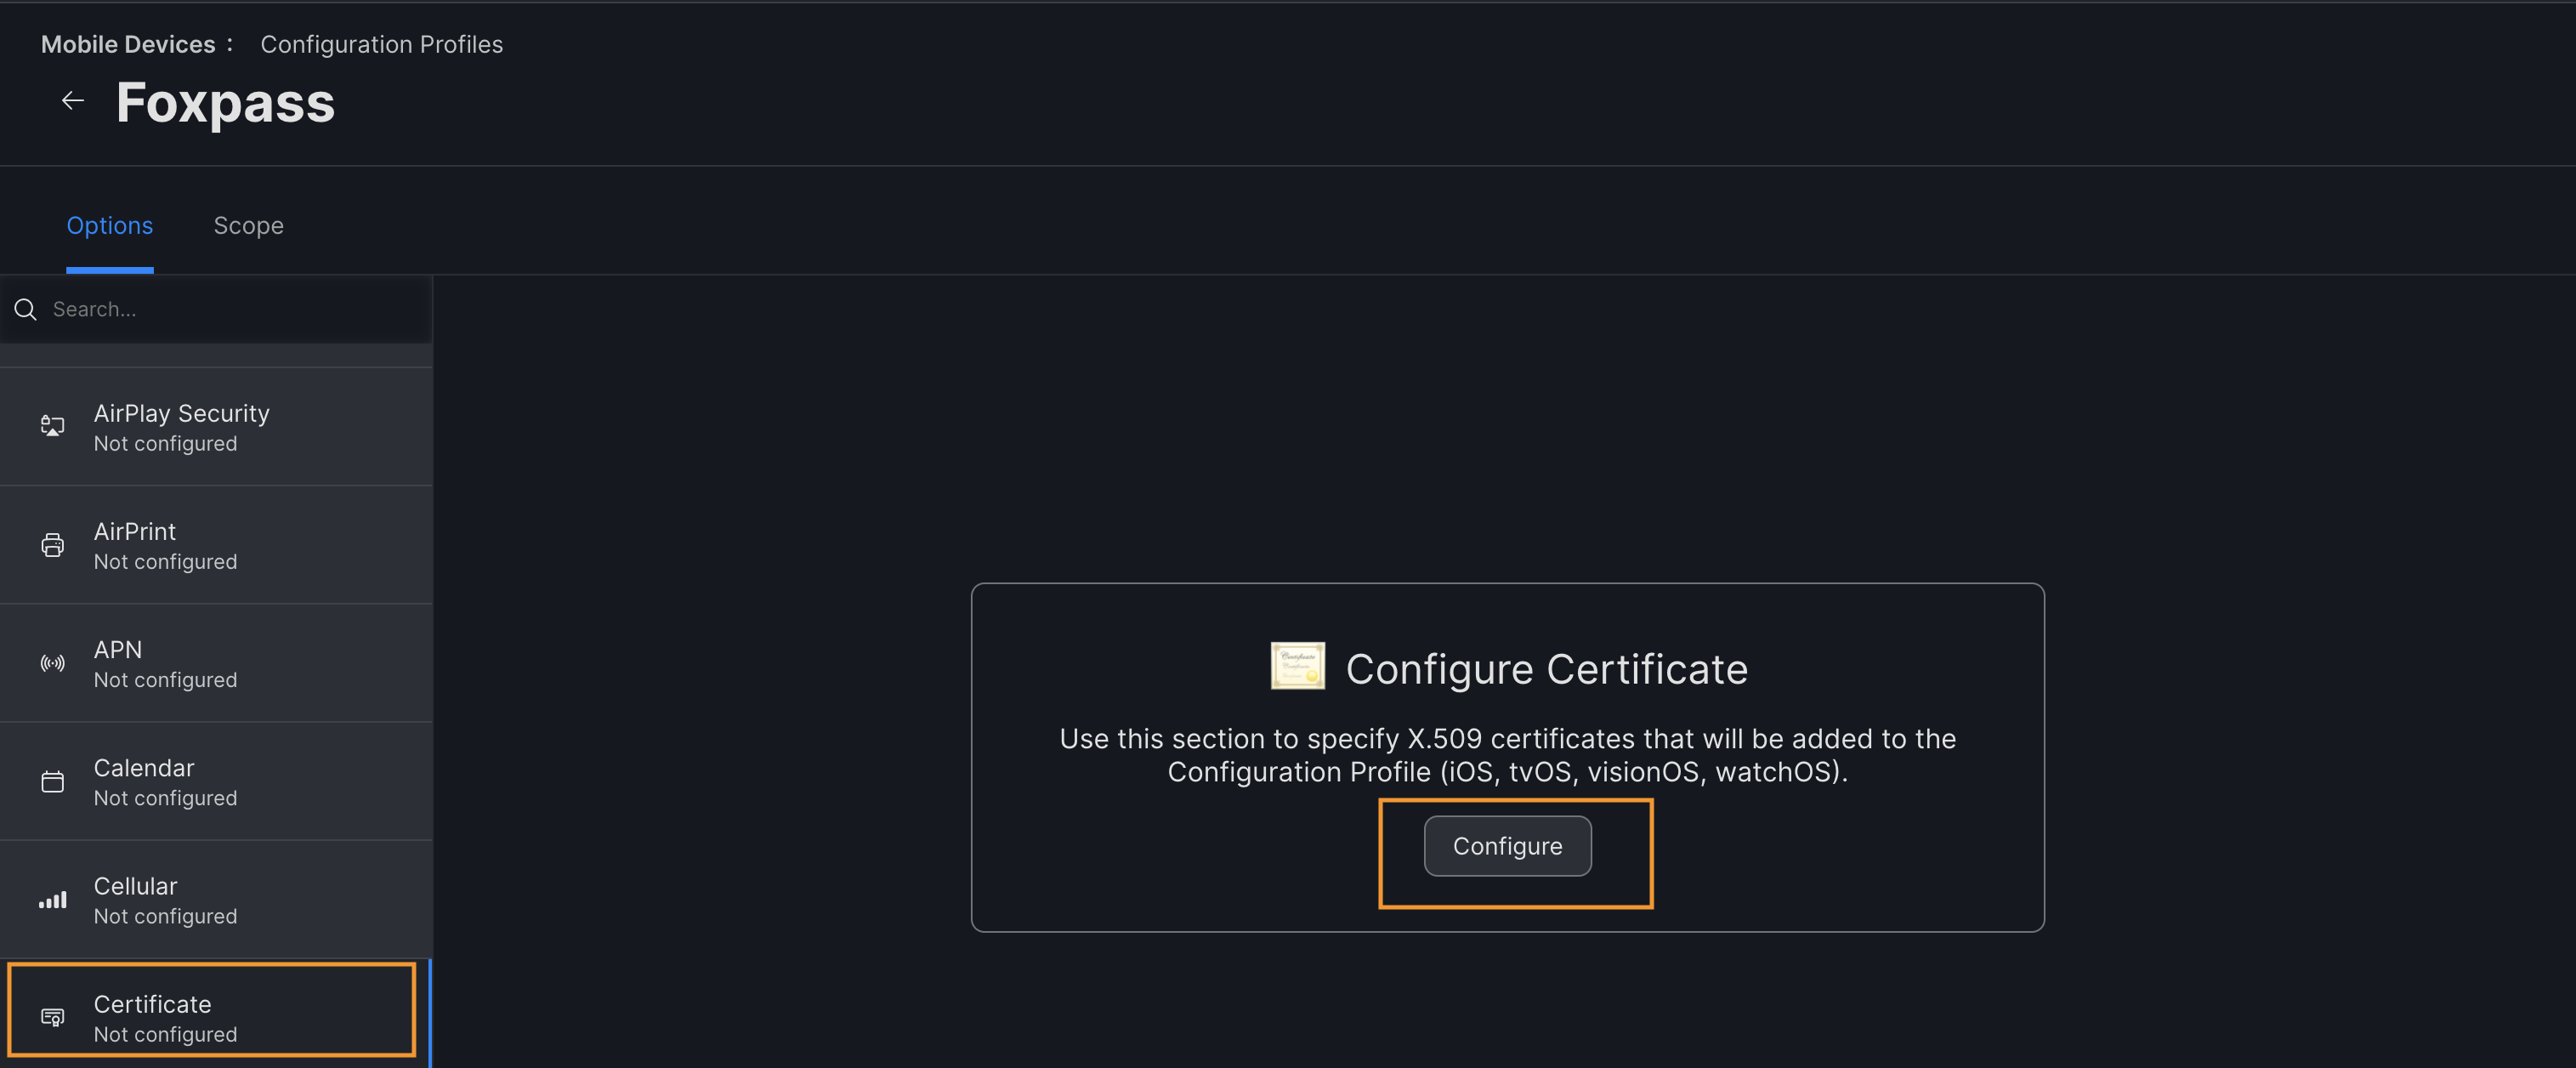
Configure certificate
- Give a name to the certificate.
- Upload the previously downloaded Server CA.
- Click 'Save'.
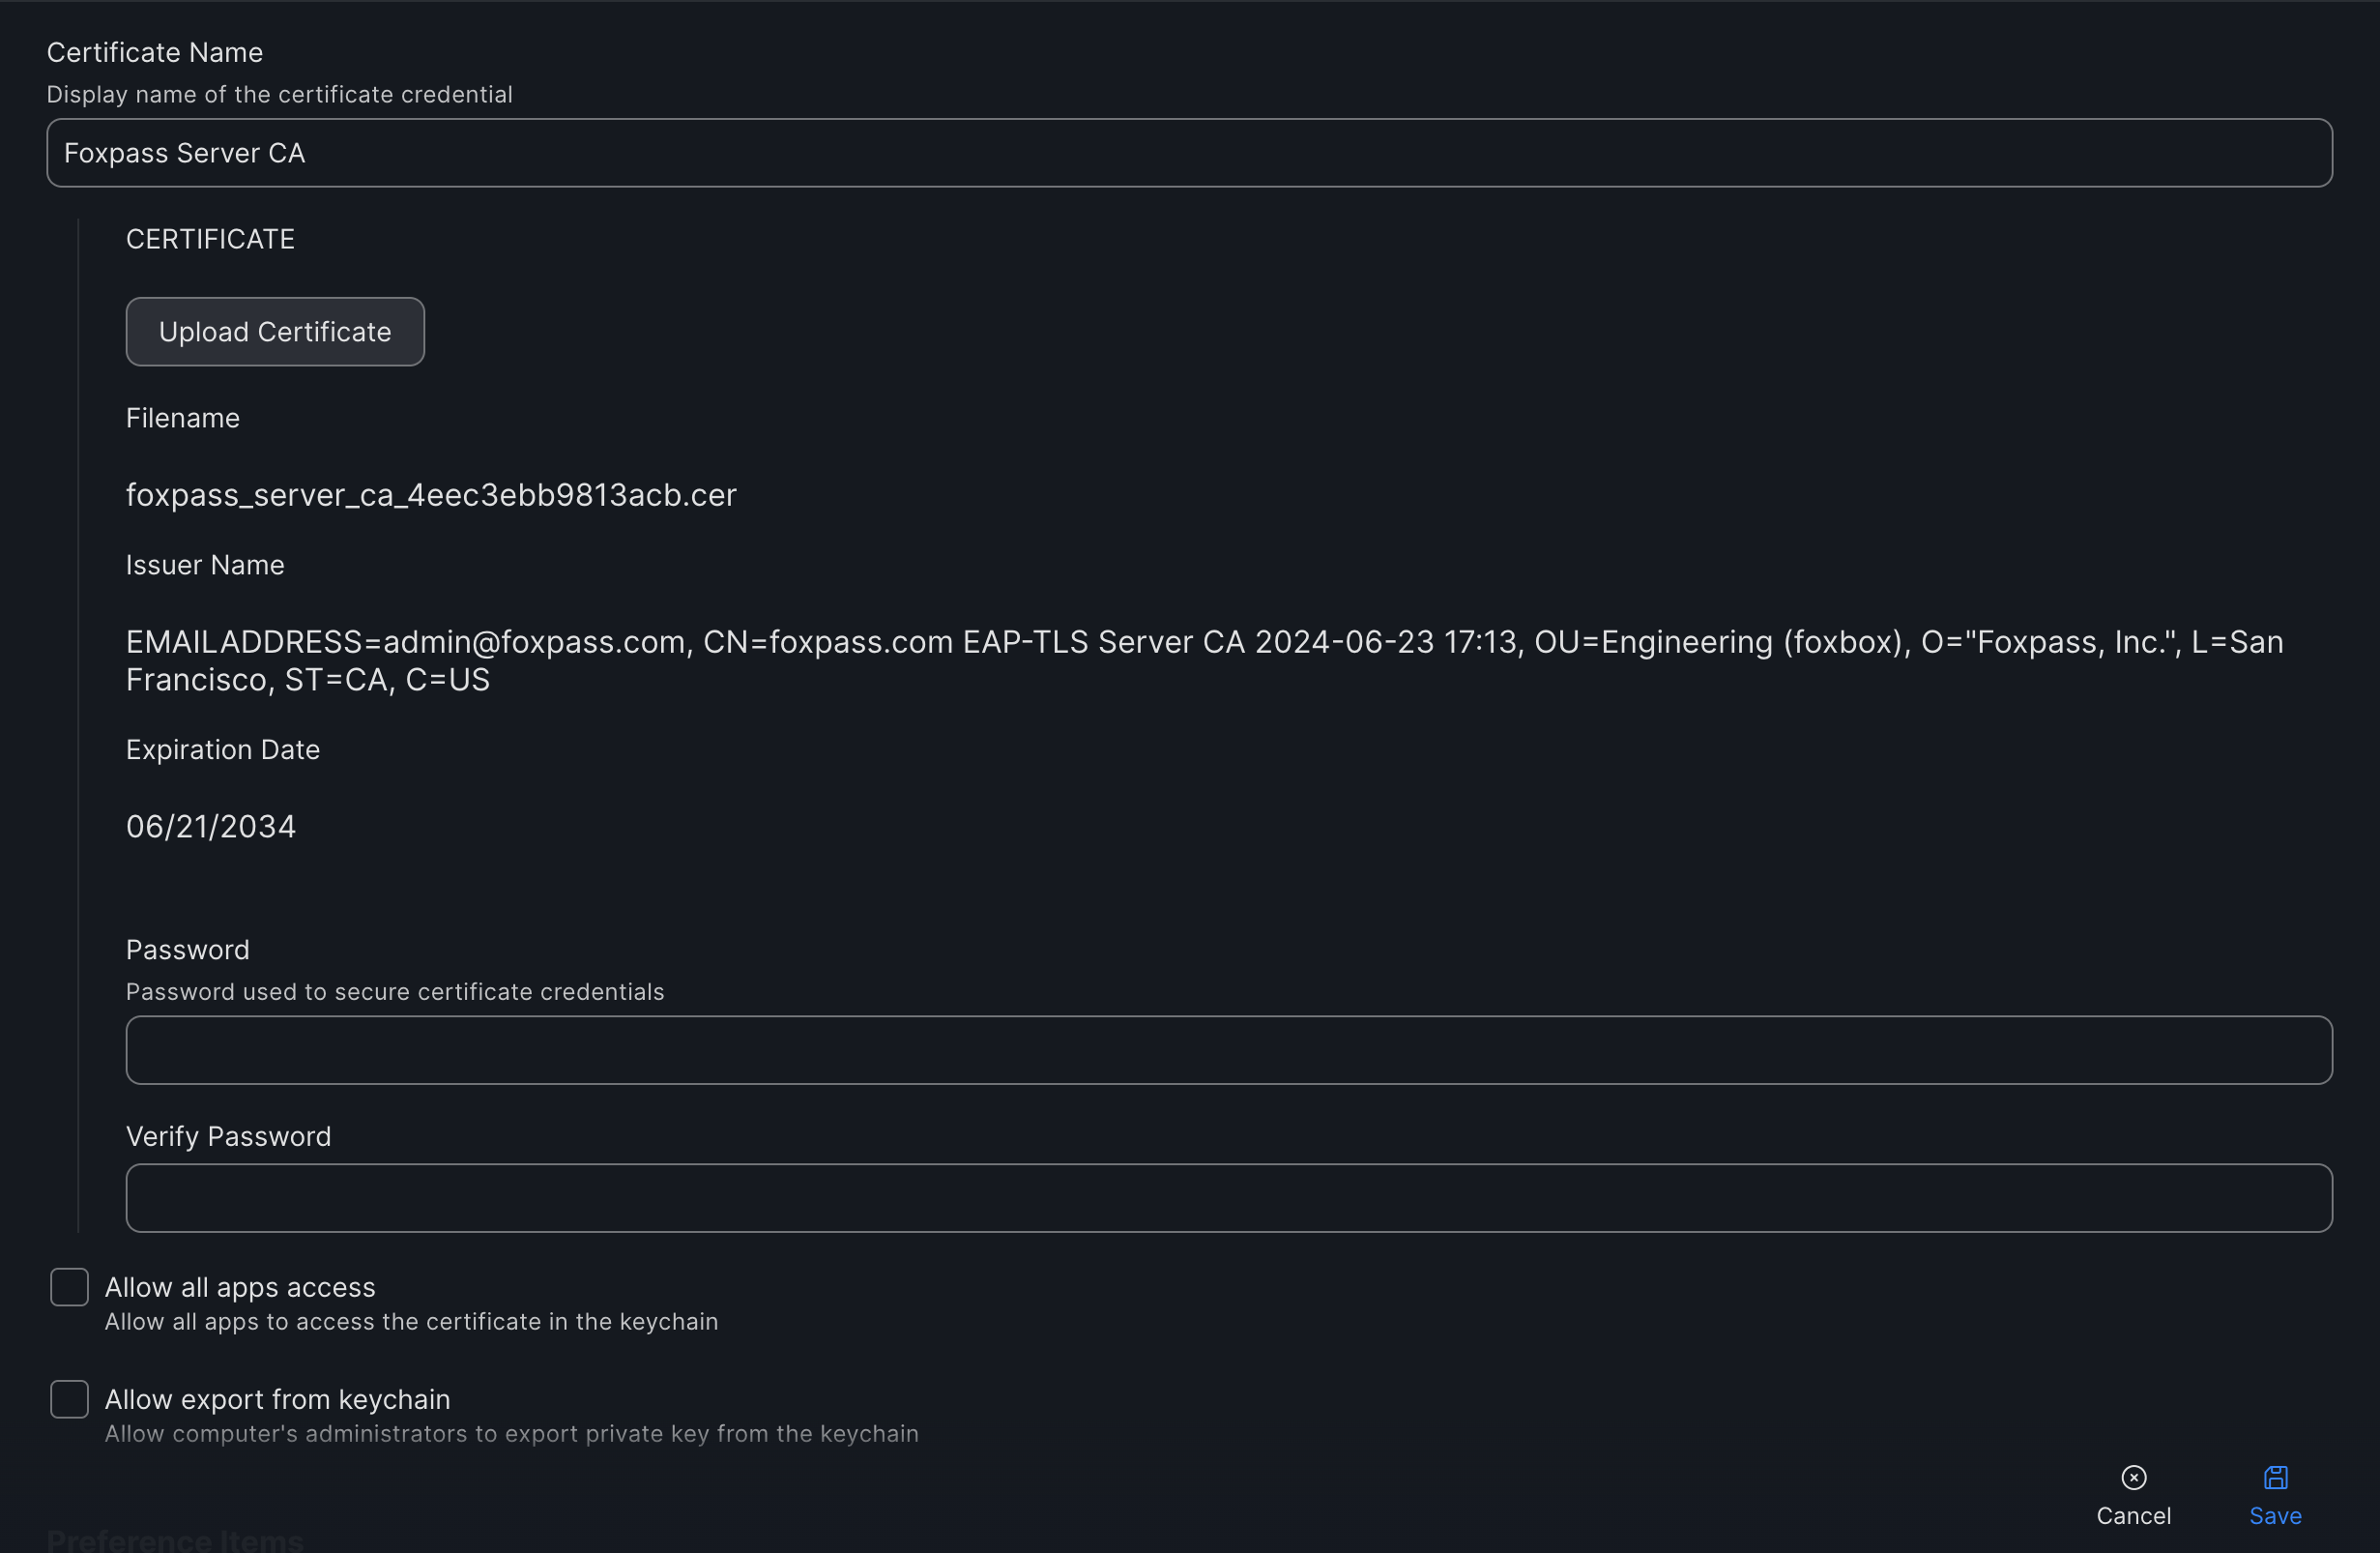
Configure server CA
Configure Network
- Click on the 'Network' option > Configure.
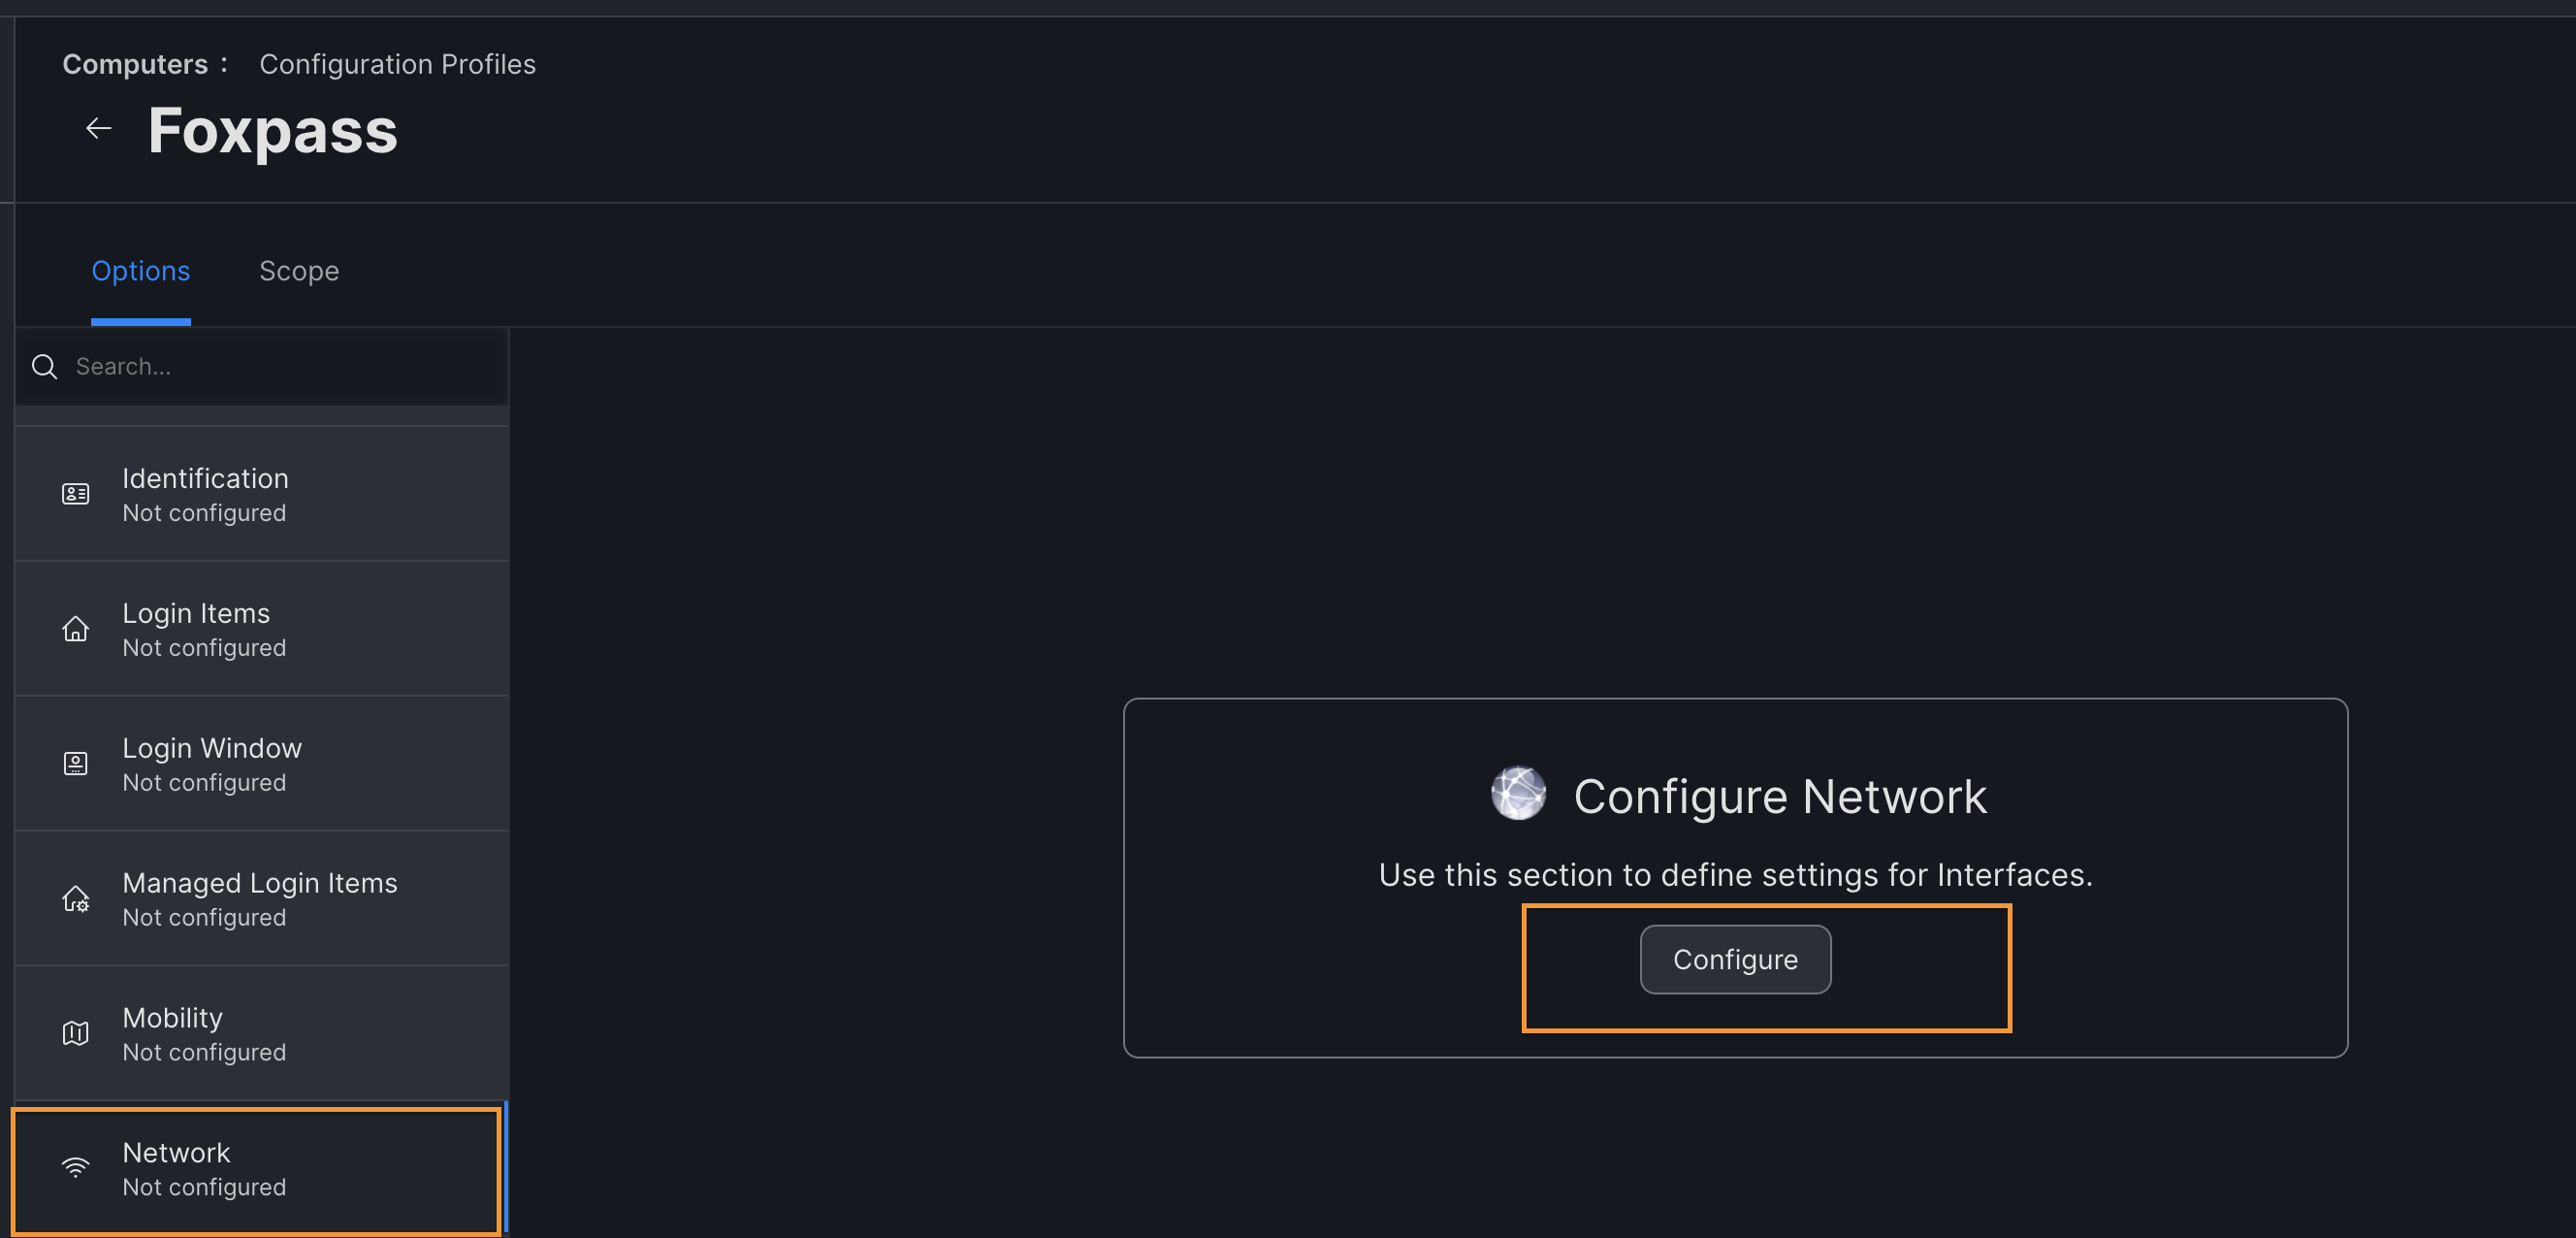
Configure Network
- Network Interface - Wi-Fi
- SSID - Your network's SSID Note: this must match EXACTLY, including capital letters.
- Security Type - WPA/WPA2 Enterprise
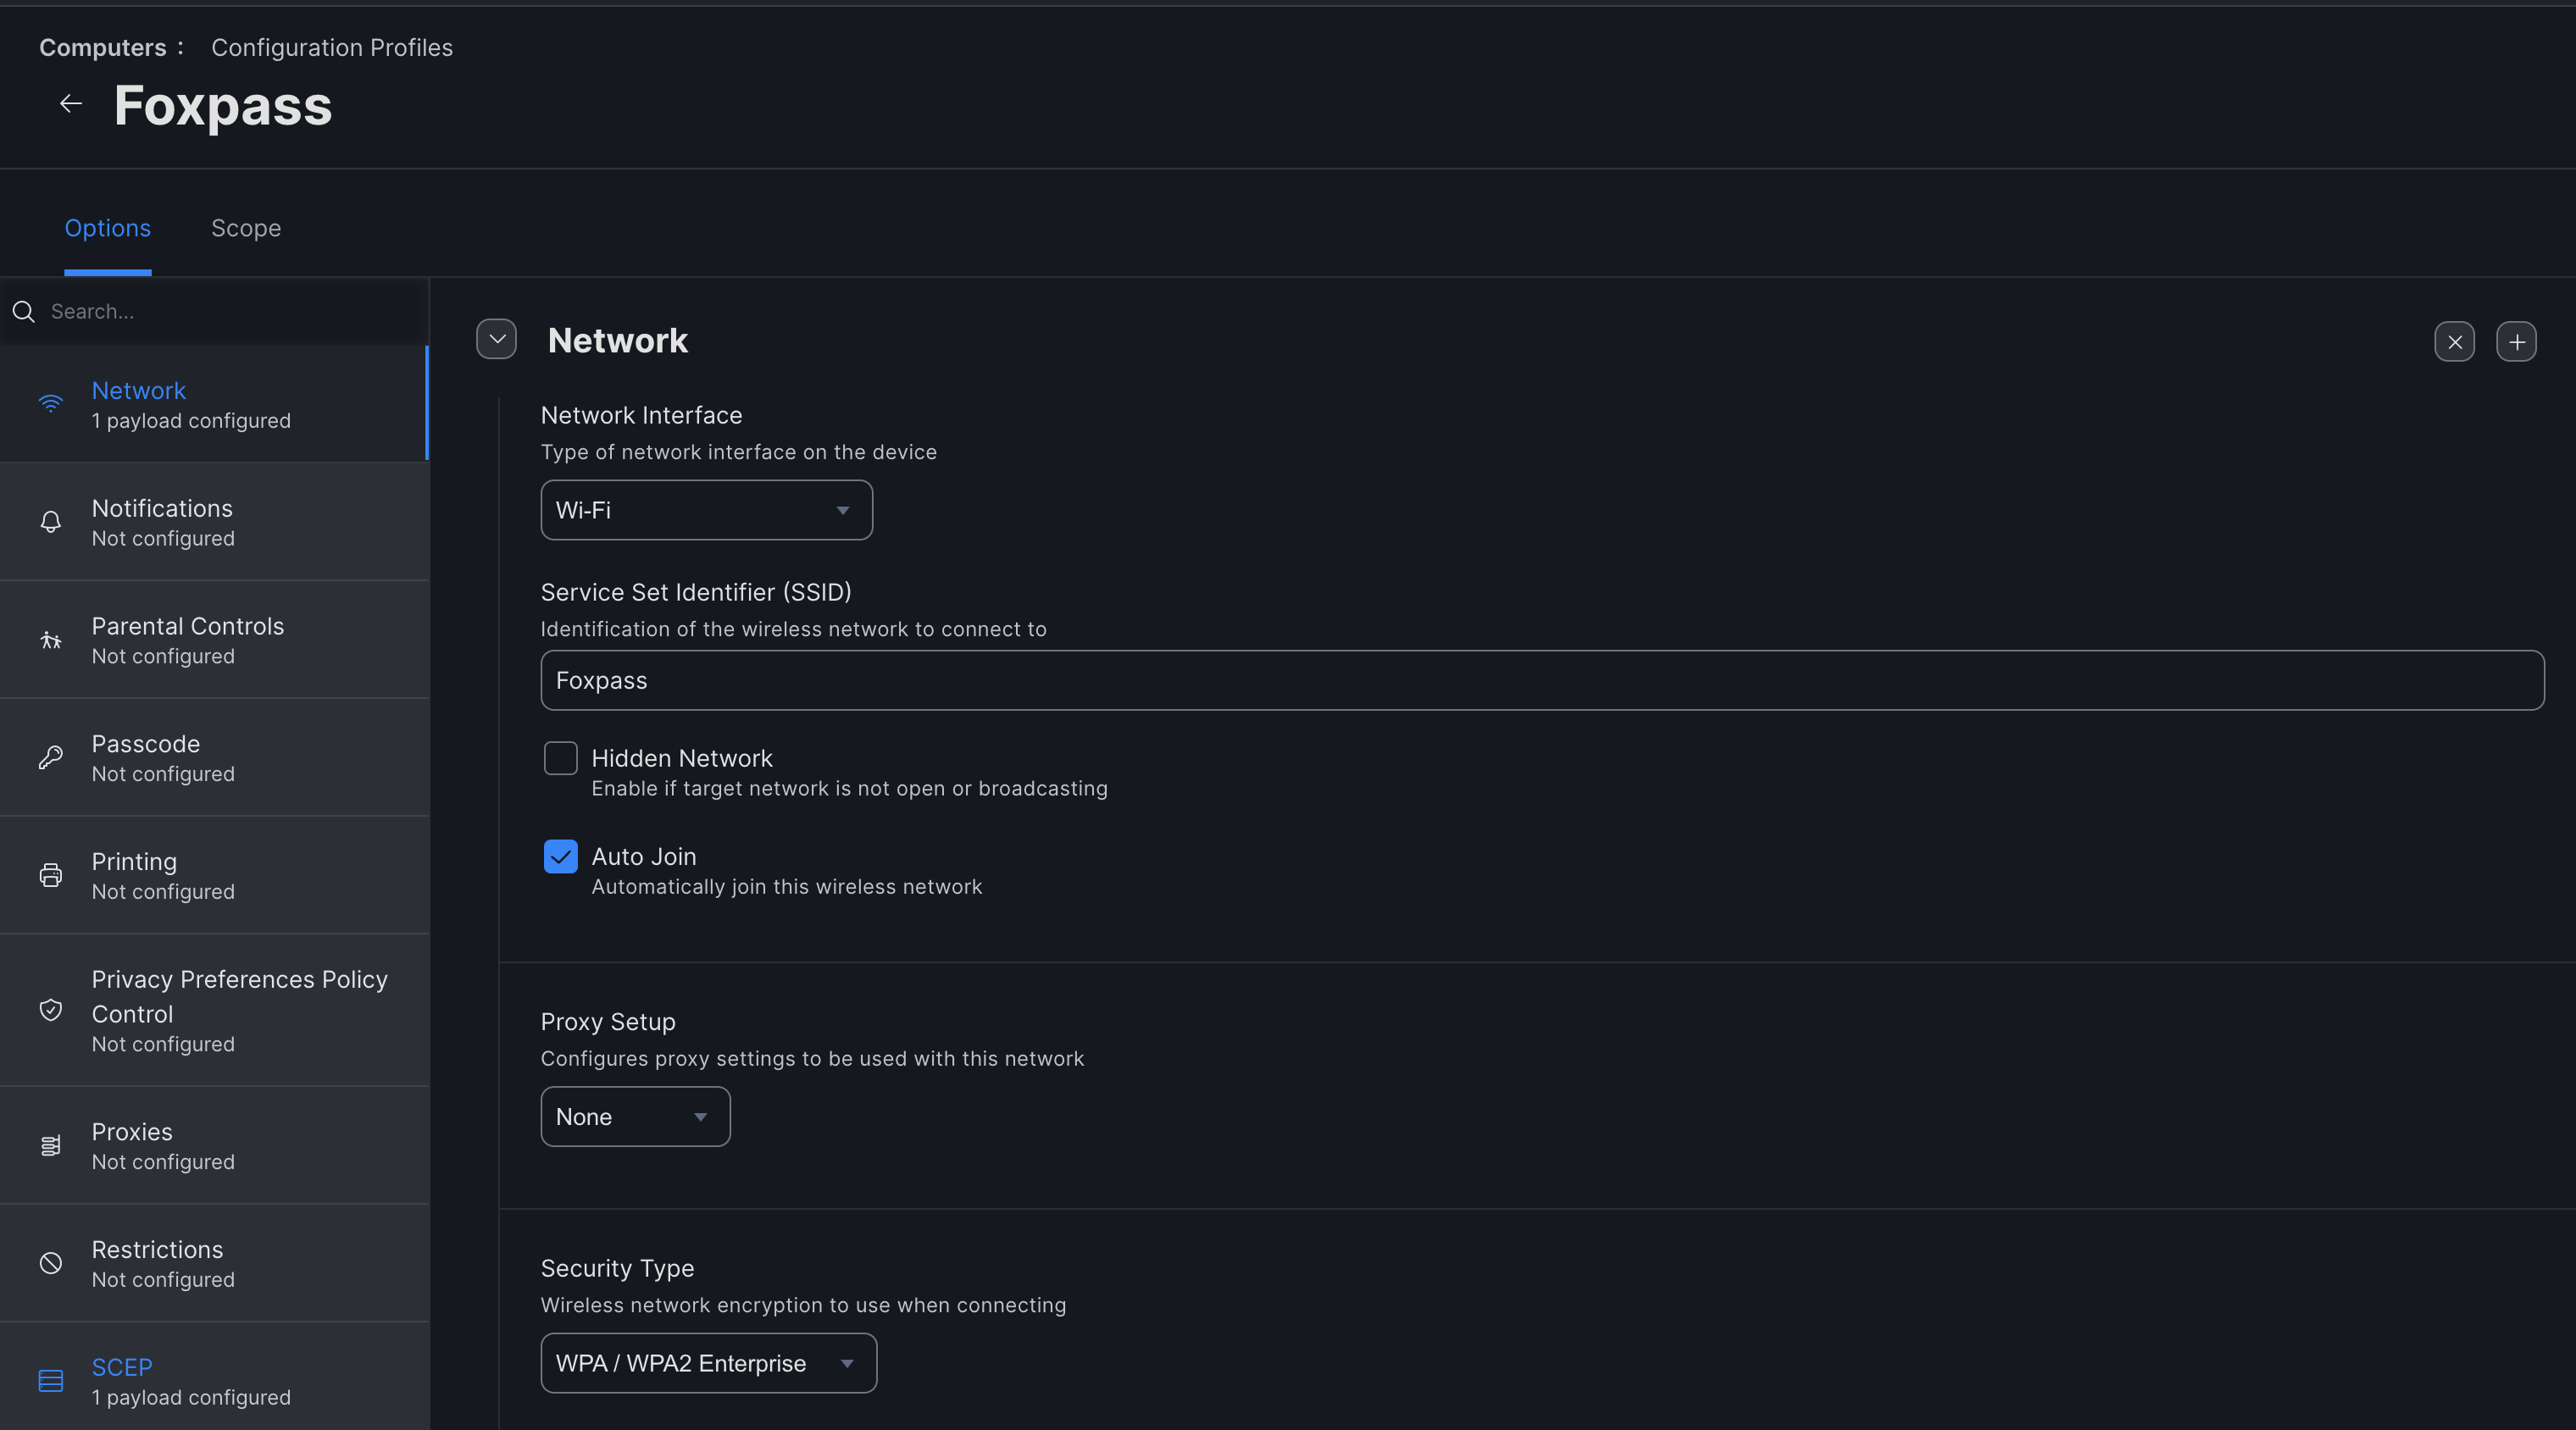
Configure Network
- Accepted EAP Types(Protocols) - TLS
- Identity Certificate - Select SCEP from the dropdown.
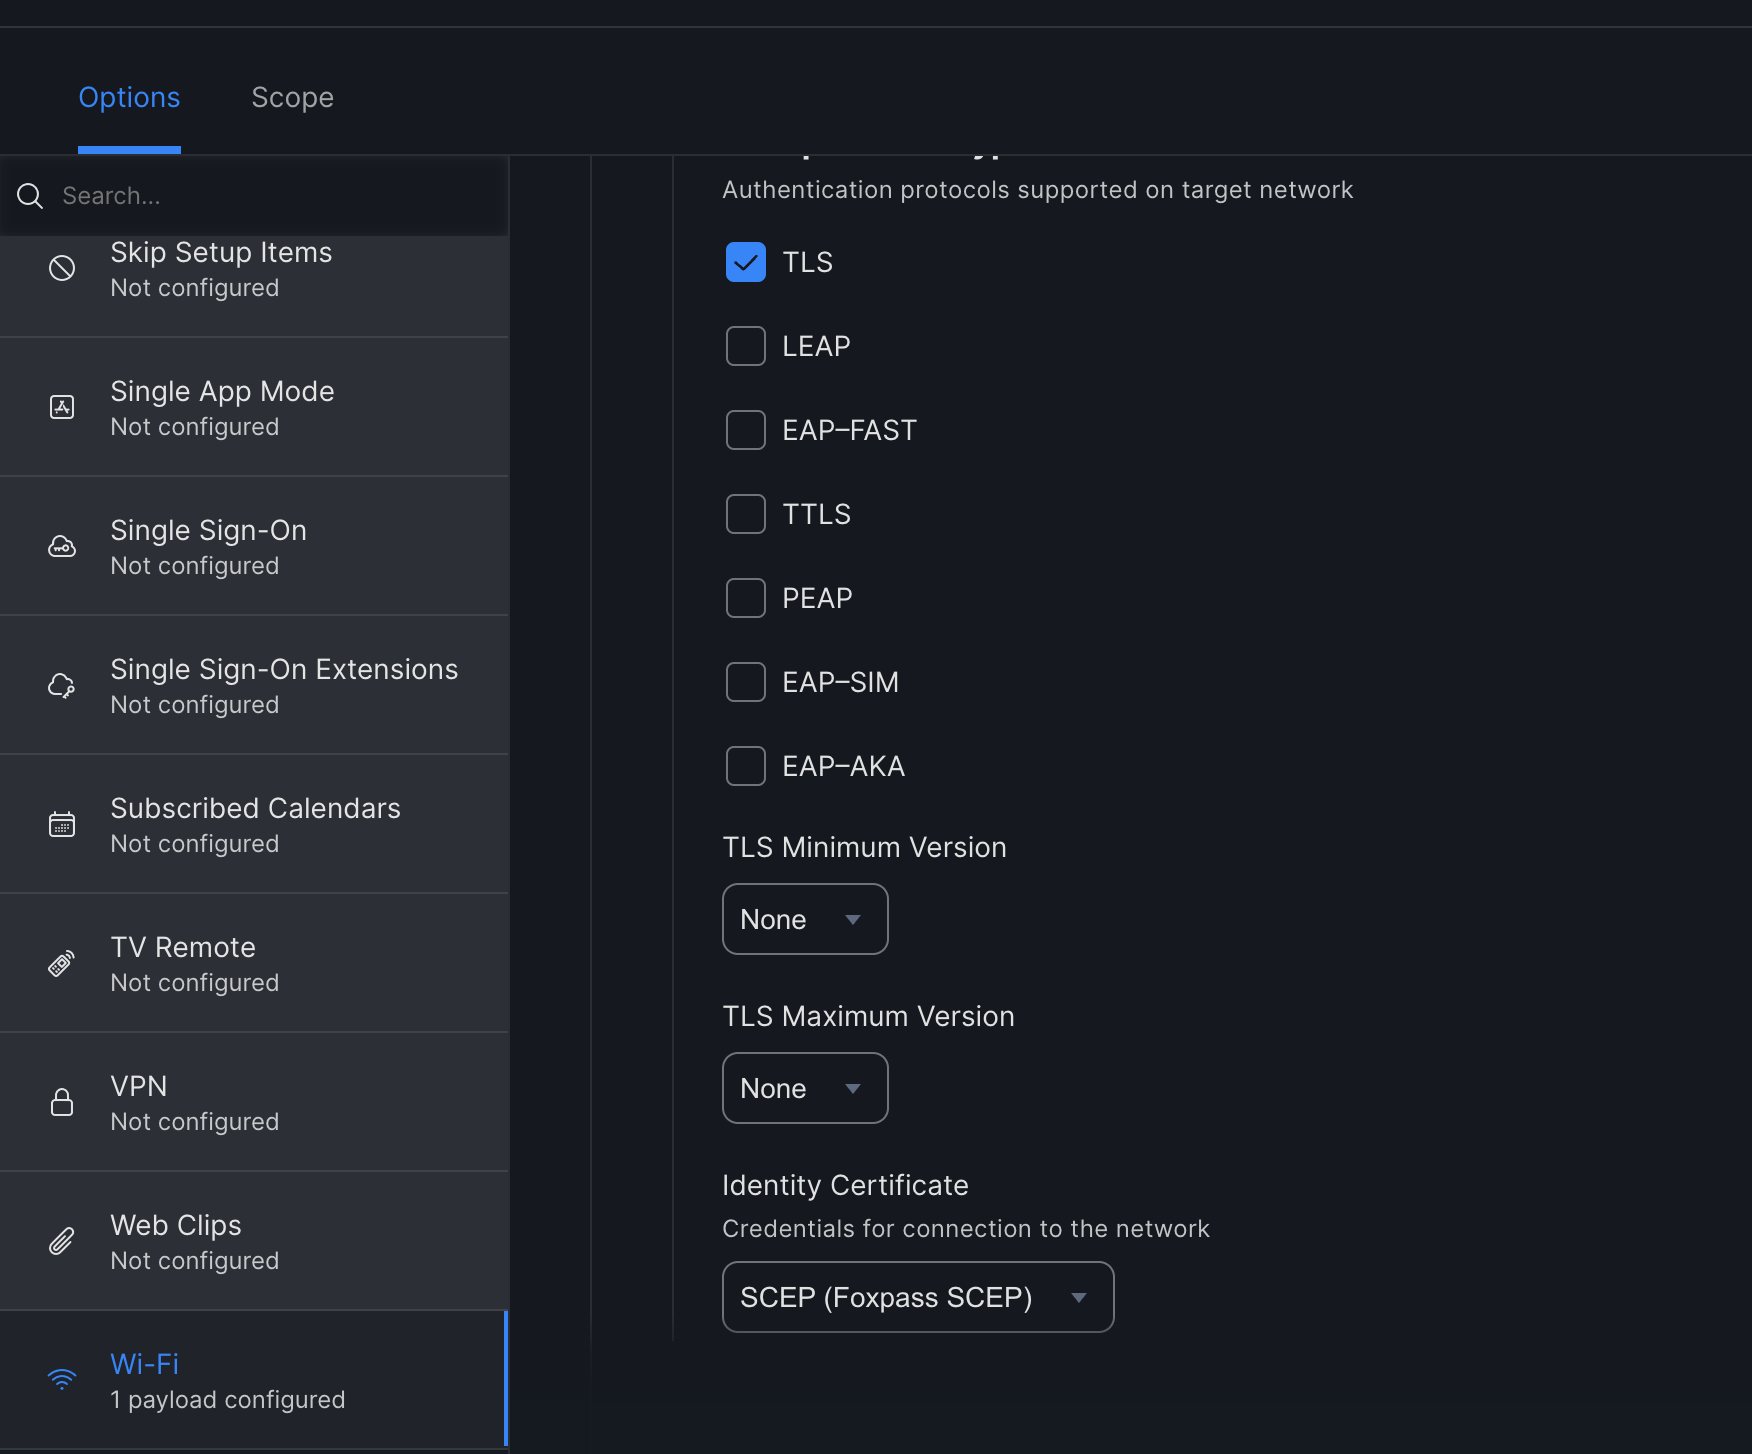
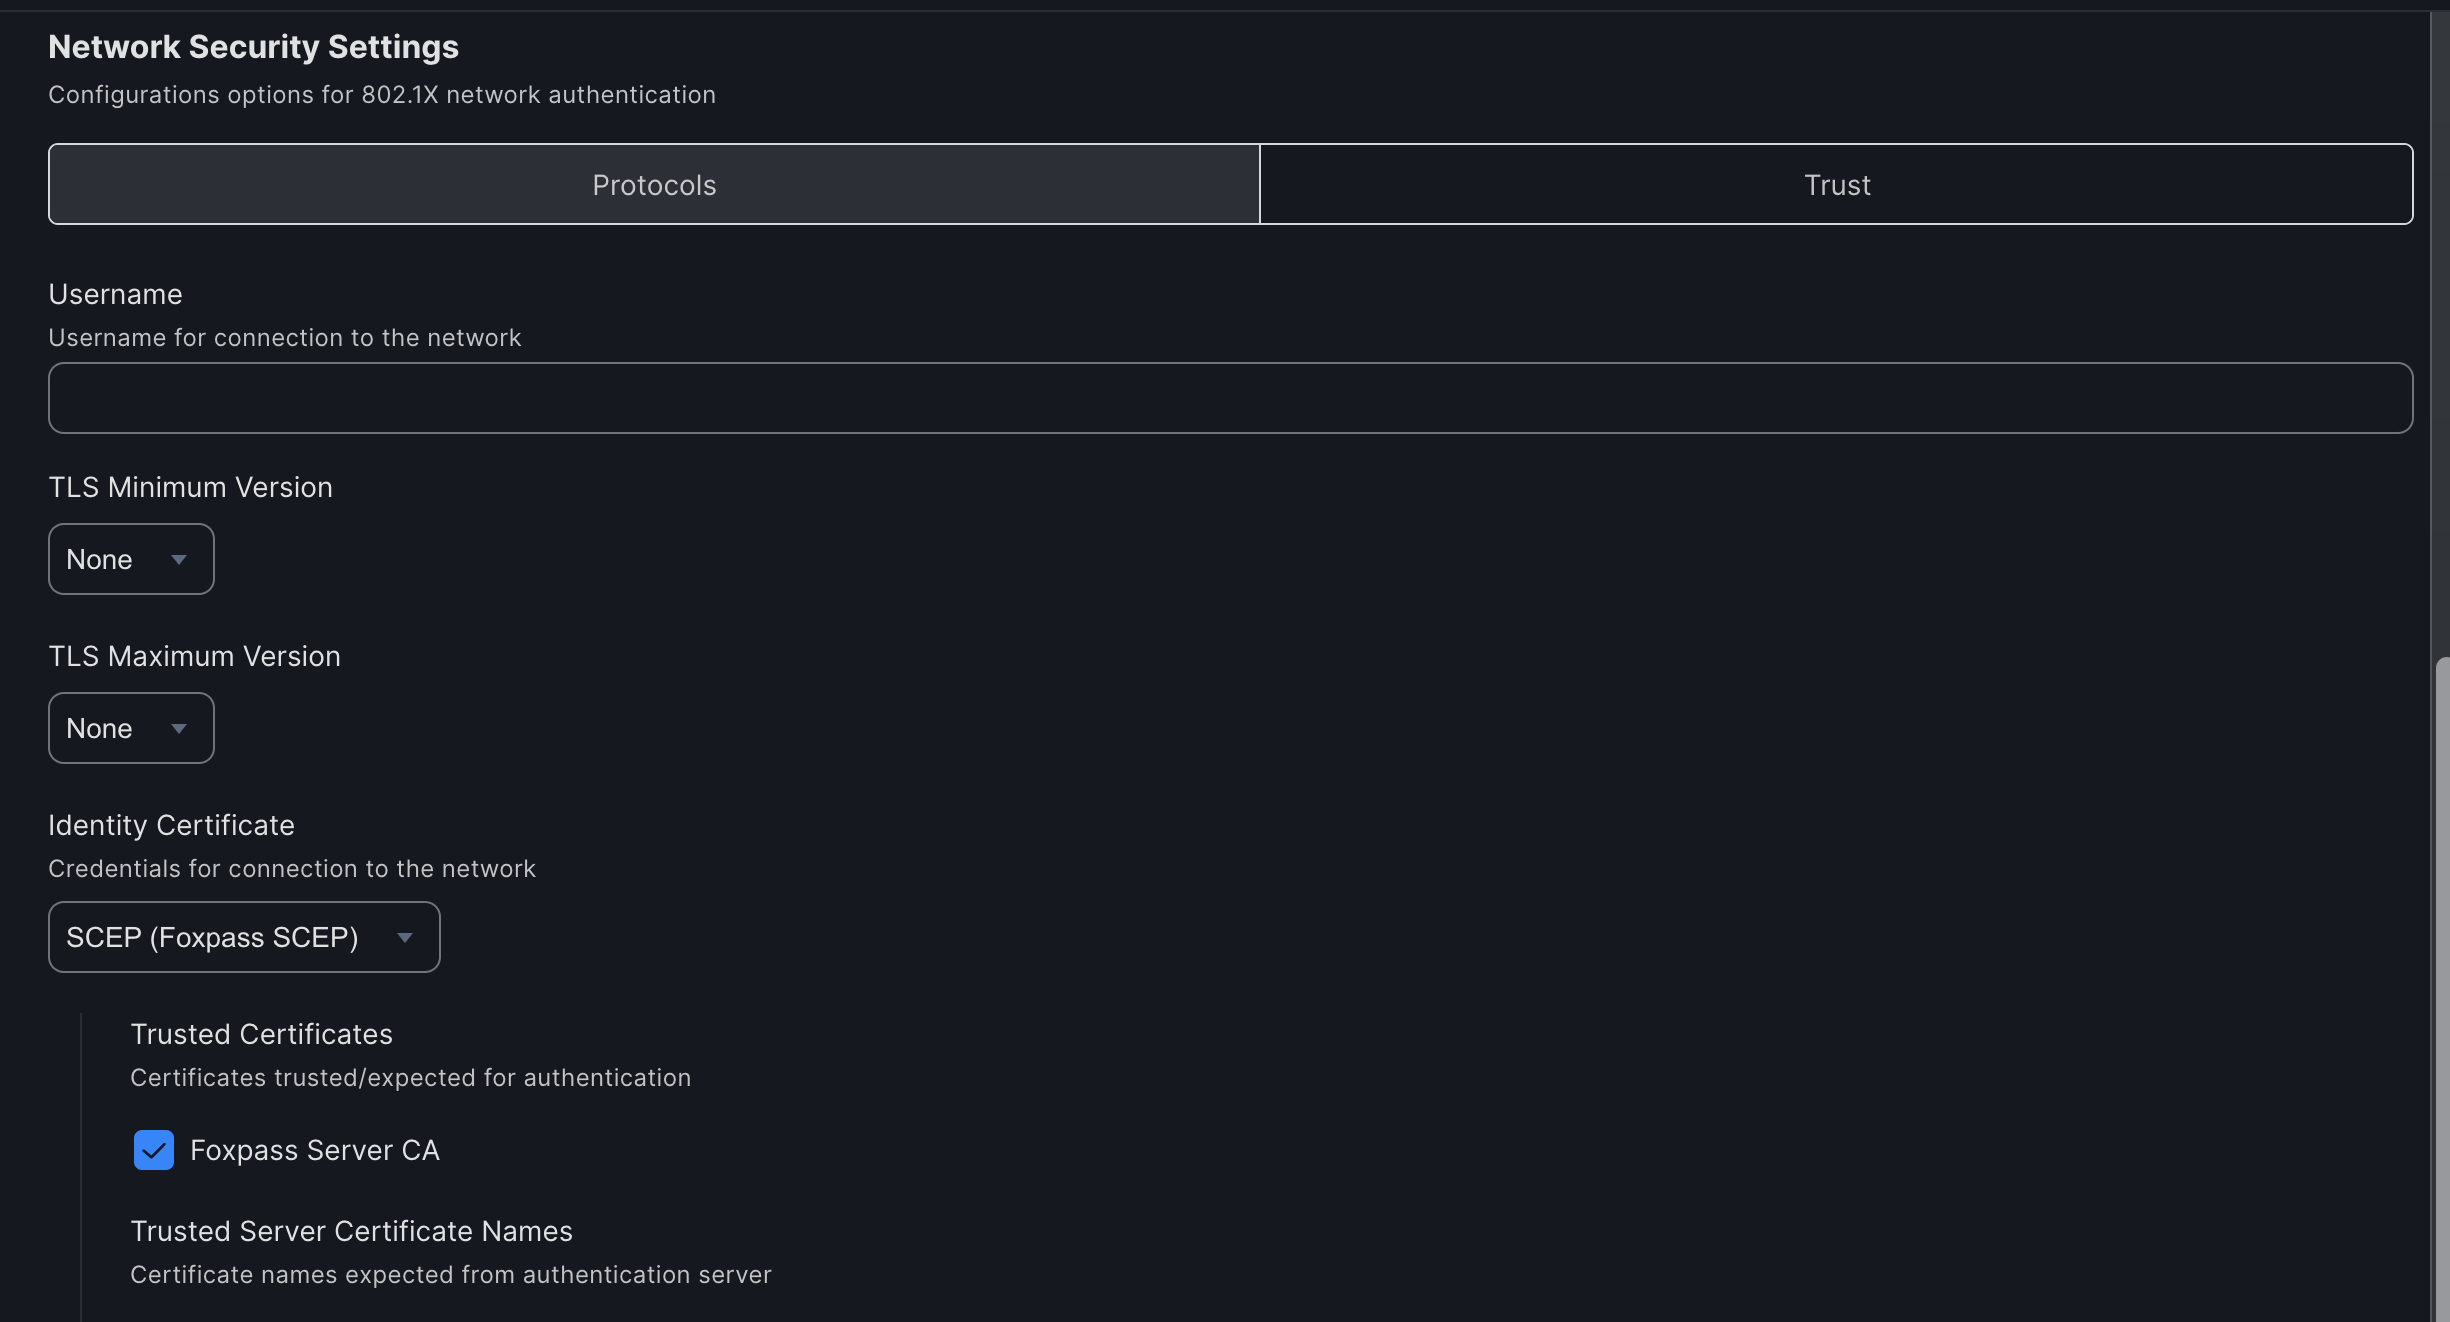
- Select Trust under Network Security Settings.
- Check 'Foxpass Server CA'.
- Click 'Save'.
Enroll device to JAMF
- On your device, open a browser and go to your device enrollment URL. The enrollment URL is the full URL of your Jamf Pro server followed by /enroll.
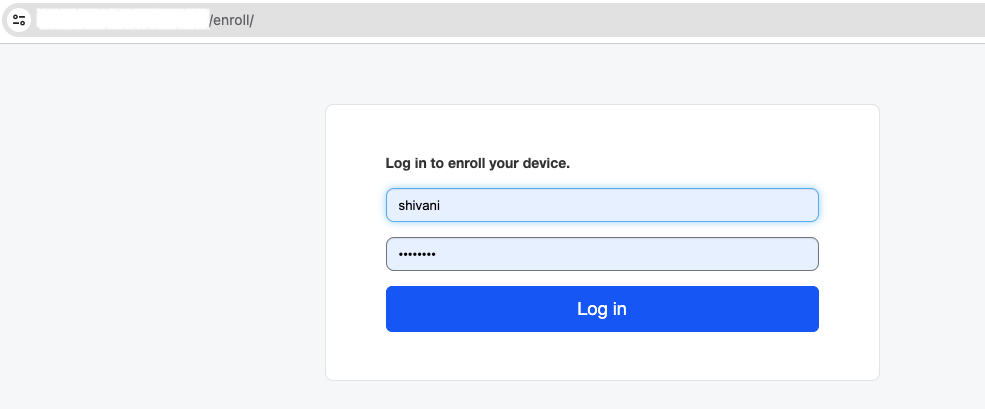
Login to enroll
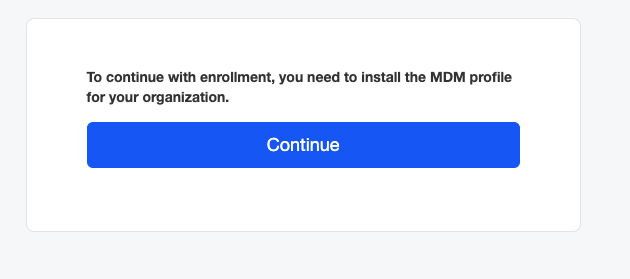
Click 'Continue'
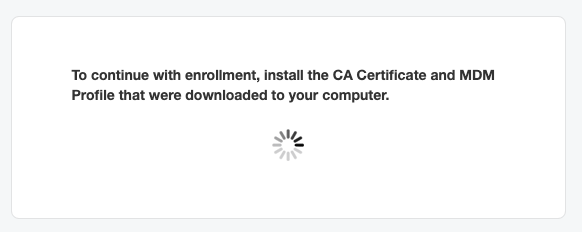
- Install the downloaded profile.
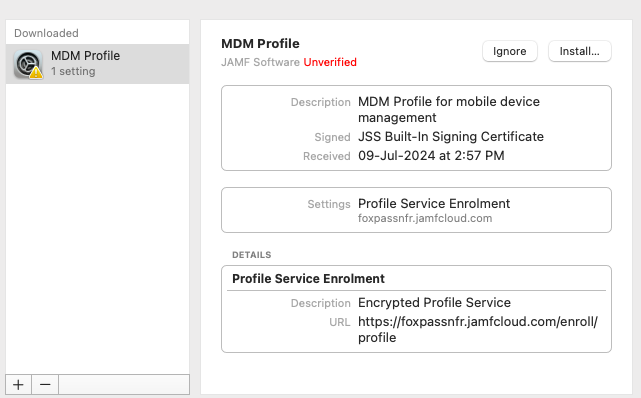
Install the profile
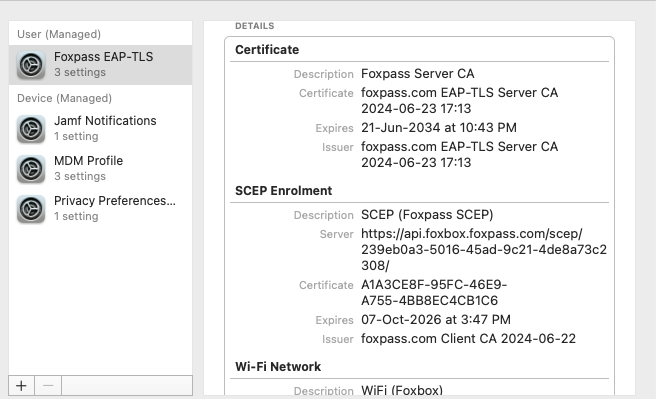
Profile installed
You can see a SCEP certificate under 'Client Certificates' on the EAP-TLS page.

Sample SCEP user certificate

Sample device certificate
If everything is configured correctly, you will be able to connect to your SSID. For logs, you can visit RADIUS logs page. JAMF automatically refreshes profiles based on the “Redistribute Profile” setting to ensure certificates remain current.
Updated 3 months ago
