JFrog LDAP
Configuring JFrog to work with Foxpass's LDAP server
JFrog's LDAP configuration comes in two stages. The first part of the configuration helps establish the connection and authenticate users, and the second part integrates LDAP group memberships.
Create an LDAP Binder
First, create an LDAP Binder account with the name 'jfrog' (or easily identifiable) on the LDAP binders page. Copy/paste the generated password! It is only displayed once.
LDAP Settings
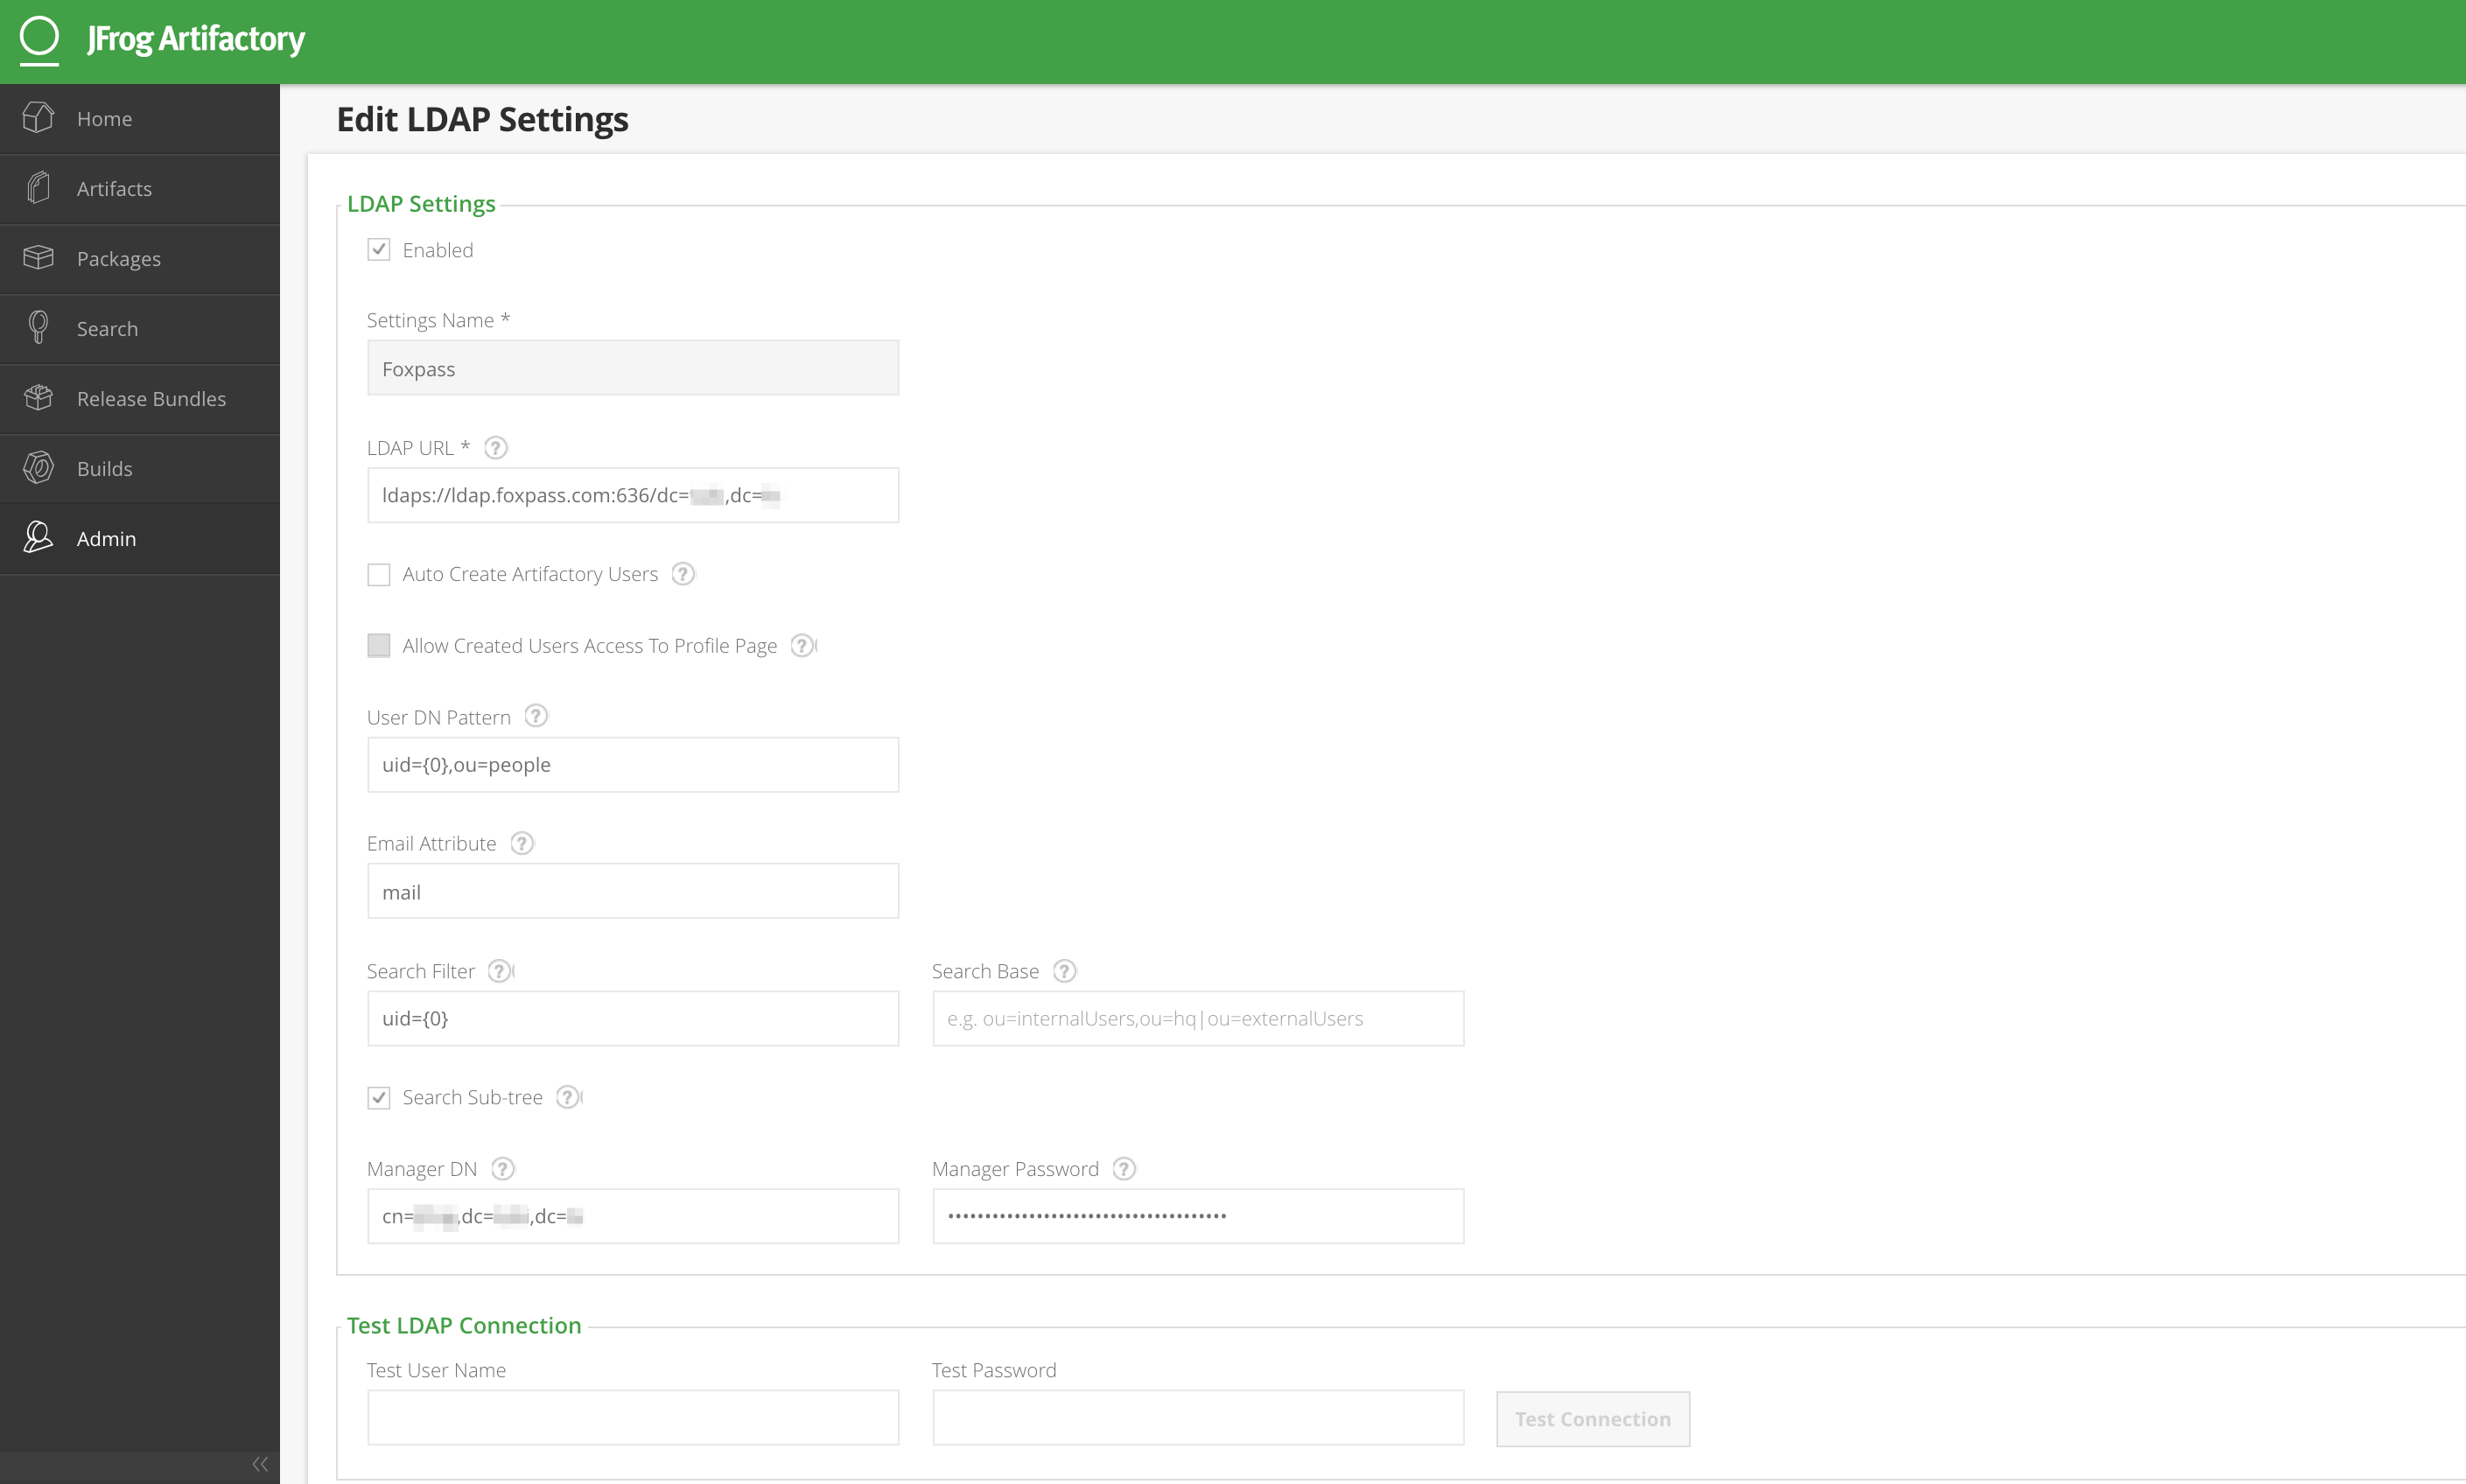
Then, go to the Admin tab in JFrog to configure the LDAP connection. Under 'LDAP Settings', set these values, inserting your own information where marked by the double arrows:
LDAP URL: ldaps://ldap.foxpass.com:636/dc=≪example≫,dc=≪com≫
User DN Pattern: uid={0},ou=people
Email Attribute: mail
Search Filter: uid={0}
Search Sub-tree: checked
Manager DN: cn=≪binder name≫,dc=≪example≫,dc=≪com≫
Manager Password: ≪binder password≫
You can test the LDAP connection by entering your Foxpass username and password in the 'Test LDAP Connection' section. If everything is configured correctly, you should see successes on the Foxpass 'LDAP Logs' page. You can read JFrog's full LDAP documentation at this link:
https://www.jfrog.com/confluence/display/RTF/Managing+Security+with+LDAP

JFrog LDAP config
LDAP Group Settings
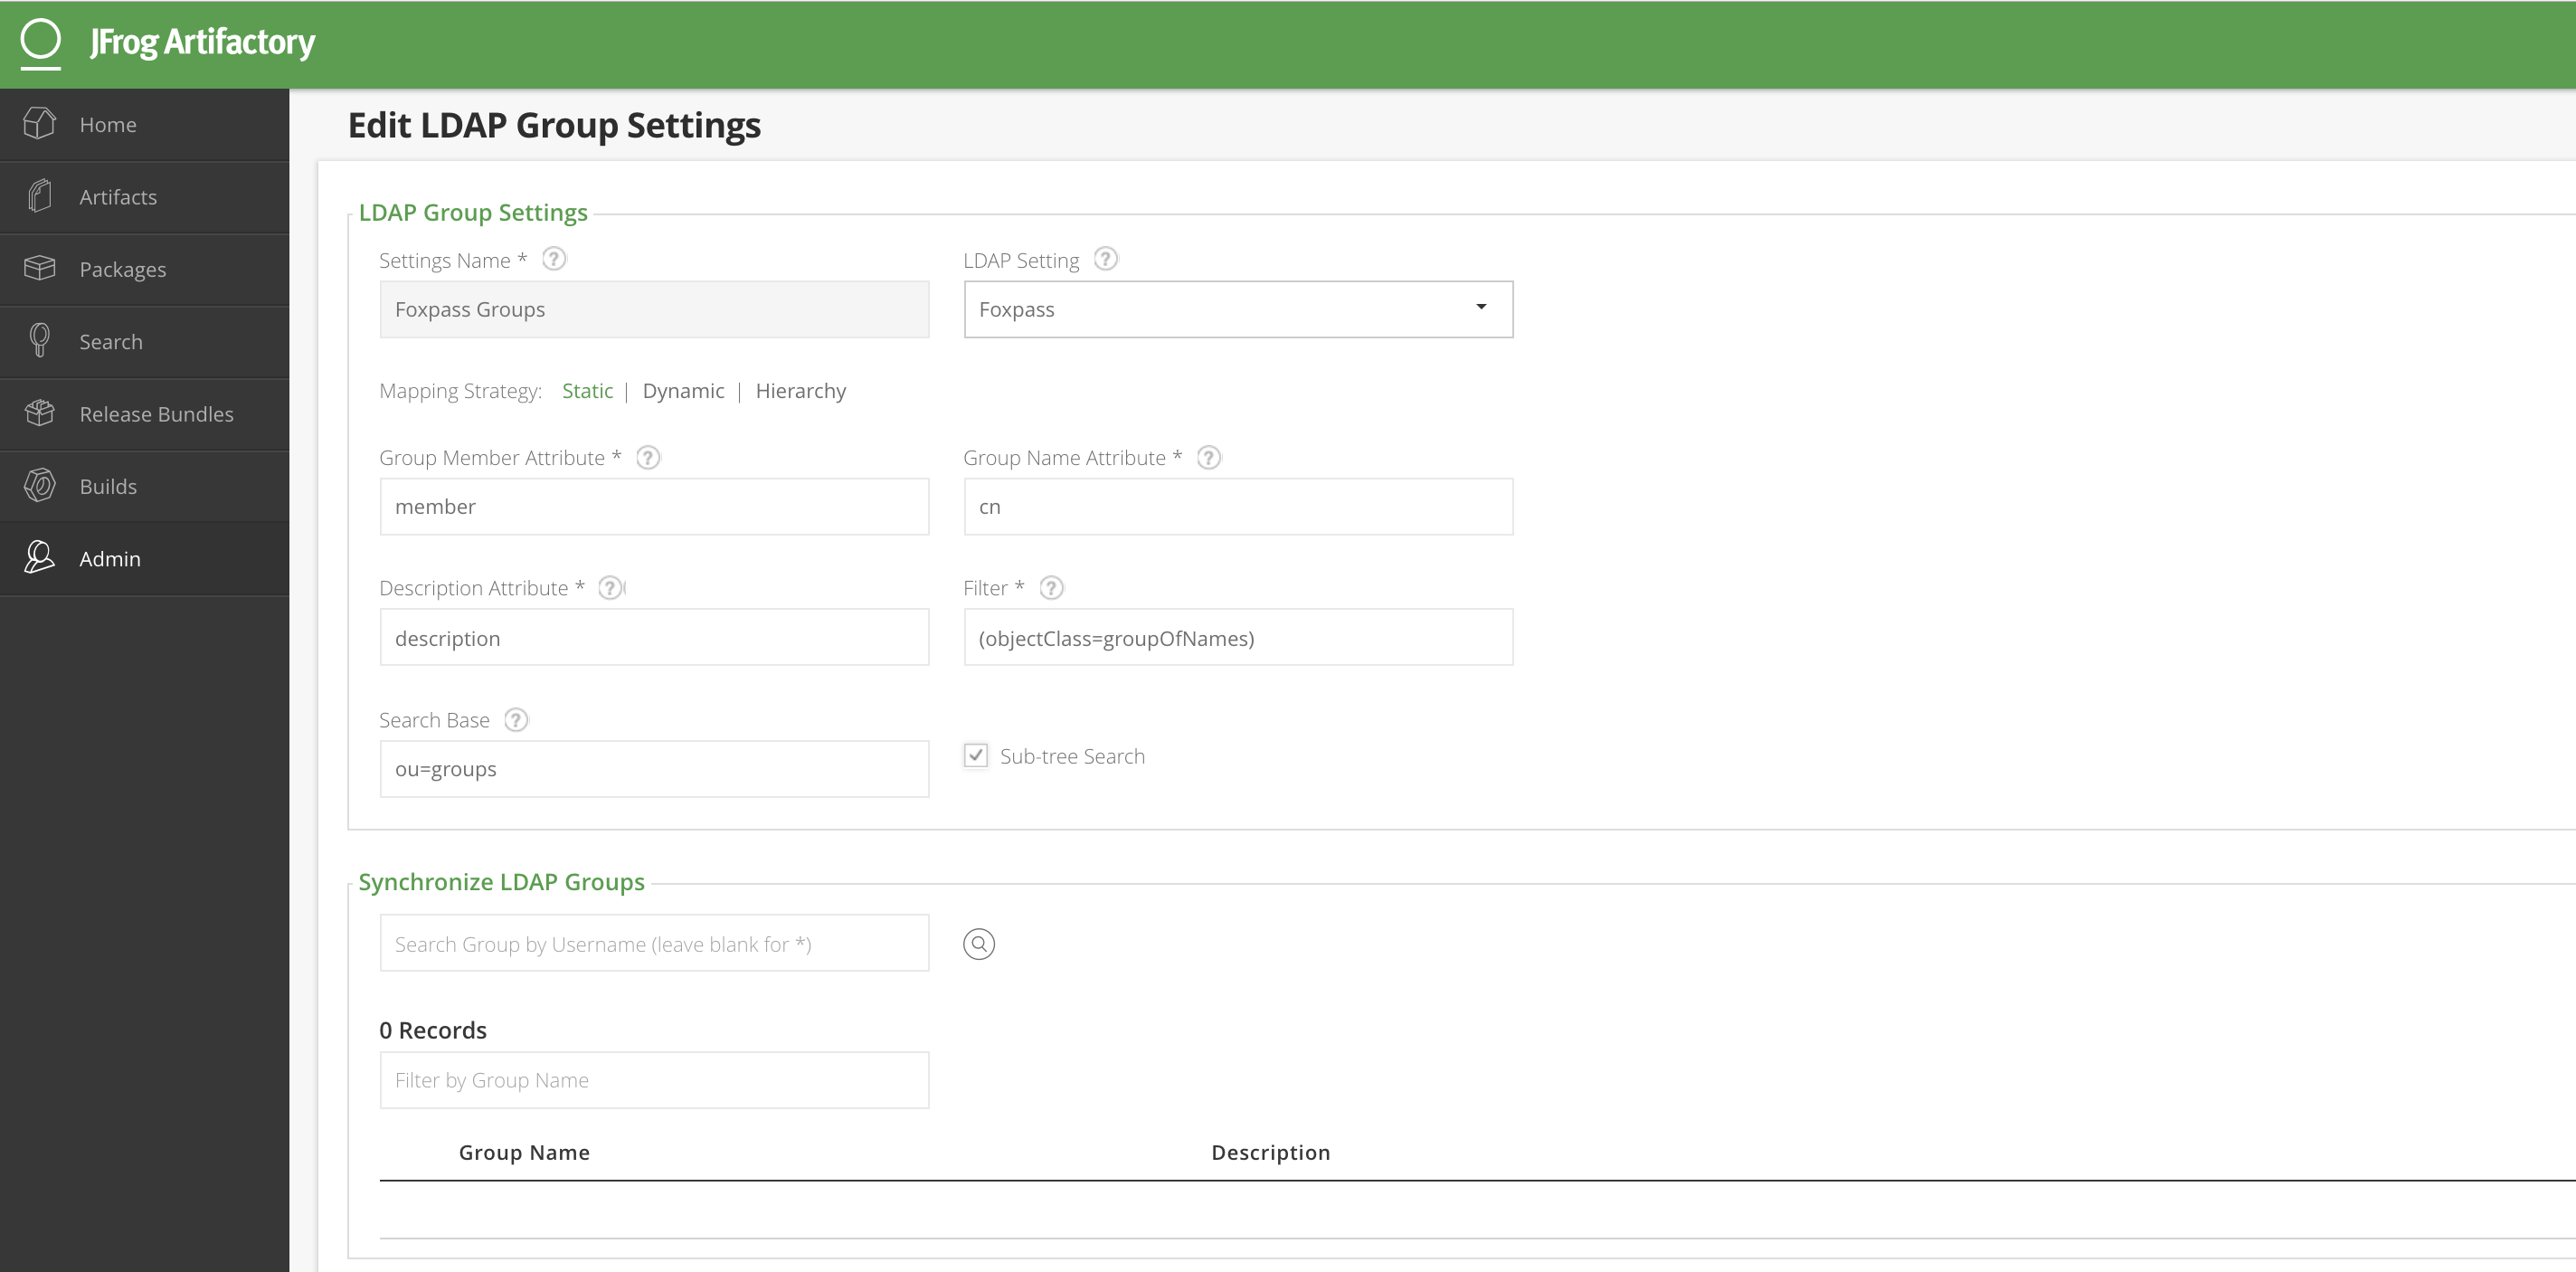
Next, edit the LDAP Group Settings. Set these values in the appropriate fields:
LDAP Setting: ≪name of Foxpass LDAP settings≫
Group Member Attribute: member
Group Name Attribute: cn
Description Attribute: description
Filter: (objectClass=groupOfNames)
Search Base: ou=groups
Sub-tree Search: checked
You can test the LDAP group settings by clicking the search icon in the 'Synchronize LDAP Groups' section. If everything is configured correctly, you should see your groups show up. Try entering a user to see what groups they're in. The appropriate groups should show up if everything is configured correctly. You can read JFrog's full LDAP documentation at this link:
https://www.jfrog.com/confluence/display/RTF/LDAP+Groups

JFrog LDAP groups config
After that you're good to go!
Updated 3 months ago
