
Aruba Central RadSec Setup
Setting up Aruba equipment to work with Foxpass RadSec
Foxpass RadSec allows a RADIUS connection via TLS for an additional layer of security. This setup guide will help you configure Aruba equipment with Foxpass RadSec.
Configure Aruba
- Download the Foxpass RadSec Server CA from the Foxpass RadSec page.
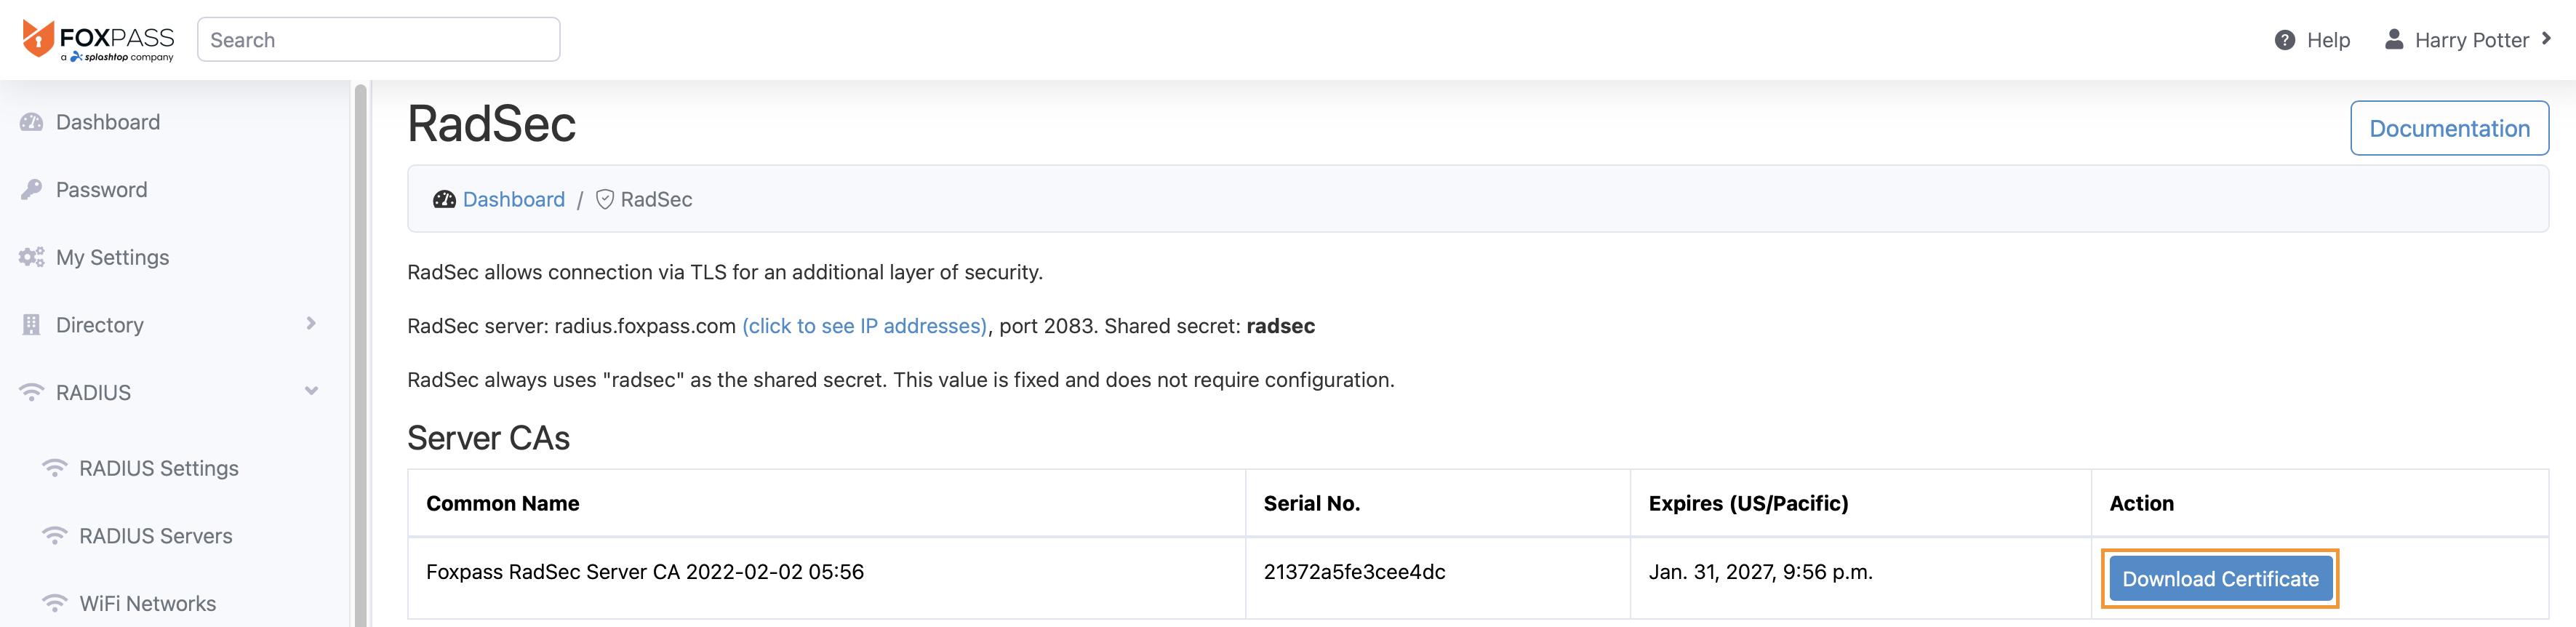
Download RadSec Server CA
- Click "Create Client Certificate". Click "Download". Choose "Combined .pem" and click "Download Client Certificate".
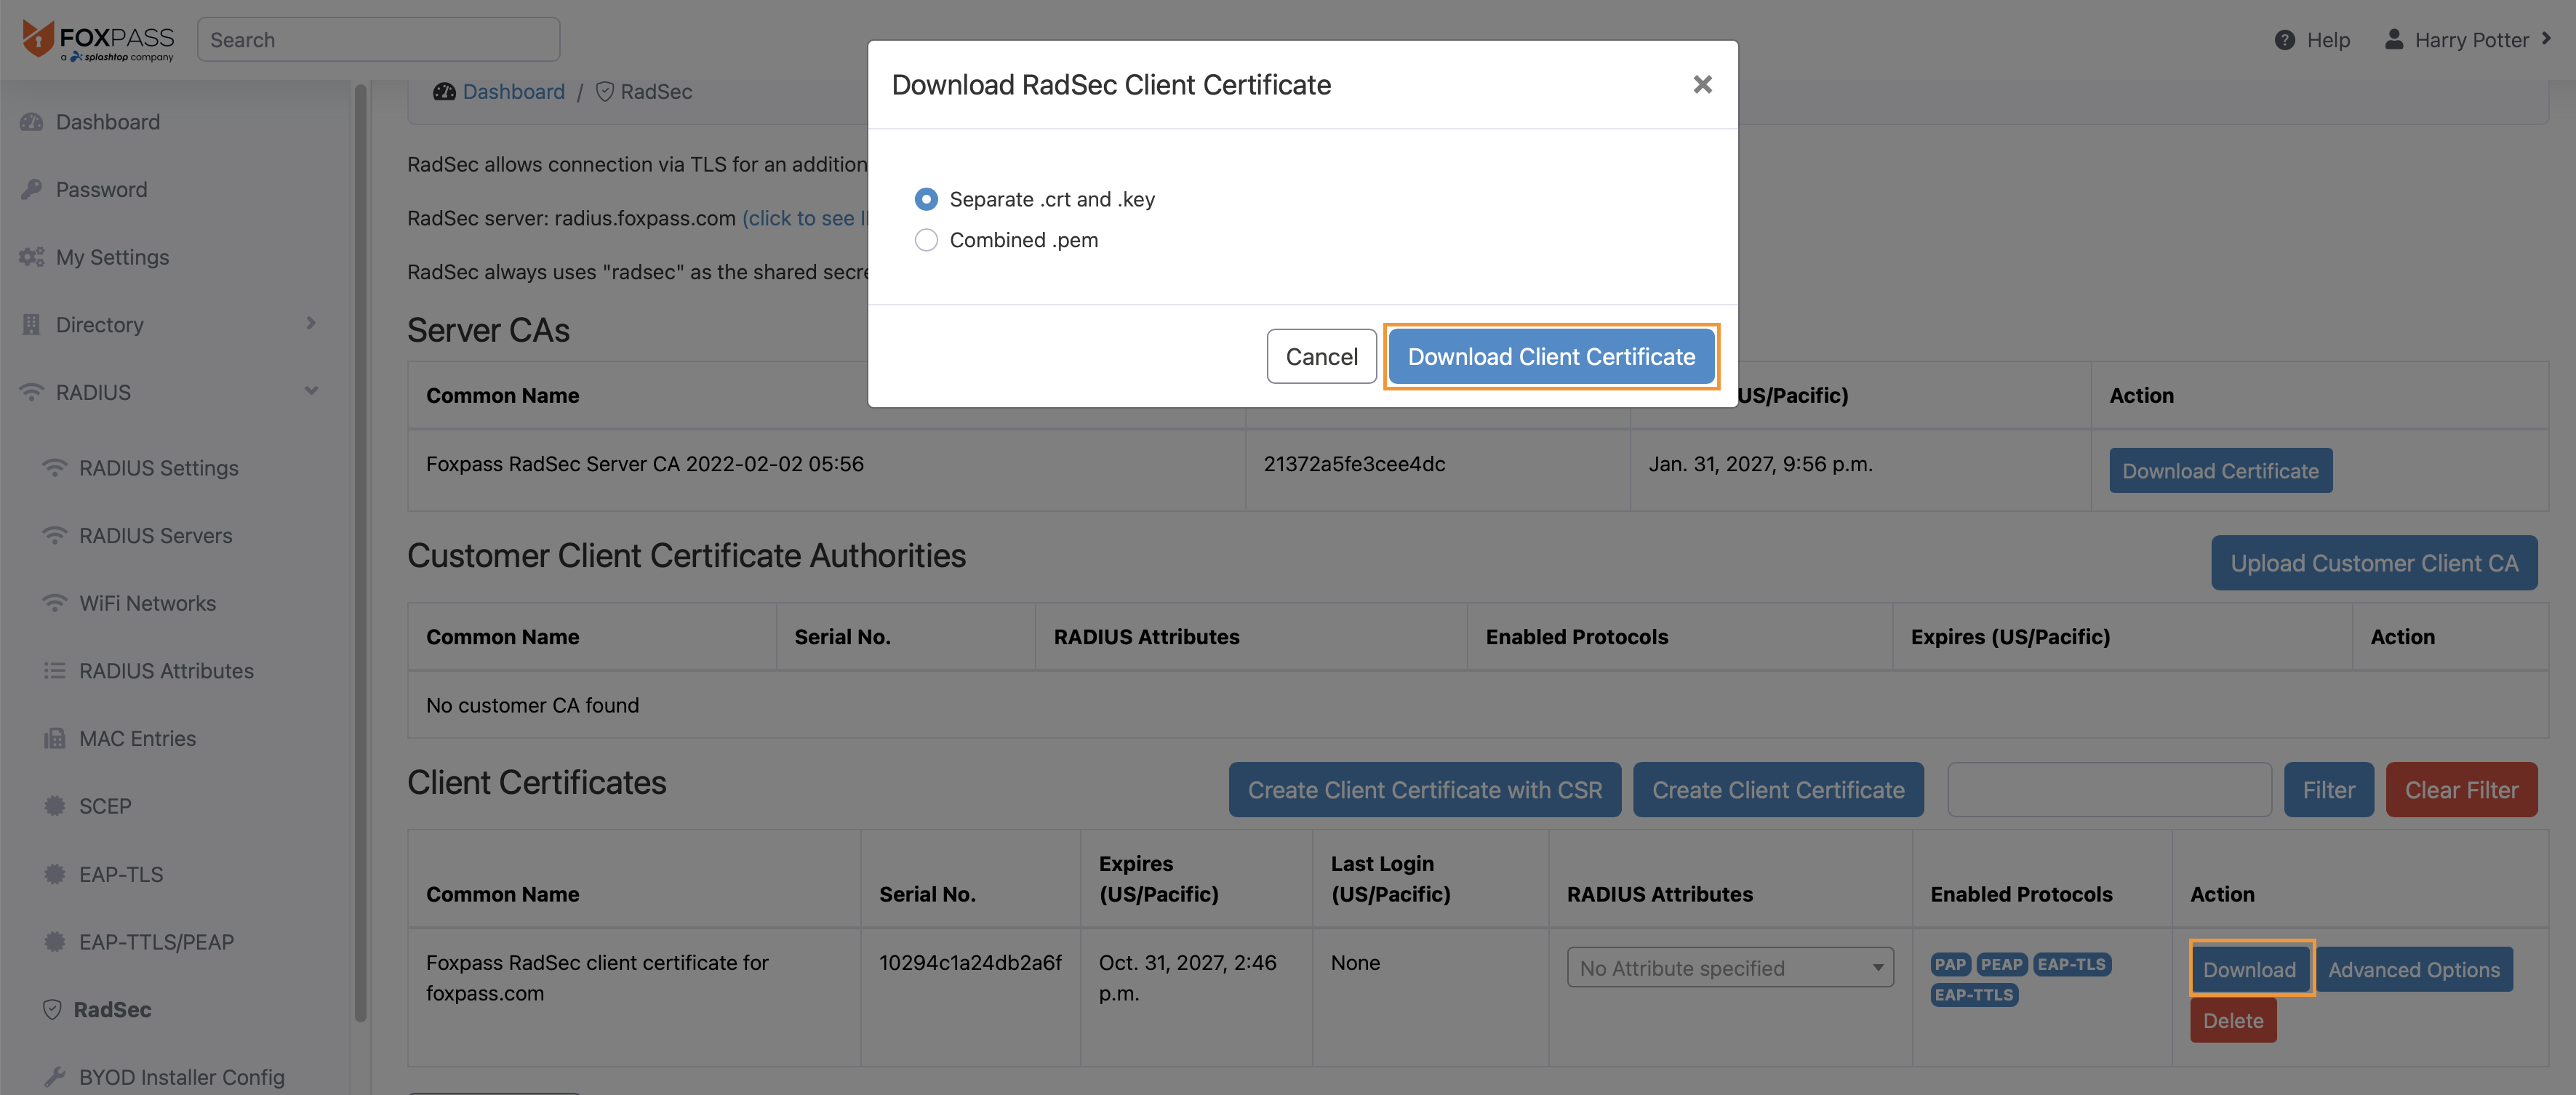
Download RadSec Client Certificate
- In Aruba Central navigate to Global | Organization | Network Structure | Certificates
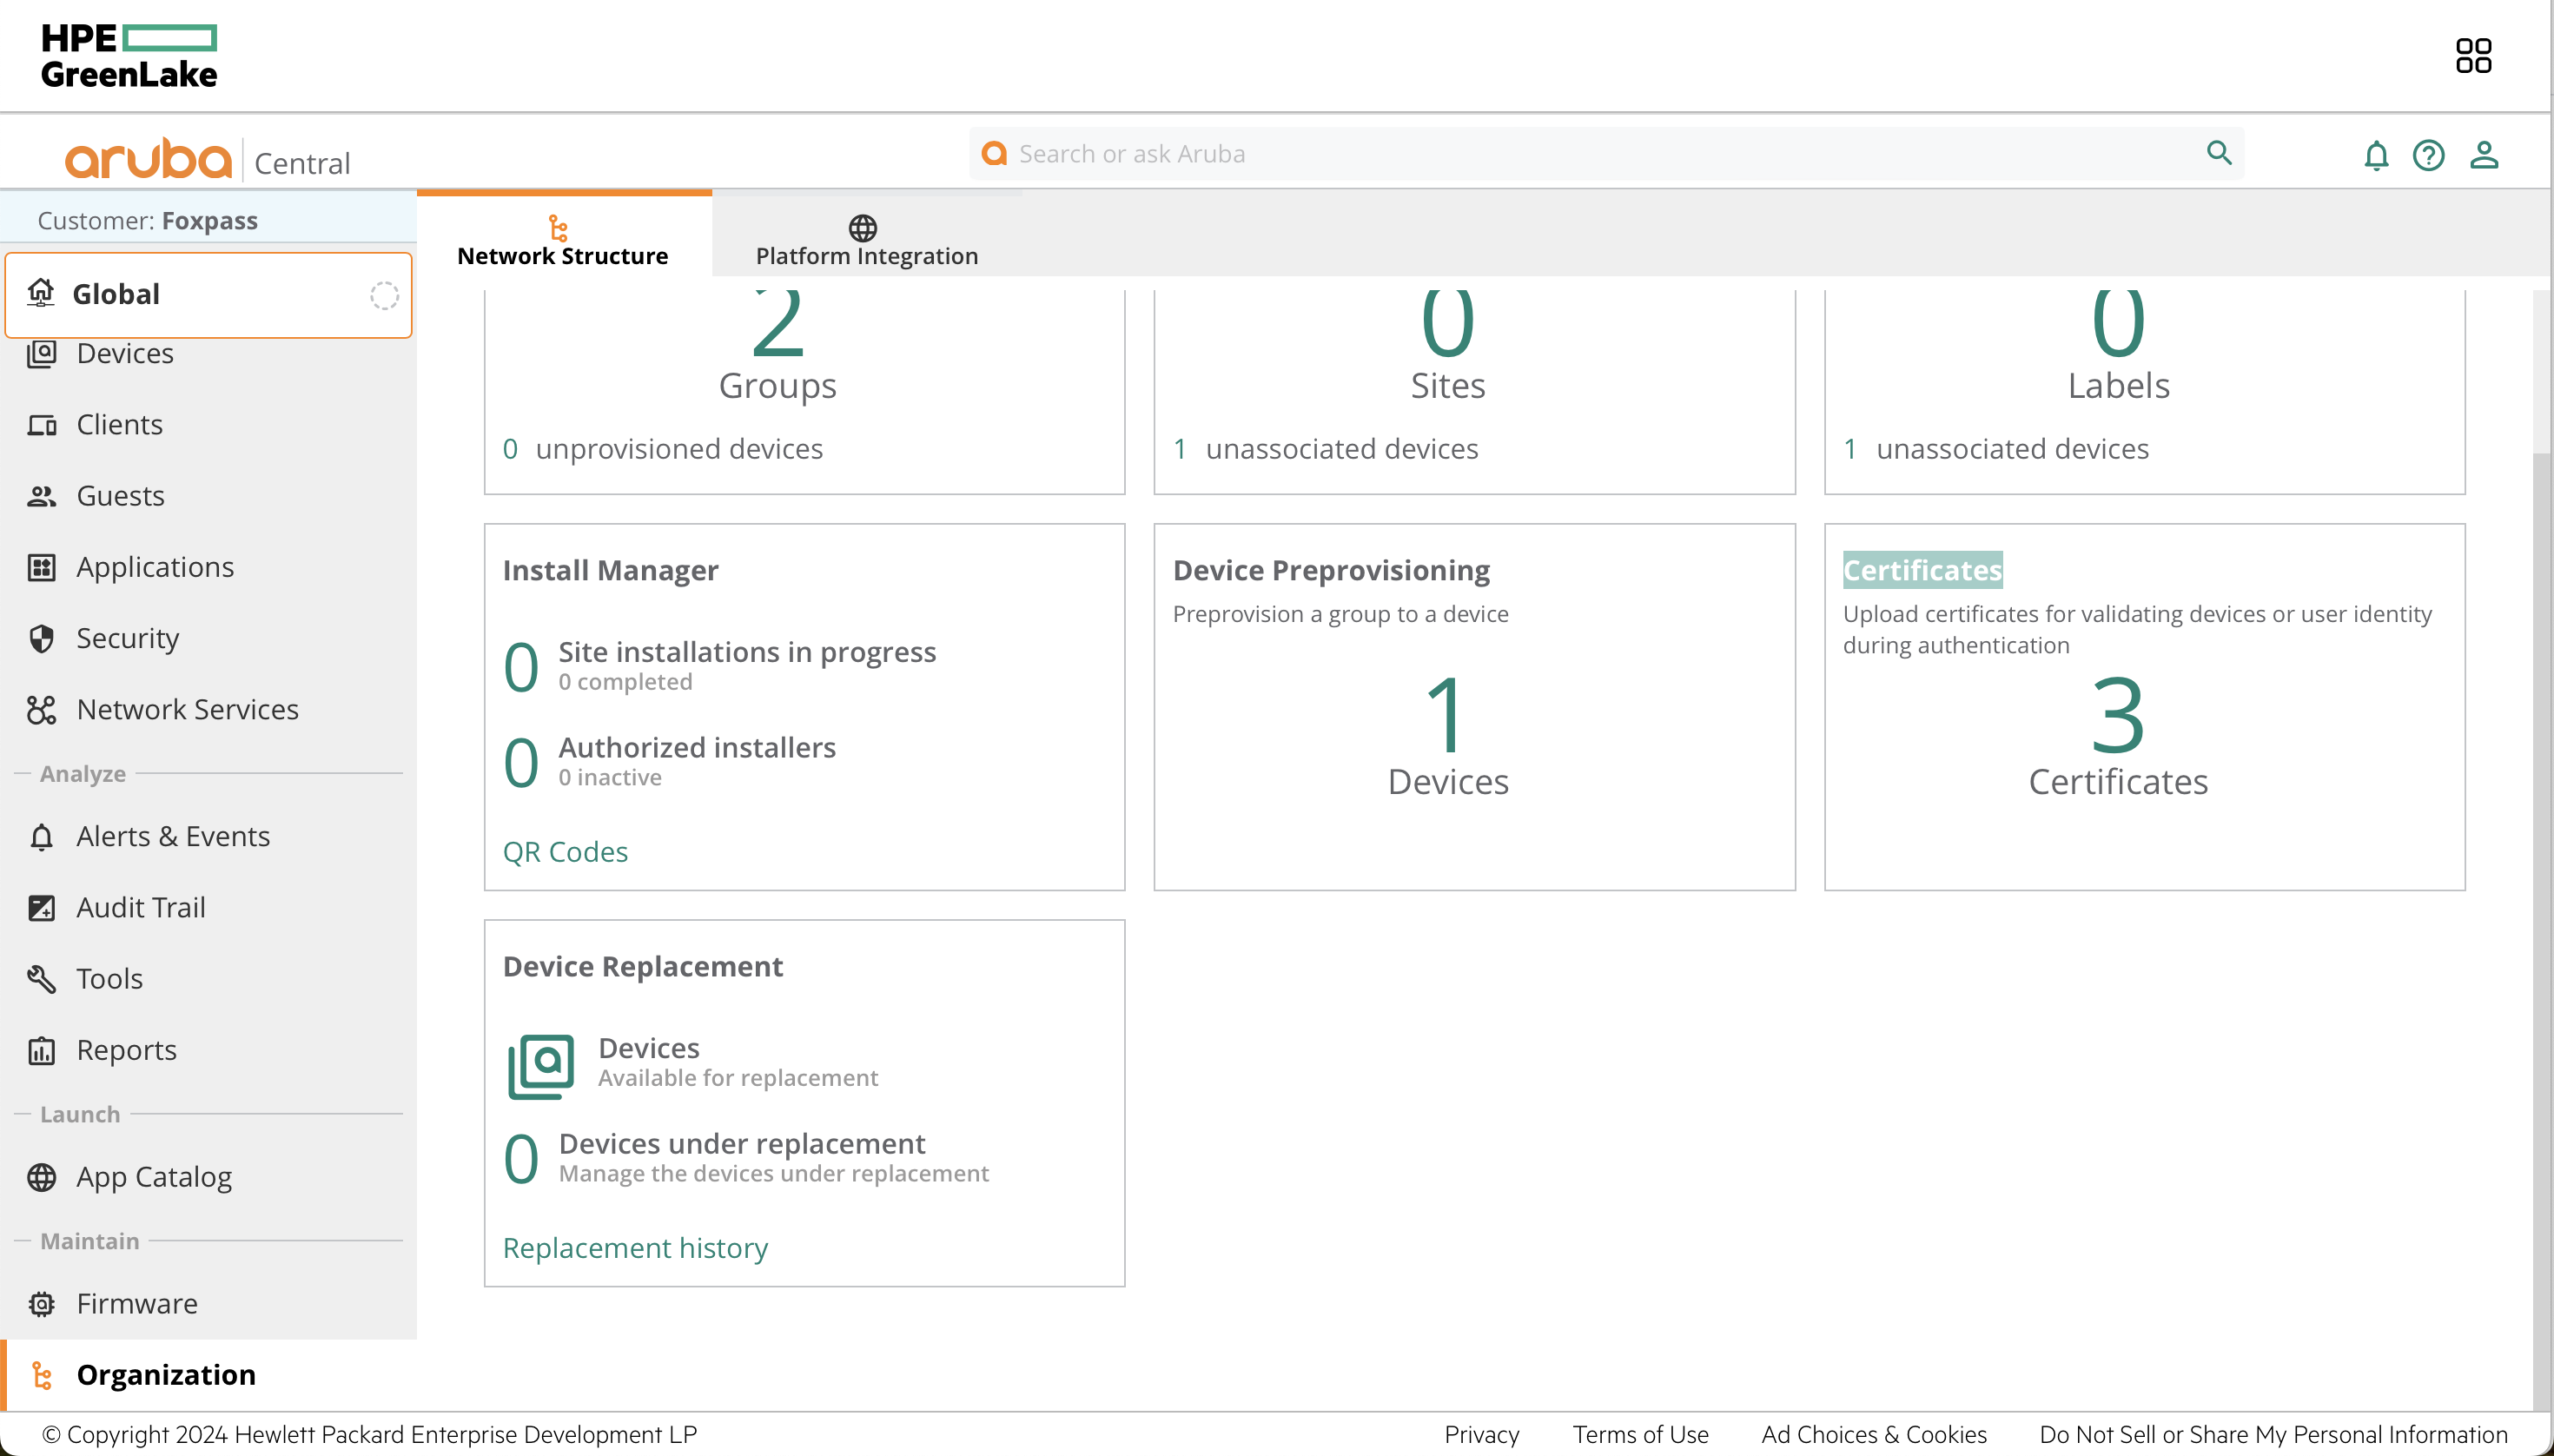
Click Certificates
- Under Device Certificates > Certificate Store click the plus. Name the certificate "Foxpass Server CA" and ensure that the type is set to CA Certificate and the format is set to PEM. Upload the CA .crt file downloaded in Step 1.
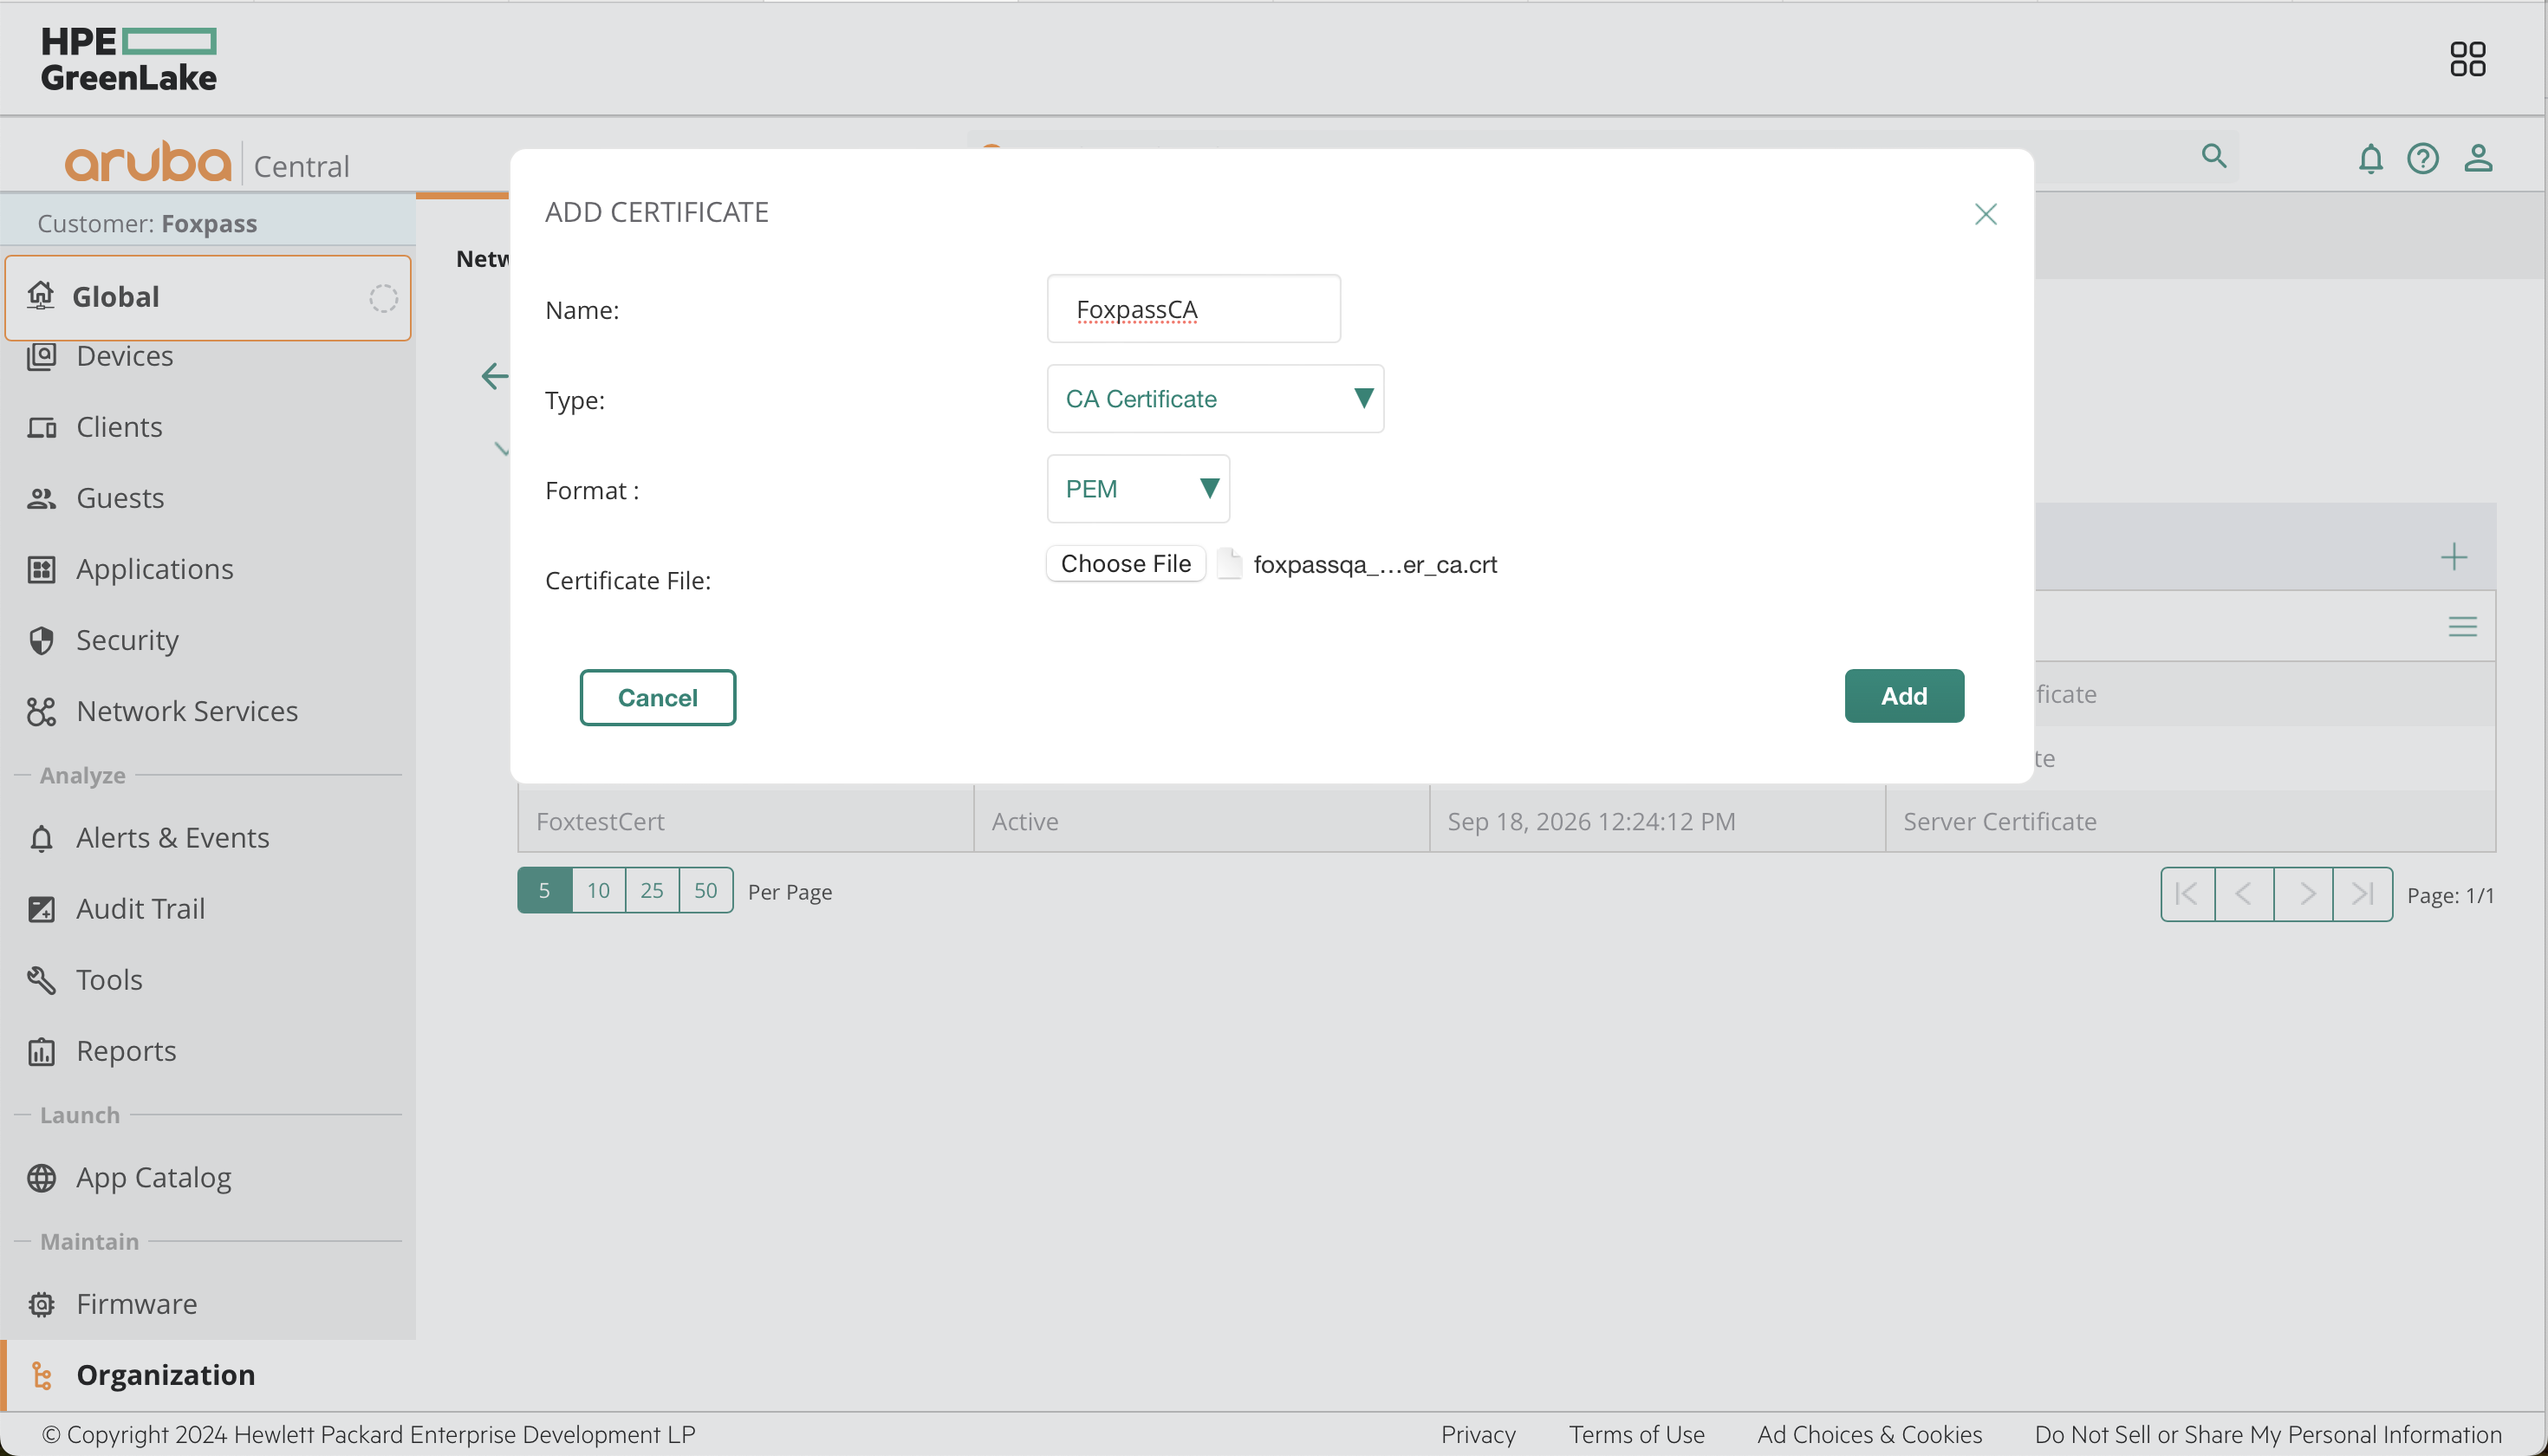
Upload the CA
- Click the plus once more. Name the certificate "Foxpass client certificate" and ensure that the type is set to Server Certificate and the format is set to PEM. Upload the Cert+Key file created in Step 3.
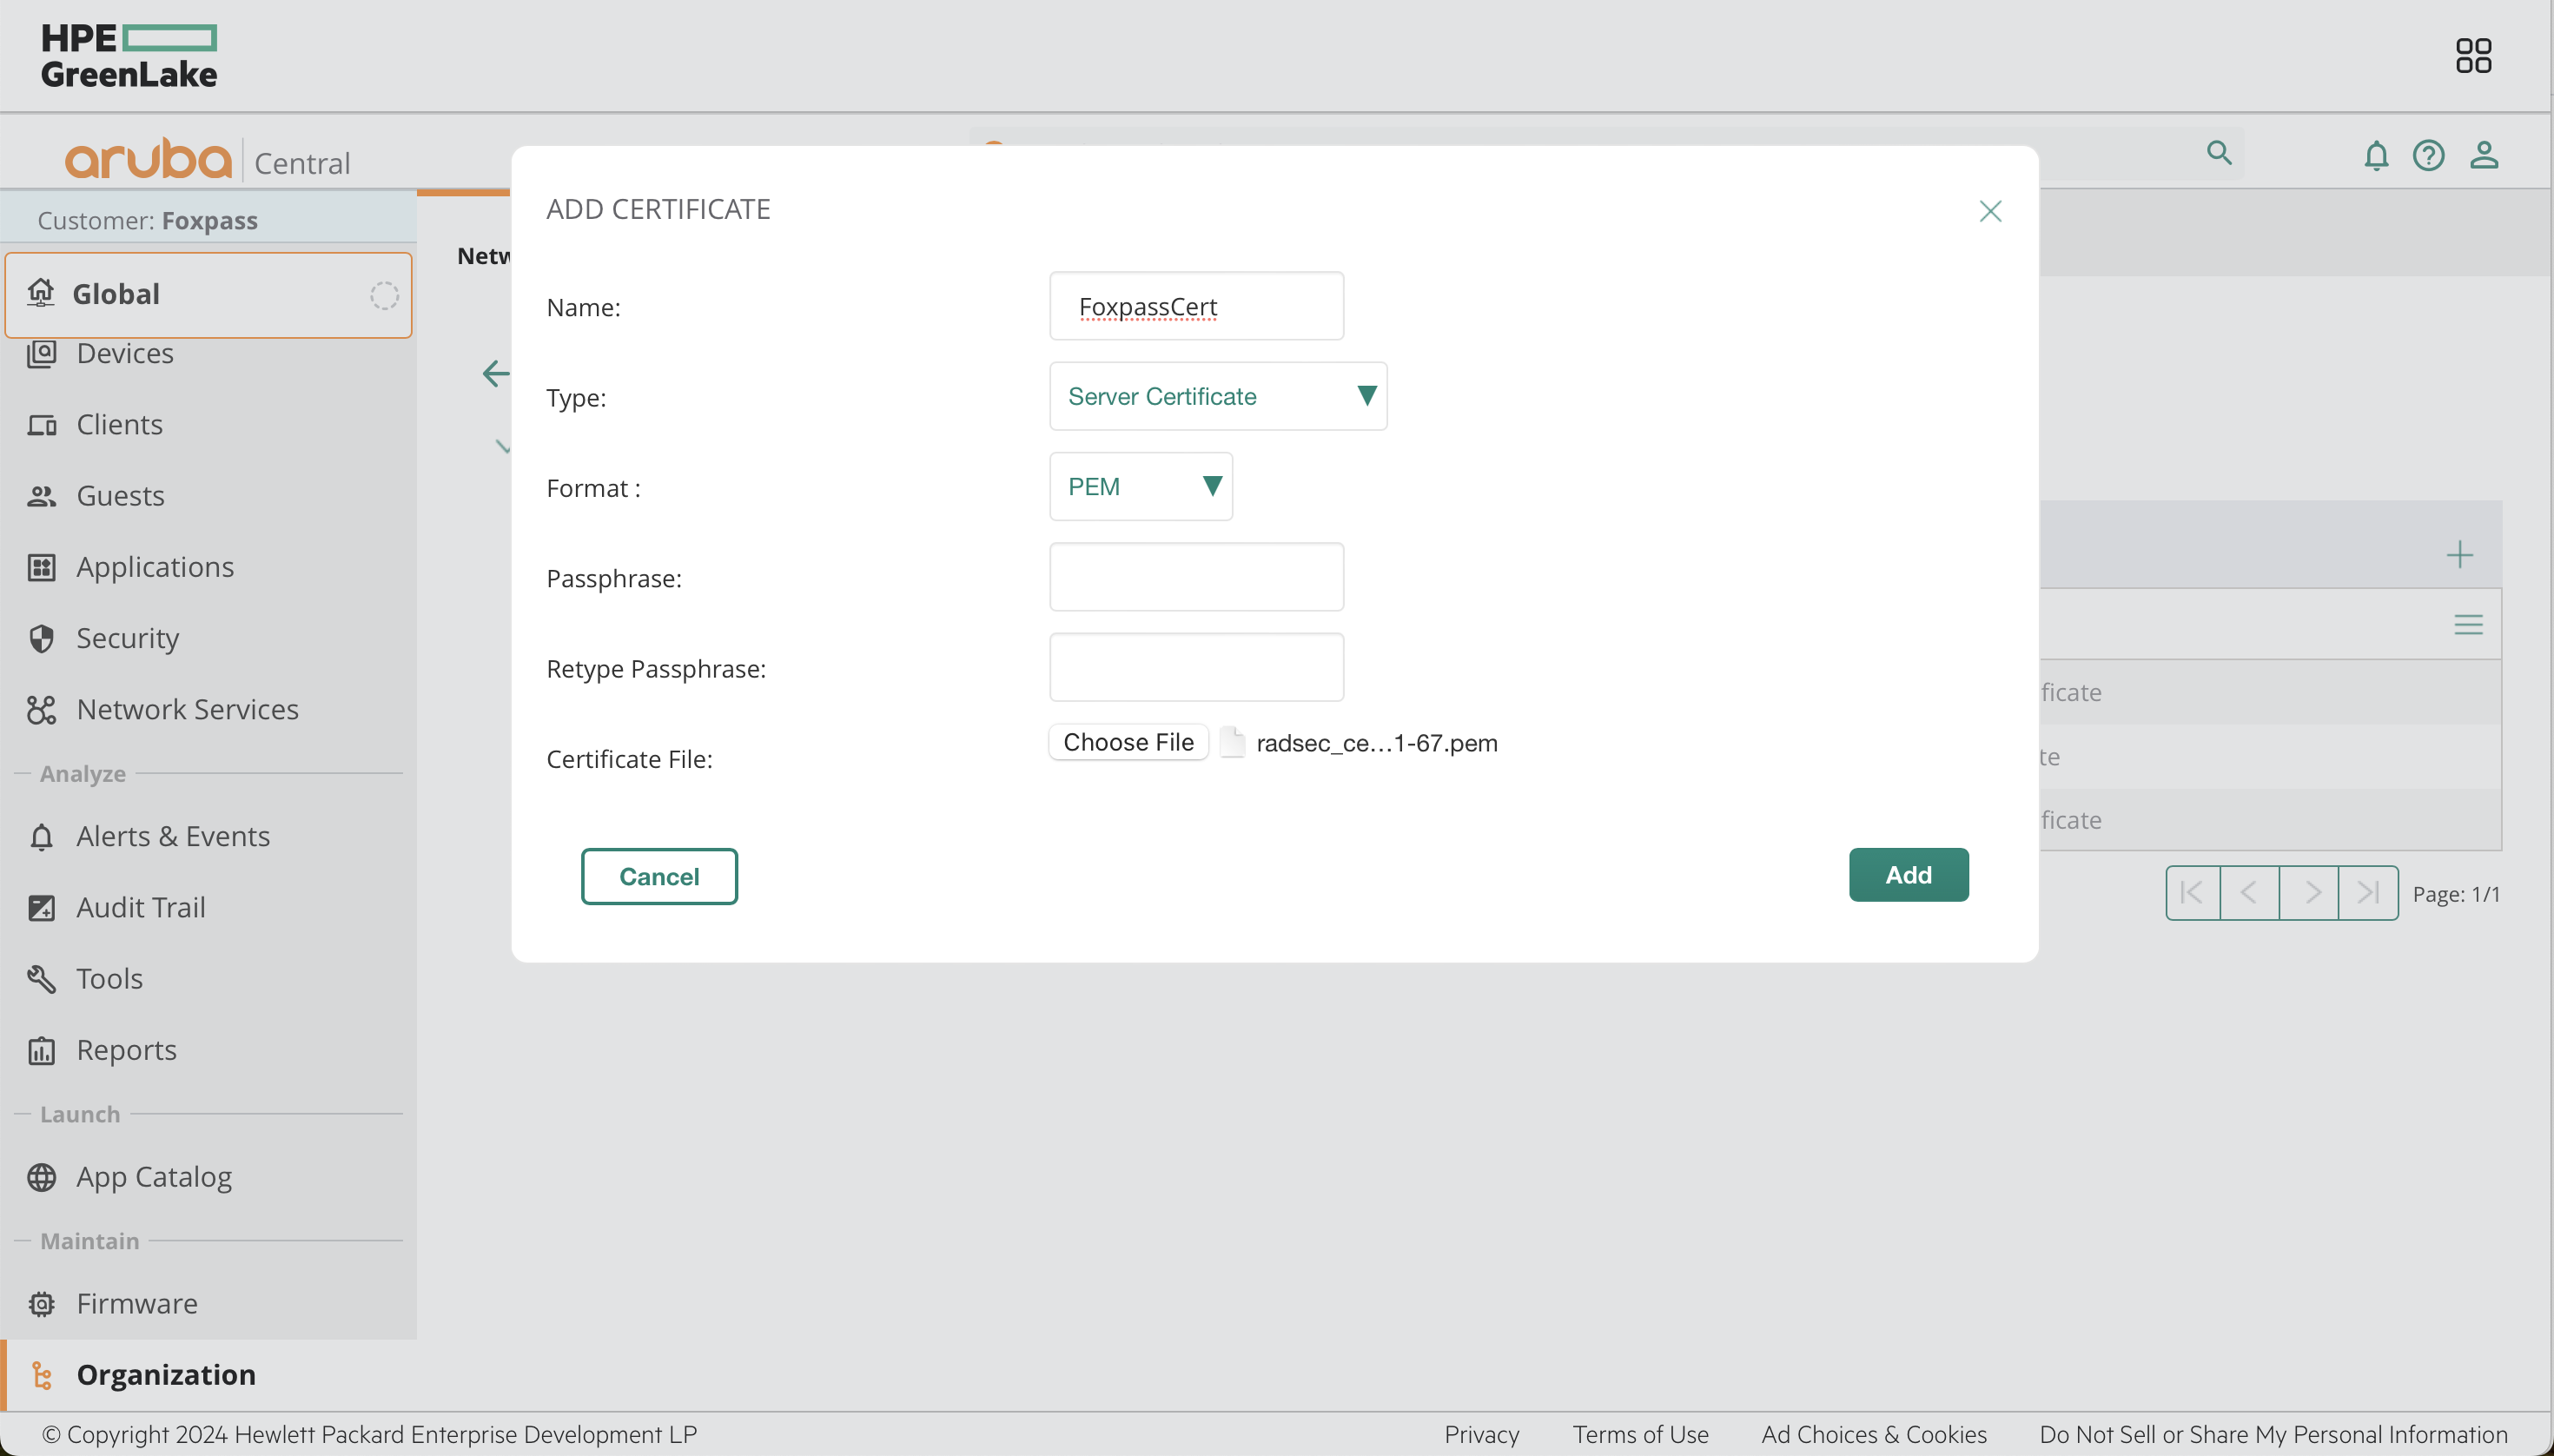
Upload the Cert + Key
Configure SSID for RadSec
- In Aruba Central navigate to Devices | WLANs. Click Add SSID. Name the SSID and click Next.
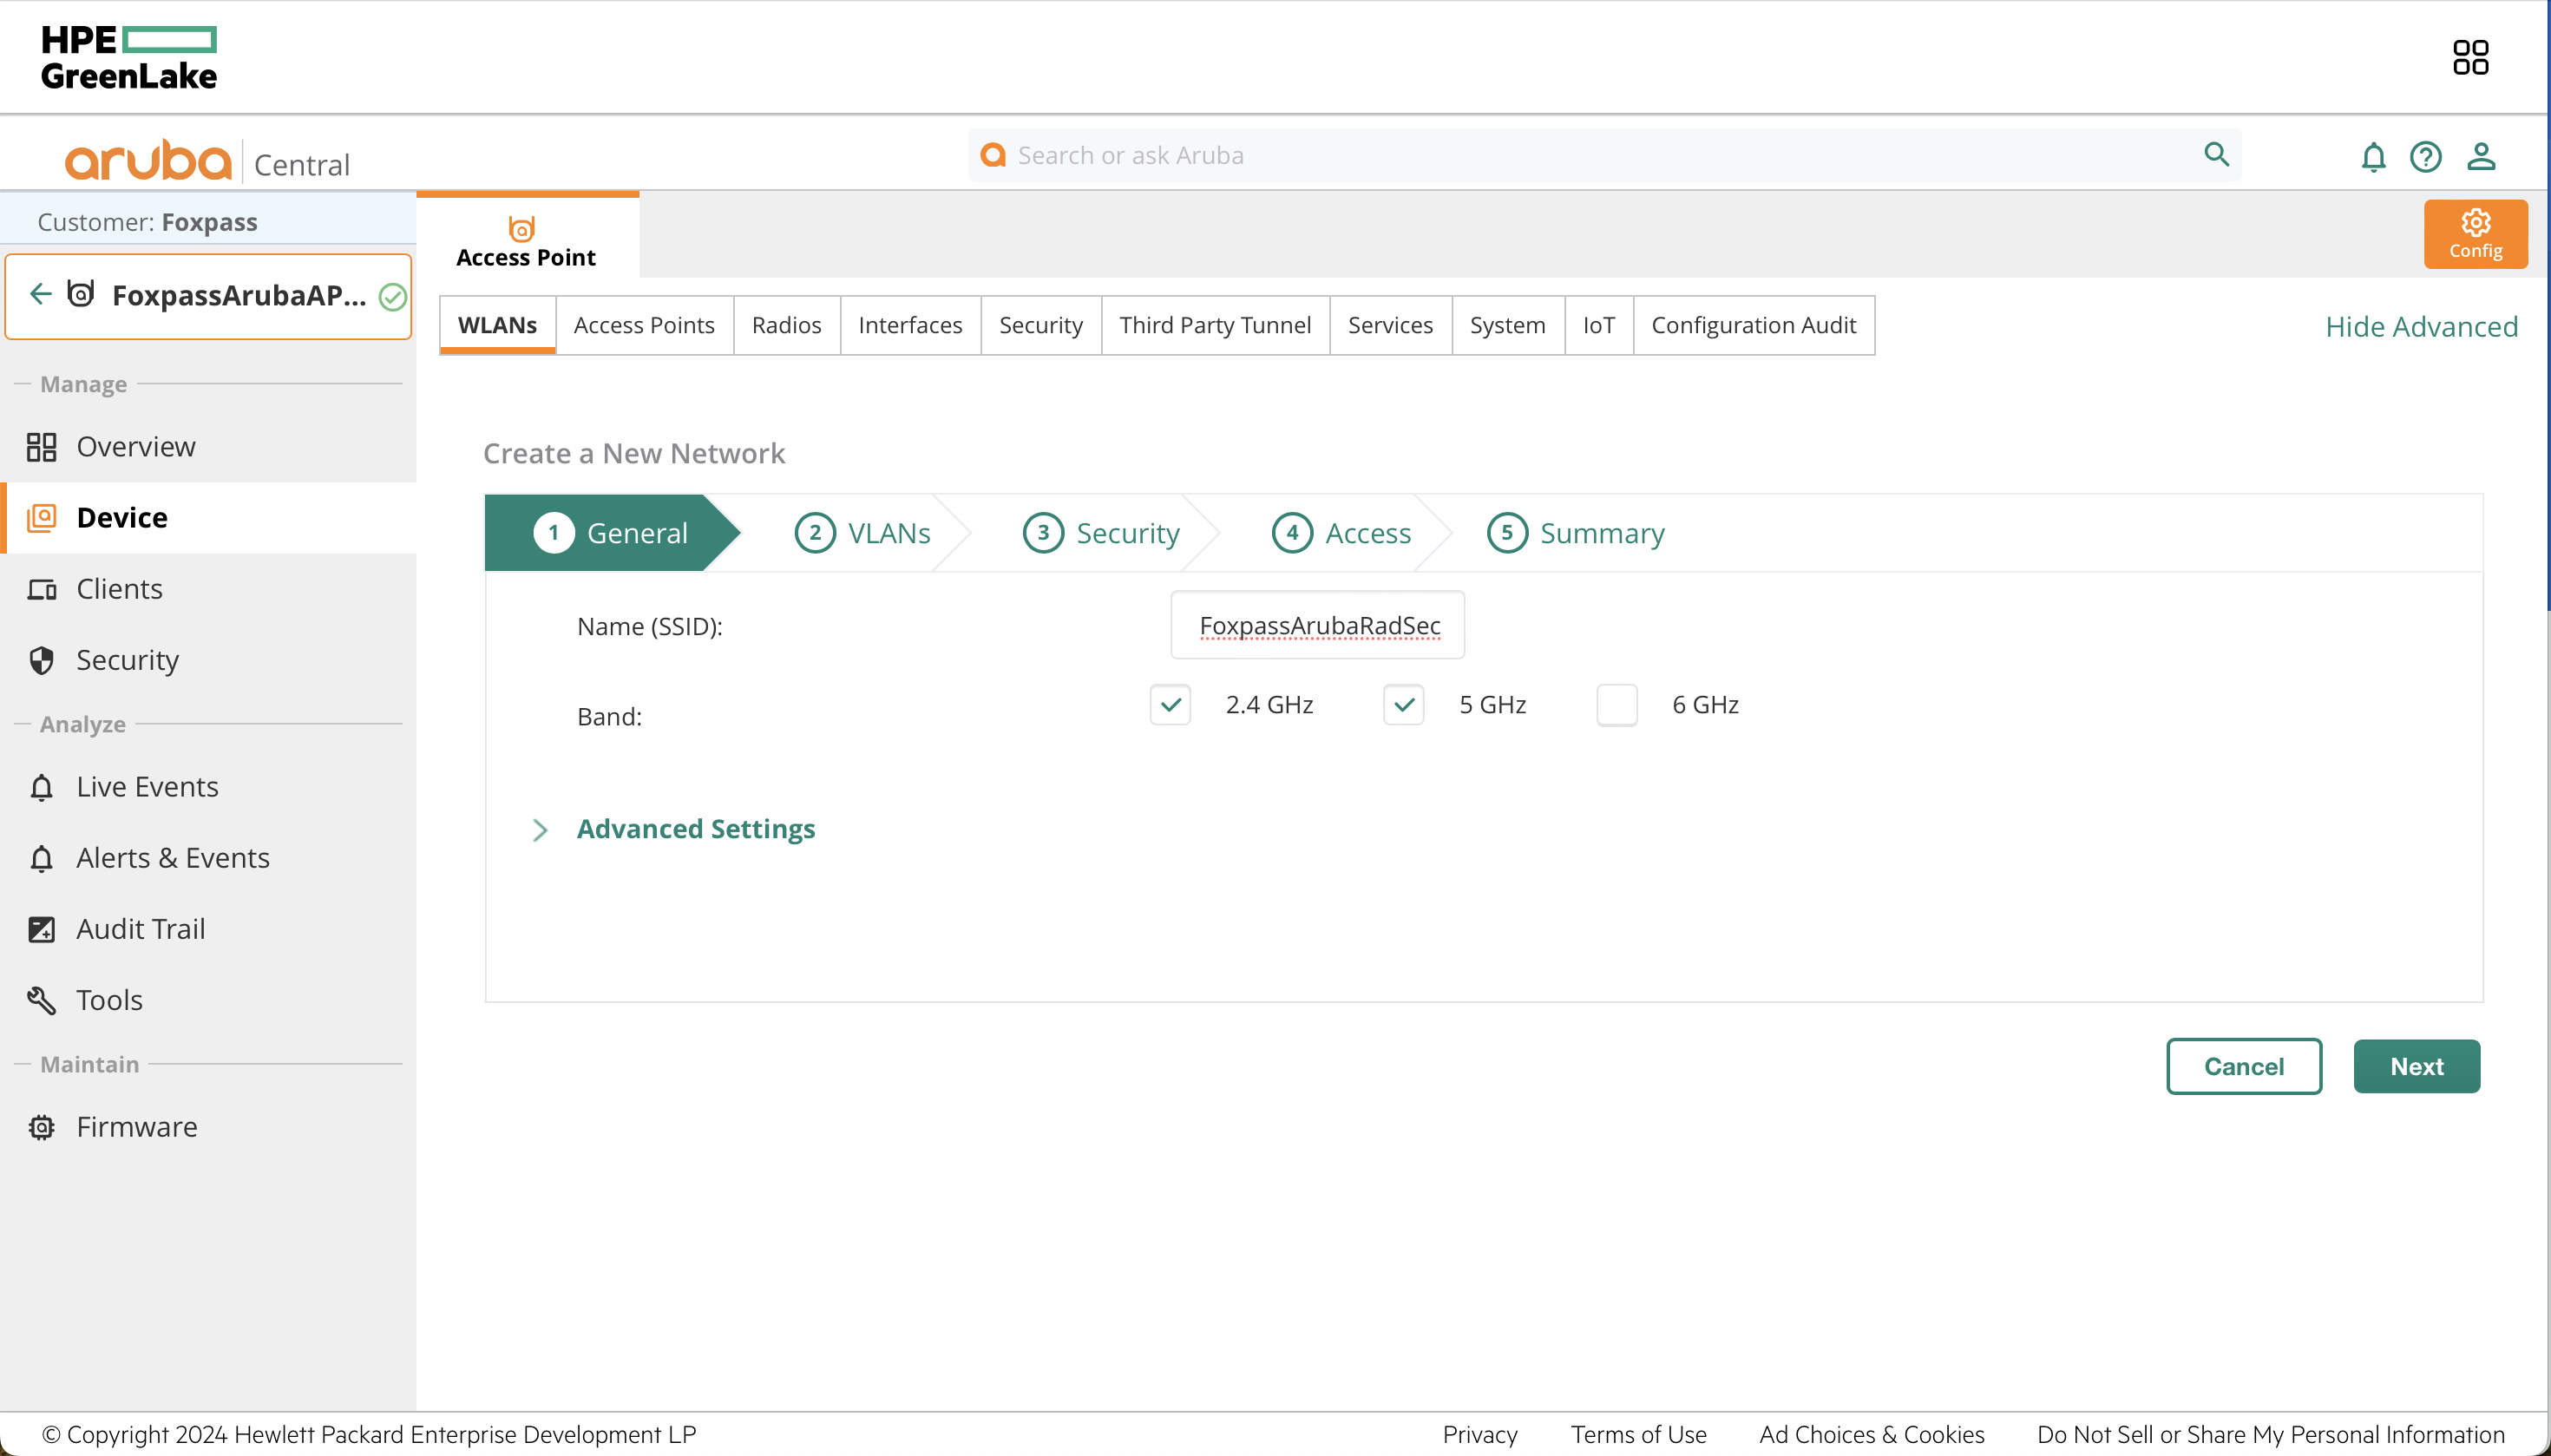
SSID General Configuration
- Leave the Traffic forwarding mode and Client VLAN Assignment on Bridge and Static respectively. Add whichever VLAN you would like the network to pull IP address from, most likely 1, and click Next.
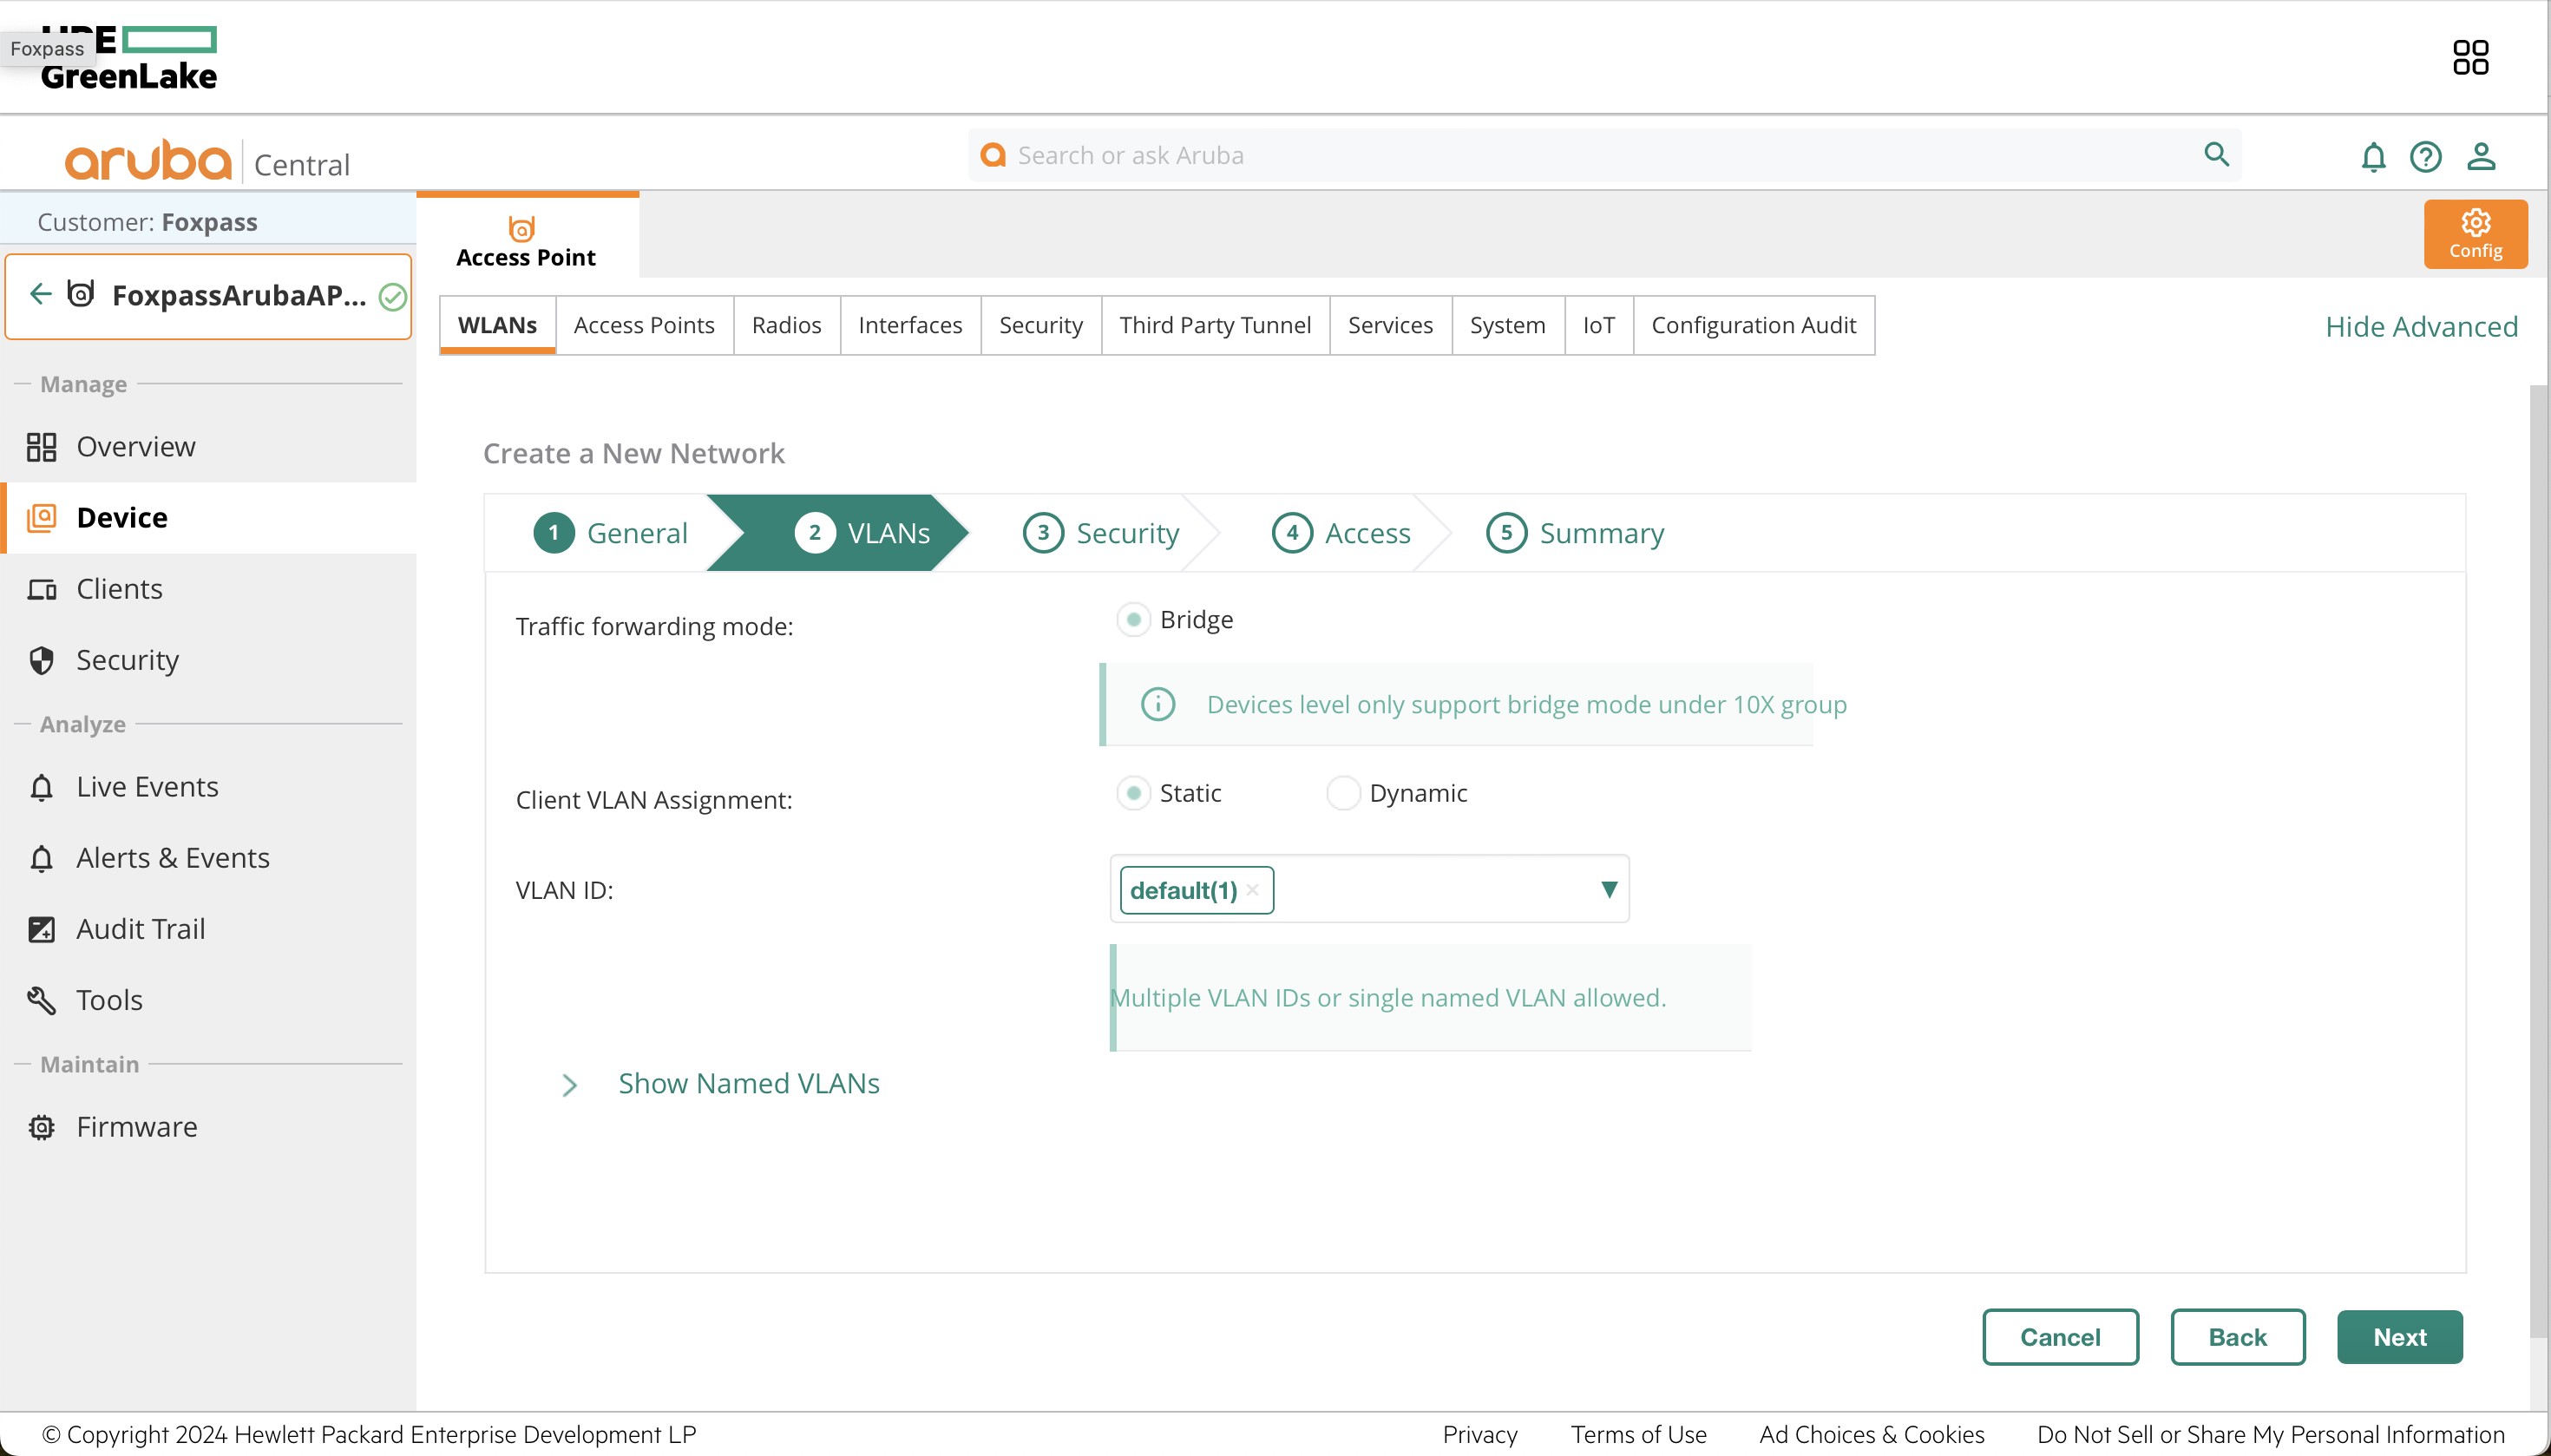
SSID VLAN Configuration
- Set the Security Level to Enterprise and click the + next to Primary Server. Name the new server, set the Server Type to RADIUS, enable Radsec, ensure the Radsec Port is 2083, the Radsec Keepalive Type is TCP Keepalive, and the IP Address/FQDN is radius.foxpass.com, then click OK.

SSID Authentication Server Configuration
- Make sure that the Security Level is Enterprise, the Key Management is WPA2-Enterprise, the Server Group is Primary and backup only and the Primary server is the authentication server you just created in Step 3, and click Next.
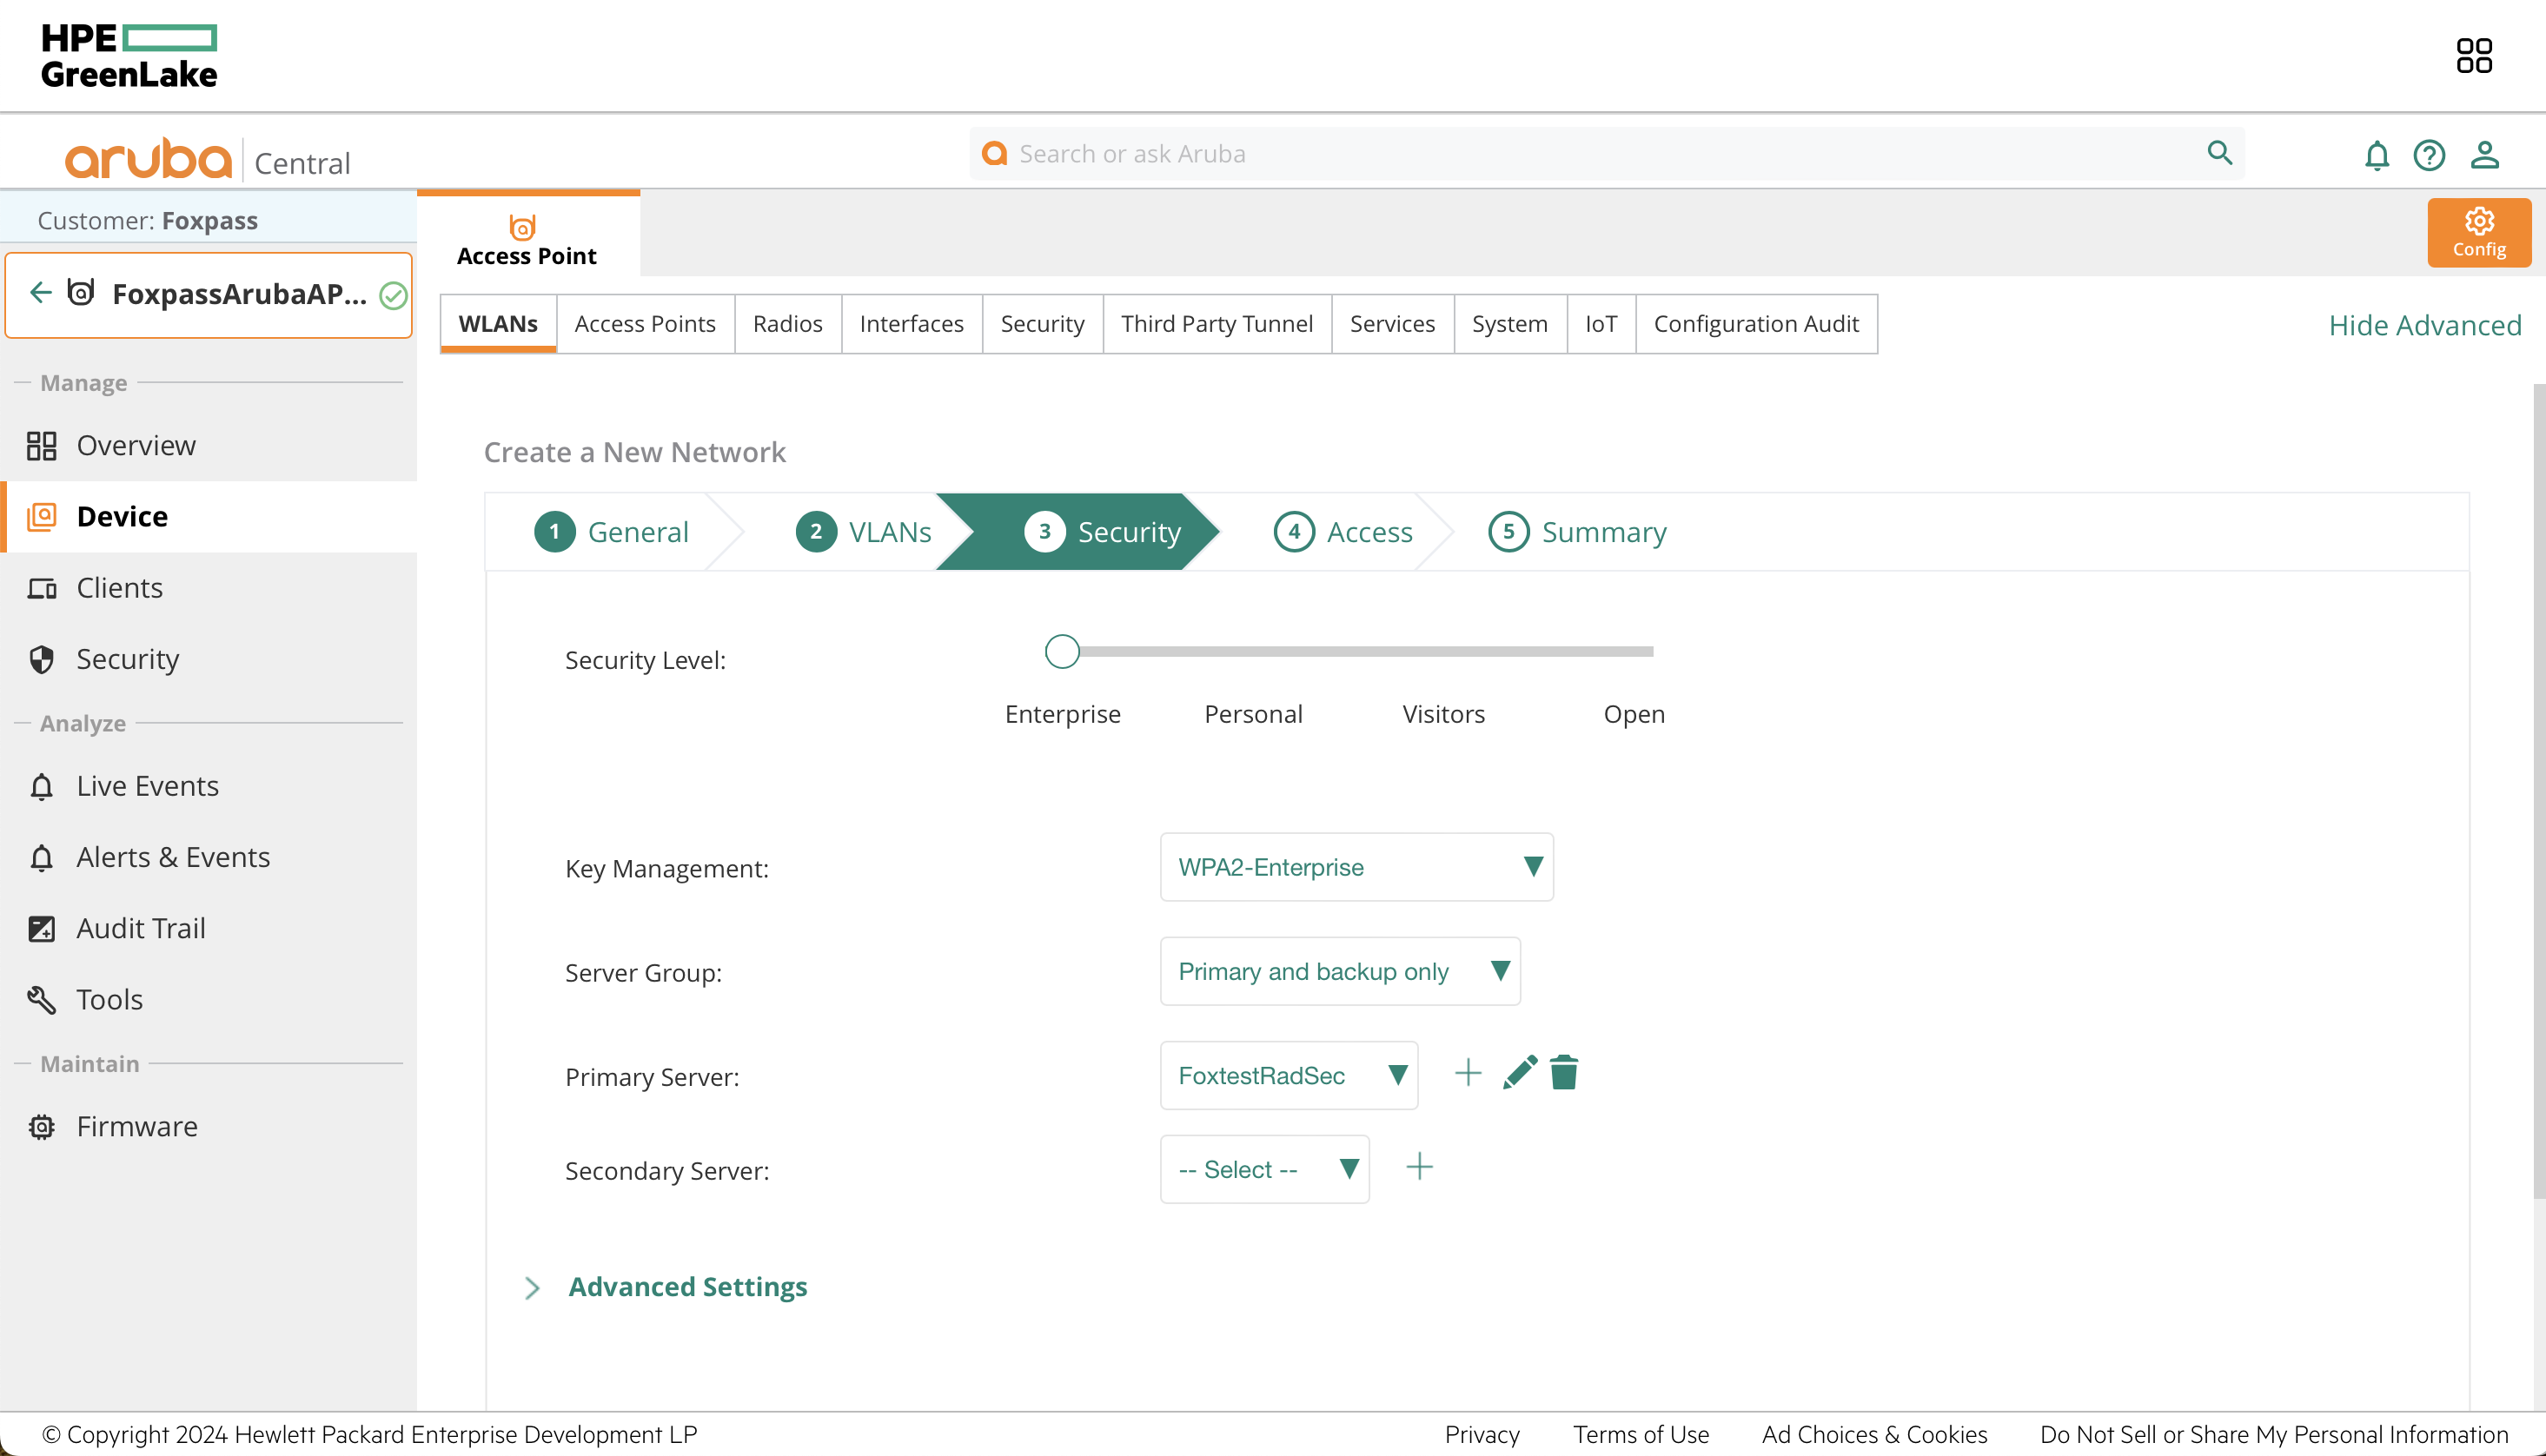
SSID Security Configuration
- Configure the Roles and Rules as you see fit and click Next to reach the Summary confirmation page. Then click Finish to create the SSID.
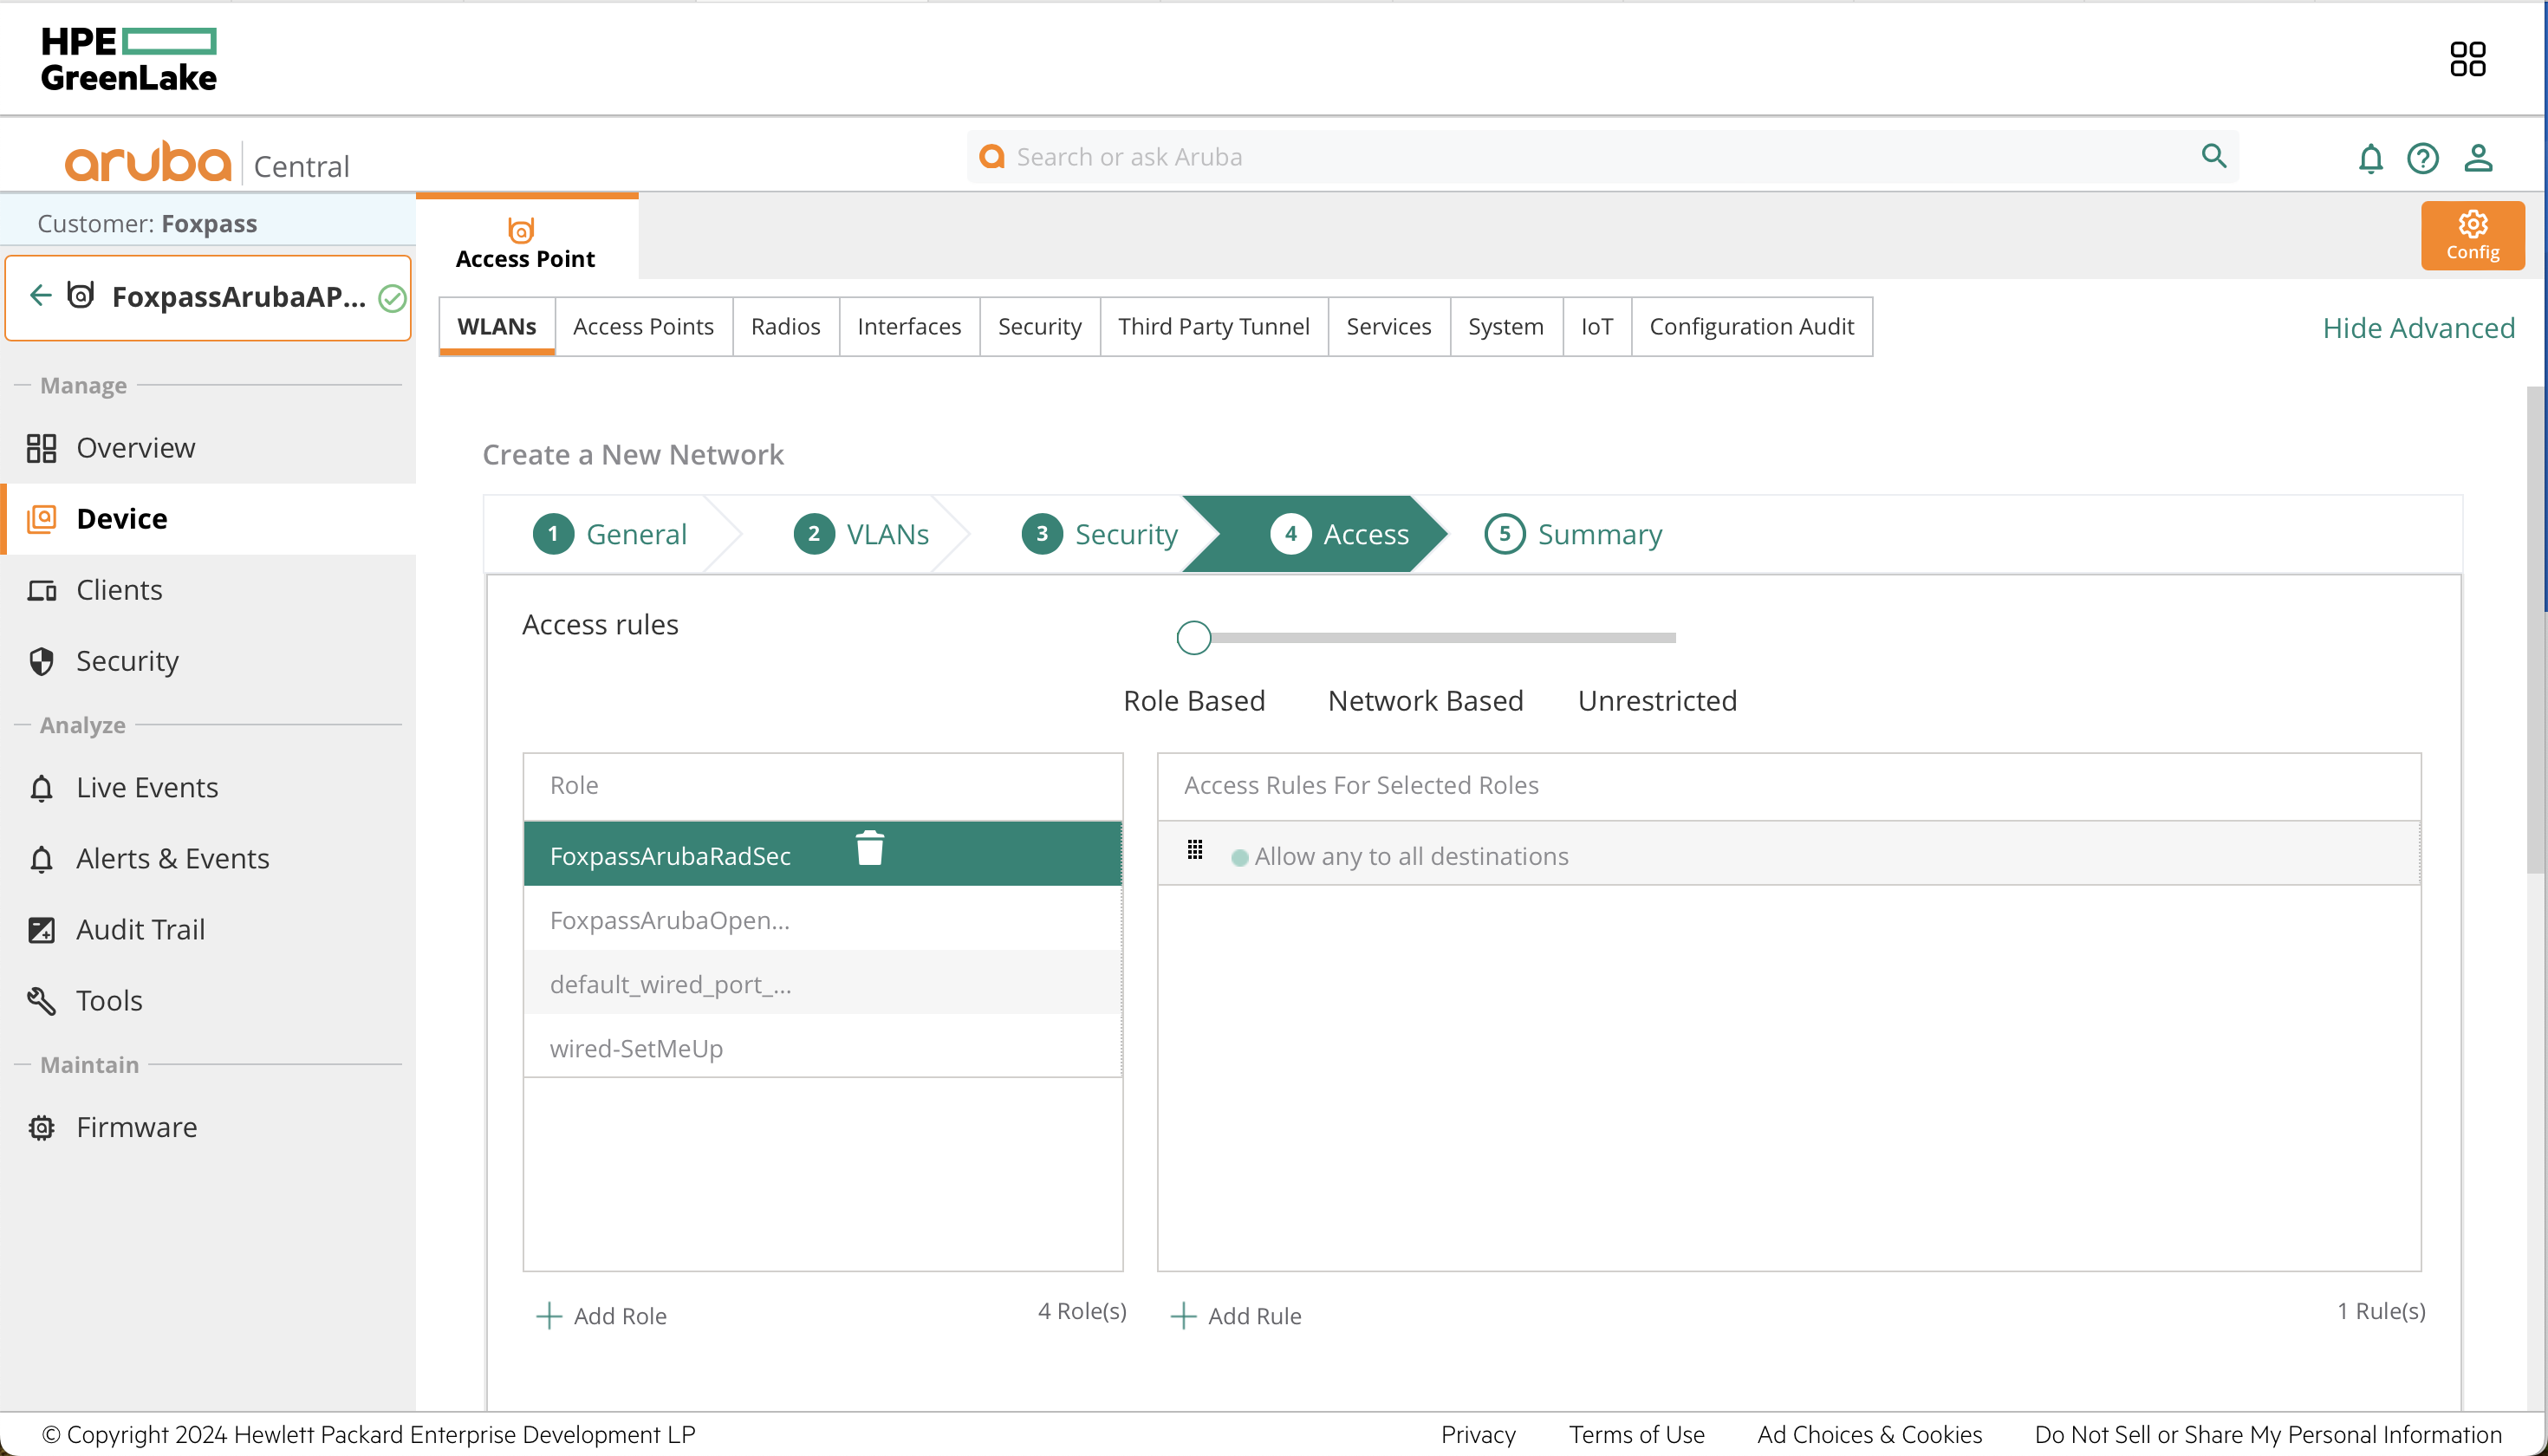
SSID Access Configuration
- Click Show Advanced to reveal the rest of the tabs in the Device menu. Navigate to the Security tab. Expand Certificate Usage and the expand the sub category also named Certificate Usage. Set the Certificate Authority and RadSec CA fields to the certificate authority entry you created in Step 5 of the previous section. Set the Authentication Server and RadSec Client Certs to the server certificate entry you created in Step 6 of the previous section. Click Save Settings to publish your changes.
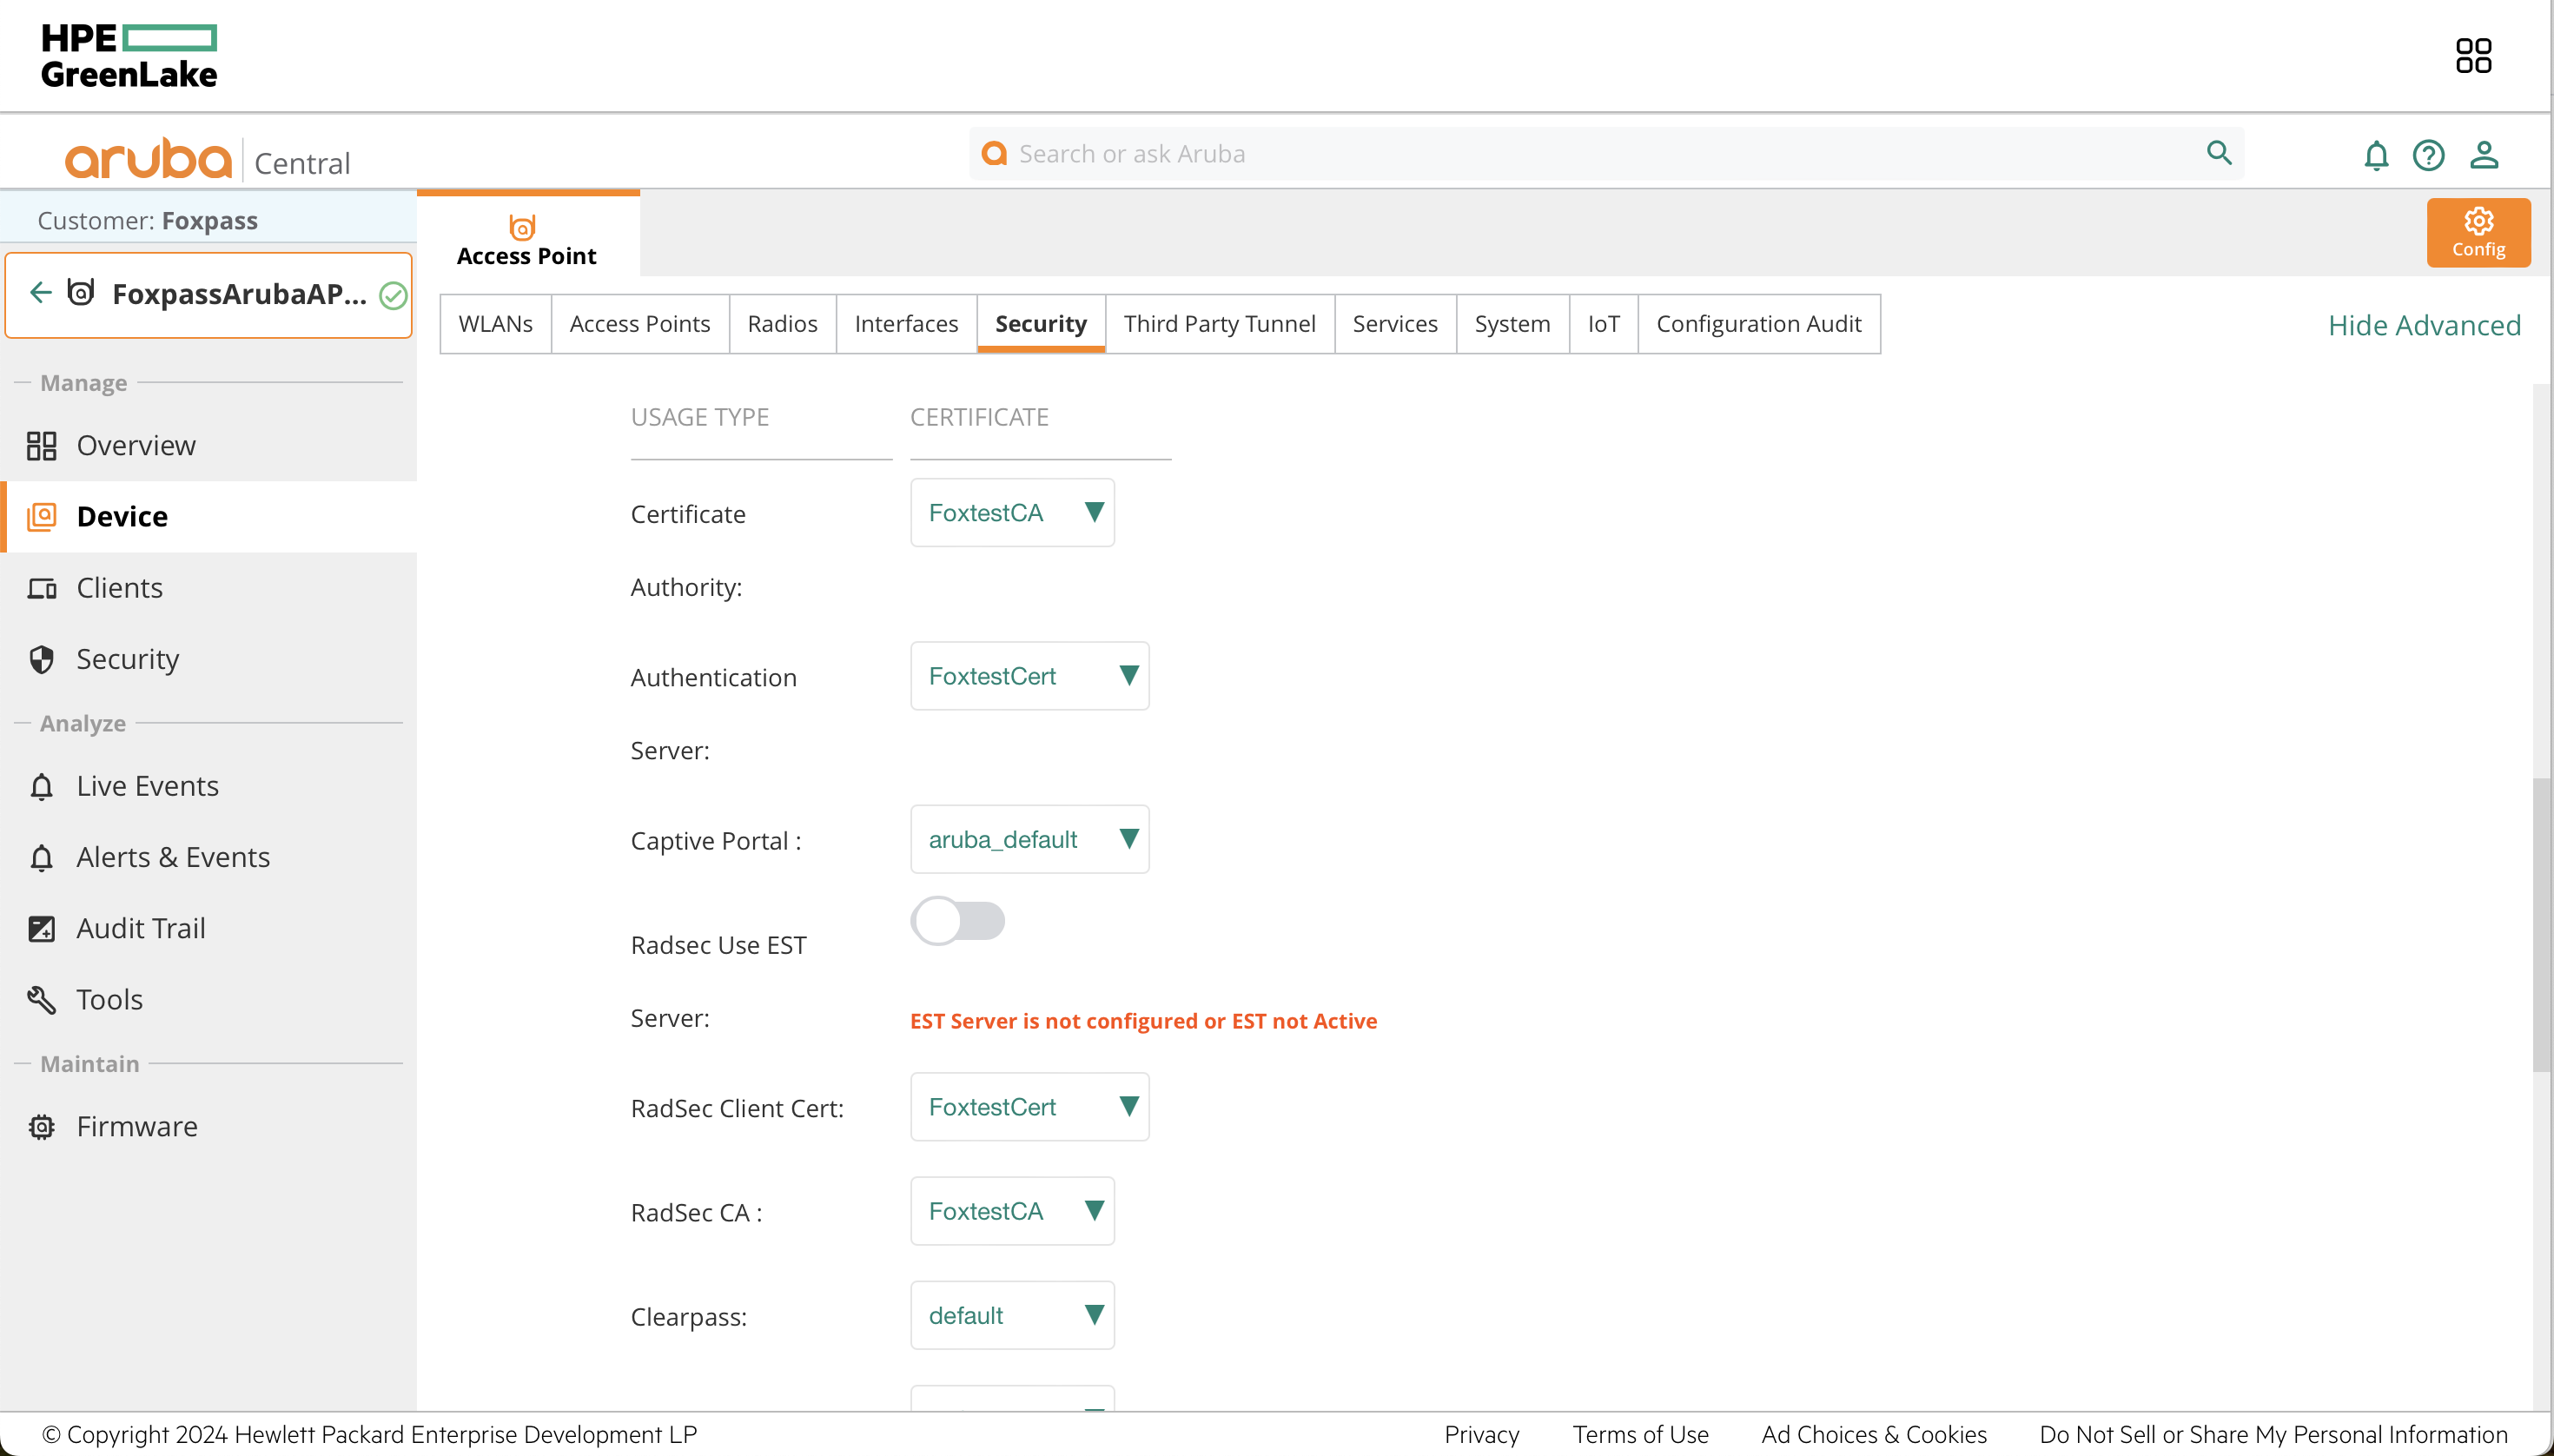
Certificate Assignment
- Now connect to your SSID.
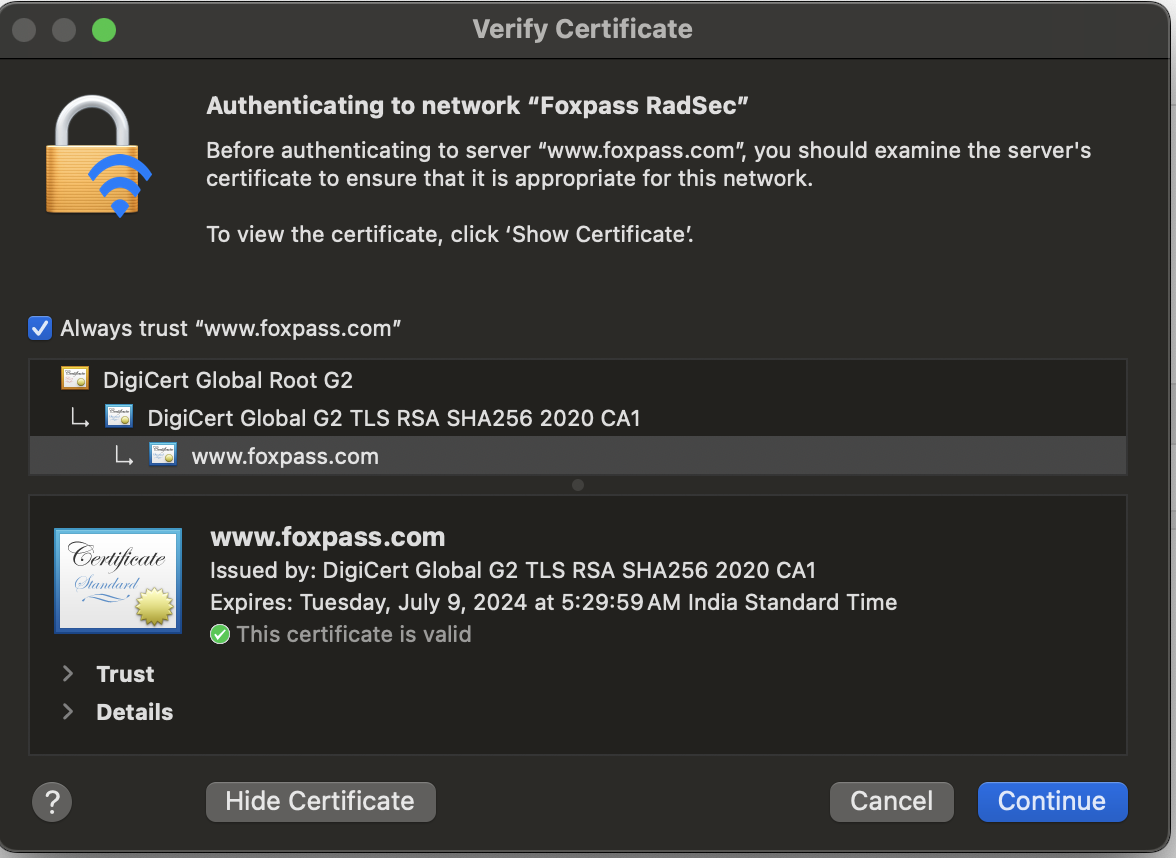
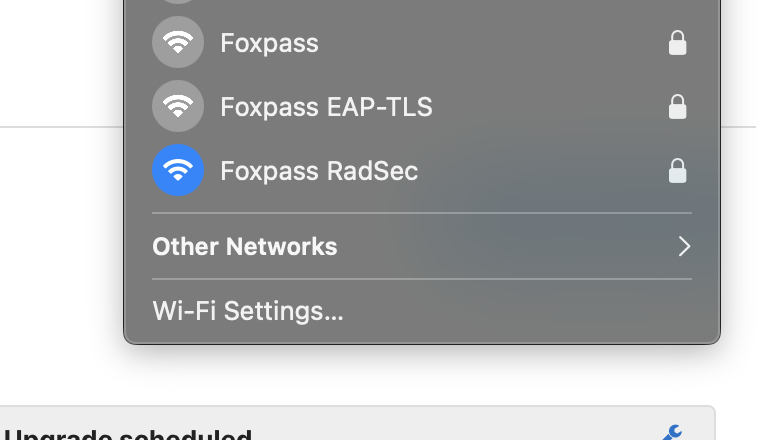
Connected to SSID
- You can see successful/unsuccessful logs on the radius logs page.
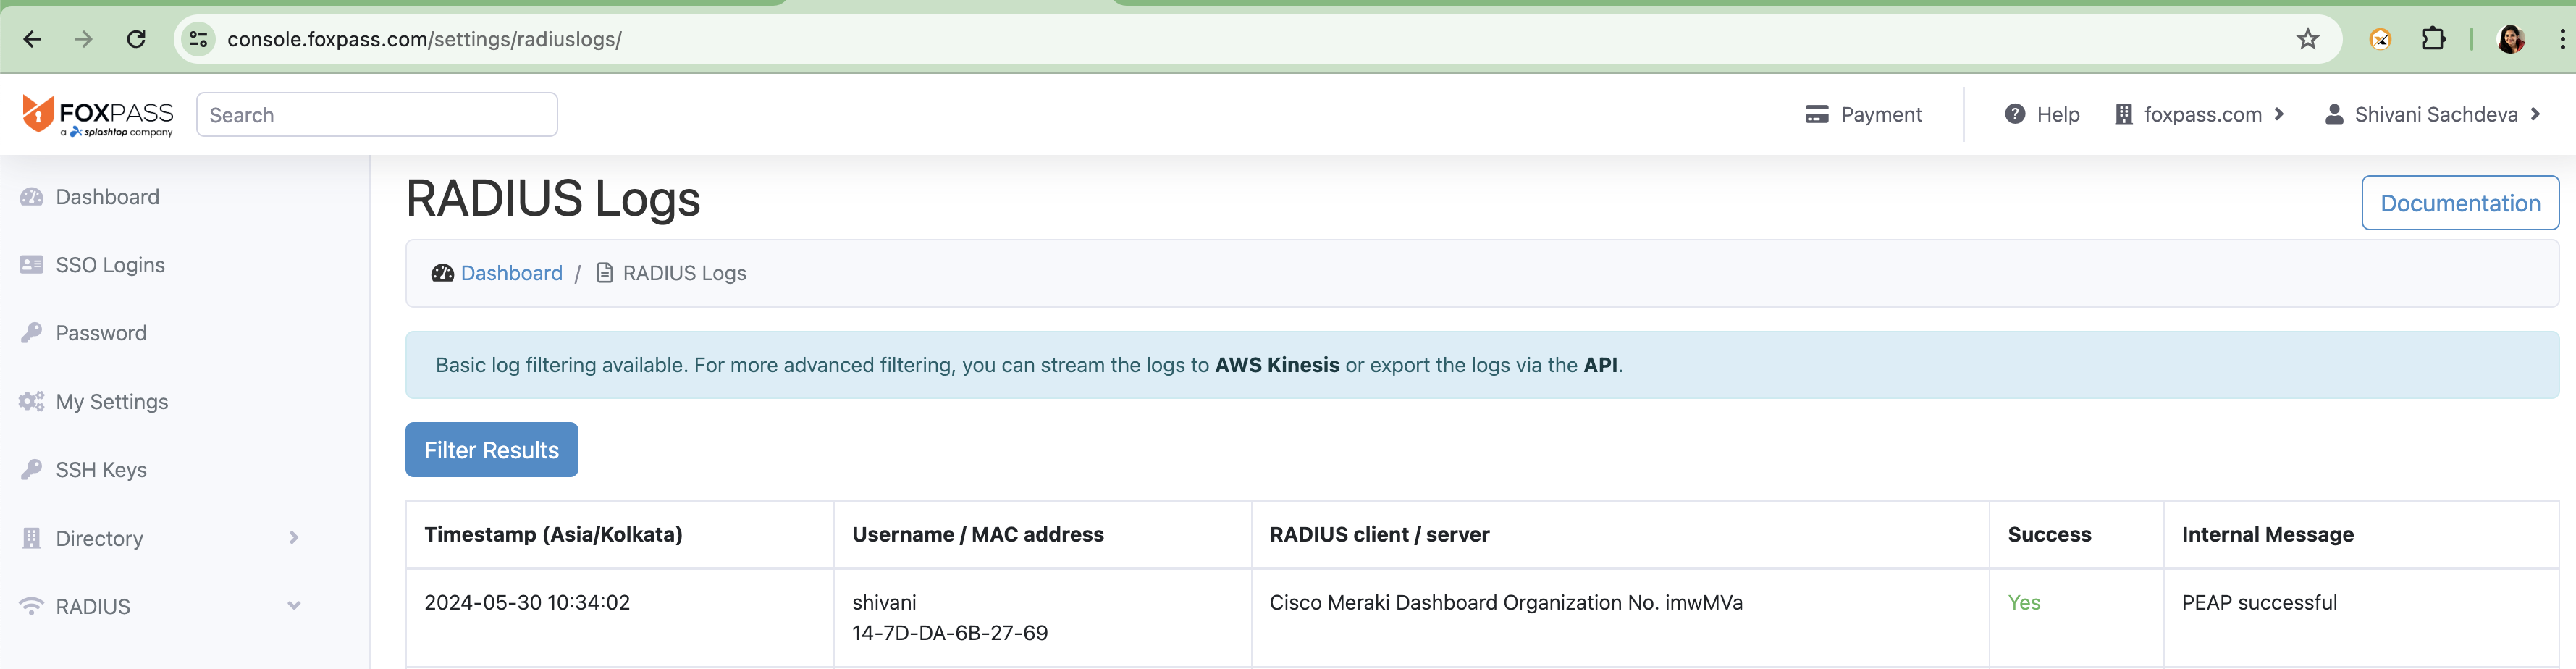
RADIUS logs
Updated 4 months ago