
Workspace ONE UEM (Initial Setup)
To install and configure SCEP (Simple Certificate Enrollment Protocol) on a MacBook/Windows device using VMware Workspace ONE UEM (Unified Endpoint Management), you need to set up both the Workspace ONE UEM console and the device. This involves configuring a SCEP certificate template in Workspace ONE UEM and then deploying it to the devices. Here are the step-by-step instructions:
Prerequisites
- Ensure you have administrative access to Workspace ONE UEM.
- Ensure the MacBook is connected to the internet and can reach the Workspace ONE UEM server.
- Ensure your user in Workspace one is an active user added in foxpass.
Add Certificate Authority and Certificate Template in Workspace ONE UEM
- Create a SCEP endpoint on the SCEP page in Foxpass if not done earlier.
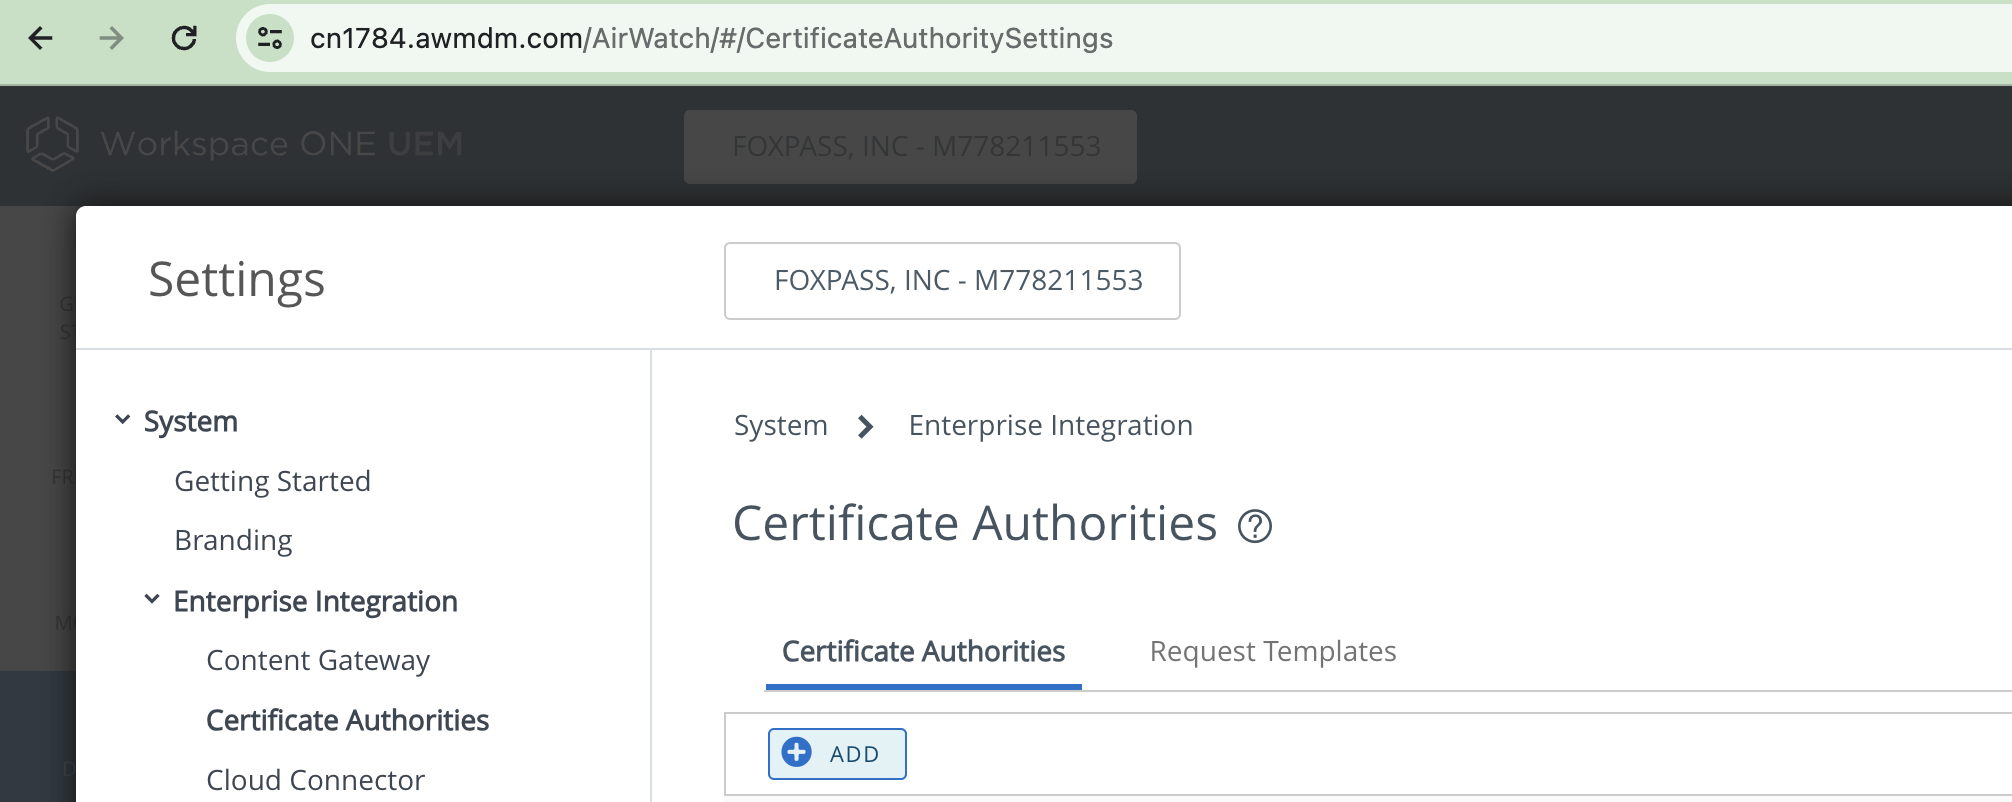
- Log in to Workspace ONE UEM Console. Open your web browser, navigate to your Workspace ONE UEM admin console, and log in with your credentials.
- Go to Devices > Certificates > Certificate Authorities, and then click Add.
Add Certificate Authority
-
Enter details as below:
-
Name: Give name to CA of your choice.
-
Description: Give description of your choice.
-
Authority Type: Generic SCEP
-
SCEP URL: Paste the SCEP endpoint noted earlier. Note: Please add a '/' at the end of the SCEP URL after pasting it. For example, if the SCEP endpoint is https://api.foxpass.com/scep/1234-34343-221/, make sure to add an extra slash like https://api.foxpass.com/scep/1234-34343-221// when pasting it in Workspace ONE.

-
Challenge Type: Static
-
Static Challenge: Paste the challenge password noted earlier.
-
Enable Proxy: Enabled
-
-
Click on 'TEST CONNECTION' button.
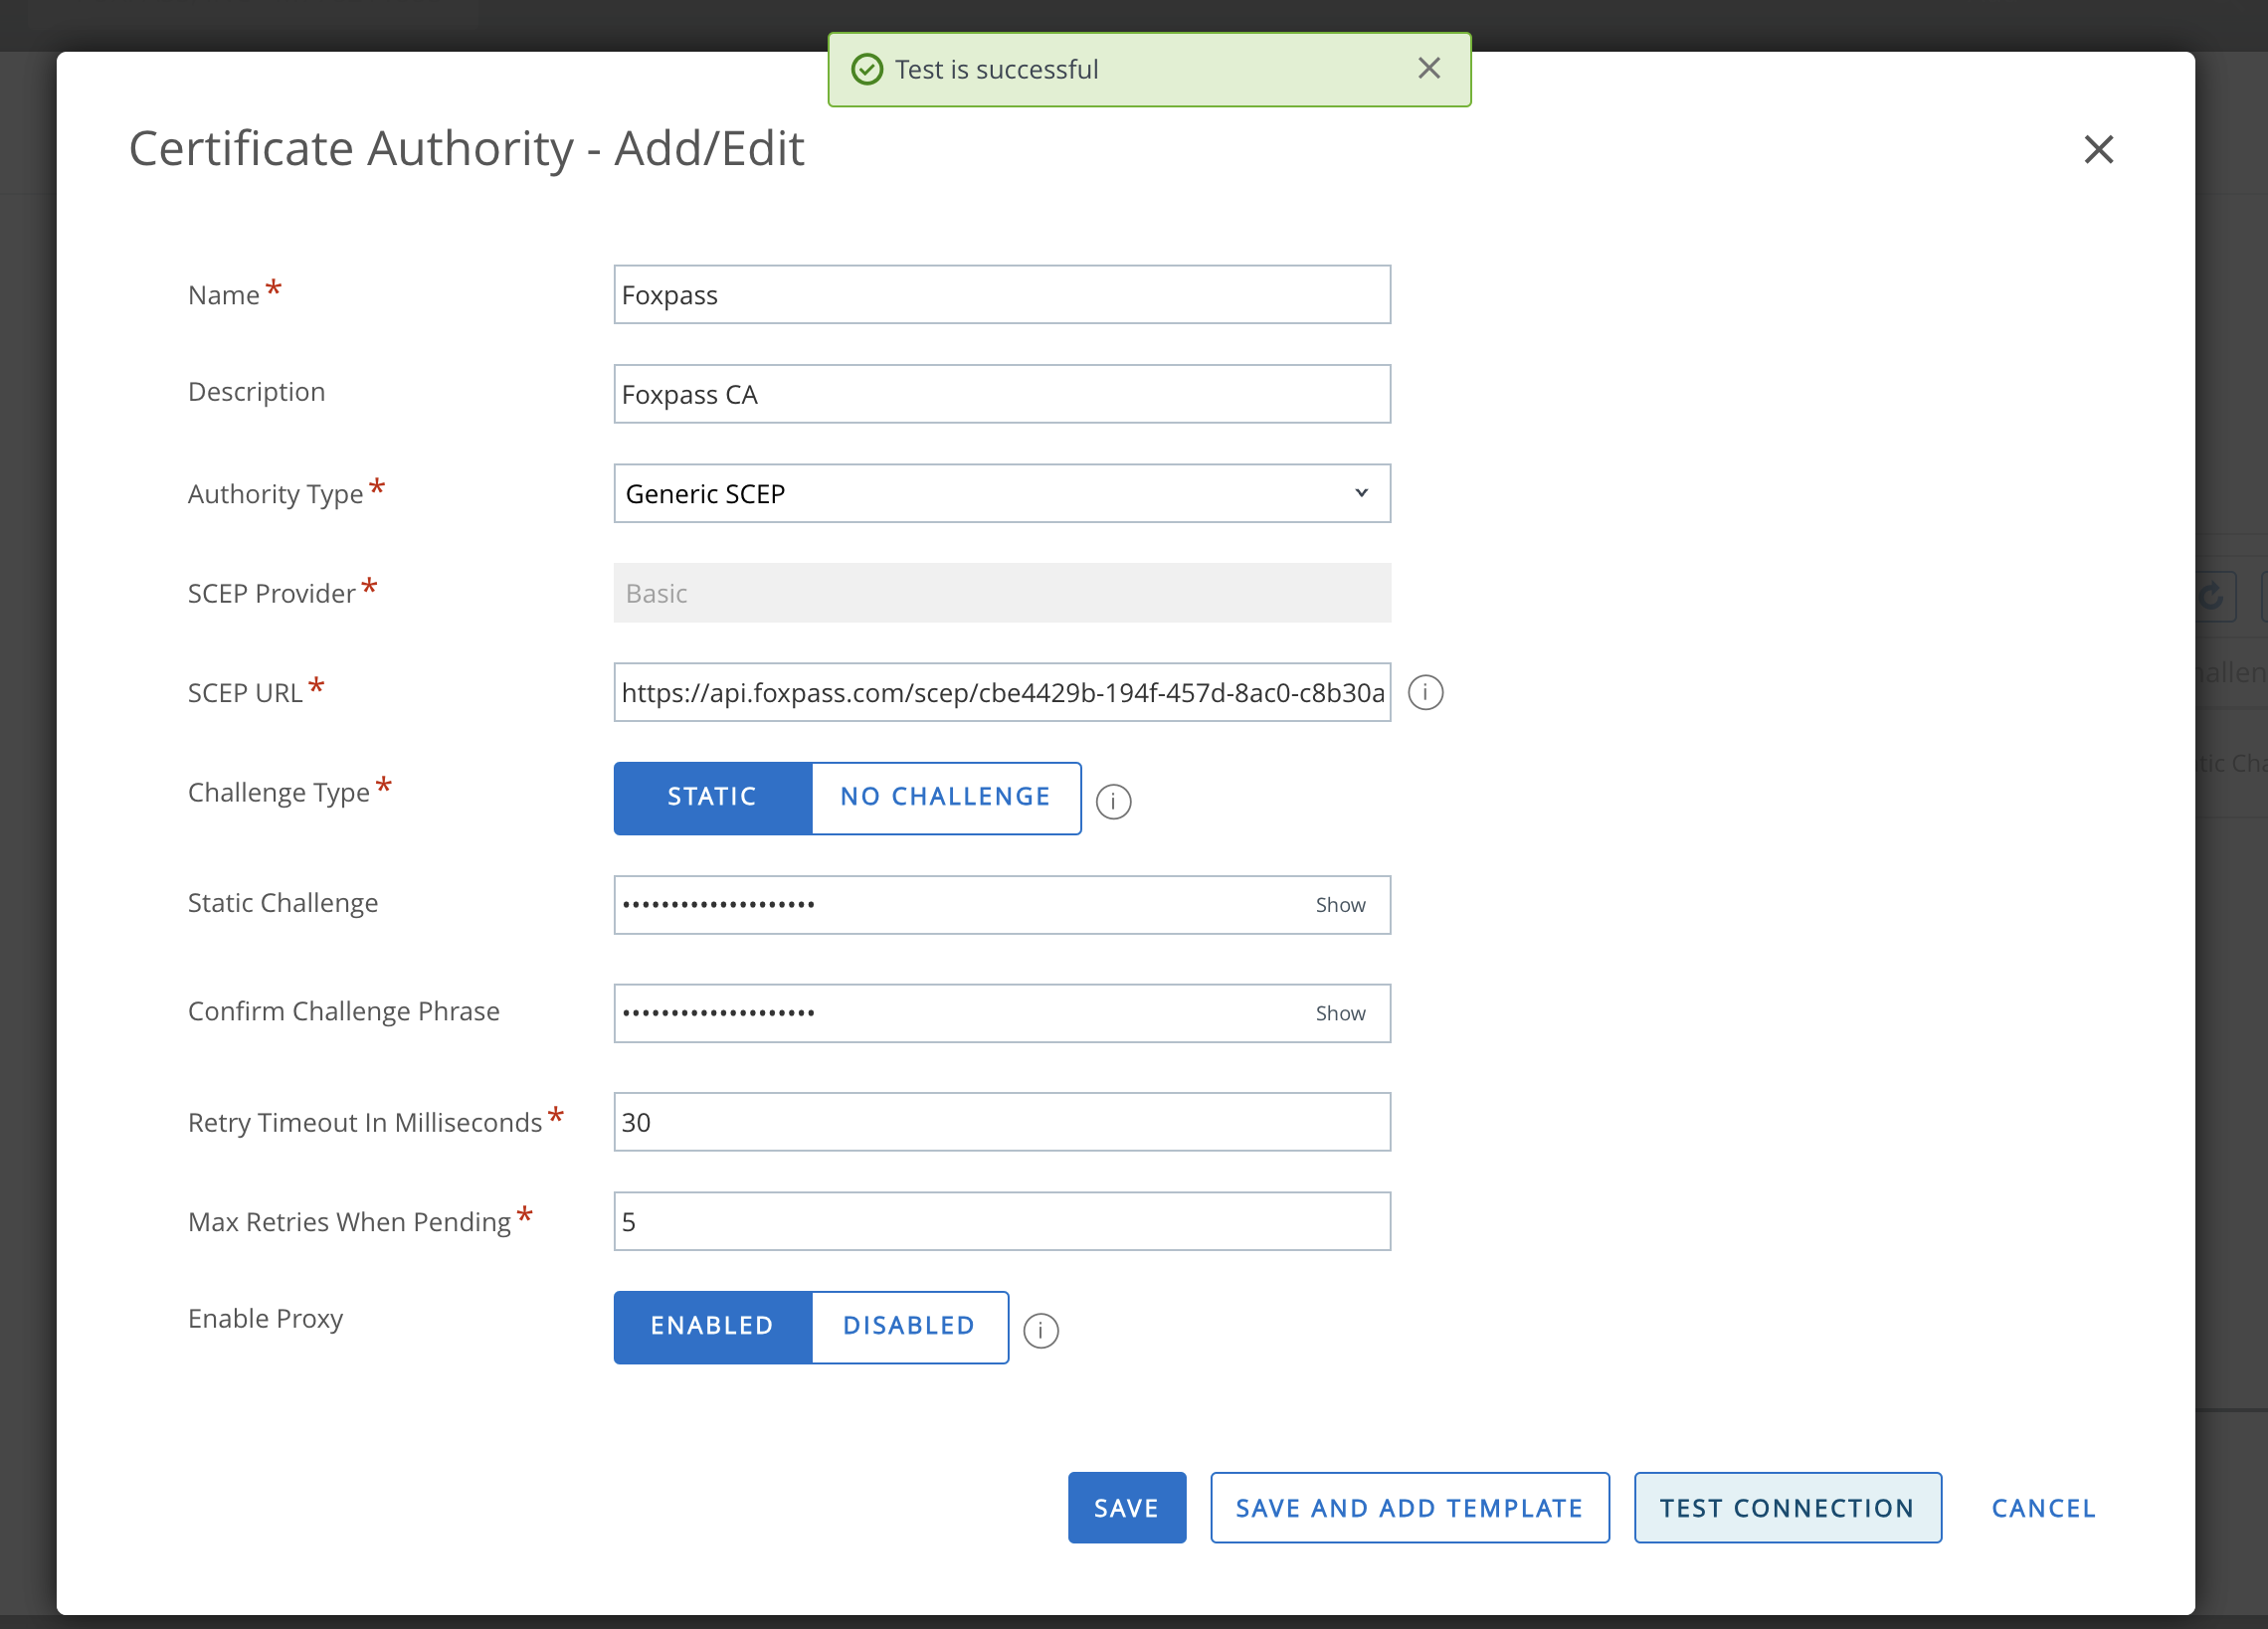
Add details and test connection
- If the test is successful, click 'SAVE AND ADD TEMPLATE'.
- Enter details for Certificate template as below:
- Name: Give a name to the template of your choice.
- Certificate Authority: Select the CA you just created from the dropdown.
- Subject Name: CN={EmailAddress}
- Private Key Type: Select both 'Signing' and 'Encryption'.
- Automatic Certificate Renewal: Enabled
- Publish Private Key: Disabled
- Click 'SAVE'.
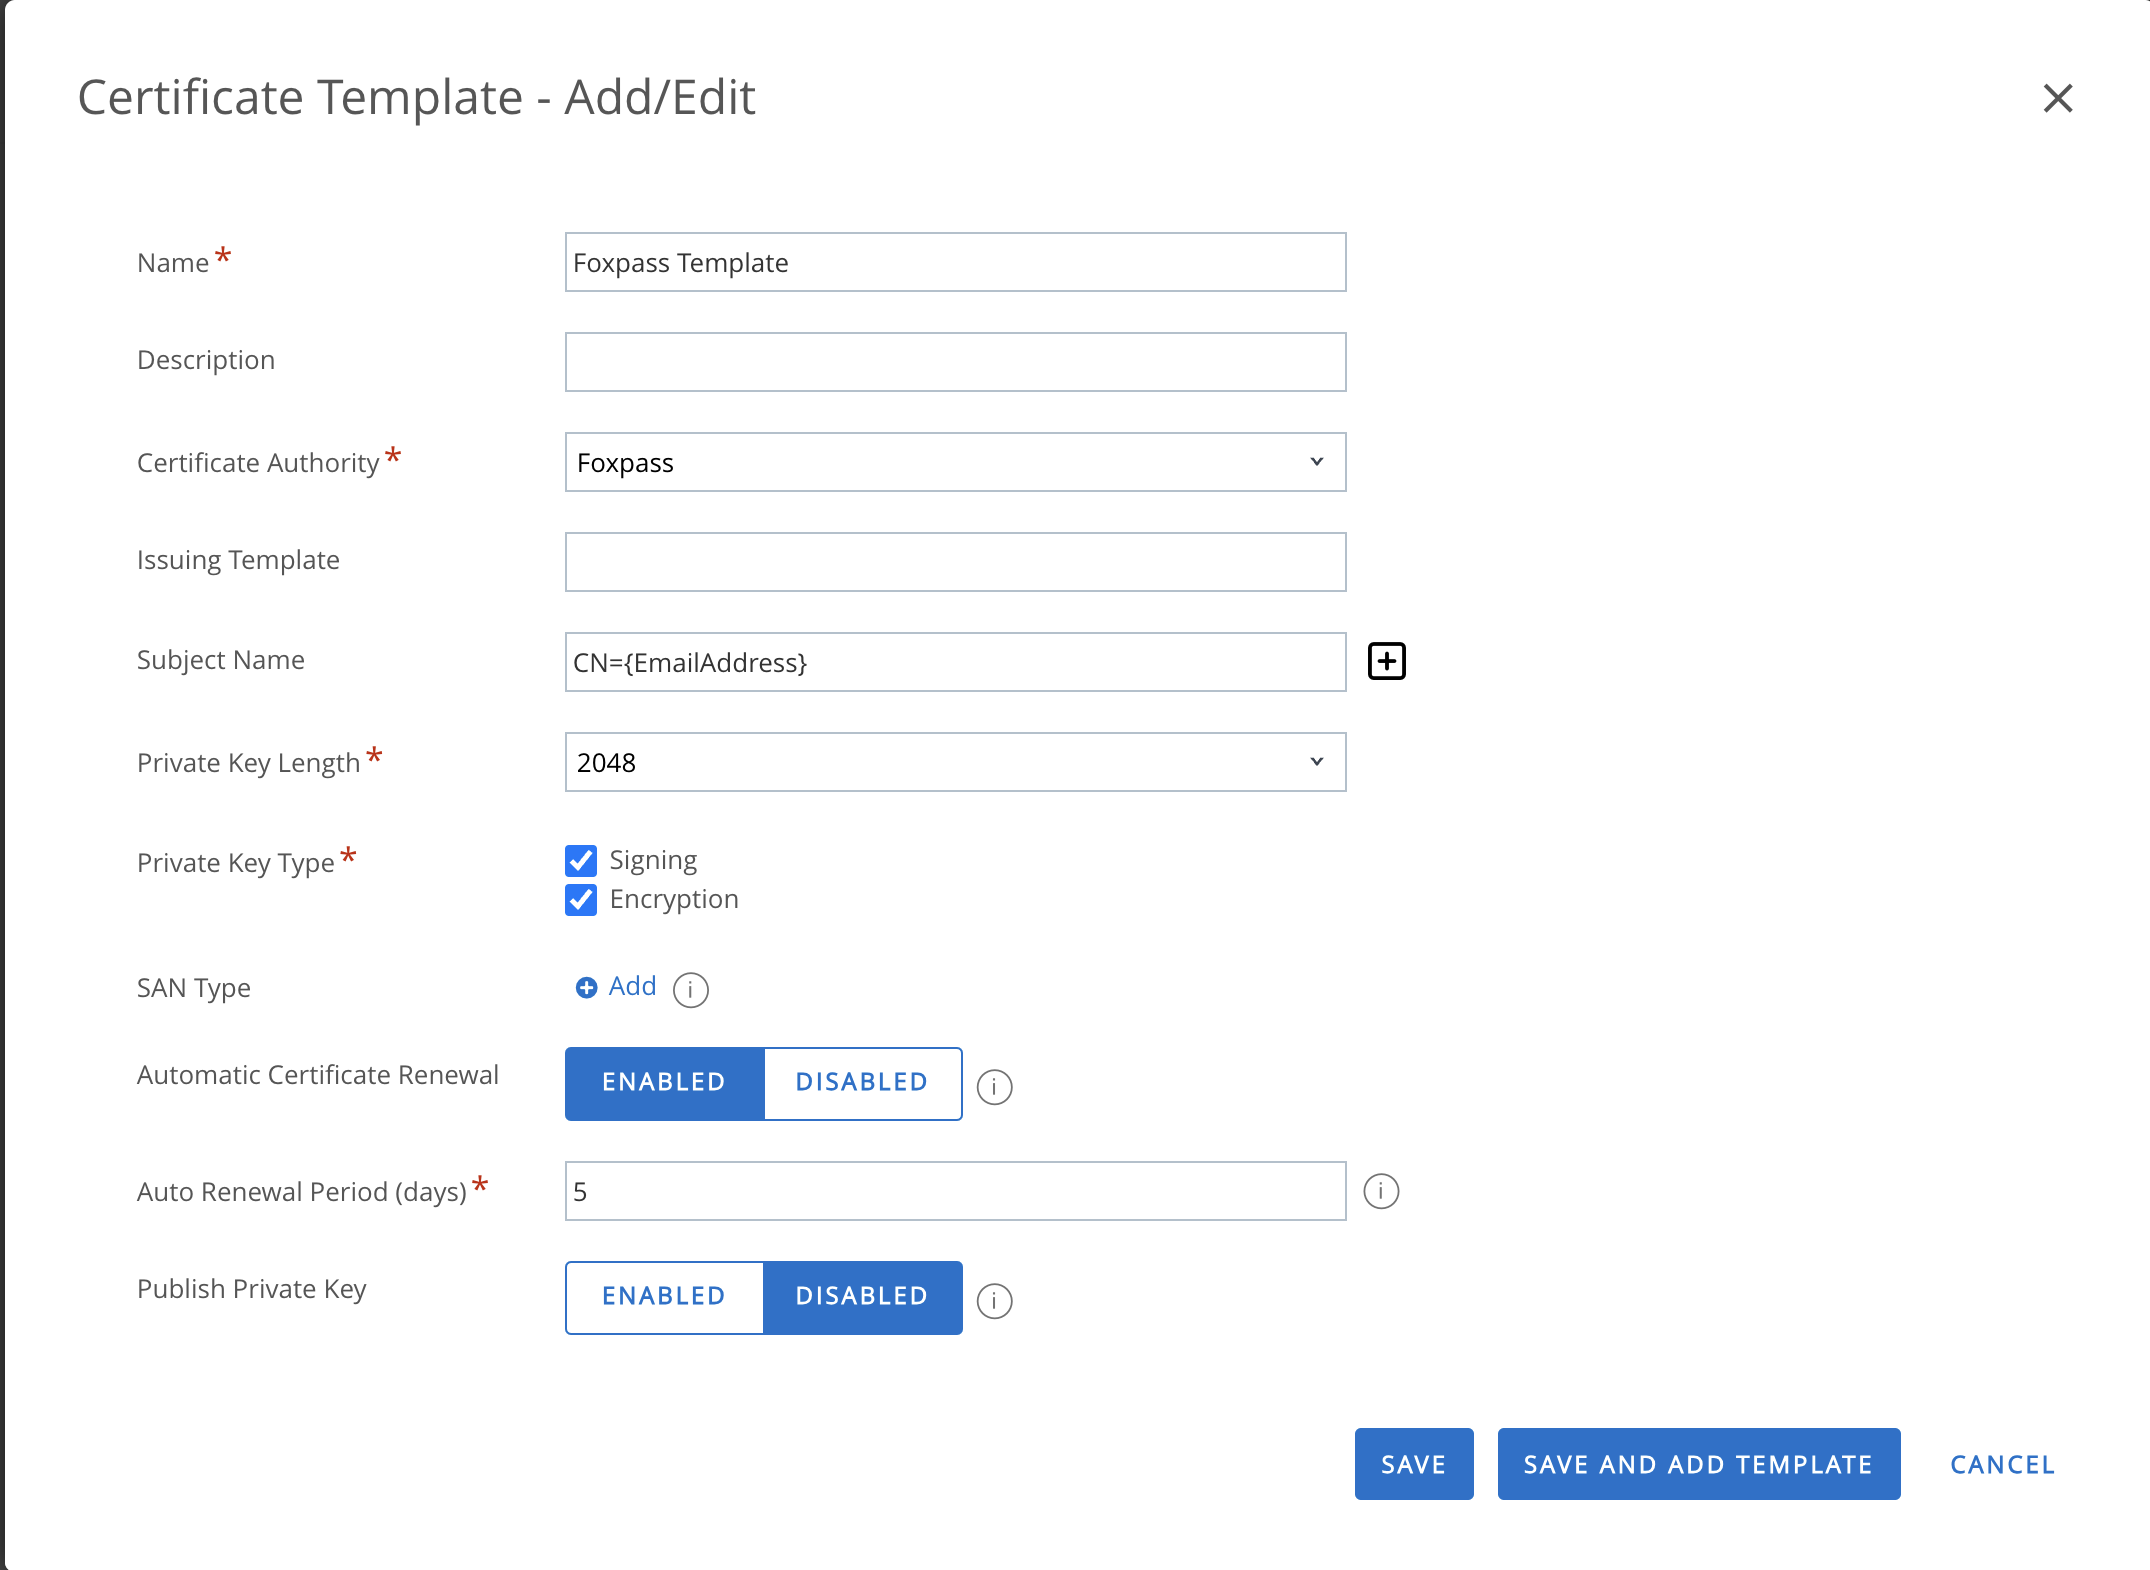
Add Certificate Template
Updated 9 months ago