
JAMF SCHOOL settings for EAP-TTLS Network
Configure Profile in JAMF School
- Go to 'Profiles' and click 'Create Profile' button.
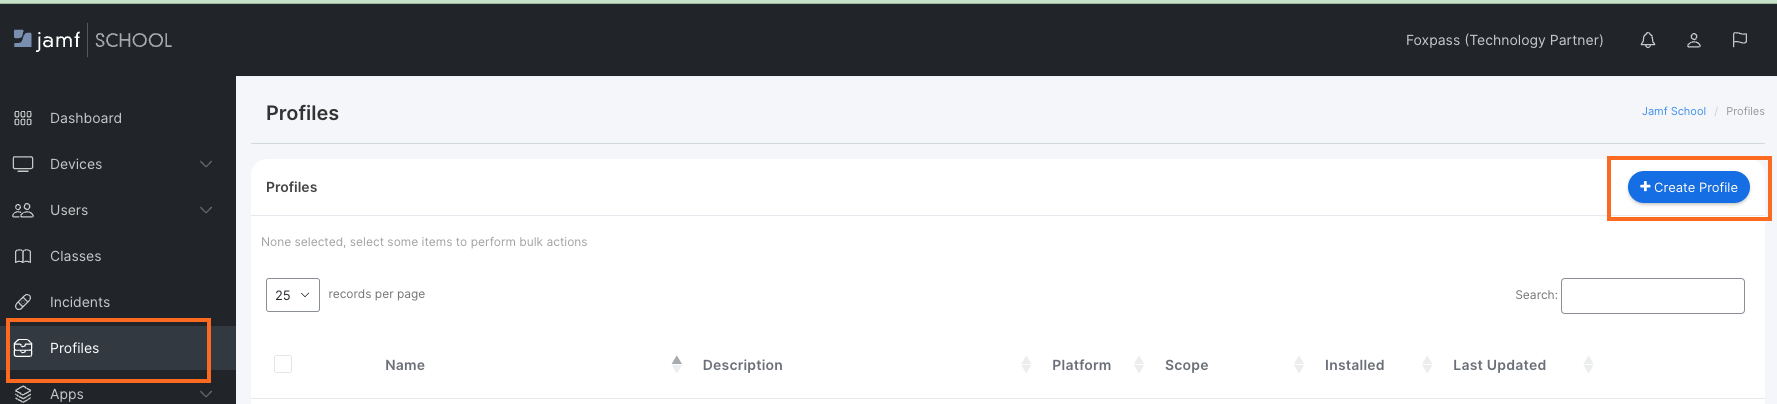
Create Profile
- Select 'macOS '.
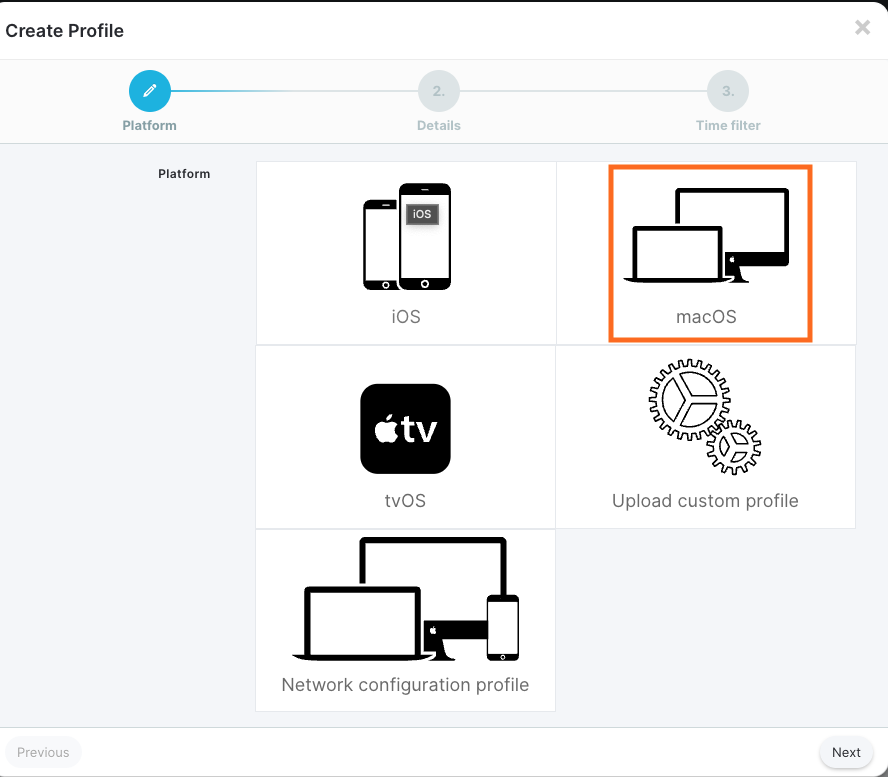
Select macOS
- Select 'Device Enrollment'.
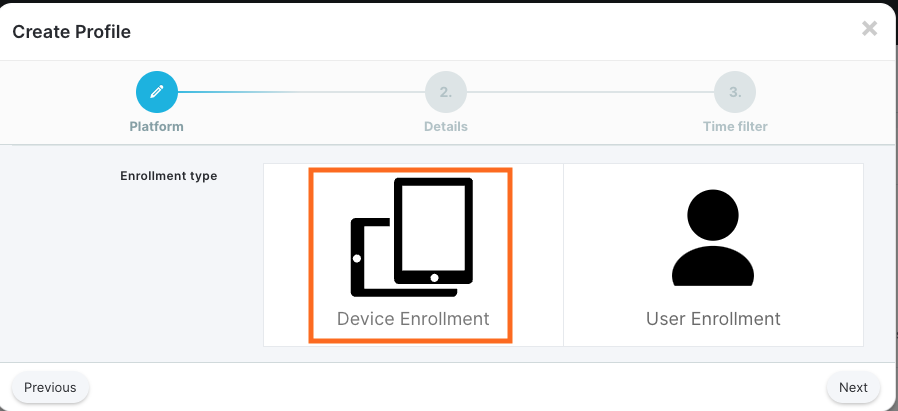
Select Device Enrollment
- Give a name to profile and click 'Next'.
- Use and configure time filter as per your use case.
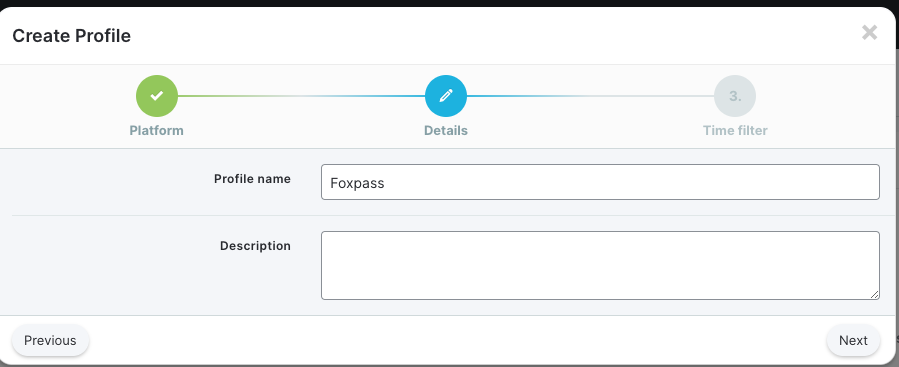
Name your Profile
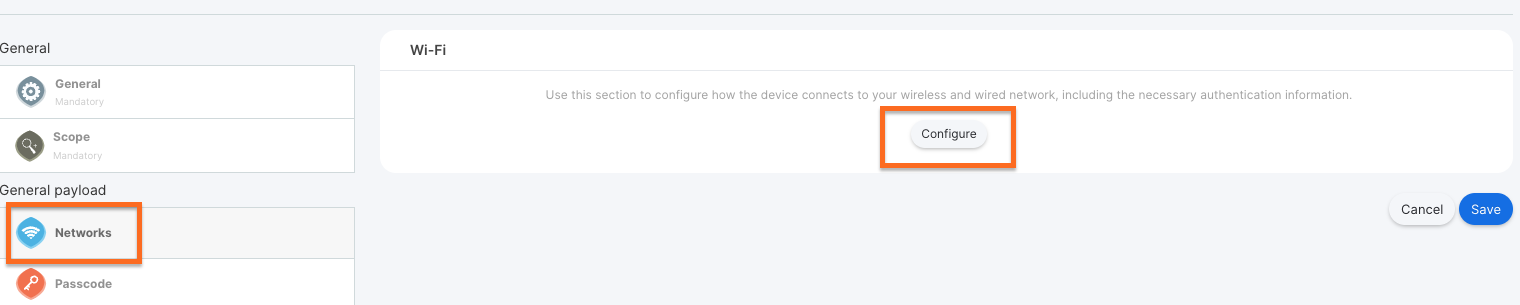
Configure Networks
- Click on 'Networks' under 'General Payload'.
- Click 'Configure'.
Configure Networks
- Network Interface: Wi-Fi
- SSID: Your network's SSID Note: this must match EXACTLY, including capital letters.
- Security: WPA2 Enterprise
- For Protocols, Supported Types: EAP-TTLS
- Select 'Trust' button and for 'Trusted servers' , click + and add '*.foxpass.com'.
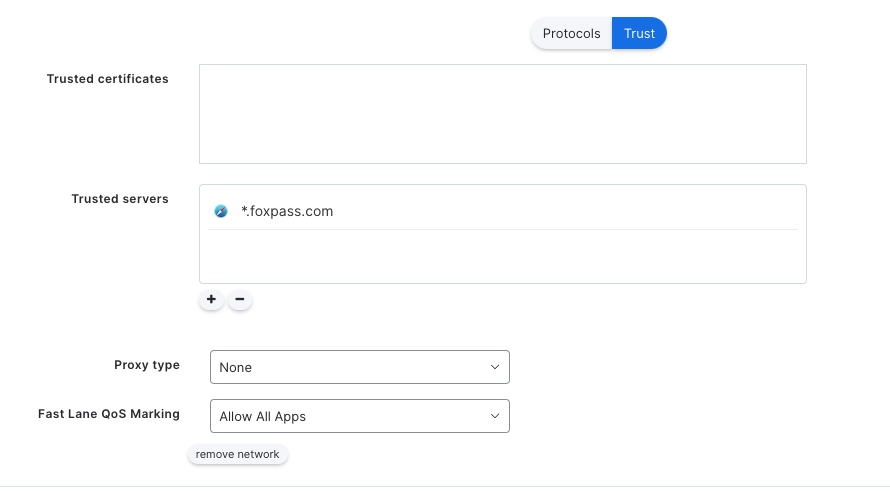
Add *.foxpass.com to trusted servers
- Select 'Protocols' button now.
- Username - <Your username>
- Inner authentication: PAP
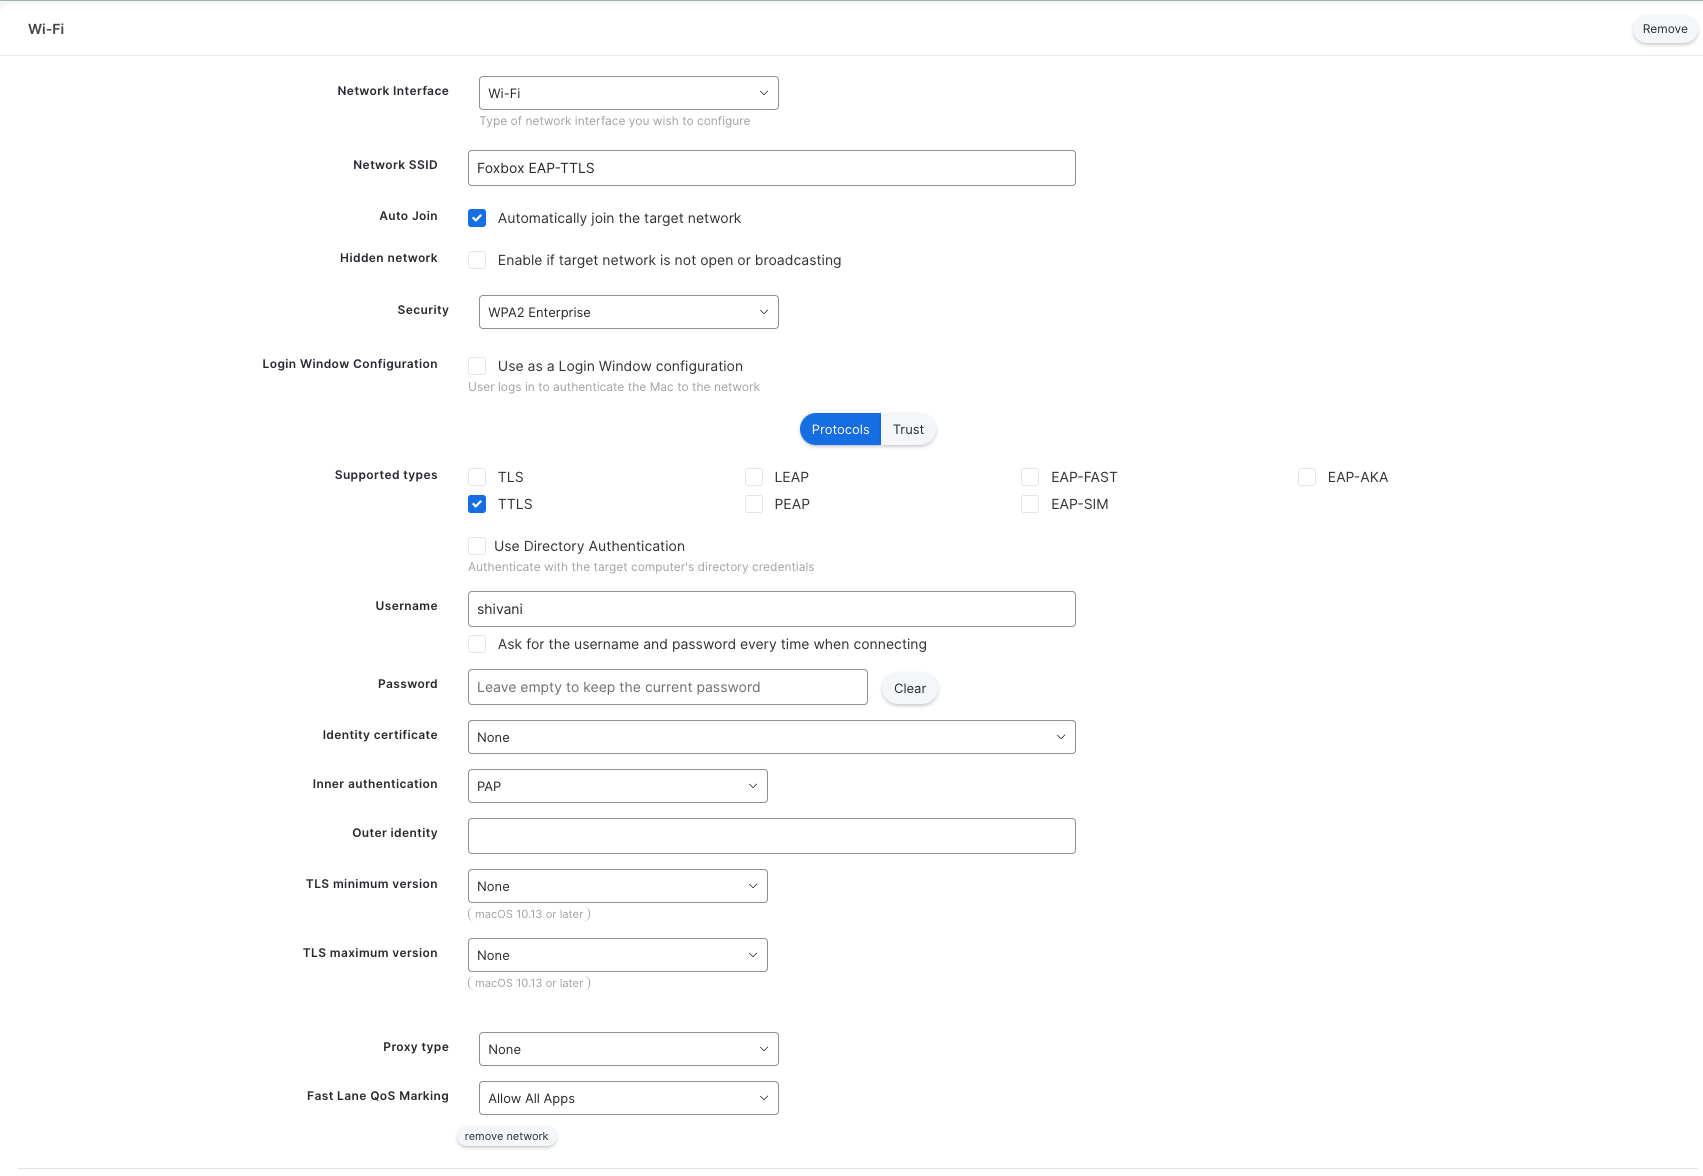
Configure Networks
Enroll your device.
- On your macOS device, open a browser and go to your device enrollment URL. The enrollment URL is the full URL of your Jamf School server followed by /enroll. You can enroll your device as per your use case. This documentation highlights 'On-device' enrollment instructions.
- Locate Network ID in your JAMF School account by going to Devices > Enroll Device(s) > On-device enrollment (iOS & macOS).
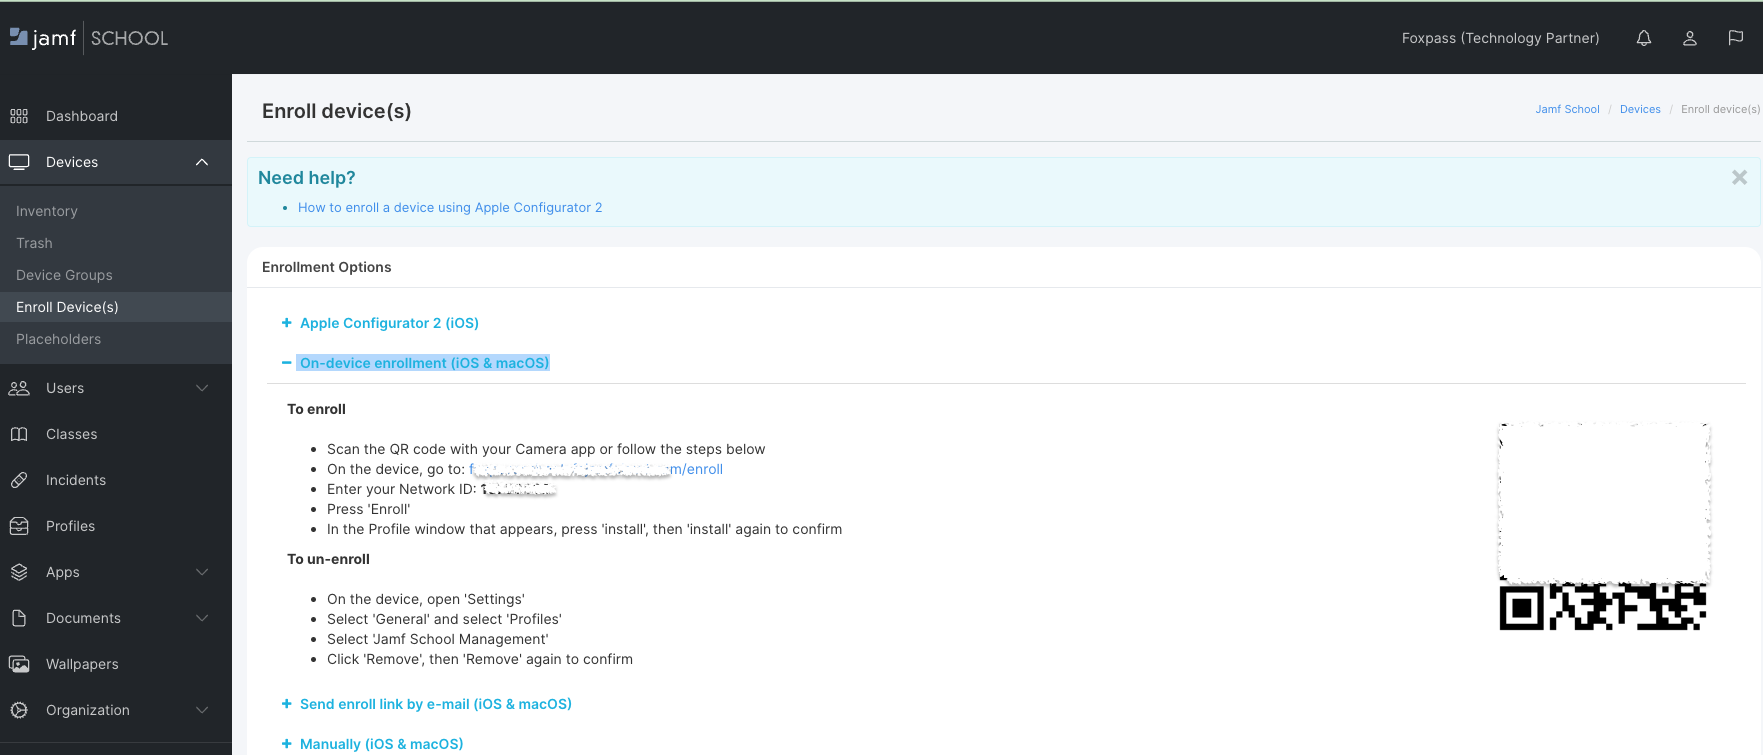
Locate Network ID
- Enter your Network ID and click Enroll.
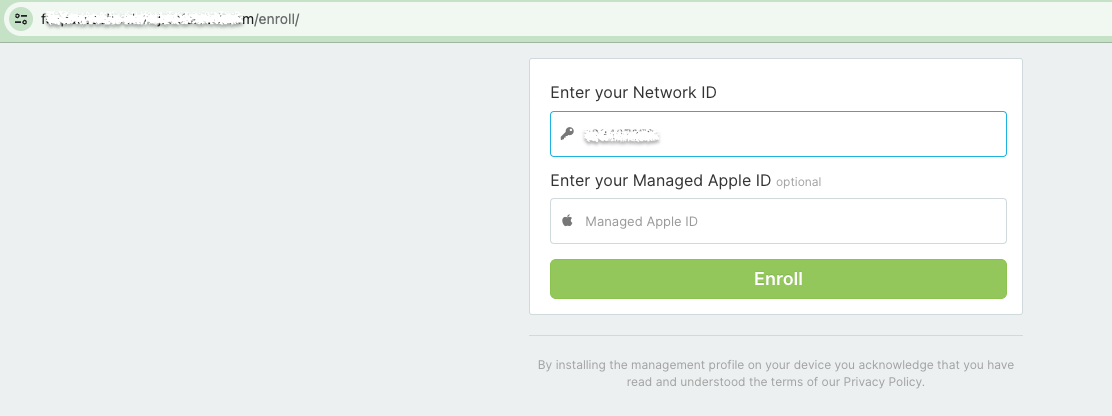
Enter Network ID and click Enroll
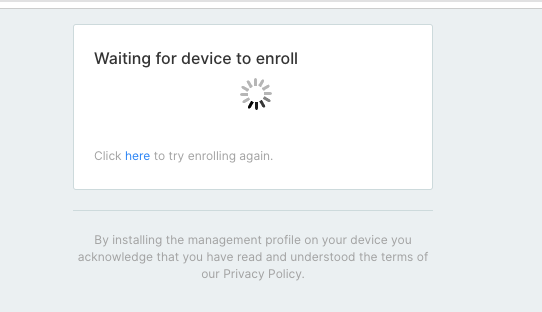
Wait for mobileconfig to be downloaded
- The mobileconfig will be downloaded on your device. Click on the profile downloaded.
- Go to System Preferences > Profiles on your macOS device.
- Click on 'Install' to install the profile.
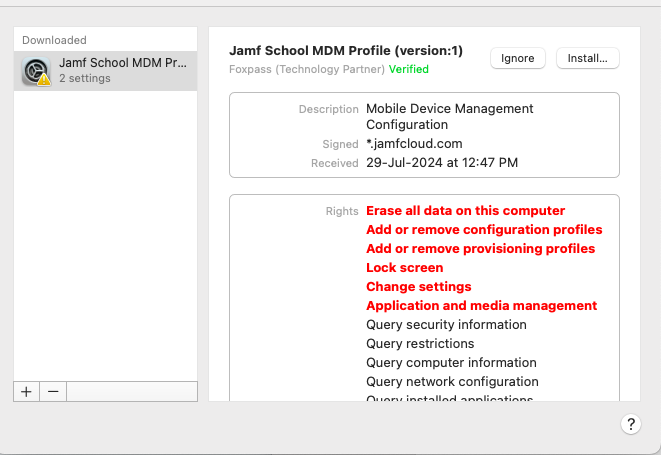
Install the profile
- Follow the on-screen instructions and install the profile.
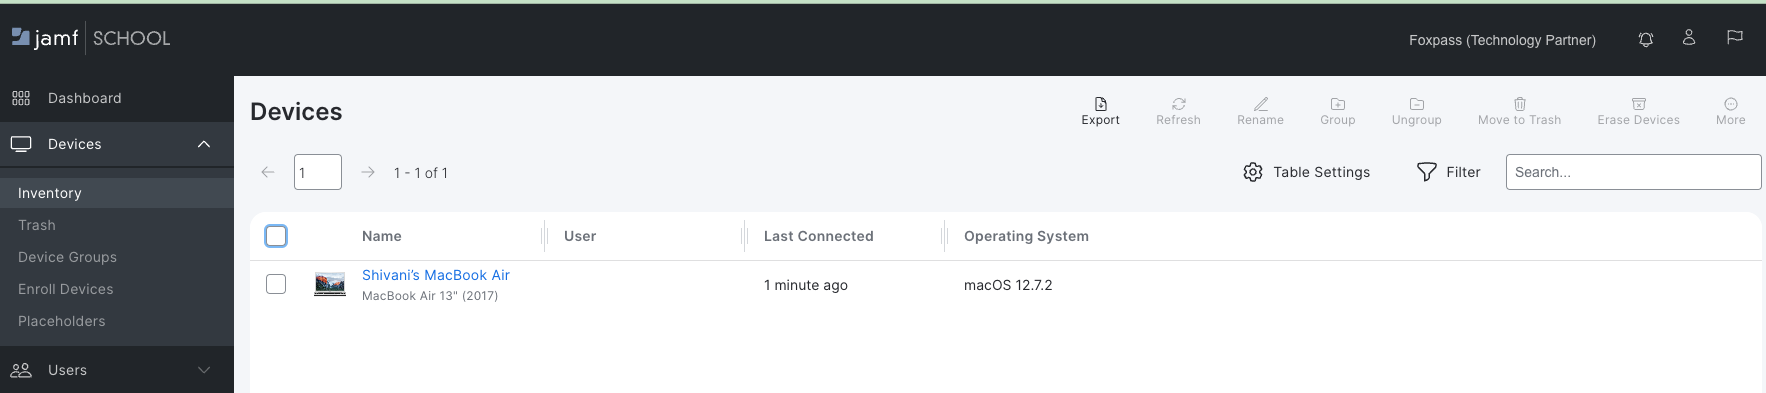
- In JAMF School account, go to 'Devices' > 'Inventory'. Your device will appear here.
Device Enrolled
- Click on the Device name.
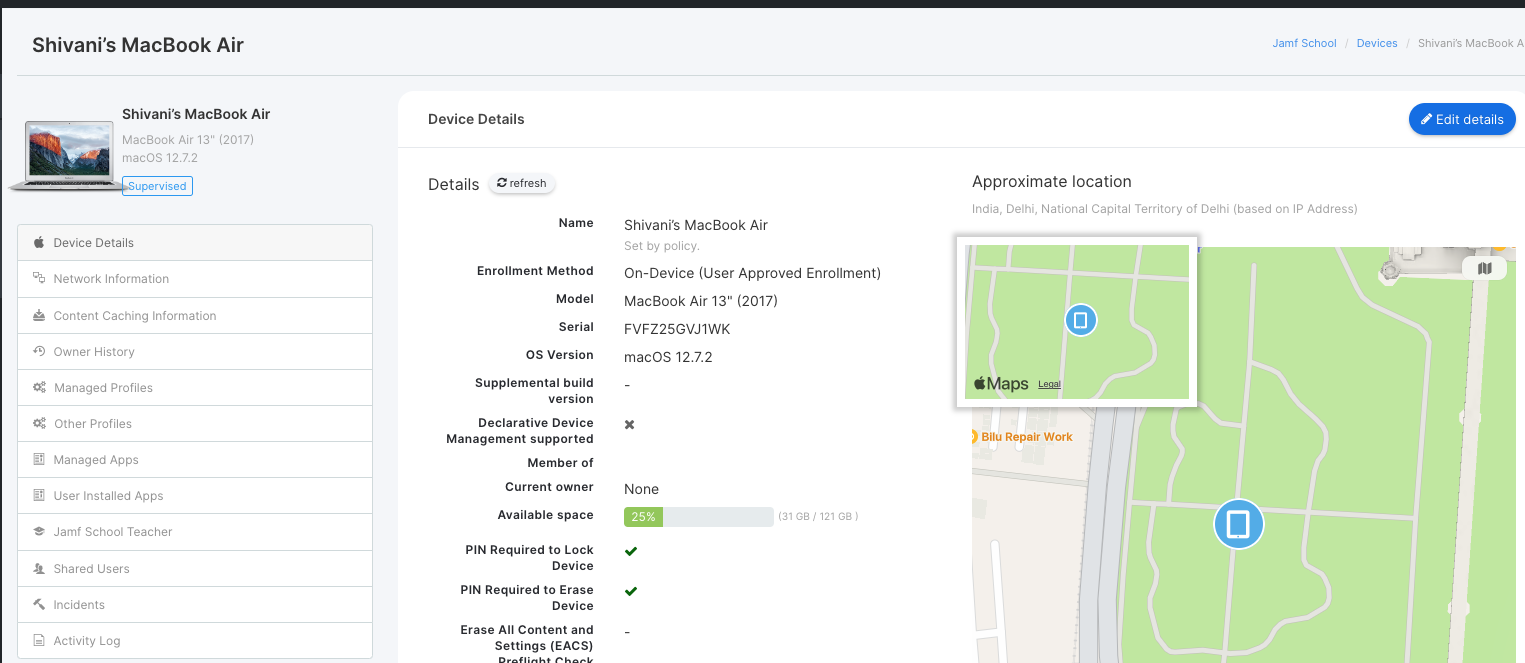
Device Details
- Click on 'Managed Profiles' and then click 'Add Profiles'.
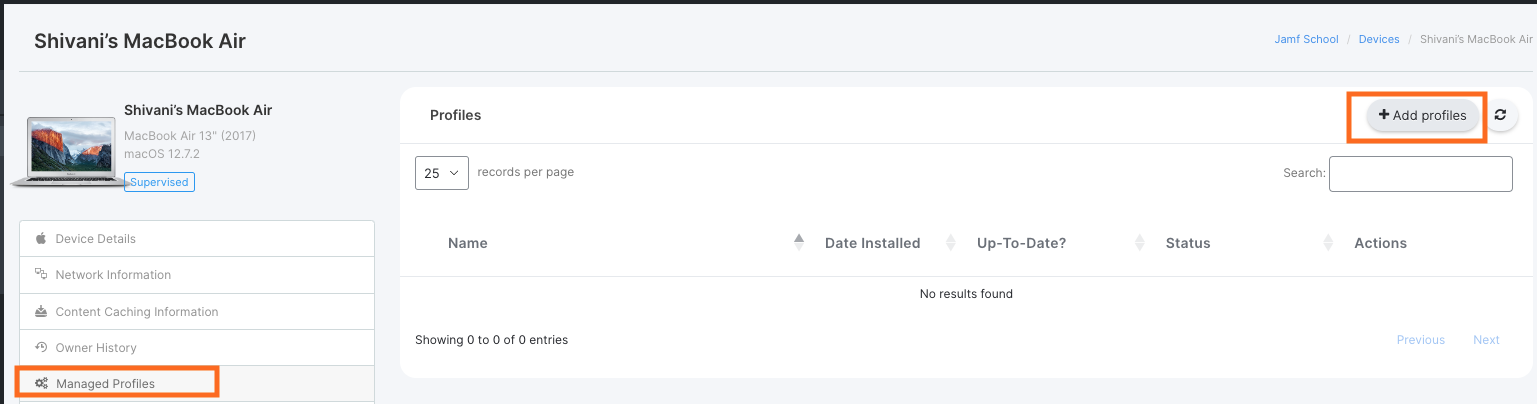
Add profiles
- Select the 'Foxpass' profile created earlier and click 'Add'.

Add Foxpass Profile
- The Foxpass profile will get installed on your device.
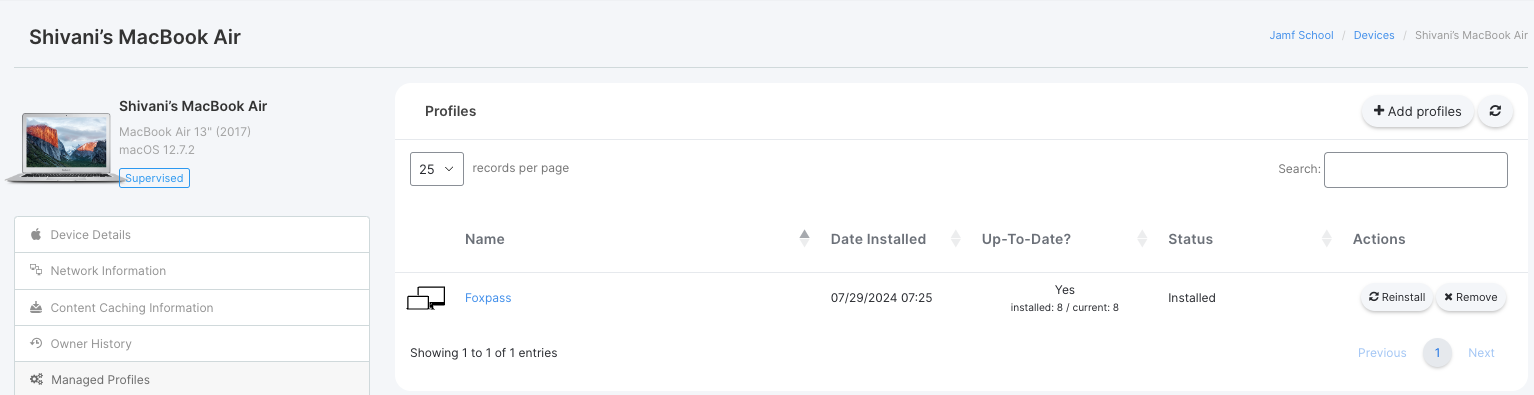
Foxpass Profile installed
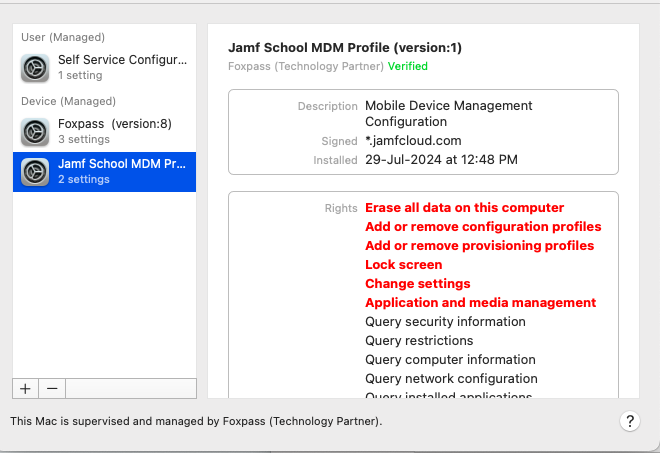
- You can check 'Activity log' for details/errors.
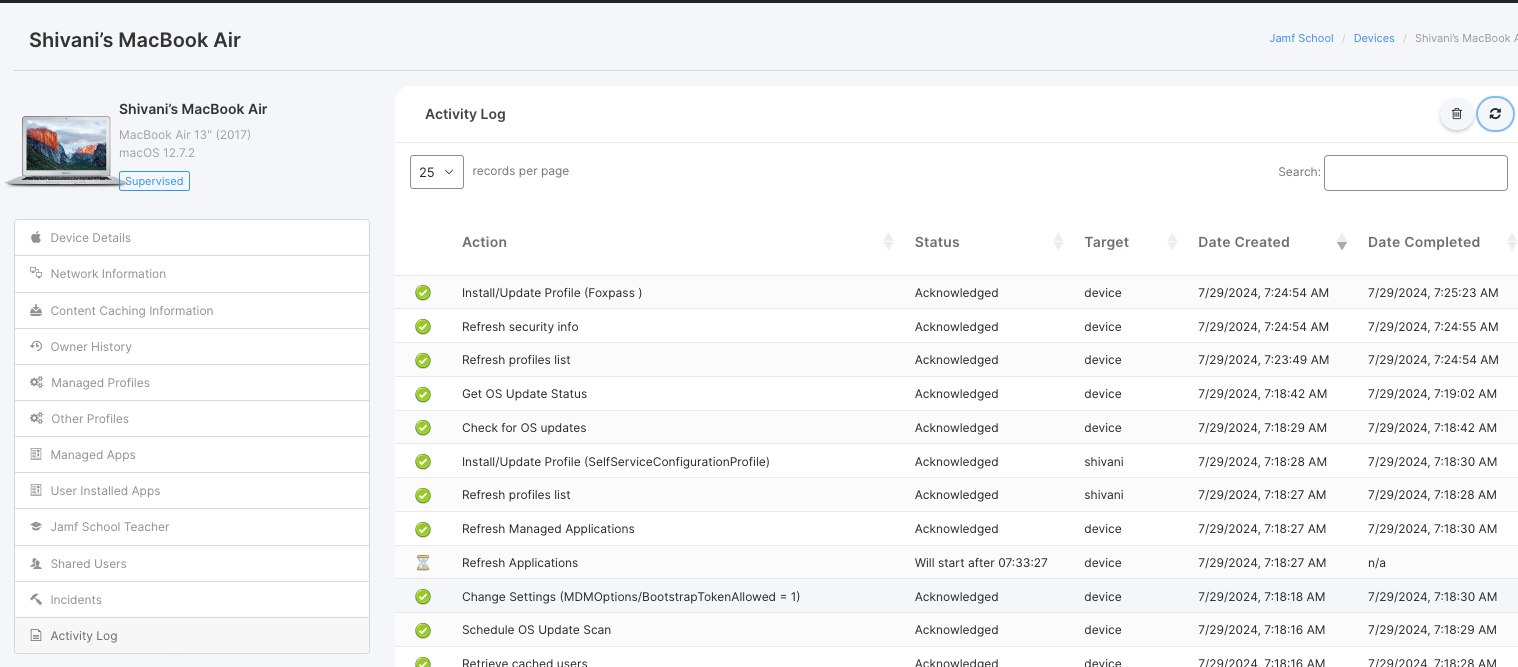
Activity log
- If everything is configured correctly in your JAMF school account and your access point, your device will get connected to the SSID configured.
- For logging, you can check logs on the RADIUS logs page of Foxpass.
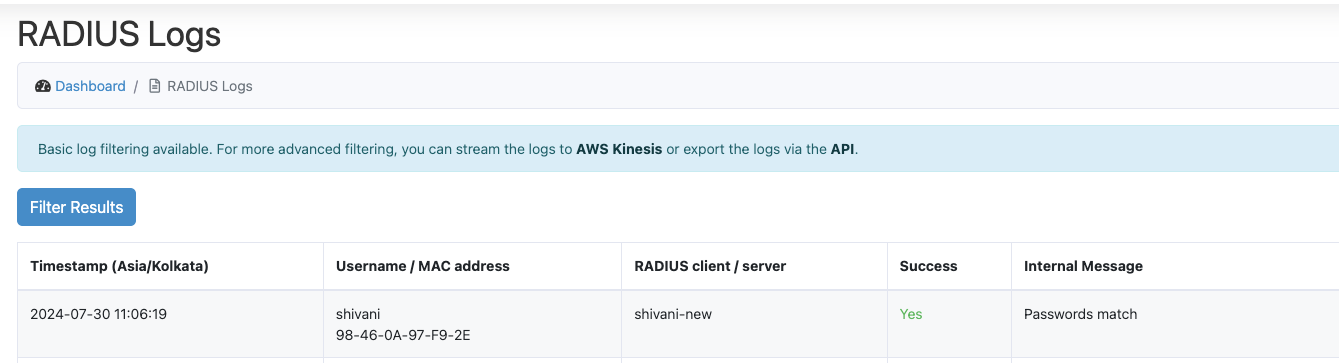
RADIUS logs
Updated 9 months ago